0
51700
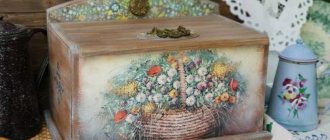
Decoupage is an easy and inexpensive way to update furniture. An old cabinet, bureau or sideboard, decorated using a similar technique, becomes a real work of art, turning from a standard model into a real designer masterpiece. For restoration, you can use various materials - fabric, newspaper and magazine clippings, special paper. We invite you to learn an interesting and simple DIY decoupage of furniture with napkins, which is not difficult to do.
The meaning of restoring old furniture
A few decades ago, purchasing furniture was much more difficult than it is today. Nowadays, stores are filled with a variety of cabinet furniture, and occasionally solid wood products are found.
Let's be honest, let's face it - the quality of modern products, especially those made from laminated chipboard, despite their good design, leaves much to be desired.
If we talk about solid wood furniture, the price is already quite impressive. Therefore, it makes sense to use an old thing from Soviet times and give it an attractive and original appearance; fortunately, this is not too difficult and inexpensive.
Restoration, including decoupage of furniture, is carried out with one’s own hands, based on the following goals:
- to create an original product;
- if necessary, adjust the item to an existing style;
- in order to obtain aesthetic pleasure and satisfy the need for creativity;
- to save cash.
A popular, simple and relatively inexpensive technique widely used to achieve these goals is decoupage.
Decoupage technique techniques
The variety of materials used in the creative process allows you to decorate any surface: wood, glass, metal. The use of various techniques provides endless possibilities for the manifestation of imagination. Among the existing types of decoupage are:
- Straight (classic). The most common type. The work consists of priming and painting the surface, gluing a pattern, using decorative techniques, and applying a finishing coat.
- Back. Using this method, transparent plastic and glass objects are decorated. The process is the same as in the first case, only done in reverse order. The image is glued face down onto the glass, after which the standard steps are performed.
- Volume. They are made independently by gluing copies of individual fragments onto the main picture, which will become three-dimensional. 3D images are also used. Recently, Sospeso Trasparente technology has appeared, which can be called modern. Designed by Italian decorator Monica Allegro. Non-toxic thermoplastic is used as the main material.
- Art. Imitation of full painting. It is divided into three subtypes: smoky, landscape, classic. The idea is that the paper applique and the background merge into one.
- Decopatch (patchwork). The surface of the object is decorated not partially, but completely. For the work, various papers are used, which are divided into pieces of different sizes, and then the entire plane is covered.
In decoupage, special decorative effects are used to give the design a different look:
- Attrition. It feels like the item has been used for quite some time. To create the effect, wax is used, which is applied before the design.
- Craquelure. Creating cracks in the paint layer. For this, special varnishes are used.
- Patination. Creation of artificial spots.
- Shading. Paint is applied to the surface of the object using a dry brush, which allows you to hide the boundaries of the image.
- Toning. Along with shading, it allows you to emphasize the design by applying multi-colored spots and sparkles.
- Potal. Finishing the drawing, the plane itself, with gold, silver paints, and sheets of decorative gold leaf.
Coffee table: how to make decoupage with newspapers
Everyone probably has such a piece of furniture at home: coffee tables are often inherited from parents. Consequently, the age of the furniture directly indicates that it needs to be restored. You can return the table to its former attractiveness using the pages of a book or newspaper:
- The surface of the table is prepared: cleaned of dirt and sanded.
- PVA glue is poured into the container and a large but flat brush is taken.
- Newspapers are placed randomly: they are applied to the table one by one and coated with glue.
- It is important to prevent air or wrinkles from forming, so you need to work slowly.
- The finished product is coated with several layers of varnish.
In this way you can also decorate the consoles of the chest of drawers, shelving, as well as armchairs and chairs. If you initially paint the surface of the table blue or another color, you can highlight this furniture in the room. Decoupage with newspapers is perfect for modern decoration with photo wallpaper.
Decoupage of kitchen accessories
The advantage of the decoupage technique is that it is very easy to master. Even beginners can restore old pieces of furniture on their own. The finished results will delight not only household members, but also evoke admiring glances from guests. Decorating old furniture using decoupage technique is a way to save money and bring new solutions to the interior.
Stylistic directions of decoupage
The type and method of design of the item depends on the overall interior of the room. The item used in the work must correspond to the existing design. Therefore, when choosing a material, color, direction, first of all, pay attention to their combination with the existing decorative elements. Popular styles of furniture decoration include:
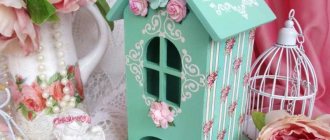
- Provence. One of the country trends. It is characterized by the dominance of cold white colors and pastel colors, as if faded by the rays of the sun. The image is characterized by lavender and lavender color, spicy herbs, grapes on artificially aged surfaces.
- Victorian. A mixture of Gothic, Renaissance, Baroque. Gilding plays a special role. Primary colors are light, soft shades of brown, burgundy, beige, pink. A large abundance of flowers, natural motifs, and fauna are used as images.
- Country. The rustic style is characterized by beige, brown, white, and blue colors. Characterized by the aged surface of objects. The pattern is selected in accordance with what is already on the upholstery of chairs, sofas or on a tablecloth or curtain.
- Shabby chic. Characterized by soft pastel tones. Restored old furniture in golden shades is used. The surfaces are made to look like antiques, the pattern is blurred with worn edges.
- Simple City. For this work, clippings from magazines, newspapers, and old photographs are used. Big city style.
- Military. A distinctive feature is the use of an army orientation and military paraphernalia.
- Ethno. The most common varieties: Japanese, African, Indian style. When designing, the cultural traditions of a particular people are taken into account.
Required materials and tools
An important point in the process of decoupaging furniture is preparing everything necessary for the work. The comfort of the master, as well as the final result, will depend on this. For creativity you will need the following tools:
- synthetic brushes;
- putty knife;
- sandpaper (coarse, fine-grained);
- foam sponges;
- disposable plastic plates as a palette;
- auxiliary tools.
Materials:
- motive;
- acrylic primer;
- acrylic paints;
- acrylic lacquer;
- PVA glue, glue-varnish for decoupage.
Features of decoupage for polished furniture
Most owners of old, dull furniture want to transform it. But in order to decoupage a polished product, you will need to prepare its surface, otherwise after a while the entire decor will simply flake off and peel off. Working with such surfaces looks like this:
- The coating is sanded using coarse sandpaper. It is not possible to completely remove the polish; just remove all the shine.
- To eliminate defects and level the surface, it must be covered with a layer of putty.
- Since a polished product lacks a natural texture, it must be completely primed using acrylic paint.
- Having completed these steps, you can begin decoupling.
Polished furniture differs from its wooden counterparts in its composition, namely the absence of wood. Under a millimeter layer of varnish you can see paper or a sheet of chipboard.
How to restore a closet
You can easily decorate an old Soviet cabinet using the decoupage technique. To do this, you just need to find the necessary piece of furniture and select materials: acrylic paints and varnish, napkins with the desired designs, flat brushes, PVA glue, rubber gloves and containers for paint. The procedure looks like this:
- All shelves are removed from the cabinet and fasteners are removed.
- Use sandpaper to sand the surface of the furniture.
- Paint the product and shelves in the selected color of acrylic paint. It is better to do this in two layers.
- When the paint is completely dry, you can begin decorating: apply a third layer of light-colored paint and a dry sponge, creating antique stripes.
- The selected motifs are cut out from napkins and glued to the dried product using PVA.
- When the glue has dried, the product is coated twice with acrylic varnish.
An old Soviet wardrobe will not seem worn out and shabby if it is skillfully transformed using the decoupage technique
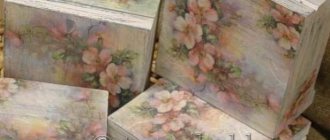
Decoupage a wooden cabinet in a vintage style will be a great idea to transform an old shabby piece of furniture into a beautiful interior item. To do this, just choose napkins with images of flowers, ornaments, landscapes or still lifes (the color can be any: blue, purple, yellow).
Decoupage rustic shelves
Features of decoupage of plastic furniture
Plastic furniture itself is not particularly beautiful, but with the help of decoupage it can be turned into a work of art. However, the plastic will need to be prepared initially so that the ornament will last a long time on the surface of the selected product.
All preparatory measures boil down to the usual degreasing of the structure using an alcohol-containing liquid. When working with glossy, slippery plastic, it should be roughened. For this, fine-grained sandpaper is used. Then a thin layer of gypsum primer is applied, which will provide better adhesion to other materials.
How to prepare the surface of furniture
For beginners, it will be enough to prepare surfaces for decoupage according to the generally accepted scheme. First, cleaning with sandpaper, then priming, sanding and re-priming the MDF. Depending on the expected final result and the number of fibers, various wood elements can be additionally rubbed.
If the chipboard surface has cracks and dents, they should be repaired with putty. Tiles and plastic can simply be degreased by wiping with an alcohol solution. A metal table and stool seats should be treated with a solution of vinegar, soda, citric acid, and removed from rust.
Master classes on furniture renovation
Decorating wooden and plastic surfaces with your own hands is a great option to bring old furniture back to life. With the help of creative ideas and a minimal set of materials and tools, you can create a chic antique dining nook in Provence style, update your desk and do other useful things. There are many interesting master classes that will allow you to fill your home with real antique masterpieces, teach you how to work with napkins, lace, and how to properly restore and treat cabinets, wardrobes, and shelves with a special varnish.
Decoupage the dining table with colored wallpaper
First of all, you need to decide on the type of equipment and prepare the table for decoration. To make decoupage last longer and make it easier to apply, remove any remaining paint from the surfaces, clean it with sandpaper, and cover it with putty. We take measurements of furniture and cut off the amount of wallpaper required for work.
After the preparatory work is completed, we apply a piece of wallpaper with the image facing up to the surface of the table. Before fixing, the picture must be carefully smoothed, all creases and unevenness removed. Mix glue with water and spread it over the entire area of the paper element.
A thick piece of wallpaper should be well moistened, so the glue should be applied thickly in several layers. When the material becomes pliable, turn it over and smooth out the folds with a roller. Leave it alone for a day to dry. After a radical renovation, the countertop in the kitchen remains to be varnished. If the edges are uneven, they should be sanded.
Coffee table decorations
You can decorate a coffee table using several techniques. The most popular is decoupage with napkins. Specialty paper products can be purchased with a variety of motifs (vintage, holiday themed, animals, nature, big cities, etc.). It can also be clippings from newspapers, magazines, geographical maps, photographs. But it should be taken into account that it is more difficult to work with dense material; it must be thinned before fixing. Decorating a coffee table using the napkin technique takes place in several stages:
- We decide on the color scheme. For a heavily damaged countertop, it is better to use light shades.
- We prepare tools and consumables.
- We disassemble the table, remove the tabletop, unscrew the legs.
- We clean all wooden parts from old varnish and paint using sandpaper. If the table is made of plastic, it is enough to degrease it with alcohol.
- We treat cracks and joints with putty. Let it dry for several hours.
- We carry out priming and painting of surfaces.
- We lay out decorative cards or individual pieces of napkins on oilcloth and carefully smooth them under running water.
- Lubricate the tabletop with glue and lay out the pictures.
Restoring a chest of drawers with napkins
A very popular option for restoring an antique chest of drawers in the shabby chic style. This is simultaneous decoration and aging. Simple decoupage using napkins can be done on any painted surface, but it is better if it is white, pink, light green, blue or beige.
Before work, a piece of furniture must be prepared - remove varnish and paint, since old polish and impregnation will not allow you to obtain the expected effect and will significantly reduce the service life of the decor. The cleaned surface must be primed.
The first step is to paint the old chest of drawers. It can be acrylic paint or based on colored chalk. Experienced craftsmen recommend using the second option, since, in their opinion, it lies more evenly. You can work with a wide brush or roller.
While the chest of drawers or bedside table is drying, prepare napkins for decoupage. You can replace thin pictures with photographs and various printouts. Now we carry out artificial aging. Use a metal scraper or sandpaper to randomly wipe off the paint. Then we coat the pictures with glue and apply them to the wood. Using a small brush with glue, we expel the air and strengthen the edges. When all the napkins are glued, all that remains is to polish the chest of drawers with varnish.
Decoupage kitchen set
You can make a real exclusive out of a standard kitchen set using pieces of unnecessary wallpaper. We choose the type of decoupage and determine the area to be processed. Is a continuous coating necessary or can you get by with partial application of elements to the facades?
We begin work by preparing the surfaces. While the soil dries, we think over the composition, give the napkins the desired size and shape. You can make straight lines or cut off the edges with special scissors. We saturate the drawings with glue and apply them to the surface to be decorated. Smooth the picture with a brush, remove the bubbles. To update, you can use whole pieces of wallpaper. The final touch is varnishing. The strengthening solution should be applied over the entire area of the facades, and not just in the picture.
Decoupage stool
You can decorate the stool in any style. The main thing is that the updated design fits into the overall interior of the room. This could be Provence, vintage, newspaper technique or the use of fabric. You should start with a careful selection of colors. It should not differ from the main background of the walls, headset or other large furniture. Now we print out napkins with the selected pattern.
If there are cracks or burrs on the stool, they must be removed and smoothed with sandpaper. If the pictures are transparent, the product can be painted. We wet the napkins with water, cover them with glue and apply them to the surface. If you decide to use wallpaper, then you should keep it in the liquid longer, about 1 minute. Use a roller or brush to push out the air. Finally we coat it with varnish.
You can achieve the most harmonious combination if you decoupage the stool with wallpaper that covers the walls in the room.
Using decoupage to decorate a bed
When entering a child's or adult's bedroom, the first thing that catches your eye is the bed, namely its headboard. This part of the bed will be the most successful for applying decor. Various inscriptions, flowers, and vintage drawings are suitable for decoupage. The baby's bed will be decorated with fairy-tale characters, animals, fish, and pieces of fabric. All decor should be matched to the main colors of the interior. You should also understand that all wooden surfaces of the bed are polished and will have to be removed. You can get the original scuffed effect if you listen to the following recommendations when decorating:
- A darker paint must be applied over the primer in the area of joints, sides, and relief patterns;
- Then these areas are rubbed with paraffin and painted in a light tone;
- After the top layer has dried, it is partially removed;
- The surface is covered with napkins and varnished.
Cabinet decoupage ideas
You can transform a closet of any size using a variety of available tools. Napkins, colored pictures, wallpaper and other paper elements are suitable. A piece of furniture can be given an aged look using the craquelure technique.
Napkins are the most convenient material for decoupage. Thanks to thinner paper, you can achieve imperceptible transitions on the overall surface. It is better to choose sophisticated, romantic images in Provence and vintage style. Pastel colors will create an unimaginable atmosphere of comfort and tranquility.
Decoupage with wallpaper on a large surface of a cabinet or whatnot is best done by novice craftsmen. You can completely cover all the parts or use them on the ledges of facades. The only difficulty is the need to remove the outdated varnish coating. In addition to paper, you can use fabric elements, beads, sequins and other decor.
Decoupage furniture with fabric
A new interesting direction is decoupage of furniture with fabric. When working, you can use any combination, combine different themes and colors. You will need all kinds of scraps, glue, varnish, sponge and brushes.
Regular PVA glue is applied to the cleaned furniture, and textile pieces are treated with a special adhesive composition. The flaps are applied to the surface and pressed with a sponge. If these are round legs, the material must be wound in a spiral. When all the pieces are glued, they should be sprayed with additional glue through a spray bottle. The final touch is coating with clear varnish.
Children's table decoration
Decorating the table with your own hands is done in the following sequence:
- The prepared surface is coated with acrylic paint. Children's furniture should be bright and cheerful. Therefore, you need to choose a paint of a rich color that matches the overall style of the room. You can use several colors, combining bright and neutral ones, or paints of the same color but different tones. The surface should be painted several times, allowing each layer to dry.
- Cut out decorative motifs from decoupage cards or napkins and lay them out on the tabletop to choose the best arrangement.
- If the pictures are cut out from napkins, you need to carefully separate the top layer, which will be glued to the table surface. The image cut out from the decoupage card needs to be soaked in water for a couple of seconds.
- The blanks are glued to the tabletop. If you don’t have much experience in this matter, you can use a little trick. Pour a little water onto a regular file and place the picture on it (face down). When it is saturated with water, the excess liquid should be drained and the picture should be lightly blotted with a cloth. Then everything is simple: turn the file over, place it on the place chosen for the picture (having previously coated it with glue) and smooth the file with a rag. Then you need to carefully lift the file, and the picture will remain on the tabletop. Using this method, you don't have to worry about damaging the image. After all the pictures are in place, they are additionally glued on top, moving the brush from the center to the edge. The tabletop prepared in this way is left for some time until completely dry.
- The final stage of decoupage is coating the table with varnish. When the first layer is applied, it is allowed to dry and if there are any roughness, they are removed with sandpaper. After this, two more layers of varnish are applied.
In order for your child’s room to look elegant and festive, it is not at all necessary to buy expensive furniture. A little patience and time spent can miraculously turn an ordinary children's table into a favorite thing using decoupage.
The best posts
- Test No. 23 Which member of the British royal family are you?
- Roller blinds “Zebra”: tips for choosing and decorating the interior
- How and from what to make a coffee table with your own hands (50 photos)
- Correct design of a 1-room 30 sq. m
- Do-it-yourself Zernovushka doll: master class with video
- Which bathtub is better: cast iron, steel or acrylic? Comparative analysis
- DIY pearl necklace
- Black and white wallpaper for the kitchen: how to choose, what to combine with in the interior, types, wide format, photos, design tips
Related article: How to sew short curtains in the bedroom up to the window sill: models for the bedroom and kitchen