How to make a solid bar of soap from remnants
Creating a new soap is a creative process. It can take any shape, color, and also have a variety of scents.
Creating a new soap is a creative process
To make soap from soap remnants at home, you need to follow safety rules and tips for making the product.
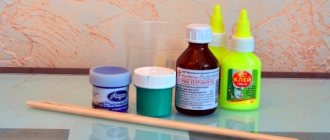
For the soap making process you will need the following components:
- remnants of old soap;
- grater;
- forms;
- dishes with lid;
- hot water.
A high-quality and fragrant product is obtained by following the following sequence of actions:
- The existing bars of soap are grated.
- Soap shavings are transferred to the prepared dishes.
- The container is filled with hot water.
- Close the lid so that the soap shavings dissolve in the water. To speed up the process, the composition is constantly stirred.
- If necessary, components such as:
- essential oil;
- cream;
- flavoring;
- natural scrubs.
- When everything is dissolved, the soapy water is poured into prepared forms.
- The preparation is placed in the refrigerator for 2 days. The composition will harden and take the desired shape.
The soap making process is painstaking work.
The soap making process is painstaking work.
To get a quality product you need to follow simple recommendations:
- Essential oil is added 10-12 drops.
- The shelf life of the composition is reduced due to the presence of natural products in the composition.
- Soap is poured into silicone baking molds or into dishes intended for soap making.
- The thick composition can be diluted with warm water.
- If the remnants used in the process of creating a new product are too old and hard, then you will need a hammer to grind them.
- Sugar will help thicken the mixture. 20 grams of product are added to the soap solution.
- Home remedy is good for skin. This is achieved due to the presence of medicinal herbs such as:
- lavender;
- St. John's wort;
- mint;
- chamomile;
- Melissa.
- Chemical dyes are replaced with food dyes. They have a natural composition, which minimizes the risk of developing allergies and negative reactions. If you add coffee, the soap turns out to be brown, the yellow color comes from saffron or calendula, and the red color comes from beets.
Attention! The unpleasant odor emitted by soap during cooking cannot be eliminated with various fragrances and flavors. Once the cooking process is complete, the aroma will improve.
Using simple tips, you can prepare a high-quality hygiene product.
Preparing for soap making
When starting to make soap at home, you must first prepare everything you need. Prepare all the necessary tools in advance and place them in one place. Cooking usually takes place in the kitchen. Place food and utensils in closed cabinets or the refrigerator. Use only one that will not be used for cooking in the future.
If there are small children in the house, to avoid unpleasant situations, organize the process so that they do not interfere with you in the kitchen. The same applies to animals, as hair can get into the soap components.
How to melt soap in the microwave?
An easy way to make a quality bar of soap is to use the microwave.
To do this you will need the following ingredients:
- special dishes for the microwave;
- remnants;
- perfume, essential oil, milk.
Old pieces of the product are ground into shavings. It pours into the dishes. Then you need to add a little hot water, cover with a lid and place inside the equipment.
In order for the soap to acquire unique qualities, the desired ingredient is added to the liquid.
The microwave power is set to 600 W. The equipment starts up for half a minute. After this, the container is taken out, the contents are mixed and sent back for 15 seconds.
These manipulations are performed until the soap shavings are completely dissolved in the water. But the composition should not boil.
In order for the soap to acquire unique qualities, the desired ingredient is added to the liquid. The workpiece is poured into molds and put into the cold, where it will stay for 2 days. During this time, the soap will harden and become suitable for use.
Not all old soap is suitable for melting in this way.
If the composition contains a lot of fragrances, then after the soap-making process a specific smell will remain inside the equipment for a long time. It will soak food heated in the microwave.
Making solid soap
Solid soap is prepared in almost the same way as liquid soap, but in this case the volume of hot water and soap soap should be equal.
In addition, you will need molds to set. Grate the remaining soap on a fine grater, take a liter of soap and pour a liter of boiling water. Then you can keep the soap in a water bath until completely dissolved, in which case the temperature of the water in the outer container needs to be raised from time to time by adding boiling water. Another way to make soap is to place the container on low heat and cook, stirring occasionally.
Modern housewives use a microwave oven rather than a stove to speed up the process. How to make soap from remnants at home in the microwave? The recipe includes 1 liter of shavings and 250 g of water. You will get a soap base to which you can add flavors, softeners and other components.
Prepare the required amount of soap shavings, pour into a microwave-safe dish and set to cook. The heating power should be 600 W, and the time should be 30 seconds. Then stir the mixture and reheat for 15 seconds. Stir and microwave the soap in 15-second increments until the shavings are completely dissolved.
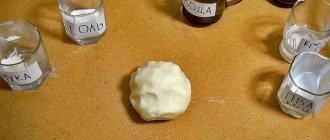
In order to make solid soap from soap remnants, we need:
- plastic container suitable for heating in the microwave,
- microwave,
- molds where we will pour the finished soap.
First of all, grate the soap on a coarse grater or chop it into small pieces with a knife.
Then we put them in a prepared plastic container and add a little hot water to them. If you want to get multi-colored soap from soap remnants, place the remnants in different containers, without mixing one color with another.
Close the container with the soap remnants with a lid and put it in the microwave for 15 seconds. Then take it out and mix. We set it again. And we do this until the soap melts. Try not to bring the soap to a boil.
Before the final “heating”, you can add various oils, oatmeal, ground coffee, and flower petals to the new soap. This way you will not just have recycled soap, but a new useful and beautiful product.
Grease the molds with oil and pour the melted mixture into them. You can make multi-colored soap with several layers. To do this, first pour melted soap remnants of one color, let the mixture dry a little, and pour the second batch of a different color.
It’s also easy to make new bars of soap from remnants.
The water bath is used not only in soap making, but also in cooking, as well as in making candles. Exposure to steam avoids burning, excessive evaporation and allows the product to be sterilized. In a water bath, the soap is gradually melted, reaching the desired consistency.
Experienced soap makers use special dishes for a water bath, but in fact this is not at all necessary. It is enough to prepare two heat-resistant vessels of different sizes so that one can fit in the other. A regular saucepan and glass container will do just fine. Any pan is suitable as the bottom for a water bath, and for the upper part of the structure you can use a glass, plastic, ceramic or enamel vessel
Required items:
- water bath dishes,
- grater,
- remnants,
- water,
- additives,
- soap containers,
- oil for lubricating containers.
When all the necessary items are at hand, it’s time to start preparing:
- Rub the soap on a fine grater. You can cut it into small pieces, but then the pieces will take much longer to melt and the process will be delayed. The combination of remnants of different colors can give an unexpected result, so it is better to melt them separately
- When the soap is crushed, put a pan of water on the fire and bring to a boil.
- We install the upper bowl with soap shavings. If the top bowl of the water bath comes into contact with boiling water, the soap will melt faster, so you should stir the soap more often and monitor the temperature more closely
- Melt the soap, stirring occasionally. Don't let the soap boil! The optimal soap temperature during melting is 80 o C.
- While the contents of the top are melting, grease the soap molds with oil. This will make it easier to remove the soap after it has hardened. To make solid soap, you can use any containers, including children's sandbox molds
- When 90% of the soap shavings have melted and only a small amount of crumbs remain, remove the vessel from the water bath. The choice of soap additives depends on the personal preferences of the manufacturer, and the ability to combine them comes with experience
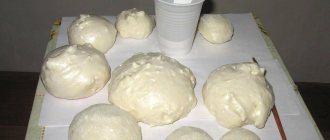
- Pour hot soap into molds.
- Leave in a cool place until hardened. Do not dry soap in the sun.
- Remove the solid soap from the molds. To make the soap easier to remove, place the mold in hot water for a few seconds.
- Wrap in plastic film. Ready-made soap should be stored wrapped in film to avoid overdrying and deformation.
- We put it away for storage.
You can melt the remaining soap using any heating method: stove, microwave or even oven. First you need to prepare the soap:
- Use a grater with large holes to grate the remaining soap. You can grind it using the blade attachment in a food processor.
- If the soap is old and brittle, add olive oil to it at the rate of 30 ml per half kilo of soap.
- To soften the soap, add liquid to it - an infusion of herbs or milk, 1 tablespoon per 0.5 kg of soap. The liquid should be completely absorbed into the soap shavings, so it should be left alone for several hours.
After this, you can proceed directly to remelting.
To make a soap bar, you need to fill the soap with water, put it on fire and cook for several hours, stirring thoroughly so that the mass is homogeneous. Then pour it into prepared molds. Silicone ones, intended for making cookies, are better, but regular ones are also possible.
When the soap hardens, you will get a brand new piece, ready for use. If you don’t have time to stand at the stove, but you want to make soap from soap remnants, use a faster method: grate the soap on a fine grater and pour in hot water, stir until completely dissolved, then pour into molds and send to a cool place, after a couple of days the product he'll be ready.
Probably, every zealous housewife periodically has the question of what to do with the remnants that remain from soap and accumulate, especially if the family is large. Using a bar of soap until the very end is simply inconvenient. When a thin piece of soap remains, it slips out and breaks and it is no longer possible to soap anything with it, so it is most often thrown away, happily replaced with a new fragrant piece.
However, this is an unforgivable luxury. Let's tell you how you can use soap remnants. Namely, how to make soap from soap remnants, including how to prepare liquid soap at home.
Using old remnants can turn into real creativity
In general, there are many ways to use soap remnants. For example, professional seamstresses replace chalk with fine soap residue when cutting a product. Soap, unlike chalk, does not stain your hands and leaves a more permanent mark on the fabric. True, this method has one big drawback - it cannot be used by an ordinary woman who does not sew or cut anything, and you cannot draw much using a remnant in this way.
But another way to preserve leftover soap and give it, so to speak, a second life, can be useful to any housewife. Namely, how to make soap from soap remnants at home, how to prepare a new, unique soap created with your own hands. In a creative impulse, you can use remnants of solid soap and those ingredients that the author of the work likes.
In general, soap making is a very exciting process. If you like it, in the future you can create the most intricate soap products using aromatic oils, chocolate or cocoa, cream, various herbs and spices and other absolutely incredible ingredients.
We invite you to familiarize yourself with the table for washing clothes in an automatic machine
So, let's try to make soap from soap remnants with our own hands.
If we talk about saving, then you can use completely different soap remnants to make new soap. But if we are talking about how to make good soap, then preference should be given to the remains of baby soap. The latter does not contain harmful additives or active perfumes, which means it will serve as an excellent basis for creating a new soap product.
It is also important to remember that different colors can give unexpected results when mixed. Therefore, it is better to sort the accumulated soap by color and cook it separately.
Then pour the mixtures into the soap mold one by one so that the new soap from the leftovers has beautiful stains. It is also worth making liquid soap from soap remnants separately.
This question cannot be answered unambiguously because... Laundry soap can be different: our old one has such a nondescript appearance and a not very pleasant smell and newfangled one with the addition of various chemical ingredients.
The latter can be used exclusively for preparing the same laundry soap, however, even here you need to be extremely careful because the chemical elements contained in its composition may react. This can cause not only skin irritation or an allergic reaction, but also headaches and other unpleasant consequences. For the same reasons, you should not experiment with mixing laundry and toilet soap.
How to make soap from soap remnants: cold and hot method
The cold method of soap making begins with the lye being filled with ice water in a separate container. The mixture should be left to cool.
In order for the soap to acquire unique qualities, the desired ingredient is added to the liquid.
If solid essential oils are involved in making soap, they must be melted before use. To do this, use a water bath or microwave. All oils are mixed together until smooth.
Wait until the alkali and oil mixture reach a temperature of +37...+38 degrees. It is best to measure it with an electronic thermometer.
When this happens, the lye solution is mixed with the melted oils. The resulting composition is filtered through a sieve and thoroughly mixed.
Then the mixture is whipped using a blender. This is done until the composition acquires a viscous consistency. Then flavors, dyes and other substances are added to it.
If solid essential oils are involved in making soap, they must be melted before use.
The soap preparation is poured into molds and left for 1 day. During this time, the composition completely hardens. Then the formed pieces are taken out and wrapped in film.
In this form they are stored for another 4 weeks in order to be completely ready for further use.
With the hot soap making method, the sequence of actions remains the same until a viscous base is obtained.
Next is required:
- Cover the dish with the preparation with a lid.
- Place the container in a water bath.
- Boil the mixture over low heat for 3-4 hours.
- Stir the soap solution every half hour.
The result is a gel-like mass that does not stick to your fingers. The composition is filled with selected additives. When everything is ready, the workpiece is poured into molds and left for a day. During this time the composition will thicken.
Possible mistakes in soap making
The package of remnants is ready, the recipe has been found. The process was carried out without deviating from the indicated points, but the result was not satisfactory. What is the reason? As a rule, they “oversalted” the components. The main disadvantages are:
- Remember to have a sense of proportion. Do not overdo it by stuffing soap with different ingredients. All you have to do is pour out the essential oils, add an extra 4-5 drops of dye, and it’s all down the drain and can be thrown into the trash. Not only the soap will be painted, but also the skin.
- To make the soap smell good, do not bring the base to a boil. Too much flavoring spoils the smell. For example, vanilla powder and cinnamon ultimately do not give the expected effect.
- A solution of brilliant green gives a shade of bright emerald color. Over time it fades.
- Red wine added to soap base can give the product a gray color.
- A series of meltings, overheating or boiling of the base, changes the pH of the soap and, as a result, a bad smell. It is necessary to monitor the temperature of the base during melting.
- It is not recommended to use chemical dyes when making soap; it is better to use food dyes.
- After adding salt, do not add water, otherwise the soap will curdle.
Soap made from colorful pieces
To create it you will need:
- colorful remnants;
- melted clear soap;
- molds;
- alcohol.
Procedure:
- Cut the existing soap into pieces of different sizes.
- Mix everything and add alcohol to glue the remnants.
- In a separate bowl, add clumped colored soap to the clear melted soap.
- Allow the composition to dry completely.
- Cut the finished soap into pieces.
Tools, containers and accessories
To make new soap from old soap you will need:
- Soap remnants are preferably in large quantities.
- Molds. You can buy professional ones. If you can’t buy them, silicone molds for baking, sand molds for outdoor games, and any small food containers are suitable.
- Base oils. For example, almond, olive, sea buckthorn.
- Essential oils for a special aroma and healing effect.
- Plastic jars of different sizes for melting soap base.
- An alcohol solution in a spray bottle to spray the base and remove air bubbles.
- Dyes, preferably food grade.
- A metal grater, preferably in the shape of a cone.
DIY liquid soap from soap remnants
It is much easier to prepare than solid soap. The structure can be preserved if only liquid ingredients are added to the product.
DIY liquid soap from soap remnants
These include:
- milk;
- perfume;
- essential oils.
The liquid product is prepared from the following components:
- remnants;
- hot water
- additional ingredients.
Also during the preparation process you will need:
- plastic bottle;
- grater;
- beautiful container for the finished product.
Technology for making liquid soap:
- Grate the soap remnants.
- Place soap shavings into the bottle. As a result, it should fill more than half of the container.
- Pour in hot water.
- Shake the bottle. This will help the chips dissolve completely.
- Add the selected liquid component.
It will take about 12 hours to form soap. After that, it is poured into a beautiful container.
Healthy Supplements
When making your own soap from soap remnants, you can improve the quality of the new detergent thanks to additional ingredients added to the base. Additives are chosen based on the goals you want to achieve when using soap.
Types of additives:
Coconut flakes, ground coffee, poppy seeds - have an exfoliating effect. Soap with these additives is used as a scrubbing agent. After its use, keratinized particles of the epidermis are removed, the skin becomes smooth, velvety, pleasant to the touch.- Almond and peach oils - soften dry skin.
- Essential oils of mint and lavender have a calming effect on the nervous system.
- Tea tree oil, essential oil of lemon, orange and grapefruit - they are added for skin rashes as antiseptics.
- Sage and chamomile oil - relieve skin irritations.
- Essential oils of ylang-ylang and jasmine are used as fragrances.
When adding essential oils, you need to take into account the fact that when heated, the soap mass does not smell very pleasant, so there is a desire to correct the smell with the help of a large number of fragrances. There is no need to do this, as the soap will acquire a pungent odor. For 200 g of soap remnants, it is enough to add 5-10 drops of essential oil.
What is homemade soap made from?
It takes about 12 hours to form soap.
The quality of soap depends on the materials used in its creation. Therefore, it is very important to pay special attention to each ingredient.
Soap base
It comes in the form of shavings or remnants.
The soap base consists of:
- water;
- alkalis;
- oils
The base is sold ready-made or made independently.
Base oil
Gives the finished soap useful properties:
- hydration;
- nutrition;
- softening.
The main advantage of oils is the absence of a specific odor. The component is used 1-2 teaspoons per 100 g of base.
Dyes
It is better to use natural food colors. They will not cause harm to health, nor will they provoke the development of negative reactions in the body.
These include:
- fruit and vegetable juices;
- food colorings;
- herbal decoctions;
- seasonings
The base oil gives the workpiece a specific shade: fir - green, cinnamon - brown.
Supplements
To decorate soap, use any available means.
Among them:
- glitter;
- dried flowers or individual petals;
- twigs and leaves of various plants;
- pieces of dried fruit;
- coffee beans;
- seeds.
The product will receive beneficial properties by adding one or more ingredients from the list:
- milk;
- coffee beans;
- ground coffee;
- honey;
- melted chocolate;
- crushed fruit seeds;
- cereals.
Soap will moisturize, nourish the skin or scrub.
Soap-scrub
To prepare toilet soap with a scrubbing effect, oatmeal, ground lemon or orange zest, ground coffee or cinnamon are added to the soap base.
Pour a little water into the soap shavings and wait for complete dissolution. The base should have a consistency similar to plasticine.
Scrubbing components are added to the resulting mass, shaped and placed in a dark place to dry.
What tools are needed?
The soap will moisturize, nourish the skin or scrub.
Special molds will help give the soap an interesting or unusual appearance. The soap will harden in them.
Commonly used:
- Old silicone baking utensils.
- Children's molds for making Easter cakes.
- Special containers for soap making.
They should be made of silicone, rubber, plastic.
Particularly popular forms are:
- colors;
- animals;
- geometric shapes.
It all depends on the capabilities and imagination of the person making homemade soap. As a result, the finished product has an unusual shape.
Benefits of homemade soap
- The main advantage of handmade soap is saving the family budget.
- The final composition of the hygiene product depends on your desires and preferences.
- Availability of useful components. By adding essential oils or herbal infusions, you can make the soap vitamin-rich and rich in substances beneficial to the skin.
- Making soap can become a hobby.
Making soap from soap remnants offers endless scope for creativity.
The main thing is to approach the matter with soul, put in a little effort, flavor it with imagination, and then the result will sparkle with colors and sparkle with aromatic foam. Did you like the article? Was she helpful?
Homemade Soap Recipes
There are several recipes for obtaining a bar of beautiful and fragrant soap. The main thing is to correctly follow the sequence of actions and calculate the dosage of ingredients.
Honey-ginger soap with cinnamon and cloves
Honey-ginger soap with cinnamon and cloves
Ingredients used for the recipe:
- crushed soap remnants – 100 g;
- glycerin – 1 tsp;
- honey – 1 tsp;
- ginger, cinnamon, cloves - ½ tsp each. in a crushed state.
You can give your new soap an interesting shape using a small plastic cup. A clean yogurt container works great.
Preparation:
- Melt the soap shavings in a water bath or in the microwave.
- When the base acquires a liquid consistency, add glycerin to it.
- Mix the composition thoroughly. Dissolve honey in it.
- Add ginger, cinnamon, and cloves to the resulting mixture.
- Pour the mixture into a clean plastic cup and place in the freezer for 1 hour. During this time, the composition will harden.
To remove the finished soap from the mold, you need to gently press on the edges of the cup.
Cleansing soap
Cleansing soap
It has antibacterial properties. Soap is good for people with problem skin.
To prepare the product you will need:
- baby soap – 100 g;
- water – 400 ml;
- hydrogen peroxide – 100 ml;
- glycerin, camphor and ammonia - 1 tbsp. l.;
- citric acid – ½ tbsp. l.
Preparation:
- Baby soap is grated.
- The shavings are filled with water and left for 4 hours, which will allow the soap to soften slightly. A water bath will completely melt the soap base.
- The remaining ingredients are added, except for hydrogen peroxide. It is poured in in a thin stream after mixing all the components.
- The workpiece is poured into molds and placed in the cold for 2 days. During this time the soap will harden. All that remains is to remove it from the molds.
Scrub soap with added coffee
Scrub soap with added coffee
To create the product you will need:
- baby soap – 100 g;
- water – 200 ml;
- olive and sea buckthorn oil – 5 ml and 17 ml, respectively;
- ground coffee – 3 tsp;
- patchouli essential oil – 6 drops.
Preparation:
- Grind baby soap. Place the shavings in a saucepan. Place the dishes in a water bath to completely dissolve.
- When the composition is transformed into a homogeneous mass, remove from heat.
- Add oil. Mix the preparation thoroughly.
- Add ground coffee and stir until smooth.
- Pour into prepared containers.
- Place the molds in the cold to allow the soap mass to harden.
If you want to achieve the maximum effect from scrubbing, then use coarsely ground coffee.
The following are also used for this:
- poppy seeds;
- crushed grape seeds;
- oatmeal flakes;
- cosmetic clay.
Liquid soap
The recipe for making liquid soap is simple. We grate the soap on a fine grater. Transfer to a container. It should be approximately 2/3 filled with shavings. Pour boiling water or herbal decoction. If desired, you can add other components later. In this case, leave some space in the container. Shake vigorously from time to time. It is necessary to achieve complete dissolution of the remnants and the formation of a thick composition.
After this, you can add a few drops of essential oil or a little liquid honey and pour it into a bottle with a dispenser.
If the mixture is too liquid, add a teaspoon of sugar and mix thoroughly.