simple flower
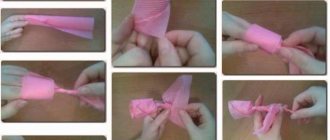
- Open the paper napkin completely (Illustration 1).
- Fold all four corners towards the center (Illustration 2).
- Repeat the previous point again (Illustration 3).
- And once again bend the corners towards the middle (Illustration 4).
- Turn the square over (Illustration 5).
- Now fold the four vertices towards the middle on this side (Illustration 6).
- Holding the corner, pull the folded part (illustration 7).
- Now lift this part to make a petal (Illustration 8).
- Repeat steps 7 and 8 with the remaining corners to create four petals (Illustration 9).
- Lift the wrapped triangles up (Illustration 10).
- You will receive four more petals (Illustration 11).
- You can leave it like this, or you can also pull out the triangles to form leaves (Illustration 12).
Simple origami from a napkin on a table is ready!
Beautiful butterfly
We present to your attention another simple way to make origami from a napkin on a table:
- Fold the napkin in half to form a triangle (picture 1).
- Fold in the top of the triangle (picture 2).
- Now fold the right side in half (picture 3).
- Do the same with the left side (picture 4).
- Fold half of the figure in the opposite direction to form a triangle (picture 5).
- Fold the figure to make a boat, as in picture 6.
- Pull out the bottom part of the figure (picture 7).
- Turn the part over (picture 8).
You've got a cute butterfly that would be appropriate to decorate a plate at both a children's party and an adult one.
Methods for laying out a napkin holder
The easiest way is to fold the napkins into a triangle. The resulting corners must be placed in the holder in one of two ways: in a single or double fan. In the first case, the fan is laid out towards each other, in the second - from the center to the edges. These two methods are good because, if necessary, the napkin can be removed without destroying the integrity of the composition.
Another simple but beautiful option is a double-sided waterfall. To make it you will need a cup. The napkins are folded in half, forming flat strips. Having made twenty blanks, stack them on top of each other. Bend the middle and place it in a cup. There are other, more original ways of laying out to decorate the holiday table.
Bird with a colorful tail
This option is simple to implement, but guests like it. The layout starts from the tail of the bird. To do this, you need to choose bright, rich colors of napkins. Plain colors will also work, but the bird will look less impressive. Manufacturing sequence:
- Each napkin has two parallel corners folded. Fold the napkin in half. It turns out to be a trapezoid - one part of the tail. Continue working until the required number of such parts is available;
- make the head and neck. To do this, the napkin must be folded several times, forming a flat tube. The top part of the tube must be bent to form a head;
- All parts are placed in the holder.
This interesting layout method is suitable for any celebration. The bird symbolizes warmth and homeliness. This figure is especially relevant during the celebration of the New Year, the symbol of which is the rooster. Rich colors will also decorate the festive table at a child’s birthday. A bright napkin holder will attract the attention of little guests and delight the birthday boy.
On a note! Before looking for patterns for folding napkins, you need to determine where they will be placed. This could be a napkin holder, a glass, a plate. Based on this, the addition option will be selected.
Peacock made from napkins
These wonderful origami crafts from napkins for the table are simple (photo above), but at the same time they look quite beautiful. Operating procedure:
- Take one napkin and fold the right and left corners towards the middle (Figure 1).
- Then fold the left and right sides of the napkin to the center again (Figure 2).
- Fold the parts to the middle a third time (Figure 3).
- Fold the resulting figure in half (Figure 4).
- Unscrew the edge of the upper triangle and lift one half, as in Figure 5.
- Now make the tail. To do this, take a long rectangle and fold it like an accordion (Figures 6 and 7).
- Unfold the accordion and fold the piece in half, as in Figures 8 and 9.
- Fold the edges and straighten the tail (Figure 10).
All that remains is to connect the tail with the bird and the craft is ready!
Light vase
Such napkins serve as vases. You can put, for example, sweets, treats, cakes and other confectionery products in them. The photo shows examples of folding fabric napkins, but you can fold paper ones in the same way, the main thing is to take them in larger sizes, which are not the cheapest.
Lily. Unfold the napkin, fold the corners into the center and repeat with the resulting square. Then turn the napkin over and fold the corners again.
Now, holding the corners in the center with your fingers, turn the corners out from under the bottom with the petals facing up.
Herringbone. We take napkins from the pack and do not unwrap them. We divide the napkin into 8 corners, bend the corners in the center at a distance from each other. Fold the sides inward and turn the corners into the pocket of the previous corner.
A swan made from a napkin is a symbol of grace on the table. Fold the napkin diagonally. Iron the fold line. We unbend it and fold the two sides to this line, like on an airplane, turn the napkin over and fold it again in the same way. Now we fold the resulting figure across corner to corner and bend the narrow part upward by one third, this will be the head. Fold in half lengthwise. Now arch our swan’s neck, head and spread its wings.
Article on the topic: Openwork blouse made of fine yarn with knitting needles with photos and videos
Cutlery case
Since we are talking about table setting, we need to take care not only of the decor of the plate. Cutlery can also be beautifully decorated. To do this, you can make an origami case for them from a napkin on the table.
Master class on folding decorative crafts:
- Take a cloth napkin and fold it in half (Illustration 1).
- Now fold it in half again (Illustration 2).
- Fold one edge so that it folds in half (Image 3).
- Now tuck the second corner under the first, only so that it peeks out a little (Illustration 4).
- Fold in another corner (Illustration 5).
- Now fold the piece in half with the folds facing up, as shown in Illustration 6.
- You now have a case for cutlery (Illustration 7). Place a knife in the farthest pocket, a fork in the second, and a dessert or tablespoon in the third (illustration 8).
This craft can be laid out either next to the plate or on top of it.
Unusual flower
At first glance, it may seem that making origami from napkins on a table is quite difficult. But actually it is not. The work will not take much effort and time. The main thing is to do it carefully, and then the first time in a few minutes you will be able to get a craft that can surprise your guests.
Operating procedure:
- Take a beautiful paper napkin and, without unfolding it, fold it in half to form a triangle (Figure 1).
- Fold the right and left corners towards the center line (Figure 2).
- Turn the part over backwards.
- Fold up the exposed edges (Figure 3).
- Turn the part back over and straighten it in different directions (Figure 4).
- You have your first part ready. To assemble a large craft, you will need many similar modules. Make the preparations. You will also need paper clips (Figure 5).
- Place each figure in several piles (Figure 6).
- Take two modules and connect one end with the third. Place another piece and put the fifth one on top. Thus, assemble a circle in which the last module is connected to the last. You have two rows ready. Continue collecting the flower in the same way (Figure 7). If the craft falls apart somewhere, carefully use paper clips.
- At the end, straighten the ends and gather the figure a little so that it has a cone shape (Figure 8).
This magical origami craft made from a napkin on a table can be placed in the central part as a decoration.
Beautiful flowers
It’s easy to make a festive decoration for a table or gift box in the form of flowers from paper napkins. For work we will need the following materials:
- Scissors;
- Glue stick or PVA glue;
- Strong thread;
- A tube that acts as a stem if you plan to make a bouquet.
Dandelion
The most beautiful flowers that appear in early spring after snowdrops. But such flowers can be made from napkins.
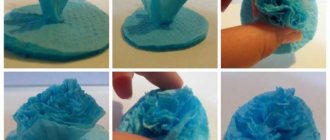
To make such beautiful and unpretentious flowers you will need multi-layer yellow napkins and a stapler.
Take a napkin and cut it into equal squares. They should not be too big, about the size of a matchbox. But, if you want to make larger dandelions, then the squares can be much larger.
Place the squares together and staple them in the center. You can also fasten it with thread, but the first option is very convenient and simple.
Now you need to make a circle out of the square. To do this, take scissors and cut the square. Once the circles are ready, make small cuts around the entire perimeter.
Spectacular Rose
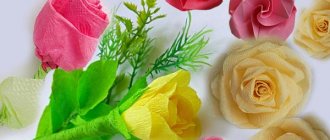
Crafts made from napkins in the shape of roses are very beautiful and unusual. To make them yourself you will need:
- Single-layer napkins;
- Scissors;
- Decorative ribbon or thread;
- Soft wire;
Manufacturing Guide
- One of the napkins needs to be cut into four equal parts. One of them is folded in half and twisted along the short side into a loose cylinder. On one side it is pulled together with a thread. This will be the base of the flower core.
- The remaining squares are cut diagonally. The right corner of the resulting triangle is bent, and the remaining ends need to be wrapped loosely around the core, securing the resulting petal with thread. Their number may vary and is determined during the work.
- To make a bouquet, stems are made. This can be thick copper wire wrapped in a strip of napkin of the desired color. You can attach a piece of paper during the wrapping process.
A beautiful and delicate bouquet of scarlet roses will be a wonderful decoration for a festive table.
Rose is a symbol of love and perfection. This is an excellent decorative item that can become an original decoration for your interior.
Bouquet: master class
- The napkin is folded into an accordion with the width of each fold equal to one centimeter. To make the product neat, it is advisable to make markings on both sides.
- Without unfolding the accordion, you should place its flat side on the table and fold it in half to find the middle. Along this line, the folded napkin is tied with a strong thread.
- The free ends of the accordion are rounded off using scissors.
- All that remains is to fluff the flower and glue the folds together to create a spectacular corrugated circle.
Beautiful handmade paper napkin flower
Receiving an original gift, decorated with your own hands, is doubly pleasant
You can make a similar table decoration in just half an hour.
Crafts made from napkins will be an excellent decoration for your home and the main attribute of a celebration.
You can fasten together several flowers of different sizes. The resulting terry version will look great as a decoration on a box, photo frame or in a bouquet, especially if you attach the flower to an improvised stem - a tube.
poppies
In the process of making poppies, you will need to take green, pink and red napkins. A black bag and green corrugated paper will also come in handy.
When making a bouquet, it is important to adhere to the following steps:
- Red paper is folded into four. Each petal is cut out using scissors (like snowflakes) and the four-petal design is unrolled.
- From the pink base, 4 more petals are prepared in a similar way, but they should be smaller in size.
- The green paper is folded in four and the base is cut out using a circle. The result is a circle measuring 4 cm in diameter.
- From the black bag, in the same way as in point 3, cut out a circle with a diameter of 6 cm.
- Blanks are folded separately (one on top) from red and pink paper.
- The green and black circles are cut in a circle, the base should remain intact.
- A black circle is laid out on top of a red and a separate pink flower and a green circle on top; they are sewn in the center with threads.
- All that remains is to fluff the composition, and the poppies are ready.
If desired, you can make stems from wire or simply glue flowers onto a cardboard mockup.
Read on the topic: Cornice for the kitchen - how to choose, installation and photos in the interior
Carnations
In the process of making a decorative element, a white napkin is folded like an accordion and fixed in the center with an invisible pin. The ends of the paper are torn off on both sides so that the petals are jagged.
Using a red or pink marker, casually color the edges of the napkin on both sides. Instead of invisible, the middle is held together with threads. The bud should first be fluffed and crushed. Each clove must be pierced in the center with wire. It is fixed under the bud. An example of the finished product can be seen in the photo.
Lotus
When making jewelry, you will need to take a purple or any other napkin. First, it unfolds completely, and then each corner folds towards the center. The envelope is turned over, after which the corners are folded back towards the center. The workpiece is lifted up by the right corner, while the inner part is held so that the center does not turn around.
The remaining corners are straightened in a similar way - the volumetric flower is ready.
Lily water lily
Start with the simplest lily pattern to master the basics of origami techniques and warm up a little.
Napkins in the shape of flowers look very beautiful on the holiday table.
Lily is formed as follows.
- Step 1. First, we unfold and straighten the napkin; if necessary, we iron it, so the finished origami will look neater. The napkin can be either paper or rag, as in this case. Next we turn all the corners towards the center. We make sure that no corner overlaps its neighbor.
- Step 2. Repeat the previous step. Fold the resulting corners toward the center again.
- Step 3. Turn the resulting square over to the other side, carefully holding the workpiece with your second hand, so that the folds are at the bottom.
- Step 4. Repeat step 2. Fold the corners to the center.
- Step 5. Pull the lower corners up a little, straightening them and carefully holding the workpiece in the center.
- Step 6. Repeat step 5 with all remaining corners.
- Step 7. Bend over the remaining small back corners.
- Step 8. The Lily Water Lily figurine made from napkins for table decoration is ready.
They visibly decorate and set a festive mood for the entire table.
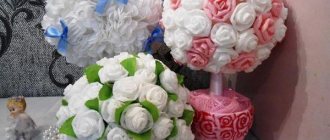
Original topiary
You will need: multi-colored paper napkins, scissors, a stapler, cardboard or a foam ball, a sheet of green paper, a satin ribbon, double-sided tape, glue, a wooden stick for the trunk, a small pot, woolen threads or twine, decorative butterflies, a piece of foam.
Master Class
- Print out the ball template, transfer it to cardboard and make a tree crown. You can also use a ready-made ball.
- Fold the napkin in half twice and fasten it in the center with a stapler.
- Cut out a circle and assemble the bud, lifting each layer of napkin up.
- Make 36 flowers in the same way.
- Cover the ball with flowers using double-sided tape.
- Wrap threads around a wooden stick.
- Glue the flower ball to the trunk.
- Place a piece of foam in the pot and insert the stem into it.
- Make grass from a strip of green paper and glue it at the base of the trunk.
- Cut out the leaves and decorate the crown.
- Tie the pot with a ribbon and decorate the topiary with butterflies.
The napkin topiary is ready!
