General information
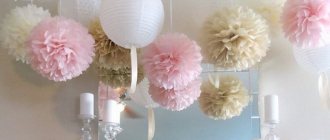
Kusudama paper balls have a positive effect on the nervous system. Such figures help you relax after a working day.
The process of their production has a beneficial effect on humans:
- develops creative abilities;
- teaches mindfulness;
- allows adults and children to have a pleasant time.
Even the very first crafts will look beautiful.
In the Land of the Rising Sun, where kusudama was first made, such paper products are considered magical. The Japanese believe that they bring health and wealth. A multi-colored paper ball with medicinal herbs was often hung near the bed of a sick person, which contributed to his quick recovery.
To make kusudama balls you will need a minimum of tools:
- scissors;
- paper;
- double-sided tape for better connection of modules.
A module is 1 piece of paper that is required to assemble a figure. To make a kusudama figure, you can use paper of any color. You can assemble the modules alone or together with someone, for example, the whole family.
There are a huge number of varieties of kusudama figures. They can have not only different colors, but also different shapes. Modules can be assembled in various colors. The Japanese most often make kusudama in the form of sakura and lily.
The following varieties of kusudami balls are available:
| Option | Description |
| Classic kusudama | Based on modules represented by triangles. A ball is formed from such modules. The diagram of the figure is simple; even those who have decided to get acquainted with the basics of oriental art can make it. |
| Model in the form of sakura | The product only visually seems difficult to manufacture, but in reality it is accessible to beginners. Kusudama sakura is voluminous and looks beautiful. |
| Modular flower | It consists of 10 small flowers. In this case, glue is used to connect the modules. The main difference between this kusudama and classic products is that 60 modules are used for it. It takes a long time to collect flower kusudama. |
History of kusudama
Kusudama is a subdivision of modular origami and an important part of this art. The origami ball is one of the most ancient decorative traditions that originated in Japan. It may consist of individual flowers, rosettes, or other parts called modules. Modular origami evolved from the conventional technique of folding a square sheet. For a module, it is necessary to repeat the same origami figure several dozen, or even hundreds of times. Then fold them in a certain sequence.
Translated from Japanese, kusudama literally means “medicine ball”. In ancient times, these products were used for various rituals and ceremonies. They were located in the corners or along the perimeter of the territory where the ceremonies were held. They contained all kinds of incense and collected aromatic herbs.
Around the same time, there has been an opinion that an origami ball suspended over the bed of a sick person contributes to his speedy recovery. No one knows whether it is a psychological factor at work, or whether the beneficial energy of the creator is affecting it, but this opinion is confirmed.
Nowadays in Japan, not a single celebration is complete without decorating with kusudama. They not only look original, but also represent an integral part of the cultural heritage.
Classic version of the product
Kusudama balls made from paper are easy to create and require a small amount of raw materials.
The production of a classic product takes place in the following 12 stages:
- Cut out squares. The sizes of the cut out figures can be different, usually 6 or 9 squares are formed from an A4 sheet. The exact number depends on what size figure the manufacturer wants to get. If you want to make classic kusudama, you should take 6 squares.
- Fold the squares. Each of the 6 (9) prepared figures should be folded diagonally on 2 sides, marking the center point of the square. The result will be 4 triangles that form a square of paper.
- Pull the corners towards the center. As a result, a kind of envelope is formed.
- Expand all sheets, returning them to their original state. Further work will require the remaining outlined lines.
- Fold each square in half.
- Bend the resulting rectangles in half as a result of folding at the previous stage. This needs to be done inward so that the upper and lower parts are connected.
- Pull out the hidden pocket located in the middle from the module. In this case, you should hold the left half of the module, thereby allowing the pocket to come out more easily. Lay out the right side into a trapezoid, similar to a ship made in origami style.
- Along the lines that were outlined in the early stages, remake the resulting trapezoid so that a pair of triangles are formed, equipped with pockets. To do this, place your finger in the middle, and then bend the upper and lower parts towards the center.
- Use your finger to open the pockets, resulting in squares of paper. This must be done with each of the 4 pockets.
- Fold each of the 2 sides of each of the small squares towards the center. As a result, a pair of triangles is formed. When you bend all 4 squares, you get 8 triangles.
- Raise and straighten each of the 8 triangles, and make 1 more small triangle on top.
- The corners protruding beyond the main body should be straightened and folded. The result should not be a triangle, but an octagon.
This completes the process of making the 1st module for classical kusudama. Now you need to make 5 more similar modules in the same way. Small pieces of double-sided tape are used to connect the modules. You can also use glue for this purpose. The result is a beautiful modular ball.
Kusudama balls made of paper, classic version.
Such a product will in many ways resemble a cube, because 6 faces will be clearly visible on it - 4 side, 1 top, 1 bottom.
You can do nothing else with this ball and admire what happened, or you can further decorate it by filling it with herbs or attaching woolen threads or floss to the bottom edge. Additionally, you can use rhinestones and artificial flowers.
Ball Butterfly
Kusudama paper balls in the shape of butterflies will look beautiful, for example, above the bed. Making a paper butterfly is easy. It is best to use a sheet in the shape of a rectangle with an aspect ratio of 2:3 for this.
The steps to create a butterfly are as follows:
- Fold the sheet in half.
- Fold the sheet in half again.
- Flatten the pocket.
- When turning over, do the same on the reverse side.
- Fold the halves, bend the corners and tuck them inside.
- Raise the ends, directing them towards the top of the triangle. The length of the wings depends on the distance to the top.
- You need to bend the corners in the same way, turning the almost finished butterfly over to the other side.
- Attach the hanging thread with glue.
New Year's ball made of paper using origami technique. Master Class
Zoya Reasonable
New Year's ball made of paper using origami technique. Master Class
New Year's ball made of paper using origami technique. Master Class
Required materials and tools:
• White printer paper
• Colored printer paper
I found a template on the Internet, printed the template on a white sheet of printer paper and on a sheet of colored paper.
I cut out the templates using scissors.
Next, you need to put one template on top of another, as shown in the photo, and connect it using PVA glue.
Let's start forming the ball. Color template lies on white. First, we intertwine white rays with colored ones.
After the first interweaving, the white rays appear on top of the colored ones.
This is what the reverse side of the workpiece looks like.
Now we hide the white rays under the colored rays.
Back side. When you intertwine multi-colored rays, you get a pretty nice ornament.
Thus, we intertwine the rays to the end. When the ball begins to form, fix the rays with PVA glue.
At the end of all the weaves, we connect the rays and fasten them together at one point, fixing them with glue.
To make the ball a New Year's, take a golden braid, make a loop with a bow and fix it on the ball with glue.
I hope you liked the DIY origami New Year's ball.
Dear friends, thank you for your attention and support!
"Calendula" (marigold). Master class on a paper flower using the origami technique We will need: - colored paper, corrugated paper; - scissors; - glue gun, glue stick; - a thin stick; - pencil.
Chanterelle using origami technique (master class). Goal: Development of cognitive and creative activity of children. Children creating a craft - a fox using the origami technique. Objectives: 1. Strengthen the skill.
Master class “Butterfly using the origami technique” In a forest clearing there is a miracle - there are bows on the flowers. These butterflies are spread out like colored candy wrappers. G. Ryaskina. In order to make a butterfly in.
Master class “Mushroom” origami made of paper Master class “Mushroom” origami made of paper Yes, it’s not easy to look for mushrooms - They are small in stature. They hide under the trees, covered with needles. Us.
Master class “Lotus using origami technique” Where the road goes into the fields, Lakes are a blue scarf. With its pink beauty, like the dawn, the lotus flower attracts everyone. Lotus - of mysterious antiquity.
Bells
The “bells” model will require 60 small modules. 1 flower will be made from 5 such modules. There will be 12 flowers in total.
Creating a flower consists of the following steps:
- Fold a sheet measuring 9 by 9 cm diagonally.
- Lower both upper corners of the resulting triangle to the lower one.
- Bend the ends of the triangle one by one so that a figure resembling a tulip is formed.
- Open small triangles in height, then carefully iron the folds.
- Fold the protruding ends of the triangles on both sides.
- Bend the triangles inward along the existing fold lines.
- Glue the finished module along the inside.
- Having made 4 more similar modules, connect them into a flower.
- Make 11 more of the same flowers and glue them together.
Kusudama for beginners
A simple model is suitable for those who are beginning to master the art of folding paper balls using the kusudama technique.
Prepare square sheets of paper. Follow the step by step instructions:
- Fold the sheet in half diagonally, lengthwise and crosswise. Expand.
- Form a basic pancake shape.
- Unfold and fold the basic “door” shape.
- Bend the short edges towards the middle.
- Open and straighten the upper right corner.
- Repeat with the remaining corners.
- Form squares from the resulting corners.
- Turn the workpiece over.
- Turn out the previously formed squares.
- Turn the workpiece over.
- Fold diagonally in both directions.
- Form a cross. Bend the pockets away from the top.
- Make 12 of the same blanks.
Connect the elements following the photo (vertices are marked in circles, corners for connection are marked with numbers):
The largest kusudama consisted of 2400 modules. It was collected by American resident Janine Moseley. The work took more than two weeks. The assembly itself took 15 hours.
The video instruction will reveal all the unclear points:
Happened?
Not really
Kusudama lily
Kuskudama lily balls can be one color, but it is better to use paper of different colors.
Additionally you can use:
- threads;
- needles;
- ribbons;
- beads.
For production you need:
- Take a square sheet and bend it in half lengthwise.
- Bend the sheet diagonally.
- Refold lengthwise and diagonally.
- Pressing the center of the paper blank, fold it so that a double square is formed.
- Straighten and iron each edge.
- Bend the corners towards the center of the resulting figure.
- Straighten the pocket by folding its bottom up. This should be repeated four times.
- Bend the “tail” that forms on the unfolded figure upwards.
- Turn the module over with the flat side up and fold the corners towards the center.
- Spread the petals, bend each of them down and twist them using scissors.
These are the stages of manufacturing the 1st line, but for a full-fledged product you will need 36 of them. First, using a thread and a needle, you need to connect 3 lilies, then 3 more, and so on until 36. All 12 groups, consisting of 3 flowers, must be connected to each other with a friend.
creative ball
To make a creative ball you will need:
- paper clips;
- double-sided colored paper measuring 10 by 10 cm;
- ruler;
- glue.
The work takes place in the following stages:
- Fold a square of colored paper in half diagonally.
- Fold the edges of the resulting triangle upward to form a rhombus.
- Apply glue to the edges of the workpieces.
- Connect the blanks so that a petal is formed.
- When 5 petals are made, collect them into a flower. You can also use glue for this. A total of 12 flowers must be made.
- Start assembling the ball. To do this, apply glue to the middle fold of any flower petal. Attach another flower to the place where the glue is applied. Glue alone is not enough: paper clips must be used for fixation.
- After treating the petals of 2 connected flowers with glue, attach the 3rd flower to this flower pair. As a result, a triangle is formed.
- For a more secure fixation, use paper clips when attaching the 3rd flower. It's better to take 2 at once.
- Add the 4th and 5th flowers in the same way.
- After applying another 1st portion of glue to the petals of 3 flowers located next to each other, you need to glue the 6th flower to this composition, and use 3 paper clips to securely fasten it.
- Make the other half of the figure from 6 flowers.
- When both halves are ready, glue them together and staple them together.
- When the glue is completely dry, remove the paper clips.
Simple Christmas balls
Models that do not require complex assembly are best made with children. Christmas tree decorations can be created in different ways.
Glued together from small shaped pieces
Cut out many identical circles from colored paper. Mark the circle, dividing it into equal 3, 5 or 6 parts. By bending the edges of the circles along the marks, make triangles, as well as pentagons and hexagons. You can stick a beautiful applique on the inside.
We make toys for the New Year in 2 ways:
- glue the bent parts of adjacent parts, directing them into the cavity;
- place the bent valves on the surface of the ball.
If you combine pentagonal and hexagonal parts in 1 toy, you can make a model of a soccer ball. To do this, a pentagon is connected to 5 hexagonal elements, and their adjacent sides are glued together.
@yuriko_ito @2pompona @38.decor @sharmari_35 @grandefleurr
Ball made from long paper strips
A simple but effective model can be assembled from strips with a length to width ratio of 1:5. Each toy requires 3 strips. Glue 2 pieces into rings, and leave the third one unfolded.
Place 1 ring inside the other. Pass the unglued strip through the loops that protrude from the top ring. Carefully secure the ends of the strip with glue. Carefully press each convex part onto the surface of the ball along the edges with your fingers, forming semicircles - this is an optional step, but it gives the toy a more complex shape.
The products can be used for decoration alone, hanging each one on a thread. Often elements are strung on a common thread, forming garlands.
@creative_viva @queenofcolorpaper @beroney95 @milla_ts @yamochky_str @mama_podarki_deti
Paper balls made from circles
Each toy will require 12 circles. Often such balls are made from parts of different colors.
Fold the blanks in a stack, stitch or staple along the center line (diameter). At the same time, secure the hanging thread. By bending the circles in half along the stitched line, straighten the ball and give it shape. There are options for designing the toy:
- Leave the ball as it turned out after straightening the parts.
- Visually divide each semicircle into 3 or more equal parts (depending on the size of the product). Glue 2 adjacent semicircles at 1 point. Connect the following elements in pairs along the entire circumference of the ball. At a point on the next tier, connect adjacent parts in the same way, but change the pairs: connect those that were previously separate. On a large ball, this technique forms a mesh surface.
- Instead of circles, cut out other shapes with bilateral symmetry (heart, bell, etc.).
Balls made from cones
Not only paper, but also cosmetic discs and old postcards are suitable for making them. And ready-made cone parts can be replaced with paper baking cups.
Cut out semicircles. Roll each into a cone and glue the edges. Connect the blanks by applying glue to the sides. The vertices of the parts end up in the center of the ball. Cake molds are also connected in a similar way: unlike cones, they do not have tops, and the ball will turn out empty in the middle.
@delight_paperdecor
Diamond
A beautiful diamond ball can be made from 6 sheets of A4 size double-sided colored paper. You will need glue to connect them, and scissors to cut them.
The work of making a diamond ball takes place in 16 stages:
- Turn sheets into squares.
- Bend the resulting squares diagonally on both sides.
- Bend each corner towards the center. After this, straighten the sheets.
- Fold the sides of the square blanks to src=»https://handsmake.ru/wp-content/uploads/2020/04/shary-kusudama-iz-bumagi-14.jpg» class=»aligncenter» width=»600″ height ="443″[/img]
- Fold the top and bottom sides to the center as well.
- Place your palm in the center and remove the hidden edge of the paper on the right.
- Lay out part of the workpiece.
- Place 1 finger in the middle at the top of the workpiece, and place 2 fingers under the paper at the top and bottom.
- Removing your finger from the top of the workpiece, press both sides with 2 other fingers. The same must be done on the other side.
- Using your finger, open each corner.
- Make a square. To do this, the corners are folded to src=»https://handsmake.ru/wp-content/uploads/2020/04/shary-kusudama-iz-bumagi-17.jpg» class=»aligncenter» width=»600″ height= "443″[/img]
- Fold the sides of each square toward the center.
- Raise and straighten all sides.
- Fold the 4 protruding corners so that a figure with 8 corners is formed.
- According to the principle described above, make 6 blanks.
- Glue the modules together. First, connect the 4 side elements with corners. After this, attach the bottom and lid.
Paper flower kusudama
Prepare 60 square sheets of 8x8 paper.
Ball assembly:
- Fold the square in half diagonally in both directions and unfold.
- Bend across and unfold.
- Form a basic double triangle shape.
- Fold the triangle in half and unfold.
- Fold the sharp corners towards the center.
- Make 4 more of these elements.
- Connect 2 modules together.
- Fold the workpiece in half.
- Connect the rest in the same way.
- Close it in a ring.
- Turn the workpiece inside out.
- Form the same flowers from the remaining sheets and glue them together to form a ball.
Editorial Voice
Irakli
Lord of Paper Sheets
Ask a Question
All elements of kusudama must be exactly the same and neat, otherwise you won’t get a good result. The larger the component itself, the more voluminous the ball will be.
Star ball
Kusudama paper balls in the shape of a star look very beautiful.
To make them you will need:
- scissors;
- ruler;
- squares measuring 10 by 10 cm from double-sided colored paper.
The work takes place in 15 steps:
- Fold the square in half, then straighten it.
- Turn 2 corners to src=”https://handsmake.ru/wp-content/uploads/2020/04/shary-kusudama-iz-bumagi-19.jpg” class=”aligncenter” width=”600″ height=” 443″[/img]
- Turn the workpiece over.
- Fold 2 opposite edges towards the middle.
- Turn the workpiece over again.
- Fold the right corner up and the left corner down.
- Turn the workpiece over again.
- Fold the corners along the fold lines.
- Having positioned the workpiece vertically, connect its vertices.
- Open the extreme folds slightly.
- According to the scheme described above, make 30 modules.
- Connect 2 modules to each other. In this case, insert the edge of the 1st of them into the lapel of the 2nd.
- After attaching a couple more modules, form a pyramid.
- Forming the 5th ray, close the circle.
- One beam should consist of 3 modules - the circle should be closed by 5 beams.
How to make Chinese balls: step-by-step instructions, description, photos
Anyone who has attended celebrations in the Middle Kingdom has seen how people decorate their homes and neighborhoods with balloons, lanterns and other compositions to create a good holiday atmosphere. You can also make a small miracle for the New Year at home with your own hands. Let's learn the technique of creating a Chinese honeycomb paper ball.
Materials:
- Paper (creped)
- Stationery glue stick
- Cardboard, scissors
- A4 sheet
- Thread, needle
How to make honeycomb balls?
Progress:
- Prepare at least twenty identical sheets of colored paper.
- On a white piece of paper, make marks that will conditionally divide these pieces of paper into 5-6 parts (equal).
- Then place the piece of paper, mark its borders and draw strips of glue across each one.
- On the second sheet, draw stripes of glue where you have not drawn them yet.
- And so alternate each sheet.
- Then cut out a circle from cardboard. And do the same with colored paper.
- Divide the cardboard into two semicircles, glue them to the beginning and end of the colored paper.
- Connect the ends and glue them together. The result is a honeycomb ball.
Ball-honeycomb - a toy for the Christmas tree
Chinese ribbed balls are made almost according to the same scheme given above, but gluing is done along horizontal lines. And cardboard blanks are made in the form of an arc. Their width is three to five centimeters. And they coat the colored paper with glue so that it is glued between the parts of the arcs. At the end, the edges of the arcs are connected to the cardboards and threads are attached to hang the product.
Ribbed Chinese balls
Openwork ball
Anyone who wants to learn how to make a simple kusudama ball is recommended to familiarize themselves with the openwork craft. This product will be a good decoration for a living room or office space. This ball can be placed in any corner, and on the eve of the New Year holidays it can be hung on a pine tree branch.
To work you will need:
- scissors;
- glue;
- 30 paper strips of 2 different colors;
- knitting thread.
The manufacturing process takes place in 7 stages:
- Take the strip and fold it in half from left to right. After this, straighten the paper. This will create a bend.
- Fold the top corner towards the center. The same must be done with the right corner. The left corner should be pulled down, and the right corner to the point of contact with the center of the paper strip. Repeat the steps described above.
- Fold the resulting figure in half and then straighten it.
- Take a strip of a different color, bend it, stepping back slightly and fold it like an accordion so that the area where the last fold should be remains flat. The other half is processed similarly. Fold both bottom corners.
- Place the first strip in the center of the second and fold everything along the existing fold lines, and glue the resulting figure together. All the above steps must be performed again for each of the prepared paper strips.
- When all the blanks are made, start assembling the ball. Taking one of the blanks, apply glue to the surface near the accordion. Glue the 2nd piece to this very area treated with glue. This is how 5 modules should be connected. They form a circle that will form the basis of the figure.
- Attach the remaining modules to the base until a ball is formed.
Using glue, you need to attach a thread to the resulting openwork figure. Then you just have to wait until the adhesive dries and the ball is completely ready to serve as a decoration for the room.
Sonobe ball
Simple schemes for making paper balls include sonobe. It is well suited for those who do not yet have any experience in the art of kusudama. The work is simple, so small children can be involved in it.
To do this you will need:
- approximately 30 square sheets of paper;
- PVA glue;
- ribbon.
The process of making a ball according to the sonobe scheme takes place in the following 6 stages:
- Make modules. Taking a sheet, bend it, then unfold it and smooth it out. Both edges must be pressed to the resulting line.
- Fold the top corner so that it touches the fold line. The same must be done with the second corner. Fold the resulting triangles again.
- Press the edges towards the center and then make additional folds. Perform the same steps for the second end.
- Fold one side and put a corner in it. As a result, a rhombus is formed. It needs to be folded in half.
- Take a triangle from the workpiece and attach it to the center. The same must be done with the opposite edge. All the steps described above must be performed with each of the 30 square paper sheets prepared for this craft.
- Assemble the figure. The corner part of one module must be inserted into the pocket of the other. Then you can take the 3rd element and add it to the first 2. The result will be something similar to a pyramid. The remaining modules must be attached in a similar way. Glue is used for connection.
When the figure is ready, you can attach a ribbon to it and hang it in any place that needs to be decorated. Making a kusudama ball that will be an excellent interior decoration is not difficult. All you need is paper, scissors, a desire to create, as well as some free time and imagination.