master class with step-by-step photos and video selection
An original candy bowl made from newspaper tubes will be an unusual decoration for any table and will delight guests. It can also be made as a gift, because handmade crafts are always highly valued. By following all the steps in our master class step by step, you can easily weave such a vase yourself from the most budget-friendly material - old newspapers.
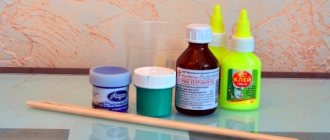
For the craft we will need:
- Whole sheets of newspaper;
- Paper cutting knife;
- Scissors;
- Thin knitting needle;
- PVA glue;
- Flat bristle brush;
- Acrylic lacquer;
- A small form for braiding (for example, a salad bowl or plate).
Preparing a newspaper
Newspaper sheets need to be rolled into tubes. To do this, cut the sheet along the folding line and bend it across into a strip about 7 cm wide. Carefully cut it.
Twist the tubes
- We place the knitting needle at a slight angle and hold the newspaper with our left hand, and tightly twist the newspaper tubes with our right hand.
- Carefully glue the very tip of the resulting tube with a small amount of PVA glue.
- The tubes should be as dense as possible. It is very important that one end of the newspaper tube is wider than the other.
- Carefully paint the tubes with water stain. It is very easy to use and has a large selection of colors.
- You can paint it immediately in a bunch, dipping it on both sides in stain. Dry, but not too much; the tubes should be slightly damp for flexibility. If necessary, you can spray them a little with water from a spray bottle, leaving the ends dry.
Weaving the bottom
- We start weaving a candy bowl from the bottom, which will be in the shape of a saucer. For the base, we lay out the tubes crosswise and fasten them with glue.
- Take the next tube and wrap 4 base tubes in a loop at once. We press the loop tightly to the base, and its ends will be working tubes for further weaving.
- For convenience, one of the base tubes can be marked with an elastic band for money, so as not to lose where the row begins and ends.
- We bring the bottom tube forward to the next 4 bases. We place the working upper tube on top of the lower one and place it down under the 4 base tubes.
- In the same way we weave 3 rows in a circle.
- If the tube runs out, you can lengthen it: insert a narrow one into the wide end, adding a drop of glue for strength.
- Then we divide the base tubes into 2, braiding them in the same way as the 3 previous rows.
- We weave a few more rows and again separate the base tubes, one at a time, in the shape of the sun. The bases should be spaced equally apart. Once we have woven the bottom to the size that suits us, we cut off the working tubes. And we will discreetly hide their ponytails in the weaving with a knitting needle.
- All “rays” of the sun must be removed. We cut them off one by one with scissors, leaving small ends that we hide in the weave.
Cup weaving
- Fold the tube in half and drag it through our finished saucer closer to the middle. We insert several more tubes in the same way. They will be the basis for the cup.
- We take the tube, bend it in half and put it on one of the base tubes. We carry out weaving, as for the bottom, only in a vertical position.
- After weaving the first row, we place our salad bowl shape and secure it with clamps or clothespins. We continue weaving, pressing the newspaper tubes to the form. We make sure that the distance between the base tubes does not exceed 3 cm, otherwise the cup will not hold its shape well, and the weaving will be sparse. By carefully spreading the weave with a knitting needle, you can insert additional tubes.
- We remove the shape and weave further, separating the warps one piece at a time, just as when weaving the bottom.
- We braid the cup to the height we need and again cut off the working tubes. We hide them in weaving. We flatten the base tubes and also hide the tails.
Handle weaving
To weave a handle, take 2 tubes and insert knitting needles next to them in parallel. We glue the third to the second tube, retreating 2 cm from the edge. We braid the first two tubes of the third in the form of a figure eight. We weave the required length and take out the knitting needles. We attach the handle to the cup, spreading the space under the handle, using a knitting needle and glue it with glue.
Dilute the glue with water in a 1:1 ratio and carefully coat the cup on all sides with a brush.
To give the cup strength, it needs to be primed. To do this, dilute the PVA glue with water in a 1:1 ratio and use a brush to completely coat the cup inside and out. After drying, the candy bowl will become very durable and tough.
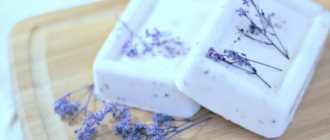
And at the final stage of work, we coat the cup with acrylic clear varnish. After varnishing, the candy bowl will be protected from moisture, will become glossy and more saturated in color. The varnish should be applied in 2 layers and allowed to dry thoroughly. Let's decorate our candy bowl with satin ribbons, lace, artificial flowers and beads.
Video materials
Master classes in video format on making a candy bowl with your own hands.
sdelala-sama.ru
DIY candy bowl made from newspaper tubes
Today we have another master class on weaving from newspaper tubes.
This time we will weave a candy bowl from newspaper tubes with a voluminous bend.
To make a candy bowl with your own hands we will need:
- newsprint;
- PVA glue;
- knitting needle;
- scissors;
- stain.
We make tubes from newsprint using a knitting needle and PVA glue. After drying, paint the tubes with two colors of stain. I used cherry-colored alcohol stain for the basket and oak-colored stain for the finishing. And now we begin the weaving process. To do this, take 2 pairs of tubes, fold each of them crosswise and lay them on top of each other, as in the photo. We start a working tube and braid the first row with 2 tubes, and with the second - one at a time.
We weave in a circle to the size we need with cherry-colored tubes. As we work, we grow the working tubes. I wove 7 rows and from the 8th row I began to lift the tubes up, not immediately vertically, but at a slight angle, so that the weaving had a more elegant look. I wove 3 rows with a rope, then changed the color of the working tubes to the color of oak. I wove 2 rows, after which I again switched to the main color and continued weaving to the desired height, while growing the vertical tubes-stands. To finish weaving the basket with a volumetric bend, we will need additional tubes, which we insert into the weave under the horizontal tubes at each stand and bend cut them in half, as in the photo.
Additional racks differ in color. We weave 2 more rows of rope to secure additional tubes.
Next, we do the usual bending for the nearest racks, only 3 tubes at a time. Tip: before moving on to bending, moisten the rack tubes and wait a few minutes until they become limp, and only then proceed to bending. This will allow you to avoid severe creases in the tubes and make it easier for you to work. Start the second row of folding with a cherry tube, stretch it over the next three tubes into the inside of the basket, followed by 2 light tubes. And so on in a circle. All that remains is to shorten the tubes inside the basket with scissors and wrap them around the weave, giving a more aesthetic appearance. Author of the article “Do-It-Yourself Candy Bowl from Newspaper Tubes” Irina
See also interesting articles on a similar topic:
samodelka.info
Openwork candy bowl made of newspaper tubes. Author Natalil409
2.
So, for work we need: two cardboard circles for the bottom (it can also be woven), 46-50 tubes of one color and 15 tubes of a different color, as well as scissors, PVA glue, a 3-liter jar and a bit of masking tape. Of course, you can weave everything in one color.
3.
Between the cardboards covered with wallpaper (mine) I insert 18 pairs of tubes (light ones in the photo) and 5 tubes for handles, placing them one at a time between the pairs. (5 tubes between pairs, skip 4 pairs and another 5 tubes). Mine are a little darker.
4.
We lift our tubes for the handles up and fasten them with a clothespin. The product is placed face down.
5.
In our working pairs we braid one row, putting the tails from the working tubes in the middle.
6.
Next, for simplicity and convenience, I drew concentric circles on the rejected cardboard. Small in diameter like our bottom, and the other two are at your request. Their radius is 6-8cm larger than the radius of the smaller circle. It depends on how tall you want the candy bowl to be.
7.
We place our bottom in the center on a small circle and secure it with masking tape.
8.
Now we do any binding. I arranged a couple of tubes over the first, under the second, over the third, under the fourth and brought them to the top. The main thing is that the tubes are moistened and come out to the top after the last binding.
9.
I moved counterclockwise. We do this with all couples. At the same time, make sure that the height of the fold touches our circle. In this basket I chose a smaller circle.
10.
This is what happens when we completely intertwine all pairs of tubes. Now you need to straighten everything well, tighten it, etc.
11.
Next, we remove the masking tape and place our entire structure on an inverted 3-liter bottle. Carefully lower the binding down, pressing it against the bottle. We lift our tails up, and lower the tubes for the handle down.
12.
I glue the tubes for the handles to the binding and secure them with clothespins. And on our ponytails I weave 3 rows of rope. I cut the tubes. I turn the product over and design the handle.
13.
The handle is simple. It does not carry the load. So I just collected my tubes and wrapped them around them. The basket is ready.
14.
This is roughly what happens.
15.
Since candy (for some reason) doesn’t grow at the dacha, I had to use it in other ways.
16.
17.
This is my harvest. True, the cherries are already leaving, but the cucumbers are only from the garden bed (greenhouse)
Source
We weave a candy cup from newspaper tubes
Hello, dear friends!
I'm Katya. I really love weaving with paper wicker, and I want everyone who wants to learn to feel the pleasure of weaving. Therefore, today I will show you how to create an unusual and functional candy cup from ordinary paper. This one, for example.
For work we will need: newspapers or consumer paper, a stationery knife, scissors, a knitting needle with a diameter of 1.5-2 mm, PVA glue, a form for braiding (I have a small plastic salad bowl), a flat brush with bristles, aqualac (acrylic varnish) .
We will not weave from the paper itself, but from paper tubes that still need to be wound. So let's get started.
We cut the spread of the newspaper along the fold line, then fold the sheet across so that we get a strip 7-8 cm wide and cut it.
Then we take the knitting needle and place it on a strip of paper at an angle of 20°-30°. We begin to twist the tube. We hold the newspaper with the fingers of our left hand, pressing it to the knitting needle, with the rest we tightly wind it onto the knitting needle.
We drop a small drop of glue onto the tip of the paper and glue this tail at the end of the tube.
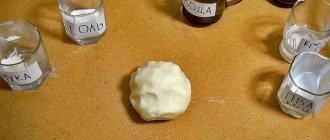
The tube should be dense, and one end should be slightly wider than the other - this is necessary for extending the tubes (we then insert the thin end of the tube into the wide one, thus lengthening the tubes).
After the tubes are wound, they need to be painted. The easiest way to do this is with a water-based stain - it has a varied palette, it is odorless, and the tubes stain well. This is done like this: take a small bunch of tubes, dip them directly into a bottle of stain, take them out, turn them over to the other side and dip them again. Place the tubes on paper to dry. Advice: in order for the tubes to be elastic when weaving, they need to be left a little dry so that they are slightly damp. If the tubes are dry, then you just need to spray them with water from a spray bottle, leaving the ends dry (4-5 cm from each end), otherwise they will not fit well into each other and it will not be possible to extend the tubes.
The tubes ready for use look like this.
Now let's start weaving the cup. We always start weaving from the bottom, in our case it will be a saucer. To do this, you need to lay out the tubes crosswise as shown in the photo. This will be the base of the saucer, and we will call these tubes stands. To prevent the tubes from moving apart, we glue them with PVA glue.
We take a new tube, bend it in half and put it in a loop on 4 stand tubes at once.
We press it tightly to the center of the base of the future body. Thus, we received 2 working tubes with which we will weave. I mark one tube-stand on which the loop is put with a rubber band so that in the future I can immediately see the beginning and end of the row. Next, take the bottom tube, bring it forward and place it on the next 4 racks. We place the upper working tube on top of the lower one and place it under 4 racks. This weaving method is called a straight rope with 2 tubes.
Crossing the tubes in this way, weave 2-3 rows in a circle. You need to carefully monitor the working tubes - always first bring the bottom tube forward and place it on the racks, and crosswise place the top tube on top of it and place it behind the drains. If this condition is not met, the drawing will be confused.
When the tube ends, we extend it - insert the narrow end into the wide end of the new tube, after dropping a drop of PVA there so that they do not separate.
After we have woven 2-3 rows, we begin to separate the racks in twos, braiding them in exactly the same way as the previous 3 rows.
After separating the racks, we weave a few more rows until the distance between the racks is approximately 3 cm. After this, we again separate the double racks and separate them one at a time, forming a “sun”. When braiding the racks, you need to separate them so that they are approximately the same distance.
We weave the saucer to the desired size and finish weaving. We do it this way: we cut off the working tubes, leaving the ends 1.5 cm, and using a knitting needle we hide them in the weave next to the adjacent stand.
Now you need to close the edge of the weaving. To do this, flatten the first post, bend it next to the second post, leave the tip at 1.5-2 cm, and cut off the excess. We hide the tip in the weave next to the second post. We do the same with the second post - we cut it off and hide the tip next to the third post. We help ourselves with a knitting needle - we move the weave a little to make room for the tip that needs to be hidden.
We get this closed edge of the weave.
The saucer is ready!
Now let's start weaving the cup. First you need to make stands for the cup. To do this, take a tube, bend it in half and push it through the bottom like the letter P.
We need a cup stand to “grow” between each tube-bottom stand. It turns out like this.
Now you can proceed directly to weaving the cup. We bend one tube in half, put it on the stand and begin to weave a rope. It is woven in the same way as in the bottom, only now the racks are in a vertical position, and not horizontal.
After 1-2 rows, we insert the shape that we will braid and fix it with clothespins so that it does not slip off. Instead of clothespins, you can put something heavy in the mold. Now we weave further, pressing the tubes tightly to the form.
If during the weaving process the distance between the posts becomes 3 cm, then you need to insert additional posts, otherwise the weave will not be tight and will not hold its shape well.
This is done simply - use a knitting needle to spread the weave a little and insert one tube into the weave next to each post.
Then we return the shape to its place and weave further, spreading the racks one at a time in the same way as we did when weaving the saucer.
We weave the cup to the desired height. We finish the weaving and close the edge exactly as we did when weaving the saucer - we cut off the working tubes and hide them in the weaving, and we flatten the posts and hide the ends next to the adjacent posts.
This is what should happen.
The cup is almost ready, all that remains is to make the handle. We will weave this too.
We take 2 tubes, leave free tails 2-3 cm long, and glue the tail of the third tube to one tube. We place 2 tubes in parallel at a distance equal to the distance between the racks in the cup, and with the third tube we begin to braid them in a figure eight. To prevent the tubes from getting pulled together, we insert them along the knitting needle next to them. We braid the handle to the required length, glue the working tube or hide it inside the weaving, and take out the knitting needles.
To attach the handle to the cup, insert the knitting needle into the weave next to the stand, thus expanding the space for the handle, and insert the tails of the handle into this hole. To be safe, add a drop of PVA to these places.
To give the cup strength, it needs to be primed. To do this, dilute the PVA glue with water in a 1:1 ratio and use a brush to completely coat the cup inside and out.
When the cup dries completely after priming, it will become very durable, like wood. However, if there are irregularities in the cup that need to be corrected, this must be done before the cup dries. We simply smooth out all the unevenness with our hands, give the desired shape to the handle and leave it to dry. If the wicker product is already quite durable, then you can skip the priming step and immediately proceed to the last stage of work - coating the cup with varnish. This is a necessary step to give the product additional strength and protection from moisture. In addition, after varnishing, the color of the product will become brighter and a beautiful light gloss will appear. I recommend using colorless aqualac (acrylic varnish), which is sold in any hardware store. Unlike alkyd varnish, it dries quickly and is odorless, so it can be used indoors. Using a brush, cover the cup with two layers of this varnish (each layer should be allowed to dry). Now the cup is completely ready for use - it is not only durable, but also protected from moisture. If desired, the cup can be decorated with lace, ribbons or beads. For example, like this.
OK it's all over Now! If you have any questions about the master class, I will be happy to answer them.
Good luck!
www.evna.by
Making a candy bowl
To make a candy bowl you will need:
- newspapers;
- knitting needles (1.5-2);
- PVA glue;
- acrylic lacquer;
- the shape in which we will braid (a salad bowl will also work);
- stationery knife;
- scissors;
- dense bristled brush.
Stage 1. Prepare the tubes from which we will weave a cup. To do this, lay the newspaper on a flat surface and cut it along the fold. After this, fold the sheet so that a strip of 7-8 cm is formed and cut it off.
After this, take the knitting needle and place it on a strip of paper at a slight angle (20-30 degrees). While twisting the tube, hold the newspaper with your left hand so that it is as close to the knitting needle as possible. Try to wind the paper tightly onto the knitting needle so that it does not fall apart later.
When the tube is twisted, it must be secured. To do this, apply a drop of glue to the remaining small corner of the newspaper and press it to the end.
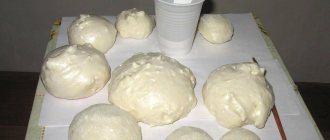
The finished tube should come out tight, and one end will be slightly wider than the other - don’t worry, this will be needed to build the tubes on top of each other. Now you need to repeat this another 40-50 times. At least this many tubes will be needed to create a candy bowl.
Stage 2. Now the finished tubes need to be painted. The easiest way to do this is with a water-based stain. Its palette is varied, which will give you the opportunity to choose your favorite color; in addition, it is odorless and stains paper well. Take a small pack of straws and dip it into the paint bottle. After that, take it out, turn it over to the other side and repeat the procedure. Now you need to let the tubes dry.
Also remember that to give them elasticity you need to leave them slightly damp, this will make it easier to weave. If you haven’t caught this moment, you can moisten them with a spray bottle, but the ends (4-5 cm) should remain dry.
Step 3: Be patient as this is where the weaving of the bowl begins. Let's start from the bottom.
Article on the topic: How to sew a children's hat from fleece: pattern and master class
Take the tubes and arrange them crosswise, as shown in the photo below. To prevent them from moving apart, glue them a little. In what follows, we will call the tubes struts.
Take the next tube and, bending it in half, put it like a loop on four posts at once.
Press it into the center of the base. So, you have two working tubes with which you will braid the saucer for the candy dish. For convenience, one of them can be marked with a rubber band, which will serve as a guide for the end of the row. Take the bottom tube, bring them forward and place them on top of the four posts. After this, stretch the upper working tube over the lower one and run it under the four racks. This method of weaving is called a straight rope with two tubes.
Continue circular weaving up to 2-3 rows. Watch the working tubes carefully, because first the lower tube is always brought forward and placed on the racks, and only after that can the upper tube be placed on top crosswise and placed behind the racks. If you do not follow this rule, the drawing of the candy bowl will go astray.
If you run out of straw, extend it. Take the next tube and insert the narrow tip into its wide end. Don't forget to add some PVA glue there, this is necessary for a tighter connection.
After 2-3 rows, start separating the racks in twos and continue braiding them in the same way.
Braid a few more rows until there is about three cm between the posts. After this, you can separate the double posts and thus form a “sun”. It is important to ensure that the distance between them is approximately the same.
Weave the saucer to the desired size and finish weaving. To do this, cut off the working tubes, leaving the ends 1.5 cm and hiding them in the weave using a knitting needle. To close the edge of the weaving, flatten the first post, bend it next to the second, leaving a 2 cm tip. The excess is cut off. After this, hide the end of the tube in the weave next to the second post. We perform a similar procedure with subsequent racks. You can help yourself with the help of a knitting needle: move the weave apart so that you can more freely hide the tip of the stand into it. Thus we got a closed edge:
Article on the topic: Patent elastic band with knitting needles with diagrams and descriptions in a circle
Stage 4. We move on to weaving the bowl itself. Prepare stands for it: take a tube, bend it in half and insert it through the bottom in the shape of a P. Make sure that between each saucer stand there is a cup stand.
Next, bend one tube in half, put it on the stand and start weaving in the same pattern as the saucer, with one difference being that the stands are now in a vertical position.
After completing two rows, insert a shape (for example, a salad bowl), secure it with clothespins (this is necessary so that it does not slip and the pattern remains even). Instead of clothespins, you can also place something heavy in the mold. Continue weaving, pressing the tubes to the form.
Watch the distance between the posts. If it approaches three cm, you will have to insert additional tubes, because otherwise the cup will be loose and its shape will be unstable.
This is quite simple to do: use a knitting needle to spread the weaving and insert one tube next to each stand. After this, the shape returns to its place, and you weave further according to the same pattern.
Continue weaving the cup to the desired height. After completing the weaving, close the edge as you did before. Cut the working tubes and hide them in the weave, the posts are flattened and the ends are hidden next to the adjacent posts.
The result should be the following:
Stage 5. All that remains is to weave a handle for the cup.
To do this, take two newspaper tubes and, leaving the tails 2-3 cm, glue the tail of the third to one tube. Place two straws in parallel at the same distance as between the posts in the cup. After that, start braiding them in a figure eight using the third tube. During the process, the tubes may become pulled together; to avoid this, insert knitting needles next to them. Finish the handle, and glue the working tube or hide the weaving inside. We take out the knitting needles.
Related article: Batik drawings for beginners
The next step is to attach the handle to the cup. To do this, insert the knitting needle into the weave next to the stand. This is necessary in order to expand the space for the handle. Insert the tails of the pen into the resulting hole, having previously lubricated them with a drop of PVA.
Stage 6. Let's make the cup stronger. To do this you need to prime it. Dilute the PVA with water in a 1:1 ratio and carefully coat the cup inside and out using a bristle brush.
When the bowl dries completely, it will be similar in strength to wood. However, you need to check if there are any uneven places in the product. If they are not noticed immediately, it will be impossible to correct them after drying. To correct unevenness, simply smooth it out with your hands while shaping the handle.
If you think the cup is already strong, you can skip the primer.
Stage 7. Varnishing. To give the cup additional strength and protection from moisture, the product is varnished. Moreover, varnishing gives a beautiful gloss and brightness to the color. It is better to use acrylic varnish for this, since it dries quickly and does not have an unpleasant odor, which allows you not to move from the room during varnishing. Cover the cup with a brush in two layers (remember to let each layer dry).
Now your product is ready to become a reliable container for sweets and various fruits - it is durable enough and can withstand any mountain of sweets. You can also decorate the candy bowl as you wish. For example, like this:
If the cup seems too complicated to you to create, then you can make a simpler candy bowl. Its creation will not take much patience and time, but despite this, it is just as beautiful and will be able to surprise guests. The following video explains how to create such an openwork candy bowl:
Candy bowl made from newspaper tubes – Crafts Lessons
Share the link to this article with your friends on social networks.
We would like to share with you one small idea on how to make a candy dish from ordinary paper. Each of us has old magazines and newspapers at home. But have you ever thought that they can be put into action? You can make many useful things in everyday life from ordinary paper. We invite you to work with your hands and make a dish for sweets from newspaper tubes.
To work we need:
- newspaper or A4 paper;
- thin stick or knitting needle;
- PVA or glue stick;
- hot gun.
Stage 1.
Let's start preparing the paper. Cut into strips 3-4 centimeters in size. Place it on a thin stick at an acute angle, twist it, holding it tightly and stretching it to make a long and elastic paper stick.
Stage 2.
We paint the sticks with white acrylic or floor paint using a brush. If you have paint in a can, great, it will distribute the paint evenly. In our case, acrylic paint is used. The drying process will take about 2 hours.
Stage 3.
To weave such a dish you need an unpaired number of sticks. We intertwine the sticks with each other, guided by the photographs. We wrap one stick and pass it through one in a certain sequence. We try not to let go, but to press and tighten.
When the stick runs out, connect a new one, you can secure it with glue.
We weave the bottom to the desired size. We check the shape and weave further. As you may have guessed, we need to select a vessel that will serve as a mold.
We weave to the desired height. In order to secure the remaining sticks, measure the length of the bend and cut off the excess.
We bend the sticks to the adjacent one and press it well. Add some PVA glue and let it dry.
For the braid, paint several sticks pink. We braid a pigtail.
Glue the pigtail on top with hot glue.
You can put fruits and sweets in such a vase made from newspaper tubes.
Vase-candy made from newspaper tubes.
The ability to make paper crafts and weave from newspaper tubes can be useful in everyday life. Having learned to weave light things, you will gradually move on to more complex work.
Especially for the site Handicraft Lessons Irina Korniychuk.
xn—-htbdjdhckueqe7ag0q.xn--p1ai
Wonderful weaving from newspapers | Needlework
Delightful baskets. boxes, tueski, elegant, with ornaments, decorative elements are created by the talented weaving master ILFAT.
https://stranamasterov.ru/blog/248236
Photo master class from ILFAT: How to weave a candy bowl with quilting elements
Tubes prepared for weaving
The basis is prepared:
Then the blanks are rolled up to create a pattern.
Elements for ornaments have been prepared.
Then the creation of the product begins, the prepared parts are built into the wicker base
An ornament is created around the entire perimeter of the product
and then the weaving of the product continues again
And here is the result: a candy bowl woven from newspaper tubes is coated with varnish.
And more products from the wonderful master ILFAT:
Jul 31, 2015Galinka
delaemrukami.info
Weaving from newspapers: do-it-yourself candy bowl
Weaving from newspapers is a very exciting process. Sometimes you're amazed at what things can be made from seemingly useless materials like old newspapers. Boxes, vases, drawers and even tables.
This article will discuss the process of creating such a useful thing as a candy bowl. It can be a good gift for a sweet tooth, or serve for you. Making such a “sweet” vase is not as difficult as it seems at first glance. Even for a person inexperienced in the field of weaving from newspapers. The process is reminiscent of weaving a basket from newspaper tubes.
To work you will need:
- several newspapers,
- scissors,
- spoke,
- thick cardboard (from some box),
- PVA glue,
- a pair of rubber bands or thread,
- deep bowl of the size you need for the base,
- clothespins
- enamel in a can.
How to weave a candy bowl from newspaper tubes
Why newspapers? Because they are more flexible in operation, unlike printer paper, although they are sometimes used to weave different things. Why spray paint? Because this is the easiest option for dyeing after making the item. However, there is also a method such as dyeing the tubes before weaving.
Preparing newspaper tubes
We cut the newspapers into strips approximately 4-5 cm wide. Take a knitting needle and tightly twist a strip of newspaper onto it in a spiral to form a thin tube. If anything, you can always turn to the Internet for help, where you will find many detailed video tutorials on how to curl newspapers for weaving. Try to make more tubes; it’s better to have some left over. More detailed information can be found here.
You need to cut out two circles from cardboard with a diameter corresponding to the bottom of the bowl taken as a basis, and cover them with newspaper.
Assembling the “body”
Take 24 tubes of equal length (preferably the longest) and glue 2 of them together so that you get 12 very long ones. Then, placing them in pairs between two cardboard circles (as shown in the photo), glue them together, holding them together with clothespins. Let the glue dry for a couple of hours.
When the structure is securely glued, we move the tubes to a vertical position. To do this, we will place two base tubes under the next pair and lift them, and so on in a circle until we lift everything.
Weaving a candy bowl
Place the bowl on the cardboard bottom and secure it with threads or rubber bands. This will help give the candy bowl an even shape. Let's start weaving. We glue two tubes together as was done at the previous stage to get one long (working) one and bend it in half. In the place of the bend we place a couple of tubes from the base at the very bottom and braid the bowl in a circle, increasing the length of the working tubes as necessary. It is important to periodically press the weave towards the bottom for density.
As soon as we have woven it to the desired height, we take out the bowl and fix the edge of the weaving. There are many ways to do this, you just have to look for the right one on the Internet.
How to weave a handle from newspaper tubes
If you think that the candy dish should not have a handle, then feel free to skip this step. So, in order to make a handle, you need to provide it with a base. For this purpose, a couple of tubes will be enough, which we securely glue to an existing basket in the chosen place. It is best to use tubes from the base of the candy dish. When we have formed the arc-handle, we braid it too, as shown in the photo.
Painting
You can choose any color, in this case it is copper. We go outside (so as not to breathe in the paint) and carefully, evenly coat the finished candy vase with enamel. The enamel is easy to apply and dries quickly. The dried candy bowl should be decorated with something. For example - tape. You can't just tie it, so you'll have to glue it in a couple of places, but that's a minor detail.
That's all, you can fill the product with sweets and put it on the table!
Cardboard butterflies or autumn leaves are also suitable as decorations.
Author: Rysukhina Elena
terra-hobby.ru
Preparation of tubes
Before you start weaving, you need to prepare the starting material - wind tubes from newspapers or magazines. You will need the paper itself, PVA glue in a bottle with a dispenser, a long pushing knitting needle or a piece of stiff wire. The diameter of the knitting needle/wire is 1.5-2 mm. These are all tools at the preparatory stage.
Lots of ideas - lots of material!
Let's spin
To prepare the tubes, you must first cut the paper into pieces of the desired size. We cut newspaper strips or magazine spreads into several parts. Aspect ratio - 1:3 or 1:4 (for example, 27 * 9 cm, 35 * 10 cm). The exact dimensions are not important. Divide the page into several parts so that they are approximately the same aspect ratio as above.
Take a knitting needle and a strip of paper. We twist the corner of the paper around the knitting needle, and gradually, layer by layer, roll it into a tube. Secure the edge of the strip with a drop of glue. To make the tube the desired density, we lay the paper at 45° relative to the knitting needle. Then it will be quite dense, but at the same time it will bend well.
This is how we make paper tubes for weaving
We take out the knitting needle. The tube is not too long; to work, you will have to splice them together. If everything is done correctly, one edge will be thin, the other will be thick and hollow from the inside. To connect two newspaper tubes, drop a few drops of PVA glue into the thick part and insert the second tube with a thin edge. Now we wait until it dries.
Painting and other processing methods
Sometimes, for simpler weaving, the tubes are rolled using a regular rolling pin. They become flatter. In this form it is easier to work with them - stretch them between the rows. But this is an optional step. Try “rolling”, maybe you will like weaving from newspaper tubes more this way.
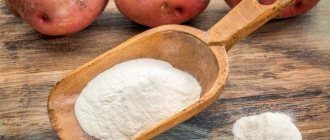
Not everyone likes the “natural look” of newsprint weave. To improve the appearance, the wound tubes are painted. Acrylic paint is best suited for this. It fits tightly, works well with any type of paper, does not flow, dries quickly and has no odor. A water-based, moisture-resistant stain will also work. Paper tubes coated with acrylic varnish, to which a coloring pigment is immediately added, look good. Simultaneously with painting, they become less sensitive to moisture.
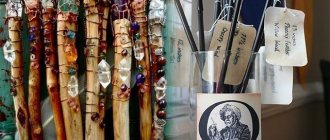
Some colors of water stain for dyeing paper straws
Painting each tube with a brush is long and tedious, so they look for a long tray into which the tubes are placed. Paint is poured into it, and ready-made newspaper tubes are lowered into it. Then they are laid out on a layer of polyethylene to dry.
Before starting weaving, so that the “newspaper vine” bends well, you can moisten it. It is better and easier to do this from a spray bottle, simply spraying water.