Useful tips
Watch the video if you are too lazy to read
Watch the video if you are too lazy to read
Envelope
- This is just a shell or packaging for inserting various objects or papers. Basically, we are used to thinking of an envelope as a “packaging” for letters or documents. But there are also envelopes made of thick fabrics or blankets for newborns.
Today we will learn how to make envelopes for different needs
and let's start, perhaps, with the most common envelope - a paper envelope.
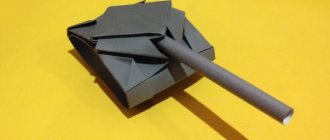
How to make an envelope out of paper?
The simplest envelope
can be made from a square sheet of paper by folding the corners towards the center. To do this, you will need a square sheet of paper of the desired size, a ruler and a pencil.
1) Mark the very center of the sheet
point, measuring the distance to it using a ruler.
2) Fold the left and right sides inward so that the corners touch the center point
.
3) Then fold the bottom side up so that it covers the center and can be glued to the two already folded corners
.
4) Apply glue to the bottom sides of the envelope as shown in the photo. You can also use double sided tape
.
5) Fold the top corner down. The envelope is ready!
This envelope can be made in just a couple of minutes. It is based on the simple principle of adding angles. Here are a few more schemes for making envelopes from sheets of different shapes:
Diamond envelope
Envelope “from the heart”
Envelope with a square
Let's look at several options
Equipment for work:
- creasing tool;
- scrapbooking paper;
- pencil;
- decor details.
Stages of creation.
The size of the envelope depends on the size of the photographs that will be stored in it. If these are ordinary photographs measuring 10 by 15, then the envelope will be 2 cm larger in size so that the photographs do not wrinkle or bend, but lie without external influences.
You need to take a sheet of A4 paper.
To work with paper, you need a special tool, but if you don’t have one, convenient materials at hand are perfect. The scrapbooking sheet on the work surface is positioned in Landscape orientation. There is a 6 cm indentation from the left side, after which a fold line is drawn. From the resulting horizontal line, 10 cm + 3 mm is set aside for the convenience of placing photo cards inside the envelope. Then another straight line is created. From this straight horizontal line, 6 cm is also set aside and carefully cut off with scissors.
The sheet must be placed in portrait orientation and a line must be drawn, departing from the left edge by 3 cm. From the straight line drawn, 15 cm + 3 mm must be set aside for ease of placing the photograph inside the envelope. After which another straight line is drawn. From this straight line, 3 cm is also set aside and carefully cut off with scissors.
Related article: DIY box for small items: master class on making
All corners of the resulting workpiece must be cut off. They are cut along the fold line until the lines intersect. As a result, a cross-shaped figure appears on the desktop in front of your eyes. In places where the indentation was 3 cm, there are valves. Now you need to cut 1 cm from each valve. Initially, one valve is fixed with glue, the resulting long sides lie on top and are also fixed with glue.
To decorate such an envelope, you can use anything: satin ribbons, quilling paper, plain paper, tracing paper, beads and much more. You can safely fold the photographs into the resulting envelope and put them in the place intended for them. There they will wait their turn to watch and reminisce.
Having shaped hole punches on hand, making envelopes using scrapbooking at home is quite simple and affordable.
Equipment for work:
- scrapbooking paper and regular thin paper;
- white cardboard;
- colored paper;
- decorative details;
- satin tape;
- glue and scissors;
- ruler;
- pencil;
Stages of creating an envelope. Based on the above 10x15 template, you need to cut out a blank from white cardboard.
Based on the cut-out blank, you need to cut out two rectangles from colored paper, identical to the upper parts of the envelope.
For the middle of the envelope, a blank is cut out of another paper, identical to the width of the previous blanks, but shorter in length.
You can add tenderness to the envelope you are making using a lace frill, which should be located on the sides of the blanks.
Completed pieces with decorative trim must be attached to larger pieces of the envelope.
To make the composition unusual, it is recommended to follow the glued lines and colored parts with a zigzag seam using a sewing machine.
Before gluing the final colored part, you need to place a satin ribbon across the envelope and secure it with glue.
If desired, you can place a rectangle on the envelope for an inscription. The inscription may contain information about which holiday or day the photographs located in the envelope belong to. Butterflies cut out with a curly hole punch will perfectly complement the display of the envelope. The ribbon is tied into a bow, and the envelope is ready for photos.
Related article: Cartoon characters: DIY crafts from natural materials
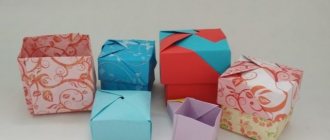
Envelope templates
With this template you can make envelopes from colored cardboard
:
By adding a ribbon, you will get envelopes for different occasions
: For greeting cards, money, invitations, etc.
Long envelope template
:
Envelope template on A4 sheet
:
You can decorate envelopes with colored lace or appliqués
:
You can use beads and threads
to close the envelope:
Envelopes are sometimes decorated with various paper details
, made in various techniques: origami, quilling, scrapbooking, etc.
Read more about the quilling technique
you can read here.
More about paper flowers
you can read here.
Envelope stencils “Open when”
You can come up with your own “Open When” envelope template and cut the envelope according to your design. But you can do this using a ready-made stencil:
Envelope stencils “Open when”
Envelope stencil “Open when”
Envelope stencil “Open when”
Envelope stencil “Open when”
Envelope stencil “Open when”
Envelope stencil “Open when”
DIY money envelopes
What could be more banal than a gift in the form of money
, but sometimes this is the only thing that comes to mind.
To make your gift unique, you can place it in a handmade envelope
. The envelope can be beautifully decorated and signed like a postcard.
Envelopes for money are usually made of cardboard and have an elongated shape so that the bill can fit completely inside it
. You can draw the templates yourself or use ready-made templates:
How is paper money made?
Last time Geektimes published an article about the history of paper money.
The Chinese were the first to use cellulose fibers to produce a lightweight analogue of metallic money. Paper is still used for the same purpose today. Of course, the complexity of the technological process for producing paper money has increased significantly; modern money paper is not at all what was used in China or any other country 100-200 years ago. Typically, flax and cotton are used to produce money paper. The cellulose content in the final product is about 95-97%. The production process begins with loading cotton (we are talking about several tons of cotton fibers) into a boiler. Here the source material is kept under very high pressure. After this, the finished mass of fibers is poured into a tank where clarification and cleaning are carried out. After this, the mass is pressed and placed in softeners. The next step is adding a special paint that changes the shade of the still wet paper. At this stage, recognition watermarks are also created (more about them below). Sheets with security fibers and watermarks are sent to dry, after which the paper is rolled into rolls. The weight of each roll can be several tons.
In addition to paper, the production of paper money also requires special dyes, chemical compounds, and complex equipment. The domestic Goznak purchases inks for banknotes from the Swiss company SICPA (it makes special protective printing inks, inks for sealing products, and develops coding systems for excisable goods). According to representatives of Goznak, due to the growth of the Swiss franc, the costs of producing domestic banknotes are growing quite quickly.
But Swiss paint has always been considered the highest quality. The cost of purchasing paint for the production of banknotes in Europe and the world on average amounts to about 60% of the total cost of purchasing components and producing banknotes.
Interestingly, there are several ways to produce paper money; not all countries print money using the same method.
As for paper, one of the main requirements for this material is wear resistance. Money should be durable so that it does not become worthless too quickly. The main indicator of the wear resistance of money is its resistance to fracture and tearing. Paper bills are constantly folded and unbent, they are pulled by corners and other parts. Therefore they should not tear. Tensile strength is determined using a dynamometer. This characteristic is expressed by the estimated length in meters of a strip of paper, with a break from its own weight. For money paper, this figure is thousands of meters (more than for ordinary paper).
In order to ensure high quality and durability of the printed design, money paper must have the required degree of whiteness, opacity, smoothness and light fastness. This paper should not change its color under the influence of external factors (sunlight, for example).
In Russia, paper for money is supplied by only two enterprises. These are the St. Petersburg Paper Mill of Goznak and the Krasnokamsk Paper Mill of Goznak.
Paper protection
Paper money usually has several levels of security.
Among others, watermarks are used, which can also serve as a kind of decoration. Watermarks are created while the paper is cast. The pattern is obtained by changing the thickness of the fiber layer along the plane of the bill. It is not easy to create a beautiful and clear watermark; this requires precise, modern equipment. The watermark in some cases is combined with the design of the banknote itself. The production of money paper usually has a watermark workshop, where a large number of highly qualified specialists work. In particular, these are engravers who transfer artists' drawings onto stamps and a metal mesh of the so-called dendirol shaft. Sometimes the designs are transferred to the mesh of the cylinder of the round mesh machine. Dendirol is an equalizer that is installed on the machine’s mesh and, when rotated, forms an imprint of its watermark on the paper web. This method is commonly used to create paper with a generic watermark. If you need an artistic local sign, it can be obtained by hand casting or using a cylindrical boom machine. In this case, the designs of the sign are stamped on the mesh of the cylinder, and when forming the paper web, all the conditions are created that make it possible to obtain a multi-tone artistic sign. Banknotes of many countries also have special protective (often colored or metallic) fibers.
The watermark must be clearly visible on all banknotes, and be absolutely identical for all banknotes of the same circulation. It is not easy to fake a watermark, this is especially true for portraits.
Throughout the entire period of circulation of paper money, its identity must be ensured. In practice, this means that if a banknote, a sample of a banknote, is valid for several decades, then the money that was produced in the last years of the validity of this bill must be identical to the money that was issued at the very beginning of the period. However, during this period some changes may be made - for example, new protection measures may be added. The decision to modify the appearance of banknotes is made by special authorities, all changes are recorded. In Russia, such control is exercised by the Bank of Russia.
Development of a banknote
Creating banknotes is a very complex and rather lengthy process, which involves specialists from various fields.
These are financiers, artists, and specialists from Goznak (in the case of Russia), who are actively involved in the process of creating new money. After the customer (the state) has outlined all the necessary criteria for the production of the banknote, artists and engravers begin their work. The sketch is created first - it is developed taking into account all the criteria for the technological capabilities of production, with the help of which future money will be printed in the future. One of the main requirements for paper banknotes is to demonstrate that the banknote being developed belongs to the manufacturing state. This is done by introducing elements of the unique symbols of the state. They can be state symbols, text, portraits of famous people in this state. Typically, large banknote denominations have a much more complex design and number of security levels than small ones.
After the sketch is ready, specialists create a printed project with special printing forms that allow the banknotes to be replicated in the future. The highest class specialists take part here, including photographers, engravers, artists, etchers, stamp engravers, and designers. In the case of Russia, these personnel are trained only by Goznak. The modern process of money production necessarily includes computer technology. As soon as the first printed draft of the new banknote is ready, it is sent to a special commission for study and approval. If the received option is approved, then the production of special forms for reproducing money begins.
Printing money
There are four main printing methods used in the paper money printing process. These are offset, metallographic, typographic and Oryol printing. The most popular and used are metallographic and Oryol printing methods. Interestingly, the Swiss company KBA-NotaSys SA manufactures about 90% of all printing and pressing machines for the production of banknotes on the world market. These machines, in particular, are used at Goznak.
Oryol seal
Even though this printing method was developed in 1891, it is still used today.
The name of the printing process comes from the name of Goznak specialist Ivan Orlov, who developed this method. Then, to print banknotes using the typographic method, it was necessary to prepare a separate printing form for each color of the banknote design. Each shape was imprinted on a piece of special paper. The matching of paint lines and boundaries using this method was not ideal, since even the use of a computer and industrial systems does not give an ideal result, not to mention the technology of the late 19th century. Ivan Orlov managed to introduce a special elastic roller with a soft structure and intermediate forms. Each form has its own design for each of the colors on the original. When printed, such a template transfers its own fragment to the desired place on the prefabricated shaft, and from the shaft the full palette of colors is transferred to the prefabricated general form, where the entire original drawing is displayed in full.
The advantage of the method is that it allows you to apply a design onto banknotes with almost pinpoint accuracy, with all the boundaries of the designs and lines matching. In addition, the method allows you to create the required fragment of a design that matches the original with almost 100% accuracy during just one run of the sheet through the printing machine. It is difficult for a counterfeiter to repeat such precision, although, of course, there are specialists of the highest class.
Offset printing
Using offset printing, a so-called background grid and a number of additional elements are usually created.
In small banknotes, the main design is sometimes applied using offset printing. Since ink is transferred from the printing plate to paper through an intermediate offset cylinder, the image itself on the printing plate is made straight, not mirrored. Interestingly, with this printing method, regular and white-space form elements are located in the same plane. But the surfaces of elements have different physical and chemical properties. Thus, the printing elements are hydrophobic; they hold ink well, repelling moisture. But the space elements are hydrophilic, they absorb water, but repel paint.
Banknote inks are usually divided into three color groups. This is the blue group, red and yellow. For each group, a special form is made using a photo method. The paint from the plates is first transferred to the rubber coating of the cylinder, and the cylinder prints the design on the paper.
Here's how US dollars are printed:
Metallographic printing
This is another common method of printing banknotes.
It has been known for a long time, and was first used for banknotes in 1887. For printing in this case, specially made forms made of steel or nickel are used. These forms are almost perfectly polished plates, onto which the desired pattern is applied using a special press. The original form is made by hand using engraving. In Russian there is a special term for the original form. This is the "original stamp". When printing banknotes using this method, parts of the engraving machines create complex patterns for the banknotes. These patterns consist of a large number of lines. After the etching process, an element of the overall image appears, which is placed on the bill.
Such elements, combined with hand engraving and printed font, form a single image of the banknote. This image, after production, is replicated for the printing process. True, this requires high-precision equipment, as a rule, a high-frequency machine and an automated electroplating line.
According to experts, the main advantage of the metallographic printing method is that it can be used to reproduce a wide range of bright tones for printing. If you use different depths and widths of drawing, you can achieve a wide variety of colorful effects, often three-dimensional.
When printing, ink is applied to printing plates using prepared rubber templates. It goes to engraving and whitespace elements. Afterwards, the paint is washed off from these elements, and the form is ready for applying the design to paper. The design is applied by applying the form to the paper under high pressure. Metallographic printing is divided into two types. This is intaglio printing, when images are transferred from a printing plate on which the printing elements are significantly deeper in relation to the white space. And letterpress printing, when the printing elements on the forms are located above the whitespace. Letterpress printing is used to apply designs on large banknotes, serial numbers and a number of important elements of small and large denomination banknotes.
After the bills are printed, the uncut sheets are sent to a special workshop where they are cut into individual bills. After this, the money is counted using a machine and packaged, they are sent for “free floating” throughout the country and abroad.
Envelopes for money (templates):
Here are some helpful ideas on how to make and decorate money envelopes that make great gifts.
along with their contents.
What to write and put in the “Open when” envelope: options
So, you want to surprise and present an “Open When” for a loved one, but you don’t know what to write or what to put in, then here are the options:
Here's what you can write and put in the "Open When" envelope.
Here's what you can write and put in the "Open When" envelope.
Here's what you can write and put in the "Open When" envelope.
Money in an envelope: original ideas
The envelope design allows you to place the money inside in different ways.
.
Here are some ideas to help you make original envelopes. For example, you can use a postcard
, inside which you paste a small envelope with money.
You can write wishes on the card, and when you look inside, the recipient will find a cash gift
.
Another option is to make the envelope also in the form of a postcard, and attach satin ribbons inside that will hold the bills
.
Book of envelopes
. This original idea will appeal to those who would like to learn how to save money. You can make some simple envelopes and sign them, indicating the purpose for which the money is stored in them and the time when it can be spent.
What to put in the “Open when” envelope: gift ideas for a guy
Envelope “Open when”
You can support or even bring back romance in a relationship with small gifts. Among them is the “Open when” . What should I put in it? Here are gift ideas for boyfriend. You can give your loved one an envelope with the inscription “Open when” :
- Would you like some pepper ? Place, for example, fur handcuffs inside. Additionally, you can include your phone number so that your loved one can warn you about your desire, and after his call, prepare for a romantic meeting.
- You miss me a lot . Include a photo of yourself or a handkerchief with your scent.
- You're sad . Put down something memorable for the two of you.
- You can't call me . Hide a photo together or a chocolate bar.
- Can't sleep . Add a couple of mint or chamomile tea bags.
- Do you want to relax ? Inside is a bath bomb.
- Do you want to smile? Include a photo of you together about a pleasant memory.
- I am guilty . Place a Twix inside with the caption “don’t be angry, because we are two halves.”
Here are more options:
Here's what you can see on the "Open When" envelope
Check that the young man will definitely remember such a gift. It may seem stupid and too childish, but in fact, a couple of kind words and a few little things will help you maintain, and in some ways increase, your spiritual connection.