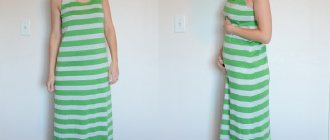
DIY dress made from napkins
Today, paper dresses are at the peak of popularity. Every eminent fashion designer necessarily uses this material in his next collection, so often among them there are items made from newspapers, toilet paper and wrapping paper. Naturally, in everyday life you won’t go out in such an outfit, but for an unusual photo shoot, this is exactly what you need. From this article you will learn how to make a dress from napkins with your own hands, what other materials can be used and what principles to follow.
How to create a paper dress?
You want to please your child and make an interesting outfit for some extraordinary celebration. Then carefully study this master class, which will describe step by step how to make dresses from napkins with your own hands for the competition.
Prepare the following materials to create a masterpiece:
- Several packs of napkins or 20-30 pieces of newspaper.
- Ruler.
- Sewing machine.
- Centimeter tape.
- PVA glue.
- Special Velcro.
Sewing the outfit according to the following instructions:
- First of all, measure your model.
- It is better to start the process of creating a dress with a skirt. If you use newspapers, then unfold them and fold them two at a time to make the product dense. Fold the paper like an accordion with 2 cm folds to create a corrugated effect. Smooth out all creases with a ruler.
Important! Please note that all newspapers must be the same size.
- Connect all the sheets together using a sewing machine or glue so that the result is a long corrugated panel. Attach Velcro to the edges.
- Gather the top of the skirt to a size that matches your daughter's waist circumference plus a small margin of 3-4 cm.
- Attach newspapers in several layers to the top of the skirt and stitch them on a typewriter. It is imperative to do this so that the paper is securely held at the waist line.
- Form the bodice of the dress directly on the model. Cover the bust, waist, back with small pieces of newspaper, and glue the overlapping sheets together. Remove any excess pieces.
- Beautifully cut out the neckline and armhole, make a straight vertical cut on the back, starting from the very top edge.
- Sew a strip of three-layer strip of newspaper on both sides to the edges of the formed cut, then attach several Velcro strips to it.
- Connect the skirt to the bodice so that the back clasps and slits match.
- We create the straps. Determine their expected length. Make a corrugation from newspapers so that the length of the strip matches the length of the strap with a margin of 4 cm. Gather the edges of the straps a little on a sewing machine, sew the straps to the product.
Important! You can make such a wonderful outfit yourself in just one evening, spending a minimum of time and using scrap materials that have long been lying around on the shelf. You can complement it with a belt made of paper, bright fabric, silk or satin.
How to make an outfit from napkins?
This section will describe in detail how to make a dress from napkins with your own hands, because of all the homemade options, the most popular is assembling paper models. With perseverance, imagination, and a small set of tools, you can make something interesting yourself.
For the napkin product you will need:
- Pattern of the simplest dress.
- Thick wallpaper or whatman paper.
- 10 packs of napkins of 100 pieces in several shades.
- Threads and sewing machine.
- Velcro.
- PVA glue.
Sew your planned outfit according to the diagram below:
- Find a pattern in any fashion magazine with a minimum number of darts and seams. Transfer it to whatman paper or thick paper, making seam allowances.
- Immediately mark the cut on the front bar and add 2 cm on each side. Then Velcro will be sewn onto it for ease of putting on and taking off clothes.
- Sew the product along all seams and attach adhesive tape to the placket.
- Take the napkins and carefully tear them into small pieces with your hands. Roll each piece into a small ball. Glue all the balls to the dress so that the paper is completely hidden under them. If you use napkins of several colors, you can make an original pattern out of them.
The dress made from paper napkins is ready, you can go to a party or photo shoot in it!
How to assemble a dress from colored paper?
Perhaps you have a large amount of colored or wrapping paper accumulated at home, then it's time to turn that pile into something interesting. You already know how to make a dress from napkins, but you will also like this idea, because it allows you to create a real masterpiece from scrap materials.
You will need it in your work:
- Colored paper.
- Finished pattern.
- Ruler.
- Pencil.
- Scissors.
- Eraser.
- Paper glue.
- Glue brush.
Do everything strictly following these instructions:
- Prepare a pattern, find it on the Internet, or try to create a sketch yourself. If you use drawings or reduce the image, convert all numbers into actual measurements so that they correspond to the future model. Transfer the drawing onto tissue paper or tracing paper.
- Decide on the modeling method. You can create a model in 2D or 3D.
Important! If you are focused on simplicity and want to save your time, then use two-dimensional modeling. To do this, prepare a picture of the object on both sides, cut it out, and connect all the parts with glue. Three-dimensional modeling involves the use of special programs. You will be able to create a three-dimensional image, then it will need to be converted into a paper copy.
- Transfer images of all details onto colored paper. Take scissors with rounded ends and draw them along the lines of the intended fold.
- Number each part to make assembly easier later. If the parts will be connected using special valves, it is better to number them so that the inscriptions become invisible after assembly.
- Cut out all parts in sequence. Stack them in the given order.
- Coat all valves with glue, attach the parts to be glued to each other and press well with your fingers. Wait until the glue dries before you begin gluing the next piece.
- Leave the model to dry completely.
Important! If desired, the finished dress can be decorated with some decorative elements, such as beads, rhinestones, sparkles, and bright ribbons.
Simple and affordable materials are widely used today to create extraordinary things. Don’t be afraid to practice this art either, because it’s interesting, useful, and the time spent doing needlework gives only positive emotions.
Share on social media networks:
serviceyard.net
Video material
Simple and affordable materials are widely used today to create extraordinary things. Don’t be afraid to practice this art either, because it’s interesting, useful, and the time spent doing needlework gives only positive emotions.
For needlewomen involved in creativity using the scrapbooking technique, it will be interesting to learn how to make a dress from a napkin with your own hands.
We will tell you about two simple, in our opinion, techniques and ways to create a paper dress.
master class in scrapbooking technique with step-by-step photos and videos
For needlewomen involved in creativity using the scrapbooking technique, it will be interesting to learn how to make a dress from a napkin with your own hands.
We will tell you about two simple, in our opinion, techniques and ways to create a paper dress.
Delicate paper dress for cards and decoration: how to make it yourself
We bring to your attention a simple but effective decorative element - a paper dress made from a colored napkin. This dress can be used to decorate a gift bag; it is perfect for a postcard or box.
In order to create such an unusual dress you will need the following materials and tools:
- colored napkin;
- sharp scissors;
- plain paper;
- a simple pencil;
- scotch;
- PVA glue;
- scissors with curly blades.
Start making a dress using the scrapbooking technique. On the rough sketch, draw a model and drawing of your dress.
Now transfer your “pattern” onto a sheet of paper, which will make up the upper part of your dress. Now cut it out.
Now take the colored paper napkins you have. It’s good if they are multi-layered, but this is completely optional. You can also make a skirt from two single-layer napkins of different colors.
Cut two rectangles from the napkins, fold the edges of the inner layer approximately one centimeter inward.
Gather in the center, making something like a fluffy bow, and secure with tape so that its edges are on the wrong side of the top of the paper dress.
Throw your skirt to one side and fold it over. Make a belt out of paper (we cut it out using scissors) and attach it to the back of the paper outfit. The top layer of the hem of the skirt can be shortened relative to the petticoat.
That's it, now your napkin dress can be glued to the surface to be decorated!
How to create a beautiful openwork dress for a paper card
This romantic openwork dress made from napkins will decorate a postcard for any holiday. For the New Year, a white napkin is ideal as a base; for a girl’s birthday (or March 8th), you can find a colored napkin or paint it yourself. So the most important thing in this matter is to find an openwork paper napkin, or rather, two napkins.
Fold the openwork napkin not in half, but about three-quarters, so that the top edge is located quite high from the bottom edge.
Now fold the napkin in half. Glue the inside of the folded openwork napkin. Bend the top corner of the workpiece back.
From white paper and the openwork part of the second napkin, cut out a heart of the same size.
Glue a napkin heart onto the paper heart. And then cut off the round sides of the heart on each side as in the example. Be sure to place a paper heart on the skirt to measure the cut points along the width of the top waistline.
Glue the top of the dress to the full skirt. Take a piece of small satin ribbon, measure along the length of your waist and glue it on.
From the second piece, make an additional part of the belt. Don't forget to form cuts at the ends of the satin ribbon to make it look more interesting.
All that remains is to decorate the dress with small beads and the incredibly beautiful decoration for the card is ready.
DIY holiday card
Prepare the following materials and tools for work:
- sharp scissors;
- pencil;
- PVA glue;
- white and colored cardboard;
- colored paper;
- adhesive-based stasis;
- paper napkins;
- double sided tape.
Choose three main card details that match the color of your card: the main background, the top of the dress and the hem. The background should be made of colored paper, the top of the outfit should be made of cardboard, and the hem of the skirt should be made of napkin.
Now cut a sheet of white A4 cardboard into half. Use one piece to make a card base. Fold the background colored paper in half and cut it.
Now glue a rectangle of bright paper onto the cardboard blank in the center. You should have a white frame around the perimeter. Then cut out your desired dress bodice.
Make a dress skirt from a colored paper napkin. Straighten the napkin and fold it so that two to three centimeters of the edge shows. Now gather it at the waist with an elastic band. Then beautifully straighten the folds on the hem and fix them on a cardboard base.
Now glue the bodice of the dress to the base. Decorate the finished design with adhesive rhinestones. Your card with the dress is ready!
A selection of videos on the topic
We bring to your attention a selection of interesting and useful videos on the topic of the article.
sdelala-sama.ru
Unusual applique
Scrapbooking is a type of separate creativity, thanks to which we can decorate cards, personal and family photo albums, diaries and much more. Thanks to various materials, including newspaper clippings, stickers, satin ribbons, short stories and any pleasant little things, you can decorate the desired item in an unusual way.
In the first master class we want to show you the process of creating a paper dress for a future postcard. It is perfect as a gift for the spring holiday - March 8th. In fact, with such a dress you can decorate not only a postcard, but also a gift bag, box, and you can also come up with a more original purpose for a paper dress made from a napkin, but before that you need to make it.
In order to make such an applique, you need to find the following materials: paper napkin and paper, pencil, tape and scissors, glue and curly scissors.
Take a piece of paper. We will use it as a draft. On a piece of paper we draw the dress we dreamed of. We carefully think through all the details. Decide what kind of dress you want: with or without a large neckline, with long or short sleeves, with or without bust decoration.
After which we take a second sheet of paper, this time for the “finish copy”. The upper part of the dress will be made from this material. We transfer the future pattern onto it. Cut out the dress. Then we take any napkins we found at home. Multi-ply napkins work best, but several single-ply napkins in different colors will also work. If you chose the first option, then we will need to disassemble the napkin into layers.
Related article: Do-it-yourself ashtray with a metal lid with photos and videos
From them we cut out a couple of rectangles of the same size. We place one piece on the second and bend the edges of the upper piece by one cm on two opposite sides.
We find the center of two napkins and collect them in a shape similar to a bow. We secure the product with tape so that the edges (of the tape) are on the wrong side of the top of the dress.
We also attach the paper dress blank to the wrong side approximately at the waist line.
Then we flip the skirt to one side. And we bend the part.
After that, take a little more paper and use curly scissors to cut out a belt for the future dress. The part must be secured to the back of the workpiece. Regarding the petticoat, you can shorten the dress a little, or you may not.
Then we decorate the dress with a small bow and glue it to the future card. This delicate option is perfect as a holiday card for girls or mom.
Crafts: Openwork dress from a napkin for a postcard
This romantic openwork dress made from a napkin will decorate a postcard for any holiday. For the New Year, a white napkin is ideal for the base; for a Birthday (or March 8th), you can find a colored napkin or paint it yourself. So the most important thing is to find an openwork paper napkin, or rather, 2 napkins, approximately in the same style as shown For example.
Fold the napkin NOT in half, but about three-quarters, so that the top edge is quite high from the bottom.
Now fold the napkin in half.
Glue the inside of the folded napkin.
Bend the top corner of the workpiece back.
From white paper and the openwork part of the second napkin, cut out a heart of the same size. We are sure that you will be able to draw the even contours of the heart yourself, but just in case, we are adding this picture so that you can trace the outline.
Glue a napkin heart onto a paper heart. And then cut off the round sides of the heart on each side as in the example. Be sure to place the heart on the skirt to measure the cut points along the width of the top waistline.
Glue the top of the dress to the skirt as shown in the example.
Take a piece of small ribbon, measure along the length of your waist and glue it on.
From the second piece, make an additional part of the belt. Don't forget to make cuts at the ends of the ribbon to make it look more interesting.
All that remains is to decorate the dress with small beads and the incredibly beautiful decoration for the card is ready.
www.youloveit.ru
We use openwork material
Well, in the second option, we suggest using beautiful openwork napkins to create an incredible romantic dress.
For this look we will need an openwork napkin (as in the photo), glue or double-sided tape, a ribbon and several small beads in the form of pearls.
The first step is to fold the napkin so that the top is slightly higher than the bottom hem.
And then fold the napkin in half.
Using glue or double-sided tape, glue the inside of the napkin together.
Then we move the upper corner of the napkin to the wrong side.
This is what the product looks like from the reverse side:
Cut out a heart from white paper, identical on both sides. Here's the template. It needs to be reduced several times in size.
We also cut out exactly the same heart from the second napkin.
Glue the napkin onto the paper and then cut off the rounded edges evenly and equally on both sides. After all, we have the perfect dress for the perfect girl!
Article on the topic: Do-it-yourself family hearth at a wedding: master class with photos
We attach the heart to the skirt so that the waist line matches. If everything is fine, then glue both parts together. This is what the dress looks like from the reverse side:
And here is our front part:
Next, take a small ribbon (satin, paper) and glue it to the waistline of the dress.
Then we cut off the second piece and decorate the belt with it. It is worth trimming the edges to make the dress sparkle with new colors.
The last step is to take small beads and decorate the belt and neckline with them. The openwork dress for the postcard is ready!
Napkin dress | Country of Masters
Good evening! Today I had a rush... A friend ordered a postcard for my sister, we discussed all the details with her the other day, today I decided to start making it... I laid out everything I needed, began to cast a spell... And then my husband came home from work and said that he also needed it for tomorrow a postcard for an employee... And let what I have already started be for him, and then I will do it for a friend...
But for a friend I was going to make a black and white card with a beautiful picture from the FASHION set... https://stranamasterov.ru/node/560070... There was not enough black and white paper left, I couldn’t use it for another card, and I was afraid that I would now exhaust all my ideas, and then I would have nothing to use to invent another one...
Then I remembered that I have another idea with postcards in my stash; there are many of them in our Country, who haven’t made them... I’ve wanted to try it for a long time, but I didn’t get around to it... And so I decided to take a risk and make something similar... https:/ /stranamasterov.ru/node/160854?c=favorite;https://stranamasterov.ru/node/60307?c=favorite - here is the pattern...
Here she is, my little fish, how she turned out...
Now the details...
It’s a pity that I didn’t have time to take photos before dark, the photos would have been much brighter... Well, we’ll have to be content with what we have...
We used ready-made cardboard embossed with flowers, pastel paper, and all sorts of little things... And, of course, a napkin suitable for a beautiful dress.
The decor is minimal, the dress already takes up all the space...
Interior decoration...
This is the result of my emergency evening today...
stranamasterov.ru
DIY crafts from napkins
Page content
Beautiful and original crafts can be made from ordinary paper napkins. Multi-layered or simple, in the hands of craftswomen, right before your eyes, they turn into amazingly beautiful flowers. Volumetric numbers decorated with luxurious roses will serve as a decoration for a birthday or any other holiday. Fashionable and creative dresses are created without much effort. The main thing is to understand the techniques of folding and cutting, as well as choosing the right color scheme.
We offer you several ideas for simple crafts made from napkins. Be patient and have materials to work with. If you have never worked in this technique, don’t be upset. Especially for you, we have prepared master classes with step-by-step instructions. Be sure to involve your children in the creative process. Fun activities develop fine motor skills and create a good mood. So let's get to work.
Do-it-yourself volumetric numbers from napkins
For work we will need:
- napkins;
- stapler;
- polystyrene foam - width 5 cm;
- Dragon glue or thick PVA;
- stationery knife;
- masking tape 5 cm.
- Carefully make a number template on paper. We transfer it to the foam and carefully cut it out with a knife.
- We will need two blanks. Glue the cut parts together. Since foam plastic has such a feature that when pressed it can quickly crumble, it is best to wrap your figure with masking tape.
- The base is ready, let's start making flowers. The number of flowers depends on the size of the number. If the figure is approximately 1 meter, then you need to make 300-350 flowers. To make a flower, fold the napkin in half and do so several times. Use a stapler to connect the napkins in the middle. Using a template ruler, draw a circle with a diameter of 5 cm. Then cut it out with scissors. Separate each layer of the napkin, pressing it towards the center. It turns out to be a fluffy rose. We make the required quantity and glue it tightly to each other on the number. The number looks impressive if the roses are of two colors. It depends on your imagination. If you made small numbers, then you will need a stand. To do this, we make a circle of polystyrene foam with a diameter of 5 cm, insert a stick into it, and fix the joints with glue. We insert the other end of the stick into the number. We also decorate the base of the stand with roses, and wrap the stick with a satin ribbon. Such numbers will decorate your holiday, create comfort and good mood.
DIY numbers from napkins photo
DIY flowers from napkins
First of all, let's learn how to make roses from napkins. We will need:
- red and green napkins;
- pencil;
- tape or thread;
- skewers;
- scissors.
Let's get started:
- Unfold and cut the napkin into 4 equal squares.
- From the edge we begin to wind it onto the pencil. We do not wind it too tightly and not until the end, about 3 cm. Press simultaneously from the edges to the center. It turns out to be a corrugated paper tube, take out the pencil and form a petal. We need 7 of these petals. To make a bud, roll the petal in a spiral.
- Next, we collect the flower, placing the petals on the bud without covering each other. We insert a skewer into the lower part of the flower and secure it with tape or thread. Cut strips of green napkin (or corrugated paper) 1cm wide. And we wrap the skewer - this is the stem of the flower. So we got the original rose. A little effort and a bouquet of roses is ready!
DIY flowers from napkins photo
DIY dress made from napkins
Using this versatile material, you can create beautiful clothing items. We present to your attention a dress made from napkins.
- Draw a sketch of a dress.
- We take measurements and make a pattern on whatman paper.
- Using a stapler and masking tape, assemble the upper part of the dress (top), then the skirt. We connect the top and skirt with masking tape. The frame for the dress is ready. For decoration, volumetric flowers with a diameter of 7-8 cm are suitable.
- Unfold and cut the napkin into squares. For one flower you will need 2 double-layer napkins. Fold it like an accordion and secure it in the middle with a thin wire. It turns out to be a butterfly. We cut each edge into a semicircle and press each layer towards the middle. We connect the two parts and tighten them with wire. It turns out a voluminous flower. We cover the frame of the dress with flowers. The result is a bright and original dress.
DIY dress made from napkins photo
DIY crafts from napkins photo
Sometimes the most ordinary thing turns into a real work of art. We invite you to take a look at some masterpieces from masters and beginners. Without any doubt, with our help, you can create entire paintings and panels, while the effort and cost of using materials such as paper napkins will be reduced to a minimum. And with that, we wish everyone creative success!
DIY crafts from napkins video
Post Views: 705
Related posts:
.
svoimi-rukam.ru
How to create a beautiful openwork dress for a paper card
This romantic openwork dress made from napkins will decorate a postcard for any holiday. For the New Year, a white napkin is ideal as a base; for a girl’s birthday (or March 8th), you can find a colored napkin or paint it yourself. So the most important thing in this matter is to find a paper lace napkin, or rather, two napkins.
Fold the openwork napkin not in half, but about three-quarters, so that the top edge is located quite high from the bottom edge.
Now fold the napkin in half. Glue the inside of the folded openwork napkin. Bend the top corner of the workpiece back.
From white paper and the openwork part of the second napkin, cut out a heart of the same size.
Glue a napkin heart onto the paper heart. And then cut off the round sides of the heart on each side as in the example. Be sure to place a paper heart on the skirt to measure the cut points along the width of the top waistline.
Glue the top of the dress to the full skirt. Take a piece of small satin ribbon, measure along the length of your waist and glue it on.
From the second piece, make an additional part of the belt. Don't forget to form cuts at the ends of the satin ribbon to make it look more interesting.
All that remains is to decorate the dress with small beads and the incredibly beautiful decoration for the card is ready.