The cutting technique allows you to create wonderful fluffy carpet-pictures of various shapes and sizes that arouse interest and admiration. It seems unlikely that such seemingly complex applications could be performed by children. Everything turns out to be possible if the work of the team is organized correctly, and even first-graders can cope with the most complex drawings. The corrugated paper cutting technique does not involve the use of any special equipment. To work, you only need a drawing with contours, scissors, a pencil or ballpoint pen, multi-colored corrugated paper or paper napkins and PVA glue.
Trimming technique: preparation for work
First you need to cut pieces of corrugated paper with a side of approximately 1.5 centimeters. Their number and colors depend on the complexity and size of the work. You can draw a stencil for your future masterpiece yourself or print any simple design you like. It is advisable to use thick paper or cardboard. For convenience, you can pour glue onto a plate, or you can also use a glue stick. The trimming technique is a simple, but at the same time labor-intensive process that requires perseverance and patience, as it contains a lot of identical repetitive actions.
Step-by-step description of the technique
1) Apply a thin strip of glue along the contour to a small area of the pattern.
2) The end of the rod or pencil must be covered with a square of corrugated paper and, using your fingers, give the paper the desired shape, reminiscent of a flower head.
3) Then the bottom of the resulting figure needs to be dipped in glue and glued to a certain area of the drawing. 4) After gentle pressure, the rod is carefully removed. The important point is that each subsequent corrugated piece should stand next to the previous one, so they need to be placed very close to each other so that there are no gaps.
Sunflower in 3D
This type of work involves planar design of the prepared drawing diagram.
What you need to prepare for the creative process:
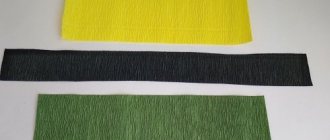
- napkins of three colors (yellow, green, orange);
- thick white cardboard;
- plasticine;
- black corrugated paper;
- PVA glue, glue brush;
- pen rod;
- toothpicks;
- scissors.
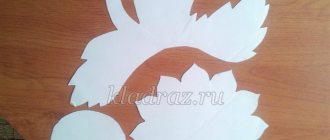
The desired image is applied to thick cardboard with a pencil. In this case it is a sunflower. For convenience, the pencil outline is outlined with a black marker or felt-tip pen.
You can use an existing schematic drawing printed on a printer.
Colored napkins are cut into squares with a side of 2 cm.
The image should be covered with plasticine. How this is done: the plasticine is smeared with your fingers on the surface, without going beyond the drawn lines.
Related article: Knitted hat for a girl: how to combine autumn and winter new clothes with photos and videos
The rod from the pen is taken in one hand, and a square of napkin is placed on the index finger of the other hand.
The blunt side of the rod presses the napkin to your finger, after which, using the thumb and forefinger of the hand in which the square is located, you need to twist the napkin into a tube and attach the crumpled part to the plasticine.
In this way, the entire open area of sunflower petals is decorated.
The space along the inner line of the petals is coated with glue. Orange squares formed according to the principle described above are attached to the glue.
The area inside the sunflower is decorated with corrugated paper. To do this, each small drawn element is treated with glue and covered with black paper.
Then the next one is coated, etc.
The remaining free space on the sheet is covered with green napkin squares.
The craft is ready.
The method described above is also loved by many adults.
If you take a complex plot as a basis and carefully think through all the color combinations and transitions, the result can be a beautiful three-dimensional painting that will find its place in the interior or become an unforgettable gift for a loved one.
When the child has mastered working on a plane, you can invite him to work on artificial flowers.
Features of the technology
What can you make from crepe paper? In fact, this material gives almost unlimited scope for imagination. Postcards made from corrugated paper, various crafts, flowers, as well as voluminous fluffy paintings look original and unusual. The corrugated paper cutting technique is a very popular working method. The products turn out to be very interesting, and the execution of such crafts does not require any special skills. Using this method, you can create beautiful and original three-dimensional images from corrugated paper. And these can be either miniature compositions or large panels. All elements should fit very tightly to each other, creating the effect of a thick fluffy rug consisting of a large number of pieces of paper. The trimming technique is very easy to learn, so this activity is ideal for recreation and activities with young children.
Picture of a goat. Corrugated paper cutting
There are so many wonderful techniques for making various paper crafts: quilling, origami, Iris folding, volumetric decoupage, and this is not the entire list.
Today I would like to suggest creating a beautiful picture using the cutting technique on paper. This is another wonderful technique that allows you to create magnificent works that amaze with their beauty and originality.
Kids can easily be entrusted with rolling up the paper and gluing it to the picture. For the New Year, an excellent option would be to create a picture using the cutting technique from corrugated paper. This will be a cute goat, which is a symbol of the coming 2015.
We will need the following materials:
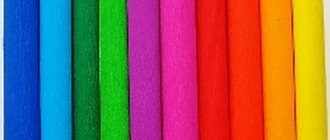
- Corrugated (crepe) paper in white, brown, black, pink, yellow, red and blue
- toothpick or ballpoint pen
- scissors
- PVA glue
- template picture with a goat
Picture of a goat. Trimming from corrugated paper - master class with photos:
Before we get started, let’s print or copy the goat.
We will transfer it to white cardboard or cardboard of any other color at your discretion.
Cut the corrugated paper into squares with sides 1 cm by 1 cm.
Apply a thick layer of PVA glue to the picture.
Take one white square and place a toothpick on it.
Fold the square in half, lightly pinch it with your fingers and roll it around the toothpick.
Glue the resulting curls onto the picture.
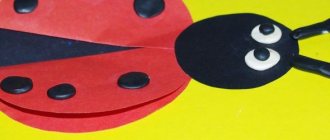
We cover the entire body of the goat.
Next, we cover the legs with white curls and the hooves with black ones.
We cover the goat's udder with pink twisted squares.
We cover the ribbon on the goat's neck with red twisted squares, and the bell with yellow ones.
We cover the muzzle with the main white color, and the eyes, nose and mouth with black.
We fill the horns with brown twisted squares.
When we have completely filled all parts of the goat with twisted colored squares, we can start trimming the butterfly. Let's make her body yellow, and her wings multi-colored and bright.
We use pink twisted squares to create a cute swirl under the butterfly. We use scissors to trim the excessively protruding edges of the paper so as not to spoil the main appearance.
So our tender and fluffy picture of a goat is ready. Cutting corrugated paper will give you a lot of positive emotions. Enjoy your time with such a wonderful creative process.
do-by-hands.ru
The advantage of working with corrugated paper
The main attraction of a painting created using the trimming technique is that the images are light and airy, which is achieved through the use of corrugated paper, a thin and transparent material that easily takes on a given shape. Unlike other methods of working with paper, the accuracy of the dimensions of the cut out parts is not particularly important; on the contrary, the more uneven edges there are, the prettier the finished product will look. However, some rules still need to be followed so that the work does not seem careless or done in bad faith.
Useful tips
To realize your plans using the cutting technique, you need to purchase corrugated paper or napkins of different colors, which you need to turn into many small pieces, the size of which is about 1.5-2 centimeters. The shape of the elements can be square, triangular or round. At the same time, the edges do not have to be perfectly smooth; they can be zigzag, wavy, and so on. The main thing is not to greatly increase the size of the parts. If the picture is large, you can make a square 3*3 cm, but no more. The smaller they are, the more clearly the picture will look in its complete, complete form. When attaching paper to glue, a thin object is used: it can be a pencil or a match. To begin mastering the trimming technique, it is recommended to start with simpler images, such as a rainbow, flower, butterfly or various geometric shapes.
Basic principles
The technique of cutting from napkins or corrugated paper does not always involve fully filling the required space. For example, there is only a contour facing in the form of a fluffy twisted frame around the entire perimeter of the selected figure, while the center of the picture may remain empty. Several colors can be used in the work; the craft can also be made in monochrome using just one color, for example, to highlight the background. The main principle of the technique is to use it in those areas where you need to add volume, while due to the small size of the paper elements, all the outlines and boundaries of the pattern remain unchanged, and the picture does not lose clarity and the main idea.
Interior decorations
Small original details make your home interior more comfortable and warm. Crafts made from napkins, made by yourself, can be used to decorate your own home or as a gift to friends and loved ones.
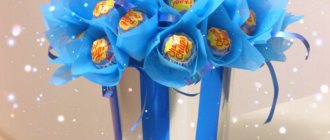
Sunny bouquet
Dandelions are called sunny flowers. A bright bouquet made of paper napkins will remind you of a sunny, warm summer all year round. You can put these crafts from napkins on the table at home or at work. Materials and tools needed to make a bouquet:
yellow napkins;- roll of toilet paper;
- green corrugated paper;
- balloon;
- stapler;
- scissors;
- glue;
- a plate of water;
- hairspray with glitter;
- small flower pot.
First of all, you need to make a base for the bouquet. Toilet paper is torn into small pieces. The balloon is inflated to the size corresponding to the selected flower pot and pasted over it with pieces of paper soaked in water. The base is completely auscultated and the ball is carefully removed from it.
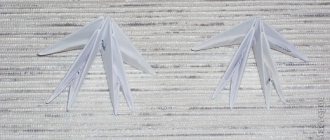
The napkins are folded into squares and secured in the middle with a stapler. Their edges are cut in the shape of a circle and buds are formed, alternately lifting and pressing each layer to the center.
Volumetric trimming technique
The paper cutting technique can be used not only for flat images, but also for firmly glued paper shapes. It could be a box, a figurine, a paper tree. You can give new life to old things using cardboard, plaster, clay and other materials, which can be “revived” not with a brush and paints, but with paper decoration. In addition, elements cannot always be secured with glue; it is quite possible to use a plasticine base, which will help save a lot of time. Gluing pieces of paper that differ in size and density allows you to create very soft color transitions and real volumes on a flat surface. All these effects influence the overall perception of the picture: the same green grass will look brighter and more natural if it is dark green in some places, and light green in places where the sun's rays fall.
Openwork crafts
In needlework, not only ordinary paper napkins are used. Beautiful works can be made from openwork napkins.
Bouquet of roses
Colored crafts made from napkins can be an addition to the main gift for a woman on her birthday or the Eighth of March. To make a holiday bouquet you will need:
- openwork napkins in red and white:
- green corrugated paper;
- wooden skewers;
- scissors;
- glue;
- transparent packaging film;
- ribbon.
The middle of a white napkin is cut out, and the openwork part is folded into the shape of a rose, securing the free tip with glue. To make a red flower, a round napkin is cut from edge to center and rolled into a bag. The resulting bud is carefully straightened.
Pink buds are attached to wooden skewers using narrow tape.
Leaves are cut out of green paper and fastened into a branch consisting of three parts. One branch is attached to each flower.
The wooden stem is wrapped in a strip of green paper , fixed with glue.
Having produced the required number of flowers, they make up a bouquet, which is decorated with decorative packaging film and ribbon.
The history of the appearance of the trimming technique
What is trimming? The history of the emergence of applied paper art technology goes back more than one century. However, there are trends that have appeared relatively recently, these include appliqué, quilling, origami and trimming. When using the cutting technique, three-dimensional paper applications are created that promote the development of creativity, fine motor skills, and abstract thinking. In addition, this activity teaches patience, perseverance and hard work, which are so often lacking in modern children. This young technology is becoming increasingly popular due to its simple execution method and the unusual “fluffy carpet” effect, pleasant to the touch and visually. What is remarkable about the trimming technique? A master class on creating three-dimensional paintings can be held without leaving home; no special equipment or expensive materials are required. You just need to stock up on napkins or crepe paper, plasticine, glue, a brush, cardboard, multi-colored markers and other devices that are already in the arsenal of any schoolchild or kindergarten student.
equipment with photos and videos
We are introduced to appliqué in kindergarten. This type of creativity attracts a small child and undoubtedly brings enormous creative potential to development. It not only develops fine motor skills and imagination, but also cultivates an aesthetic perception of the world and teaches artistic taste. In this article, we will introduce you to a new type of applique using a master class on trimming corrugated paper.
And this type of applique, such as trimming, will definitely interest even needlewomen, since its technique can be used in creating fakes that decorate the interior. Trimming is a three-dimensional structure made of twisted pieces of light paper glued to the surface using a thin stick. The use of different colors allows you to create amazing mosaics that look like fluffy carpets, three-dimensional figures, picture postcards.
Tools for work
To make such fakes you need a very small set of materials: paper, glue, scissors and a “cross-cutting” tool in the form of a thin stick.
Typically, this technique uses corrugated paper or, as it is also called, crepe paper. This paper can be purchased at office supply stores. “Ends” are cut from corrugated paper - elements of three-dimensional appliqué. Glue will be needed to cut out and glue these trims to the base of the craft. As a base, you can “fluff” with corrugated paper any surface to which this paper is glued. This could be a sheet of Whatman paper, cardboard, or light ceiling tiles. For volumetric crafts, blanks are made from polystyrene foam, newspapers, papier-mâché, and plasticine.
Well, the main tool for trimming is a long thin stick with a blunt end. A pencil, a refill or the body of a ballpoint pen, a Chinese chopstick, or a toothpick may well be suitable for the role of such a tool.
Easy lesson
The technique of trimming a flat painting begins with selecting a pattern. They draw it themselves or take it ready-made from any coloring book, after gluing it onto thick paper. We select the desired colors of paper and make blanks from them. To do this, cut the rolls of paper into strips without unrolling them, and from these strips cut them into squares with a side of about 1-2 cm.
When there are quite a lot of squares, apply PVA glue to part of the drawing, screw the squares tightly onto the end of the stick and place them on the strip greased with glue at a right angle. We take out the stick and work on the subsequent trims. Place one after the other tightly along the glue line. You can also fill in the background of the picture to create entire landscapes. Trimming a flat picture is suitable for activities with children aged 5 years and older.
Volumetric method
Another interesting method of appliqué that creates velvet figures is the so-called “volumetric trimming method.” It is made on plasticine. The same squares of the workpiece are cut, only glue is no longer needed. It is enough to mold the desired figure from plasticine and start sticking the end pieces into the surface one by one with a stick.
As a result, we get voluminous crafts:
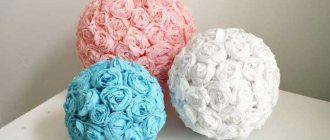
All these crafts can be done by a group of people, creating larger works, for example, large landscape paintings, photo frames, decoration toys. Handicrafts use this method to make interior decor items. If until this moment such an applique looked like child’s play, then creating flower balls and topiaries in this way fascinates with its magical light appearance.
Trimming topiary is also done using paper or napkins.
To make topiary we will need: corrugated paper or multi-colored napkins, scissors, bamboo skewer, ping pong ball, dry glue, PVA glue, brush, awl, cardboard, trimming stick, yogurt cup, paper napkin, acrylic paint , plasticine, a piece of narrow decorative tape.
In extreme cases, the ball can be rolled out of old newspapers and wrapped with thread, cut out of polystyrene foam. The ball must first be sealed with a layer of napkin so that our paper tubes can then be glued onto it, then it is decorated using the cutting technique with corrugated paper from top to bottom. The trim pieces are cut larger, so your product will be more fluffy and airy.
The barrel is a skewer that is wrapped with decorative ribbons or a strip of paper. We cover the glass with a napkin, deliberately creating crumpled irregularities for decoration. When the glue dries, cover it with acrylic paint. We insert cut cardboard into the barrel, which will serve as a lid for the cup. Now we put plasticine into our pot and stick the finished crown and trunk into it. We glue the lid onto the glue and decorate it with paper trims. Decorate with a satin ribbon.
There are as many options for creating topiary from corrugated paper or napkins as the imaginations of needlewomen: these can be hearts on legs, balls with flowers made of fomiaran, complemented by a lush cover of corrugated paper. Any surface to which paper can stick can be used as a base for the crown. Such topiaries can be made as an elegant gift for girls.
As you can see, making such crafts is not that expensive in terms of money, but it costs a little time.
Video on the topic of the article
dekormyhome.ru