Kettle warmer models
The final appearance of the product depends on the imagination of the craftsman. It can follow the shape of a fruit or vegetable - for example, a round strawberry or a bright pumpkin.
A toy in the shape of an animal will give you a fabulous look. Such a hedgehog in a forest clearing can also be crocheted. The heating pad itself is also easier to make using a hook. By knitting each row, it is easier not to make a mistake with the dimensions and repeat the contour of the teapot.
An easy-to-make heating cap that completely covers the teapot. By adding decor, you can make it in the form of a cockerel, chicken or doll. This shape is reminiscent of a woman, who in the old days used to warm the samovar during a long tea party.
A teapot warmer in the shape of a house can be made from crocheted elements. This kind of work can be done even by a novice.
How to crochet a beautiful heating pad for a teapot with peonies
A beautiful and easy-to-make heating pad, which is a pleasure to knit; besides, there is no need to understand the patterns, everything is extremely simple. A master class with a description is presented below. To work you will need:
- Hook No. 4.5
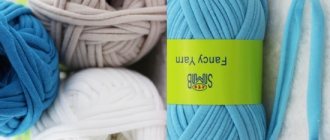
- yarn of several colors
- measuring tape
- a needle so that a thread of yarn passes into its eye
- button
First step. Measure the height of the teapot, including the lid at the very top. You also need to measure the circumference of the teapot, without handle and spout.
Second step. Cast on a chain of loops so that its length matches the height of the teapot. The next row is single crochet, the second row is alternating single crochet and single crochet.
Third step. Change the color of the yarn (if you want a striped warmer), and again knit two rows - the first with single crochets, the second - alternating. Continue knitting in this way and alternating colors until you get a rectangle with a height equal to the height of the teapot, and a width equal to the width of the teapot, but not the girth.
Fourth step. Tie the upper side with single crochets, fasten the ends of the threads from below and trim off the excess ends.
Fifth step. Knit another fabric for the second side of the teapot in exactly the same way.
Sixth step. Sew both halves together, leaving slits for the handle and spout. There is no need to sew under the handle of the teapot, there will be a fastener there.
Seventh step. Knit a loop in the same way as previously the strips for the main fabric were knitted - double crochets and alternating stitches. Knit in this way for about 10 cm. Sew the loop and button under the handle, so that both halves are well fastened.
Eighth step. Thread the yarn into the needle and use a “back needle” stitch to sew the upper “neck” of the heating pad and pull it off. The resulting crown should be decorated with knitted peonies.
Ninth step. Cast on six loops, join into a slip ring and knit 15 single crochets. The next two rows are knitted like this: two chain stitches, each with three double crochets. The next two rows are knitted similarly, but with three chain stitches.
Sew the resulting lush flowers onto the top of the teapot warmer, and tie the bottom edge of the warmer with ruffles.
The heating pad is ready! Hot-water hen in a dress.
Quite often, teapot warmers are made in the shape of animals, and for some reason, chickens and roosters are in the lead. Well, knitting such beauty is not so difficult, especially if there is a description and photo of the process. To work you will need:
- Hook No. 2
- White yarn and other colors - for dresses
- padding polyester or other filler
- beads for eyes
First stage. The head of a chicken is knitted with white yarn. Connect four air loops into a ring. All rows are connected by a connecting post. At the beginning of each row, two lifting air loops are knitted. The second row is ten single crochets under the ring. The third row is an increase in each single crochet, that is, the result is 20. The fourth and fifth row is three single crochets, an increase (25-30). The sixth and seventh rows are knitted with 30 single crochets. Eighth row - seven single crochets, increase (34). From the ninth to the twelfth row - 34 single crochets. The thirteenth row - six single crochets, decrease (30), from the fourteenth to sixteenth rows - 31 single crochets. In the seventeenth row, single crochets are knitted behind the back wall, and 4 decreases are made. The next three rows are worked in single crochets, with similar decreases as in the previous row.
Second phase. Fill the resulting form with padding polyester or other filler.
Third stage. The first row of the dress is knitted with double crochets - 30. You need to start knitting the dress from the place where in the seventeenth row you knitted behind the back wall, you got such a braid. Second row – increase in each double crochet, two double crochets (60). From the third to the sixth row, knit 60 double crochets. When the knitting reaches the kettle handle, divide the knitting into two parts and knit in reverse rows. Cut the thread and attach it near the handle. Crochet double crochets to the handle, then turn the knitting back. Knit to the spout - unroll the knitting and knit again to the handle. Knit in this manner until the holes for the handle and spout are ready. Then knit in the round, based on the height of the teapot.
Fourth stage. The comb is knitted as follows: 1 single crochet, two double crochets, two double crochets, two double crochets, one single crochet. And so four ridges. To knit a beak, you need to knit four air loops and return the connecting loops to the first loop. From here a similar part of the beak is knitted. Sew on the eyes. The heating pad is ready.
Knitting a dress
Row 1: we knit a row with double crochets, which looks like braids, formed when we knitted it using the back thread - 30 columns. 2nd row: we knit, while making additions in each double crochet, two double crochets. There should be 60 columns. 3-6 rows: we knit double crochets.
To perform this work, you need to tie it to the kettle handle and then knit it in reverse rows. Cut the thread and connect it near the handle. Next, columns with crochets are knitted to it and turned back, and knitted again to the handle on the other side. When the knitting has reached the spout of the teapot, you need to make a hole. The knitting is unrolled and knitted to the handle. Knit until the desired hole for the spout and handle is formed. Afterwards it is knitted in a circular pattern, depending on the height of the teapot.
We tie the floor of the dress in the form of a lattice - 2 air loops, then a double crochet, we knit it into the third buttonhole of the base of the skirt. Now we knit ruffles: we knit five columns with crochets on top of the cell, then five columns with crochets on the side of the wall, now the same number of columns at the bottom and continue to knit the entire row in this way. Knit the resulting ruffles of a different color with a thread in single crochet columns.
Article on the topic: Pattern for a sweater with knitting needles: diagrams with description and video
You need to make a comb in the middle of the connected head. We knit one single crochet, then two single crochets, two double crochets, two double crochets, a single crochet, and so on four times. We knit 4 chain buttonholes and use connecting buttonholes to return to the first one and from this buttonhole we knit the next part of the beak. We fasten the thread.
We sew beads onto the eyes. Let's look at the photo.
Let's start with the apron. You need to knit 22 chain buttonholes.
- Row 1: start knitting from the third buttonhole from the hook 20 single crochets;
- 2nd row: at the very beginning of the row we knit three double crochets from the primary column, then 18 double crochets and the remaining column - three double crochets;
- 3rd row: at the very beginning of the row, you need to knit three double crochets from the primary column, then 22 double crochets, and, as in the second, we knit three double crochets into the last column;
- Row 4: you need to knit 28 double crochets;
- 5 rows: at the very beginning and at the end you need to knit 3 double crochets together. After such a decrease, the edges should appear rounded.
Tie the resulting part along the edges of a different color with single crochets. We make a chain of air strings to make ties. Use satin ribbons to make flowers and leaves.
Now you need to knit the wings for the chicken:
- 1 row: knit 15 double crochets into a ring;
- Row 2: knit 3 double crochets and add to the end of the row;
- 3 rows: we knit half a circle with double crochets;
- 4-5 rows: at the very beginning and at the end of the row it is necessary to make decreases from 4 columns;
- 6 rows: knit all columns in one row;
The wing is knitted, and the second one is knitted symmetrically. Sew to the doll.
Related article: How to make ice cream from plasticine with your own hands using Play-Doh and video
The step-by-step instructions provided above will help everyone easily knit such an original decoration for a teapot.
There are many more ways to make such beautiful dolls that will decorate the teapot. Very often dolls are sewn from nylon and plastic. These teapot women are quite popular and look just like the real thing. Many may find it difficult to make such a craft, but the pattern will help in making this product, as will the detailed description. And now the granny for the teapot is ready!