Garter stitch with knitting needles: how to knit?
Garter stitch for beginners - these are the basics of knitting. Every craftswoman begins her creative journey with this pattern. There are several different techniques for knitting a scarf pattern, but, undoubtedly, the classic method is popular. You just need to learn how to knit knit stitches by grabbing the front wall.
On a note! This pattern got its name because our ancestors used to knit down scarves in this way. Today, hats, snoods, sweaters, shirtfronts and other products are knitted with a shawl pattern.
Necessary materials:
- yarn;
- knitting needles of the appropriate size.
Step-by-step description of the process:
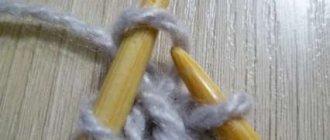
- We cast on any number of loops on the knitting needles using the classic method. Be sure to add two edge loops.
- To make the edge of the knitted fabric neat, we remove the edge loop at the beginning of the row without knitting, and at the end of the row we knit it with a purl loop.
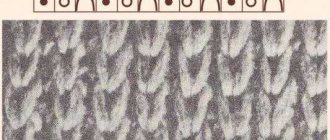
- We will knit the scarf pattern according to this pattern.
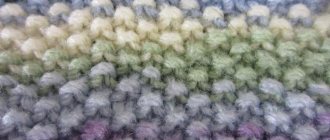
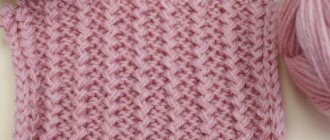
- In all rows, knit and purl, all stitches will be knit stitches. The result is a simple but original pattern.
Characteristics of a unique knit
Despite the fact that the pattern is very simple to implement, it can be called universal. Garter stitch can give a product uniqueness and charm. With its help, it is good to diversify knitting by adding fragments of patterns to a smooth fabric. Openwork, jacquard patterns, reliefs, meshes, and stocking stitch go well with it.
If you choose thin knitting needles and yarn for work, the result will be a knitted fabric. Naturally, its quality will depend on the skill of the knitter and accuracy. Thicker yarn and knitting needles will give the model volume and texture. Changing from one needle diameter to another will allow you to create beautiful waves. The pattern of the pattern is very simple - each row (hereinafter referred to as P) is knitted with one type of loop (hereinafter referred to as P). The main thing is that the entire canvas is made either with knit stitches or purl stitches. For beginners, it is very useful to watch a video on how to complete the pattern. Despite its apparent simplicity, garter stitch has many advantages over other patterns:
- is resistant to deformation and stretching;
- has the ability to add volume to the product;
- is an excellent basic structure for knitting more complex patterns;
- has a smooth side edge without curling;
- suitable for any thickness and yarn structure;
- you can easily find her description of the knitting and photo of the pattern.
Read
Knitting different models of elongated vests
Before you start making a shawl, you need to learn how to knit stitches efficiently. Knit or purl, it doesn’t matter. In any case, the canvas will be smooth and beautiful.
Let's learn more about garter stitch
Many needlewomen like garter stitch because of its simplicity. In addition, this method of knitting has several advantages:
- the pattern is double-sided, so the product looks the same on the back and front sides;
- Garter stitch holds its shape well and does not deform.
Above we looked at the classic method of knitting a scarf pattern, but this is not the only technique by which such a pattern can be knitted. Let's look at four more ways to knit a shawl pattern.
Method No. 1
You can knit a scarf pattern not only with knit stitches. Some craftswomen prefer to knit it with purl crossed stitches.
Necessary materials:
- yarn;
- knitting needles of the appropriate size.
Step-by-step description of the process:
- We cast on 14 stitches on two knitting needles using the classic method. 12 loops will be garter stitch repeat and two loops will be edge loops.
- Since we will be knitting with purl loops, we also need to remove the first edge loop in the row as the purl stitch. To do this, we simply place the working thread on top of the left knitting needle.
- We place the working thread on the main knitting needle. Using a working knitting needle, grab the loop by the front wall.
- Now we lower the knitting needle down and stretch the working thread, pulling out the knitted purl loop.
- This is how we knit all the loops in the first row.
- In the second row we also purl all the stitches. We grab the loop by the front wall.
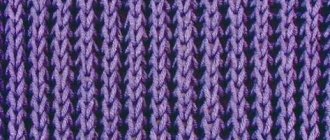
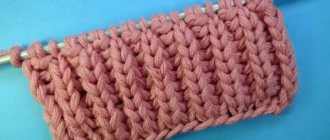
- The pattern repeat is simple: horizontally it is one loop, and vertically it is one row. That is, in each row we knit only purl loops.
- It turns out this is an original pattern.
Video lesson
If the diagrams and descriptions of options for performing garter stitch still leave any questions, then beginners can always use visual videos on working with knitting needles.
Video - garter stitch with knitting needles using classic knit stitches:
Video - garter stitch with purl stitches:
Video - garter stitch using granny stitches:
Share with your friends!
- 6
- 2
- 8
Shared
Subscribe to our Yandex.Zen channel or Yandex.Messenger
Method No. 2
Experienced craftswomen know that the pattern will be different if the loop is grabbed by the front or back wall. The scarf pattern is no exception.
Necessary materials:
- yarn;
- knitting needles of the appropriate size.
Step-by-step description of the process:
- We cast on 14 stitches on two knitting needles using the classic method. 12 loops will be garter stitch repeat and two loops will be edge loops.
- As usual, we remove the first edge without knitting.
- We insert a working knitting needle into the next loop, grab the back wall and knit it.
- Similarly, we knit all the front stitches in this row.
- We always knit the second edge with a purl stitch.
- So, exclusively with facial loops, we will knit all the rows.
Tubular hinge set
This option is ideal in cases where we need an elastic and elastic end. Knitted after 1x1 elastic, it will perfectly retain the shape of the product, protecting the edge. from stretching. In addition, the tubular embankment. loops are also perfect for faces. satin stitch, to decorate the sleeve or neck of a sweater. For work we will need yarn of two different colors, but of the same thickness. Additional n. we will link the auxiliary r. and then we will delete it. The number of stitches should be half the amount we need + 1 stitch (for example, if we need a fabric 60 stitches wide, we make 30 + 1 stitch).
Loose ponytail n. and sp. put it in your right hand, and n. from the skein - to the left, holding it, we draw it around the thumb and index point.. Sp. enter from bottom to top under n. large p., grab n. from uk. p. and pull out the loop, resulting in a crossed p.. We continue knitting the st. n., without pulling n. too much, until we get it on the sp. 31 p., then we turn the work over and work on the basics. n.: we knit the row completely l. p. behind the back wall, next p. - And. p., and the third p. already l. etc., but in the classical way - behind the front wall; thus, on our sp. along the bottom edge there are alternate stitches. and auxiliary colors.
Next, we make the first st., then we pick up the bow of the st. color, we transfer it to the left sp. and knit l. p.. Then – and. p., pick it up and do everything the same as with the previous p., continue this until the end of the p.
It is important to remember that the stitches on top should always be purl, and the stitches below (those by which we grab the sp.) should always be knit!
We remove the auxiliary thread and begin our pattern. As mentioned earlier, the most suitable options for such a set are 1x1 or 2x2 elastic bands. In the case of 1x1, we simply continue the elm. n. how they lie on the back: i. p. - purl., l. p. - persons..
Tubular set of hinges: video master class
Method No. 3
This technique of knitting a scarf pattern is not much different from the previous one. We will also knit all the loops with knit stitches, only the loop must be grabbed by the nearest, that is, the front wall.
Necessary materials:
- yarn;
- knitting needles of the appropriate size.
Step-by-step description of the process:
- We cast on the knitting needles in the classic way 14 loops for knitting the pattern.
- We slip the first edge stitch in the row onto a working needle without knitting.
- Next, we will knit the front loop, grabbing the front wall.
- To do this, insert the right knitting needle into the loop closer to you, as if in front of the product.
- Grab the working thread and knit a loop.
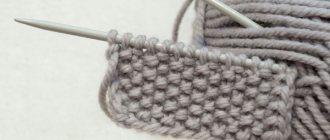
- This way we knit all the loops.
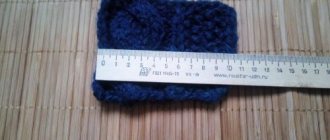
- Garter stitch made in this way looks like this.
Method No. 4
Here's another way to knit a scarf pattern. All stitches will be knitted purl in the classic way. We grab the loop alternately from different walls.
Necessary materials:
- yarn;
- knitting needles of the appropriate size.
Step-by-step description of the process:
- We cast on the knitting needles in the classic way 14 loops for knitting the pattern.
- We slip the first edge stitch in the row onto a working needle without knitting.
- In the first row, we knit all the purl loops in the classic way, grabbing the loop by the front wall.
- In the next row, the knitting technique changes, and we will knit loops, grabbing the far, that is, back wall.
- This loop is knitted as follows. We throw the working thread on top of the main knitting needle.
- We insert the working needle into the loop, grabbing it by the back wall, from right to left.
- We grab the working thread and knit a new loop.
- Next we will alternate the first and second rows in height to create a garter stitch pattern.