Instructions
So, in order to knit socks, we need:
- wool yarn 100 g;
- 5 double needles No. 3.
This article will look at the simplest way of knitting - in the round, from top to bottom. This method has received great recognition among needlewomen not only for its simplicity, but also for the convenient and comfortable socks that are then obtained.
Instructions for knitting wool socks for beginners:
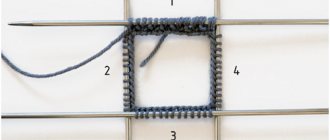
- We have already determined the size of our sock, so we should cast on 40 stitches (you use your size), dividing them by 4. This gives you 10 stitches per four needles. To make the explanation clearer, let’s visually number them.
We knit the four loops of the 1st knitting needle together with the end of the material remaining on the 4th knitting needle from the cast-on stitches, thereby closing the ring so that it fits together more tightly. With this elastic band you need to knit 1*1 11cm, that is, the upper part of the sock. You should knit with basic knit and purl stitches. If you use any others, there is a chance that the sock will be twisted. Provided it was easy for you to do this work, you can decorate the socks with finishing strips. You just need to knit three rows of stitches in the main color, three in another, three in the main, three in another. This is what it will look like. - The knitting of the heel part of the stocking is slightly different from the previous one. We do not touch the loops on the 3rd and 4th needles yet. But we transfer all 20 loops from the first two knitting needles to one and knit 6 cm in regular stocking stitch. There is also the following equality: the number of edge loops of the entire product is equal to the number of loops on one knitting needle, subtracting one. Knowing that one edge loop is formed in two rows, we calculate the height of the heel: (10-1)*2=18. Eighteen rows are approximately six cm.
- Let's move to the center. First, we will finish knitting the heel with the seventeenth front row. And in the eighteenth row, purl, we begin to decrease the loops according to the shape of the heel. To do this, you need to visually divide all the loops into three parts. Twenty cannot be completely divided into 3, so we divide the remaining between two side parts. It turns out that there are 6 loops in the center, and seven in the sides. If you get not two, but one loop, then attach it to the center. Now the most interesting thing: when you continue to knit the loops in the center, then gradually reduce the loops on the sides, adding them to the center. To complete the last loop of the center we knit it purlwise, catching the first loop of the third part. We unfold the product to the front side. We remove the first loop as an edge loop behind the wall, the thread behind the product, we move the knitting needle from front to back, that is, in the direction away from ourselves. The last loop of the center on the front side must be knitted with the first loop of the side part of the front side. Please note: these loops must be knitted behind the back wall. Turn the product over again to the wrong side. Remove the edge loop from the front wall, the thread is already in front of the product, and move the knitting needle away from you. So we continue to knit only the center loop, reducing the sides until they have loops. As a result, only ten center loops will remain. The heel is knitted. This is what it should look like.
- Let's get started knitting the middle part of the sock, until the loops “on the fingers” are reduced. Using the knitting needle where the middle part loops were, you need to pick up the edge loops on the front side of the stocking. From each edge loop we pull out 1 loop for a total of nine loops. We knit stitches using the knit stitch method on the next pair of knitting needles. We pull out the 8 edge loops with an unoccupied knitting needle. The loops of the middle part should be distributed equally between the first and second knitting needles, that is, 3 each. On the first knitting needle we get 11 loops (8+3), on the second 12 loops (9+3), on the remaining two knitting needles we get ten loops each. If you get an odd number in the middle part of the heel, don’t worry, give 1 stitch to the first knitting needle, thereby equalizing the number.
- Next step knit a row of knit stitches in a circle. You need to decrease the “extra” loops in the first two knitting needles. We knit two loops behind the back wall, turning over the first loop in advance, performing a decrease on the first needle at the beginning of the row. On the second, on the contrary, at the end of the row, knitting two at a time using the main method. And in the end we get ten loops on each knitting needle.
- And finally we tie the sock in a circle about fifteen centimeters, to the end of the little finger. Let's start adding more loops on the toe where the toes are. For the first and third knitting needles, we knit the first loop, and knit the second and third together with the front one behind the back wall, before turning over the 2nd loop. For the remaining knitting needles, we knit the two penultimate stitches together, and simply drag the last one through. We carry out this process, alternating the circle so that half of the loops are left on each knitting needle, in this example 5. After this is done, we decrease on each circle so that two loops remain on each knitting needle. Tighten the threads and secure everything. The product is ready.
Double heel
This is a reinforced version of the heel with increased wear resistance.
As in all previous methods, we use half a stitch to form the heel: we work with the 2nd and 3rd sp. We knit straight/reverse knitting. or persons. Ch. the desired height. At the same time, we knit a stitch in the first row. through one, passing the thread ahead of the work on the missed stitches for purl. iron and behind work for faces. Ch. In the second r. – we knit all the loops according to the chosen pattern. Then we divide all items into three parts. We add excess items to the central section.
We start from the wrong side: we knit again through one stitch, pulling the thread through. We knit the last stitch of the center with 1 purl. from the first paragraph of the last part in 1 persons. Turn. In persons row: knit the central part - as described above. Last knit the center loop in 1 purl. from the first point of the outermost section. Please note: on the wrong side we knit two loops into one - knit stitch, on the face - purl. This is done to beautifully design the decreasing joint. We continue until the side parts are finished.
Further knitting is as in the previous descriptions. We get a compacted heel with a double sole.
Video master class
Knitting tips
Now some tips on knitting socks for beginners:
- If you are knitting baby socks , then it is better to take a softer yarn that will not prick. You can take thinner threads and, accordingly, knitting needles.
- When you knit men's socks , it is best to take a stronger thread so that the socks do not tear in problem areas. That is, it is better to knit the toe and heel with threads containing polyester, they are stronger.
If you carefully read the entire article and try to transfer everything written to your yarn and knitting needles, then you will definitely be able to knit warm and cozy homemade socks.
Socks with “Ladybug” knitting needles - knitting socks for beginners.
Women's socks with 5 knitting needles. Photos and detailed descriptions will help beginning knitters cope with knitting this sock model.
Size:
38 (foot length 25 cm)
Yarn:
Merino (Pechorka, 50% merino wool, 50% acrylic, 200 m/100 g)
Knitting needles:
set of 5 double needles No. 4.5.
How to knit socks with knitting needles?
Description of work: Knitting socks for beginners
!!! Knitting in 2 threads.
We start knitting socks with knitting needles from the cuff. The cuff is usually knitted partially or completely with an elastic band. This can be a 1x1 or 2x2 elastic band.
To knit this pattern, cast on 45 stitches with red yarn and distribute them onto 4 knitting needles.
We close the knitting in a circle by knitting the first and last loop together. There should be 11 loops on the knitting needles. We knit with a 1x1 elastic band in a circle.
At a height of 9 cm (18 rows) we knit 3 rows with facial loops. Let's move on to knitting the heel.
— How to knit the heel of a sock with knitting needles.
Transfer the loops of the 1st and 4th needles onto one needle (22 loops). Next, knit the heel wall in straight and reverse rows.
At a heel height of 4.5 cm, divide all the loops in the work into 3 parts (6 + 9 + 7).
In the next front row, knit 6 loops on the side of the heel + 8 loops on the bottom of the heel. Knit the 9th loop of the lower part of the heel together with the first loop of the third (side) part of the heel and unfold the knitting.
Slip the first stitch on the bottom of the heel as a purl (thread before work) and purl all the stitches. Knit the last loop of the bottom of the heel together with the next loop (from the side of the heel). Expand the work.
Knit the heel with decreases until only the stitches of the lower part of the heel remain on the knitting needle.
Then continue knitting in the round. To do this, cast on loops along the edges of the heel wall (pierce the side loop with a knitting needle, pick up the thread from the ball and pull it to the front side), and knit the existing loops.
In the next round, begin decreasing stitches. To do this, in each circular row, knit together the last loop of the 1st knitting needle and the first loop of the 2nd knitting needle (to do this, swap the second loop with the first so that the second is located in front of the work), the last loop of the 3rd knitting needle and the first loop of the 4th knitting needle. oh knitting needles. In this way (with decreases) knit five circular rows.
After 13 cm from the heel wall, change the yarn to black. The beginning of the row is in the middle of the sole of the sock. Knit 5 circular rows and start decreasing.
Check that the loops on the knitting needles are evenly distributed - there should be the same number of loops on all knitting needles.
To decrease, knit the 3rd and 2nd loops from the end on the 1st and 3rd knitting needles together, knit the 2nd and 3rd loops on the 2nd and 4th knitting needles together. Repeat decreases every other round until half the stitches remain on the needles. Then decrease in each row until there are 2 stitches left on the needles. Pull the thread through the remaining loops and pull off. Fasten the end of the yarn to the inside of the sock.
Using black yarn, embroider a design that imitates the colors of a ladybug.
Photo: Women's socks with “Ladybug” knitting needles.
More models of men's knitted socks can be viewed here: Men's socks "Defender" Men's socks "Combat" Men's knitted socks "Boots"
Attention!
If you liked our model of women's socks with "Ladybug" knitting needles and, based on their description, you knitted socks for yourself, and now you want to show your work - send a photo to We will place a photo of your work under the description of this model. We would like some brief information from you - what is your name (name or nickname), what city are you from, what materials were used and how the work progressed (was it easy or were there difficulties), wishes and suggestions. We are waiting for your works!
Your works
Tatyana
, Unecha, Bryansk region “Knitted colored socks for my nephew. Knitted with melange yarn. 100% acrylic. The results turned out to be very bright and warm socks)))))))) Thank you!!!”
comments: 3 posts
Log in if you want to comment. Registration For those logged in, comments are visible, the latest comments are on the left and a quick transition is available. 
How to knit the heel of a sock on knitting needles
It is often difficult for beginners to perform the heel. You need to start it on two knitting needles, while the remaining two are not involved in the work. Let’s say there are 10 loops on two knitting needles. Total - 20. Let's imagine this number as 6+8+6. 12 turning rows are knitted on two knitting needles. In the 13th row, 13 loops are knitted, and the 14th is knitted together with the 15th, after which the knitting is turned. We knit 7 loops in the other direction, and knit the 8th together with the 9th. We turn the knitting, knit 7 loops again, knit the 8th together with the 9th. This is how the heel is formed until there are 8 loops left on the knitting needle. To complete the row, you need to pick up the missing heel stitches from the edge stitches in two steps - when knitting the front and back rows. Now you can again make a “well” of 4 knitting needles and knit further.
How to learn to knit socks
You need to start with simple models. But even for beginners there is a great opportunity to knit striped socks. You just need to change the color of the thread at certain intervals. The greatest difficulty is tying the heel and toe. If you do these “difficult” places in a different color and don’t forget to add nylon thread to the main thread for strength, you will get quite nice socks. Even if you choose leftover yarn to work with, you can create a fun accessory. But before that, you need to divide the remaining yarn of each color in half - for a pair of identical socks.
Preparation, selection of yarn and tools
If you plan to use a set of five knitting needles, it is more convenient to use aluminum or wooden tools, since the thread will not jump off them. When knitting with two knitting needles, it is much easier to control the stitches, so polished steel knitting needles are great. In a number of schemes, a rough cotton thread is used to cast on loops, which then has to be unraveled to release the loops.
Yarn must be selected according to several parameters. Let's take a closer look at them.
How to choose yarn for knitting socks
The choice of yarn is determined by the season when the socks will be worn. For winter models, choose down thread or wool thread. Cotton or synthetic thread is good for summer, and linen for hot weather. If the work uses leftover yarn of different colors, then they should all be the same thickness, the same strength and elasticity.
To learn more about how to choose yarn, watch the video instructions:
Choosing a knitting pattern and method
We decide how we will knit socks with knitting needles: in the old fashioned way, on five knitting needles, or in a new way, on two. There are options for knitting socks that don’t even require circular knitting needles. These socks are made seamless by using small tricks. One of them is a set of loops at the beginning of work on two threads - cotton and wool.
Pictures of beautiful socks
Having mastered the basic technique, a knitter can decorate socks with frills, openwork patterns, and jacquard patterns. Adding these elements is easy, and the socks turn out elegant. Fantasy socks look especially good for little children. The World Wide Web contains a large collection of photographs and patterns of elegant socks, both for babies and for young girls and ladies of advanced age. But no matter how fancy the sock is, it must fit well on the foot, otherwise the whole impression of the work will be ruined.
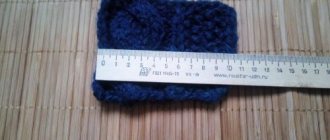
How to take leg measurements to guess sock size
In order not to make a mistake with the number of loops and rows, you need to measure your legs. Not only the length of the foot, which determines the size of the shoe, plays a role, but also the height of the instep and the girth of the shin. During the knitting process, you can adjust the size if, for example, a person has a high instep and a thin ankle. This is done by decreasing or adding loops. If you choose wool or wool blend yarn, then it is better to slightly increase the number of loops - by 1-2, otherwise after washing the product will shrink and it will be impossible to wear it.
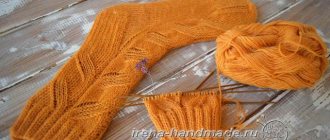
Knitted openwork socks
The previous master class is good because it teaches the basics of knitting a sock on five knitting needles, but for a masterpiece it is too simple. But these socks will become the pride of the needlewoman, and even a picky teenager will wear them with pleasure.
The yarn for such socks should not be thick, wool blend.
Video: Knitted openwork socks
We couldn’t miss another interesting option for knitting socks with openwork knitting. The peculiarity of this model is that they can be knitted with cotton or bamboo yarn and worn in the warm season.
Video: Knitting lace socks
And this is the herringbone pattern. If you have a young girl at home who loves trendy things, ankle boots with socks are at the height of fashion today. These socks are what you need for a fashionable look!
Video: Knitting socks with a herringbone pattern
Beautiful knitted socks with ornaments, patterns
Ethnic fashion has been at the peak of fashion for several years now and is not going to go down from there. We invite you to join this trend and knit beautiful socks with an ornament for yourself.
Video: Socks with jacquard. Knitting
Video: Interesting knitting - Icelandic socks
Video: Jacquard pattern “Deer”
And of course, for those who have mastered the technique, ornamental patterns for such socks.
Sock patterns
This section will be of interest to those who have already mastered the technique of knitting socks and are now looking for new solutions. A selection of detailed videos with the best and at the same time simple knitting for socks.
