Materials for weaving birch
All materials are available for every beginning beadworker.
You need to prepare:
- protective acrylic varnish;
- PVA glue;
- strong sewing threads;
- beads of several shades of green;
- pieces of copper and aluminum wire;
- acrylic paint set;
- a little alabaster.
It’s worth deciding what kind of birch there will be: winter or summer option
Leaves
Let's follow the instructions for creating birch from beads. You will have to perform several not very difficult steps:
- we cut thin wire into branches of different lengths (it is unlikely that you will find trees with branches of the same size in nature);
- string eight beads onto a small diameter wire, form a loop and scroll through it several times;
- we string eight more beads onto the same wire, twist them and attach them to the first leaf;
- We repeat the procedure until we get the required number of leaves;
- having received the desired number of leaves, twist the ends and if there is excess wire left, cut them off;
- We make the remaining branches in the same way.
Important! The number of birch branches must be a multiple of three!
The next stage is to prepare large branches from small twigs. To do this, take three small branches and twist them together.
To fully form the tree, it will be necessary to weave at least one and a half dozen branches for the top of the birch and more than fifty for the remaining branches.
Creating a tree according to a diagram
The work is painstaking, but the result is incredible beauty. The material is laid out so that the beads are separate from each other.
It often happens that beads fall apart and are difficult to find. You need to be extremely careful. Master class for beginners on how to make a birch tree from beads step by step:
- First, the novice master must weave small branches, their number is approximately 140 pieces. It is advisable to select wire with a diameter of 0.25 mm. Beads are strung on it, so you should collect the branches of the craft.
- Next, small loops are made with a pitch of 10 mm.
- If the number of loops is large, then the branches will be longer. The branches made are folded in half and twisted with strong thread. Birch branches have different sizes, so you need to make them the way they look in reality. The smallest branches will be at the top of the tree trunk.
- Then the 140 branches produced must be twisted. It is enough to take 3 branches and connect them together.
- Next you will need a piece of wire with a cross section of 1 mm. It is attached to the branches using threads. It is advisable to make windings of 25 mm. This manipulation is done with the remaining triple and double birch branches.
- To make large branches you will need wire with a diameter of 15 mm. Two branches should be connected to this wire with threads. Other branches should be attached a little lower. The interval is 20 mm. The branches should be of different lengths. It’s easier to put a photo of a birch tree in front of you and do the work from it.
- After this, the master forms the top of the birch from small branches. If there are not enough of them, then you can attach a few more pieces around the circumference of the top.
- To create a tree trunk you will need aluminum wire with a cross section of 4 mm. To make the trunk larger, it must be wrapped with thread. Instead of sewing threads, iris is better - these are a little thicker and more convenient to work with. Some craftsmen use floral tape.
A beaded birch tree is assembled with your own hands gradually, step by step.
The branches are secured from top to bottom, every 4-5 cm.
At the same time, the trunk gradually increases . To ensure that the product is not too small or large, it is advisable to make the height 20-25 cm - this is the best option.
How to make a birch tree from beads correctly
Master class for beginners on weaving birch beads
Thin birch branches symbolize tenderness and purity. And this is exactly the effect that needs to be achieved in wood weaving.
To create leaves you will need:
- beads of one number in three shades of green – 100 g of each color;
- copper beading wire 0.2 mm.
Operating procedure:
- mix beads of all shades in one container;
- string a large number of beads onto the wire, this will make it more convenient to work;
- count 7 beads in a row, twist the wire into a loop and twist the stem of the leaf 2 turns of the wire;
- the next leaf should be made at a distance of 1 cm from the previous one;
- bend the wire so that you get branches with 9, 11 or 15 loops.
The shortest ones will go to the top of the tree, so you need to prepare 10-12 of them. We will subsequently form the main branches from the longer ones. In total, you need to make about 150 twig blanks.
Assembling twigs
You will need:
- blanks for twigs;
- wire 0.25 mm;
- green floss threads.
Operating procedure:
- for a twig you need to take 2-3 thin pieces and twist the wire together along the entire length;
- cut 10 cm of wire 1 mm in diameter and form thicker branches;
- attach a piece of thick wire to the base of the branch (the place where the leaves join together) and wind it all together with floss;
- winding length – 2 cm.
First, connect the branches for the top. These are blanks with a number of loops equal to 9. Design all other blanks in this way. Try to combine blanks with different numbers of loops on one branch - this will make the tree look more natural.
Formation of large branches
You will need:
- wire with a diameter of 1.5 mm;
- assembled workpieces;
- green floss threads.
Operating procedure:
- take 2 branches, fold them together and attach a piece of wire;
- wind the branches with green thread;
- As you wind, add new branches so that you end up with 6-7 branches on a large branch.
Form all the large branches in this way, but do not try to make them the same. After this, we will proceed to the most interesting stage - assembling the whole tree.
Find out more about what you can make from beads with your own hands.
How to assemble a birch tree from beads
The birch trunk has that unique color and pattern, thanks to which the trees have become so recognizable. But first it needs to be formed and installed on a stand.
You will need:
- a piece of wire with a diameter of 5 mm and a length of 35 cm;
- a piece of aluminum wire to thicken the barrel;
- preparation of large branches;
- white iris threads for wrapping the trunk.
We assemble a birch tree from beads 25-27 cm high step by step:
- start from the top - take the shortest branches and wrap the trunk wire to them;
- At a distance of 5 cm, wrap the next branch;
- to thicken the barrel, you can additionally wrap it with aluminum wire;
- to form roots, bend the bottom of the wire to form roots and secure the base of the stand to them.
Design of the base and trunk of a birch tree
- Take the container in which the birch tree will be located and install the tree from it.
- Dilute alabaster with water and pour the tree roots into containers. Let the mixture dry thoroughly (about a day, depending on the thickness of the alabaster).
- For the branches and trunk you will need a mixture of alabaster and PVA glue in a 1:1 ratio. But first wrap the branches with cling film so as not to smear them in the solution. Dilute the mixture and apply it to all branches and the trunk with a flat brush. As soon as the first coat of coating has dried, apply grooves to the trunk with a sharp object. Let the mixture dry thoroughly for 12-14 hours. Cover the completely dry trunk with white paint 2 times. Let each layer dry.
- Apply black stripes with dotted strokes using the end of the brush. Paint and decorate the tree base stand. Straighten the branches and enjoy the finished work.
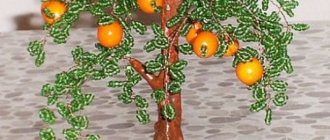
How to weave an autumn birch tree from beads
Trees painted with autumn colors are especially beautiful. Yellow, red, orange leaves are amazing in their diversity. Let's try to weave an autumn birch tree according to a proven pattern.
To work you will need:
- transparent beads of yellow, golden and orange shades, 70 g each;
- copper wire.
Start working using the loop technique, stringing beads in random order. Continue working according to the general scheme and design the stand using the appropriate technique.
A brighter and more noticeable tree will be made from orange opaque beads.
How to weave a winter birch tree from beads with your own hands
Winter trees fascinate with their frozen beauty. Not in vain, because poets love to sing about winter birches. Let's try to weave a winter tree.
Thin branches of winter birch without leaves with a frost effect
You will need:
- white, silver beads and transparent glass beads - 70 g each;
- silver wire for weaving with a diameter of 0.2 mm.
Operating procedure:
- cut 50 cm of wire;
- string 10-12 beads onto the wire in random order;
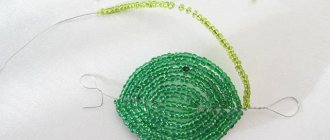
- move the beads from the middle of the wire, wrap one end around the last bead and thread it through all the beads in the reverse order, as shown in the photo;
- separate one end of the wire and string 6-8 beads onto it and also wrap the end of the wire in the reverse order;
- continue weaving until a beautiful branch is formed;
- The number of beads in each branch can be different to make the tree look natural.
Make blanks of 100-120 branches. Continue working according to the general scheme. But to connect, use only white wire and white threads (you can use nylon threads for sewing shoes).
You can also decorate a tree using the loop weaving technique. To do this, use white opaque beads and copper wire.
The symbol of next year - a beaded dog - will decorate your holiday tree.
Step-by-step master class on decorating a base for birch from beads (with photo)
The same tree in different designs looks unique and original. Let's consider several interesting design options.
The base of the winter birch can be sprinkled with decorative sand. But first coat the base with glue. Place silver microbeads on top of the sand:
The base of a summer birch tree can be decorated with natural pebbles or small mushrooms can be made from stones:
You can use artificial moss for decoration:
An autumn tree will look beautiful surrounded by small pieces of amber or beads imitating amber.
Beaded jewelry is amazingly beautiful, and a beaded lariat is suitable for everyday life and holidays.