The complexity of bead embroidery on clothing
Bead embroidery on clothing is no different in complexity from cross stitch. A needlewoman may encounter the following problems:
- Deformation and sagging of fabric . If the fabric is very thin or the design is planned to be large in size, it is worth placing interlining under it.
- Errors in choosing colors . Beads should be arranged by color in a special organizer. This will also speed up the process of putting beads on the needle.
- There weren't enough beads . Beads should be purchased with a small reserve. If the material runs out during the process, you will have to buy more of it and face some discrepancies in shades between products from different batches.
The needlewoman's workplace should be well organized. This will ensure the convenience of the process and will allow you not to be distracted from embroidery.
Selecting a pattern and preparing materials
There are many options for patterns for decorating clothes. These can be folk motifs, ornaments, intricate fantasy patterns, as well as various plot images. The main thing is that the design matches the style of the item and matches it in density. Massive heavy embroidery will be out of place on a light chiffon dress, just as a small beaded flower will be lost on a thick jacket. The wrong choice will not make things better.
Is the combination of sketch and thing important?
Not really
Preparing for bead embroidery on clothes involves choosing the right tools. Poor quality or incorrectly selected materials will negate all efforts.
Beads
Japanese products take first place in terms of quality. Next come Czech and Taiwanese. The beads are numbered by size. The smaller it is, the higher its number will be. Experienced needlewomen believe that the best option is 11.
- Beads . Round beads that can be calibrated or uncalibrated. In the first case, all the beads are of equal size, which allows you to create neat works. Uncalibrated beads can be used when the embroidery is done somewhat carelessly.
- Bugle beads . Glass tubes, the length of which can be from 3 to 25 mm.
- Felling . The tubes are the same as glass beads, but their length does not exceed 2 mm.
Threads
To sew beads to fabric, thin and at the same time strong threads . Nylon numbers 33 and 50 are considered optimal. You can also use polyester threads, cotton-lavsan and linen-lavsan, but they must be taken in 2 threads. The color of the thread and the fabric of the clothing must be the same so that it does not distract attention from the beads and does not make the design untidy.
Needles
For embroidery, you should use thin needles specifically designed for beads . They easily pass through the bead itself and through the base. The thread in the eye of the needle should pass easily and be no thicker, otherwise it will fray, which will complicate the embroidery.
Felt decoration
Finally it’s time to talk about appliqués on clothes for children. Kids also want to have fashionable stripes, just like their mother’s! You can also take a ready-made felt applique, or you can make it yourself.
We are for the second option, so we armed ourselves with the necessary materials:
- Felt;
- The clothes themselves that you will decorate;
- Scissors;
- Threads and needles.
First, cut out paper templates for all the parts.
Then we transfer the parts to felt and cut them out.
Pay attention to the advice! To prevent the felt from changing shape, pin the template to a piece of felt with a pin.
The next step is not mandatory, rather aesthetic. We have to make sure that all the elements fit together.
Once we're convinced, let's get started. First we sew together the elements of Minnie Mouse's face. This is best done on a sewing machine, but you can also do it by hand.
Related article: Bells made from plastic bottles for the garden: master class with photos
Now we need to liven up the mouse's face a little. For this we use black threads or floss threads.
Next, we sew the muzzle to the remaining, black part of Minnie’s muzzle.
Let's finish with the details. On the bow, carefully mark the fold lines of the fabric with chalk. Then we will walk along these lines with black threads.
And finally, the final stage. Sew a felt figure to a blouse or dress.
We change the threads to match the tone of the felt so that the overall picture looks beautiful and aesthetically pleasing.
Sew on the bow. And our felt patch is ready!
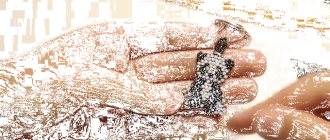
Methods for sewing beads
When embroidering on clothing, it is important to sew the beads onto the fabric so that the design ultimately does not move and remains attractive after finishing the work and after washing.
- Forward the needle. With this method, the needle is brought out from the wrong side onto the face, after that a bead is strung on it and then inserted into the fabric to stretch it to the wrong side at a distance from the first puncture equal to the width of the bead.
- stalked. This way you can secure the beads as firmly as possible. The thread is fixed in the fabric, brought to the front side, a bead is strung on it and a needle is inserted into the fabric immediately behind the bead. Next, the needle is again brought to the front side behind the already sewn bead and, having passed the needle through it, the second one is sewn. Then proceed in the same way. Thus, it turns out that each bead is held not by one, but by two stitches.
- Lowercase. To secure the beads in this way, it is necessary to string the beads onto a needle already fixed in the fabric and insert the needle immediately behind the bead. Again, bring the needle to the front side of the fabric at such a distance from the first bead that the next one fits there. Further attachment is carried out in the same way.
Editorial Voice
Matryona
Fan of embroidery and sewing
Ask a Question
With any type of seam, care must be taken to ensure that the thread does not overtighten the fabric . If this happens, a beautiful pattern will not work out, the item will be damaged and all the embroidery will have to be redone.
Transferring the pattern to fabric
To make the pattern even and neat, it is transferred to the fabric. To avoid drawing on the thing itself, tracing paper . It is placed on the embroidery chart and the pattern is copied. Next, the tracing paper is pinned to the item and embroidered on it; when the work is completed, it is pulled out.
If for some reason you don’t want to embroider through a pattern on tracing paper, the outline is applied to the fabric itself, but you need to know for sure that it will wash off from it. It is best to use a special marker that dissolves in cold water.
If you are working on dark fabric, you can transfer the pattern onto it using chalk . Holes are made on the tracing paper along the contour of the design, and the workpiece is fixed to the fabric. The chalk is ground into powder and rubbed through the holes.
Features of embroidery on different clothes
The location of the pattern and its density changes depending on what clothing it will be placed on.
Tops and T-shirts are usually made from knitted fabric, so heavy, voluminous patterns will not work - the fabric will sag and become deformed. It’s better to stick to light, small drawings. When working, you need to monitor the thread tension. You can place a piece of thicker fabric on the inside to make the embroidery even.
Embroidery on a dress allows you to show maximum imagination. The bodice and skirt can be embroidered. The pattern can be made in the same color as the fabric of the dress itself, or in a contrasting color. It all depends on personal preferences and the style of the item you want to decorate. Beads are chosen depending on the fabric - on thick dresses you can use large beads and heavy glass beads. For light translucent fabrics, it is better to choose high-quality plastic small beads.
on jeans , since the dense material allows you to use a wide variety of beads and beads. The choice of drawings is unlimited. Contrasting beads are sometimes simply sewn to the fabric in a chaotic manner. Bead embroidery can be done on a separate piece of denim, the edges of which are terry. Then such an applique is attached directly to the clothing. Often beaded patterns on jeans are complemented with sequins.
interesting ideas and video master classes
Every woman wants to look beautiful. But, unfortunately, not everyone can afford to purchase exclusive items at exorbitant prices. There is a wonderful way out of this situation: make an original thing from your old clothes. If you love and know how to do things with your own hands, you will definitely like the clothing decor ideas we offer below.
With these tips, you will transform your wardrobe beyond recognition and get the opportunity to show off unique things that no one else has. In addition, it will cost you exactly the same amount of money as consumables such as beads or buttons cost.
Unusual coloring
To decorate your own clothes, you don’t have to be a fashion designer or take sewing courses. If you have sewn on a button at least once, this is quite enough. And in some cases even this is not required. Here's an example:
To create such a T-shirt, you will need, in fact, a T-shirt itself, or a T-shirt, or a top, at your discretion. Marker or several different colors and alcohol to create streaks.
We put a sheet of cardboard in the middle, which will protect the second side of the T-shirt from printing the pattern. We draw a pattern with a marker. Then we take a syringe with alcohol and add 5-6 drops of the pattern. The alcohol will cause the pattern to float, leaving behind interesting stains.
To secure the design, you can iron the T-shirt with a hot iron after application. Or rinse in warm water with vinegar and salt. After several washes, the pattern will, of course, fade, but for some time you will be able to show off in exclusive clothes. And there it will be possible to make a new T-shirt.
Decorating used clothes
When updating old things, elements such as buttons, pins, lace, etc. are often used. When using these improvised things, this is what DIY clothing decoration can look like, photo:
Decorating clothes with buttons, especially for children, gives excellent results. Somehow they combine very well:
Clothing trimmed with chains looks very interesting. This decoration will refresh your usual blouse and add some charm and exclusivity.
Decor of knitted items
Knitted items can also be embellished beyond recognition. The decoration of knitted clothes is most successfully done using beads or seed beads. The latter will add festiveness and brightness to any, even the most everyday blouse, and after the alteration you will not recognize your clothes.
Today, beaded decor is in great fashion; you just have to look at any boutique or store to see this. In addition to beads, you can use beads, sequins and glass beads. You can combine this decoration with others, for example, ribbons, bows or embroidery. Or you can not embroider the finished product, but knit it directly with beads. But this is another topic for a completely different article.
Before you start embroidering an item, you need to first figure out how the clothes should look as a result. It is best to lay out the beads on the clothes and mark the outline first with chalk, and then baste along this place with a colored, visible thread. It is better to select beads according to the color of the item; the thread with which it will be sewn should not stand out from the general background. When stitching, try to fasten the thread more often. Then, if the thread accidentally breaks somewhere, the losses will be small.
You can also make an applique from beads.
There are two options for this type of decoration. Or embroider on the clothing itself, but make the distance between the beads very small. Or make this design, following the same rule, on a separate fabric, and then sew it to the item.
In this video you can see a few more ideas for decorating old, familiar and rather boring things.
webdiana.ru
Pattern Schemes
Simple patterns look good on T-shirts and tops. They use beads, bugles (rectangular badges) and beads (large round badges). It is better to sew beads using a stem stitch. The curls of the pattern should be stitched very tightly.
A bunch of grapes looks good on clothes made from different types of fabrics, including denim.
Beads and beads are used for work. The drawing can be monochrome or in color. Such bead embroidery is often used on a dress made of thick fabric.
Learning patterns for beginners
Among the many different patterns, there are those that are best for beginners to start working with. We invite you to consider some schemes to decide which one is more suitable for your work.
Floral ornament
This is perhaps the simplest pattern that you can use at the beginning of your activity. This pattern is easy to place on any accessories or on clothing, such as a blouse or dress. A sleeve, pocket or chest part of clothing will look stylish. In addition to a needle and thread and scissors, you will also need black matte beads, matte white beads, and also golden transparent beads.
A scattering of stars
The next ornament resembles a scattering of stars in the night sky. Curved stripes are embroidered with small beads of different shapes. Larger glass pieces should be placed closer to the central part. Basically, craftswomen in this case use the “forward needle” stitch to secure the base material. You can diversify the embroidery with single splashes of silver beads. In addition to the main and clearly defined lines of the pattern, beads can even be sewn along the perimeter of the product, as can be clearly seen in the photo of the finished work.
Read
All the magic of fairies in cross stitch patterns
This pattern can be applied to the surface of a wide skirt, which you can safely wear to any special evening or event. The design will look great if applied to one shoulder of a cocktail dress. This way you will visually extend the sleeve line. A space theme will decorate a jacket if it is embroidered in front with a slight transition to the back of the product. Use your imagination and you will see how your wardrobe will change before your eyes.
Fan for the Sultan
The combination of colored beads with silver sparkles gives the pattern such a bright and rainbow effect. Embroidery is done using the “forward needle” technique. The schematic drawing begins to be drawn up from the outer edge, gradually moving towards the central part. If you start embroidering from the center, the effect will be completely different. The drawing can be placed at any degree. It all depends on your taste and preferences.
Branch with golden flowers
This original branch is embroidered using the “forward needle” technique. In addition to beads, sparkles and glass beads are also used in the work. The stem must be decorated with an oblique stitch. It uses beads and sparkles. The side branches should also be embroidered with sequins with the addition of small pearls.
This image would look great along the edge of a jacket or on the sleeves of a shirt. Decorate the dress slightly below the waistline or decorate the entire hem beautifully. It’s worth considering your own decor options. If you are going to get married, then think about how golden embroidery in this pattern will look on a white wedding dress.