Probably everyone wants to invite and keep money in their life. It is believed that if there is a money tree in the house, then finances will certainly come and stay in it. To believe or not to believe in this is up to everyone to decide for themselves.
In the ancient Chinese teachings of Feng Shui, it is believed that this is how everything will be. It is enough to bring such a tree into the house and shake it. It would be a wonderful gift for a birthday or New Year.
It’s even better if you make a money tree from beads with your own hands. Then it is filled with the energy of the owner and the chances of attracting prosperity become greater. Even beginners can do this kind of work. This is exactly what we will talk about today.
Preparatory stage
Your tree can be of different sizes, depending on the amount of available materials. If you weave a composition consisting of ten branches and place ten coins on each of them, then this tree will truly become a powerful symbol of wealth.
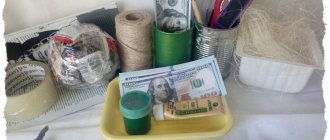
To create a symbolic tree you need to purchase the necessary material:
- beads in green shades (two, three types)
- wire of any color – 0.3mm-0.4mm
- thick wire for the barrel frame;
- gold coins (you can take decorative ones with ears or real ones by drilling a hole at the edge)
- red ribbon for tying the trunk
- pot
- chestnut tape
- acrylic paint with brushes
- plasticine
- gypsum
Loop weaving pattern
To make leaves, a loop weaving technique is used, follow this pattern. So, a piece of wire 30 cm long needs to be folded in half and put a penny on one end of the twig, lower it on the bend and twist the loop ten turns.
Next, string 5 beads onto either end of the wire (more is possible, for example, up to 9 beads - experiment), lower it to the base of the coin, form a loop and scroll five times. We repeat the same loop process with beads with the second end of the twig.
Then the wire at the base of the leaves needs to be twisted three to five times. We continue to collect 5 beads on both ends of the wire, do not forget to twist the loop we made before we need to string the beads again. We form petals by alternating on a branch. We make five to seven such loops on a branch, more is possible, then the product will turn out branchy and fluffy.
Depending on the number of coins you purchased, adjust the number of branches. For example, weave from 50 to 100 clusters with gold coins, or 50 branches with two on one element. We continue to create bunches, but without pennies. The work is painstaking and patient. Approximately one hundred simple branches need to be woven.
Branches made of beads for a small fluffy money tree.
Beaded money tree: master class with step-by-step photos
How to make a money tree from beads? DIY money tree made from coins and beads master class. To make a beautiful money tree from beads with your own hands, we hope our master class will help. To do this, we prepare green, blue and some yellow beads - about 80 grams in total.
Bead money tree step by step instructions. When using multi-colored beads, the crown of the tree will turn out to be more voluminous, realistic and will shimmer beautifully in the sun.
Mix all the beads in a container and begin stringing them onto thin copper wire (wire diameter - 0.3 - 0.45 mm). To speed up the process, you can use various devices, for example, an automatic bead stringer or a special spinning wheel. The more beads are put on the wire, the more entertaining and faster weaving from tree beads
, since you won’t have to be distracted by stringing each bead.
We begin weaving the buds, for which we retreat 6 - 10 cm from the end of the wire, make a loop of 10-12 beads. The base of the loop needs to be twisted several turns.
Close to the first loop, we make a second one, and subsequent loops - a total of 8-9 pieces, after which we twist the two ends of the wire together into a leg (leg length 4 - 5 cm).
From 80 grams of beads you get 63 small buds.
Now we take three ready-made buds and twist them together to make a large bunch.
There will be 21 bunches in total.
To give the bundle rigidity, using floral tape, we wrap a thick (1 mm) copper wire, 8 - 10 cm long, to the stem.
We will leave 5 of these branches single - they will become the crown and the smallest branches of our money tree. Next, we make larger branches, for which we fasten 2 small branches together using floral tape. In total you need to make three such branches.
We make the largest three branches in a similar way, only now we fasten together 3 small branches.
For the crown, all that remains is to prepare the money petals. To do this, we weave a frame from copper wire of medium thickness (0.6 - 0.8 mm): three small loops on a common leg. We bend the loops and attach the coins to them with hot glue. We wrap the base with floral tape.
As a result, you should get 5 branches of coins: 6 single, 3 double and 3 triple branches.
All that remains is to assemble a money tree from beads with your own hands
. We take a thick (2 - 4 mm) aluminum wire and attach 3 single branches to its edge with floral tape.
Gradually add the remaining single branches and some branches with coins.
Next, we attach all the remaining branches in random order.
We thicken the tree trunk with any available material (bandages, toilet paper).
We fix the trunk with floral tape and bend the ends of the wire for stability.
After the bead tree is assembled, you need to find a suitable pot for it. You can also easily make it yourself: to do this, cut off the bottom of the plastic packaging (sour cream or yogurt), attach double-sided tape to the cutting line, and paint everything with acrylic paint. After the paint has dried, all that remains is to decorate the pot with hot glue and glitter.
We give the branches of the tree and its trunk the shape that will look most interesting (we bend the wire whimsically). Place the tree in a pot, fill it with a mixture of alabaster (2 parts) and PVA (1 part) and water. Let it dry for a day.
Now the money bead tree stands firmly in the pot and all that remains is to cover its branches and trunk with a mixture of alabaster and PVA.
After the mixture has dried, cover the trunk and branches of the tree with acrylic paint. Without waiting for the paint to dry, we decorate the bark of the money tree - sprinkle the trunk with glitter, balls, and you can add a little beads.
After drying, the tree is ready.
PS
I almost forgot. Just recently I accidentally came across an interesting online store https://zolushka-best.ru/category/businy-so-strazami/ in search of Shambhala beads and there I found not only beautiful beads, but also beads and other kinds of beads and cool accessories . The store has a good selection, there is plenty to choose from. I think it will be interesting for needlewomen. Christmas tree made of beads, master class with step-by-step photos. Beadwork, master class with step-by-step photos allows you to find hobby options for painstaking people. Beaded flowers master class with step-by-step photos will be a good gift for loved ones. (derevo iz bisera).
I wish you creative success!
Save
Save
Beaded branches
Now it is especially important to correctly assemble the finished elements into groups, then combine them into one whole tree.
We take one bunch with a penny and intertwine it with two branches without a coin. Here it is permissible to fantasize; you can combine the usual four elements of twigs with a branch. You will get five branches in one bouquet. It is necessary to twist them together to the very bottom of the wire branches. Approximately it will be possible to form from 25 to 75 volumetric branches, depending on the number of connected clusters.
At the end of the process of assembling the branches, you will need to wrap each bunch with tape.
Shaping the trunk
- Now we need to take a thick wire (aluminum) 10–15 cm long and connect it to the fluffy branches, applying two or three bunches and wrapping them with sticky material.
2. Thick wire can be wrapped with tape before use, thereby adding volume to the tree crown.
3. Thus, having formed large clusters, paint with chestnut paint, then varnish.
4. All that remains is to connect the resulting beaded branches into one whole. To do this, take a long elastic wire 30 cm long and alternately apply each bunch to the holder, carefully and tightly wrap it with tape, and finally cover it with paint and varnish and wait until it dries completely.
5. Pay attention to how the support for the money tree below is made from wire. Try to use pliers to bend the bottom ends of the thick wire 90° into a loop to form a stand.
6. In this master class, the crown is not plastered, but only painted. I am sure that your tree will be lush, branched and stable.
7. Plant a money tree in a pot.
8. In order to make the craft stable, you will need plasticine and gypsum mortar.
9. We secure the decorated creation in the pot with plasticine so that it does not wobble.
10. Then you need to prepare a solution from gypsum (mix gypsum with a small amount of water, bring it to a sour cream consistency) and pour it over it. After six hours of hardening of the plaster, you can begin decorating the composition.
miniature tree
You can start your first lesson on creating a money tree from beads and coins with this miniature craft. For this you need the following materials :
green beads;- a coil of thin wire;
- a piece of thick wire;
- spool of brown thread;
- masking tape;
- plaster or alabaster;
- decorative container for stand;
- tube of universal glue.
The size of the craft can vary from very small to larger specimens. First, leaves and twigs are woven. To do this, you need to take a thin wire with a length of 50 cm or more. To create a small craft, you need to twist a thin wire into a loop with 8 beads strung on it. A second loop of 16 beads is placed around the first loop. Both loops should fit snugly against each other. This is how the leaf is formed.
The ends of the wire at the base of the leaf are twisted into fifteen turns. This will need to be done with all the leaves so that they are the same size. Every three leaves are connected into branches; in total, 70 branches are required to be woven. In nine of them, one of the sheets is replaced with a coin, attached through a hole drilled in it.
The branches are connected in 14 pieces into 5 bundles, which are attached to the trunk from thick wire. A section of the trunk approximately 6 centimeters long is wrapped with brown thread and masking tape using glue. Bunches of branches are fastened together.
The trunk of the finished tree is placed in a decorative stand. A mixture of plaster or alabaster prepared according to the instructions on the package is laid out on the bottom of the stand. When the plaster hardens, the support is decorated with glue with decorative elements as desired. It could be beads, coins, colored pebbles. The work is completed by carefully straightening the branches with foliage with your hands so that they are placed evenly. The master class is over. The craft is ready.
Money tree decoration made of beads
There are different design ideas. I will offer master methods, and you yourself will choose the one that suits you.
- The stand can be decorated with coins and beads glued with a glue gun. Pre-paint the hardened plaster mortar dark. The trunk is tied with a red ribbon, symbolizing wealth and prosperity.
- You can decorate it in gold by gluing a decorative element to the side of the pot or gluing some figurine.
- Most often they use coins scattered around the tree, glued and varnished on top.
When the product is ready, it is better to place it on the southeast side, attracting monetary energy. In order for well-being to increase, it is advised to create conditions for growth according to Feng Shui - attach to it a picture of a waterfall or any other picture of water that carries the meaning of watering. Now all that remains is to wait and watch the material growth of the house and see for yourself the mystery of Chinese culture.
There are many options for making a money composition from beads. We make a lot of branches in a loop at the beginning, and then glue coins to the petals using a glue gun. For those who want to learn about another wonderful structure with coins, a lesson is provided. In this master class, gold beads are used to create a lush tree. The decor consists of steps on a stand (with a detailed description), as well as strewn coins. The composition captivates with its appearance. Success in creative work!
How to make a money tree from beads
“Our answer to crises” is a money tree made of beads, which is not so difficult to make with your own hands. Many people seriously believe that if you weave such a cute little thing with your own hands - in accordance with all the recommendations that the master class gives (and not buy it in some souvenir shop), the house will definitely very soon become a full cup, and luck will never turn away from it again owners.
Also, experts in the secrets of Feng Shui advise gently shaking the tree from time to time so that real money - in the form of real coins and higher denomination bills - does not forget to fall on the owner of the “magical” craft.
How many coins are on the money tree?
The master class, during which you will have to make a money tree from beads and coins with your own hands, will take several hours - the work is quite painstaking, because the craft consists of many small parts. To work you will need:
- some copper wire with a diameter of 0.44 mm (you can make crown branches from it),
- aluminum wire with a diameter of 3 mm (it is suitable for weaving a trunk),
- one and a half dozen coins (this can be either Russian money of the same denomination, or assorted “trophies” brought from foreign tourist trips).
In addition, you will need approximately 80 grams of green (but certainly in different shades) beads, colored floral ribbons and finishing plaster.
To conduct a master class, the result of which will be a homemade tree made of beads, you will also need a couple of brushes - smaller and larger, double-sided tape, as well as a set of acrylic paints for painting the tree trunk. Whether or not to sketch what a future money tree made of beads and coins will look like is everyone’s choice, but having a project, of course, simplifies the process.
Master class begins: mixing beads
RECOMMENDED: Scorpio: stone-talisman of success
Before you start weaving, pour the beads into a large plate and mix thoroughly. The first thing you can do is to form the branches of the tree. The technology is simple: twelve beads are strung on a wire, after which they are folded into a circle and fixed. To secure it, just a couple of revolutions around its axis are enough.
When one loop is ready, you can make a new one, which is performed according to the pattern already described. In total, one branch of the future tree should have eight loops, which are closely adjacent to each other. The resulting loops must subsequently be secured together - for reliability, you need to twist the wire no less than fifteen turns.
How to make a crown with your own hands...
One branch is ready. But you shouldn’t relax, because the master class assumes that you will have to weave a lot of such branches for a long time - as many as sixty pieces.
Next, you will have to make a frame for the branches with coins with your own hands. The sequence is as follows: weave the wire, ending it with a loop at the end. And then use glue to secure the coins on this loop. There will be fifteen such branches.
When the process of gluing coins is completed, it will be possible to form the crown of the future tree - weave it, folding and fixing five pieces together - one branch with a coin plus four beads. As a result, you should get fifteen unique “money” bouquets, from which you will then make the main branches for the crown.
Secrets of the “tree bark”
Now for the master class you will need thick copper wire, to which three branches are attached using insulating tape. After this, the floral tape is covered with paint. The tree of beads and coins is almost ready - all that remains is to connect all the resulting tangles of branches into one whole. Secure them again with tape, which will then be covered with paint.
WE RECOMMEND: Using runes of wealth and prosperity
The finished tree can be placed in a pot and securely fixed there. The base is glued to plasticine, and then again filled with finishing plaster with your own hands. It is best to make textured money tree bark from it, cutting strips along the dried material.
After this, the master class will have to be interrupted for some time: the homemade magic tree must dry before further operations.
Only after this can it be coated with paint. As finishing touches, all that remains is to straighten the branches and align the placement of the coins so that everything is smooth and neat.
And the leaves can be not only green...
The process of creating a tree with your own hands, of course, can be changed and improved by adding some of your own ideas, including revolutionary ones. For example…
- You can make a money tree from beads with a domestic flavor. To do this, it is enough to paint the trunk with white paint with black stripes - to resemble the most famous Russian birch tree.
- A money tree can easily become a rowan tree if you add some red beads to the green beads that make up the branches.
- There is no point in focusing on green beads at all. As an option, you can make a money tree in orange and yellow colors, which represent wealth in the countries of Southeast Asia. This is where the tradition of making money trees with your own hands came from.
- A master class on creating a tree can be done this way: use pistachio shells instead of coins. Using a drill, make a small hole in each shell, secure the nut to a wire, and then cover it with gold-plated paint. With this option, coins can be used in small quantities, a few pieces beautifully arranged at the base of the roots.