Beaded rope
From this article you will learn how to crochet a rope of beads using the method of embroidering beads around a rope. Strands of beads are very beautifully combined as a separate part of the jewelry, or as a set of necklaces with a bracelet or earrings.
We crochet a rope of beads
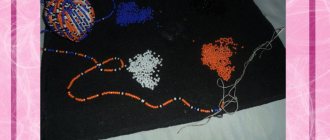
So, what do you need for a fantastic bead strand:
- yarn for the warp (usually Iris threads, I have 3 spools);
- beads of different colors;
- accessories: fastener, cones, rings, nails;
- crochet hook 0.8-1.0mm;
- bead needle;
- scheme.
It is better to use a small cross stitch pattern. To ensure that the pattern on the rope is even, but in no case diagonal (like a brick), the rope must be knitted in single crochet stitches. Make a drawing in jbead or (CrochetBeadPaint) and print it.
Determine the length of the rope experimentally - tie a sample, calculate the number of repeats of the pattern. In this case, you need 14 repeats to get beads 45cm long.
String the beads according to the diagram. Knit 15 air loops, connect with a ring. Continue knitting 3 rows of single crochets in the round (each row has 15 double crochets = pattern width is 15 beads).
Now let's start tying beads.
Hook the hook onto both walls of the st.b.n. of the previous row, pull out the loop. Move the bead close to the resulting loop, knit both loops together.
Repeat until you run out of beads.
If you missed a bead while casting beads, no problem! Tie the “empty” st.b.n. and sew on the desired bead after finishing the work.
Excess/irregular beads can be carefully split with pliers. Be careful not to damage the thread.
When all the beads are knitted, make 3 more rows of dc.
We tuck the ponytails and attach the accessories.
We put a bead on a jewelry stud, tuck it inside the strand and sew up the edge. We put on the cone, use pliers to make a loop and attach the fastener.
That's all, you've got some gorgeous beads!
Embroidering a strand of beads on a rope - African technique
If it’s difficult for you to knit according to patterns or crochet a rope of beads, you can make a rope with a pattern using African technique. That is, embroider with beads on a rope.
So, for embroidery you will need a rope, preferably in medium-sized cotton braid, approximately 5-8 mm in diameter.
The thread must be secured in the rope with a knot or small stitches in different directions, after putting several beads on the thread and twisting it around the rope. It is better to place the beads on the rope tightly, but do not pull the thread too tightly. Thread a needle into the rope after the last bead cast on, and bring it out 3-4 beads as you go backwards.
Make a short fixing stitch across the bead bottom, bring the needle further, a few more beads back, again a fixing stitch, etc.
- When all the turns have been grabbed, we bring the needle to the place where we finished wrapping, a couple of beads before the end is low.
- We pass the needle forward as we work into the last two collected beads and string a new portion of beads.
We again wrap the rope around the collected beads, fasten the turns, etc., until we have embroidered the entire rope.
How many beads to string, choose for yourself, sometimes a couple of turns is enough, sometimes more, the fewer turns at a time and the more often the fastening, the more accurate the result, but it takes a long time to embroider with too short turns, find your own reasonable compromise.
For embroidery, it is better to choose ropes with a cotton braid; the core of the rope is cut off at the edges by a couple of cm and the braid is tucked inside the rope; then it is easy to sew any fastener to the edge.
Knitting a thick rope of beads video master class
DIY bead strand with diagrams, photos and videos
A string of beads is perhaps one of the most spectacular types of beading, which is most often used to create jewelry. There are several techniques for weaving such a rope, and decide which one to prefer after you have worked on each of them.
Thanks to our recommendations and master classes, you will be able to master this type of weaving and create original jewelry and accessories with your own hands.
How to do it right
To begin with, we suggest you master several techniques for weaving a rope according to the following patterns:
- a simple twisted rope for four beads;
- strand woven with six beads;
Schemes for weaving jewelry with beads
In this collection you will find photos and diagrams of weaving jewelry with a rope of beads:
- The photo shows a simple pattern of weaving a mosaic rope, with which you can make a simple but effective decoration. For those who are just starting to study beading techniques, we recommend starting with this option.
This is interesting: Scorpion pattern made from beads
- In the photo you see a simple weaving pattern for a plain bracelet with a lizard pattern. Please note that the braid consists of 15 beads, so choose the smallest beads for the bracelet.
- This necklace with a four-color ornament is made in the form of a rope with 6 beads. We recommend making a bracelet with the same ornament as part of the set.
- This pattern will allow you to create a very impressive and bright necklace with 20 beads with a rose pattern.
- If you are a fan of the Louis Vuitton brand, then you will definitely like the necklace and bracelet with its logos. Use this strand pattern for 12 beads to weave both a necklace and a bracelet, which together will make a wonderful set. Be sure to use beads in signature colors, as shown in the photo.
- And this bright pattern of weaving a rope with dragons in the Chinese style will help you create beautiful jewelry with oriental motifs.
- The photo shows a diagram of weaving a rope with a snake ornament, which is best woven from the smallest size beads.
- If you are a fan of the elegant style in the spirit of Chanel, then the Chicken Foot weave pattern will allow you to create a beautiful set of jewelry that will definitely fit into your wardrobe.
- If you are a fan of ethnic ornaments, then we recommend using this beautiful weaving pattern, which uses eight different shades of beads.
- This delicate white and pink necklace with a Sakura ornament can be made by weaving a rope of ten beads. A bracelet with the same ornament will complement the ensemble and highlight your sophisticated style.
- This black and white necklace, woven with a strand of beads, will fit perfectly into any look and will be an excellent addition to it. Determine the length of the necklace yourself, based on your appearance and personal preferences.
- And this chic braid is woven in combination with small beads. Use the scheme and try to repeat it in other shades.
Video with master class lessons
In this collection of videos you will find many useful lessons that will teach you how to weave strands of beads using various techniques.
- Video for beginners about crocheted bead strand patterns.
- Video with a master class lesson on bead weaving for beginners, in which you will learn how to make a rope.
- Video with a lesson on drawing up patterns and weaving a rope of beads.
- In this video you will learn how to weave a square rope of beads.
- Video with a detailed description of the weaving pattern of a beaded rope for 10 beads.
- Video with a diagram of weaving a rope of beads with a mosaic pattern without using a hook.
- Video tutorial on how to weave a beaded necklace using a square strand of beads.
- Video on how to make a knitted rope using the example of several beaded jewelry.
- Video with a master class lesson that explains in detail the pattern of crocheting thick strands of beads with ornaments.
- In this video you will learn how to weave an American or twisted rope from beads.
- In this video you will see how you can weave a beautiful rose from beads, which can become one of the elements of your decoration.
- If you want to decorate your rope with flowers, we suggest watching this video to learn how to make an orchid from beads.
- In this collection of photos you will find a lot of ideas that will tell you how to embroider original and very beautiful jewelry with beads.
- A video with a selection of photos of bead strands and a description of their weaving pattern.
Master class on reading patterns of knitted strands of beads
Bead strands are very popular today. A harness is a braided cord made with openwork or dense weaving. It can be of different thickness.
- This product was made by needlewomen back in the old days, making a flat ribbon, which was then sewn into a cord.
- Today there are many types of harnesses: square, spiral, with outer braid...
- This popularity of plaits is explained by their versatility: a plait can be worn as an independent decoration, or used as a basis for other types of jewelry (pendants, chains, necklaces).
How to do it right
To begin with, we suggest you master several techniques for weaving a rope according to the following patterns:
- a simple twisted rope for four beads;
- strand woven with six beads;
- tetrahedral harness;
- square harness;
- spiral tourniquet;
- crocheted harness;
Schemes for weaving jewelry with beads
In this collection you will find photos and diagrams of weaving jewelry with a rope of beads:
- The photo shows a simple pattern of weaving a mosaic rope, with which you can make a simple but effective decoration. For those who are just starting to study beading techniques, we recommend starting with this option.
- In the photo you see a simple weaving pattern for a plain bracelet with a lizard pattern. Please note that the braid consists of 15 beads, so choose the smallest beads for the bracelet.
- This necklace with a four-color ornament is made in the form of a rope with 6 beads. We recommend making a bracelet with the same ornament as part of the set.
- This pattern will allow you to create a very impressive and bright necklace with 20 beads with a rose pattern.
- If you are a fan of the Louis Vuitton brand, then you will definitely like the necklace and bracelet with its logos. Use this strand pattern for 12 beads to weave both a necklace and a bracelet, which together will make a wonderful set. Be sure to use beads in signature colors, as shown in the photo.
- And this bright pattern of weaving a rope with dragons in the Chinese style will help you create beautiful jewelry with oriental motifs.
- The photo shows a diagram of weaving a rope with a snake ornament, which is best woven from the smallest size beads.
- If you are a fan of the elegant style in the spirit of Chanel, then the Chicken Foot weave pattern will allow you to create a beautiful set of jewelry that will definitely fit into your wardrobe.
- If you are a fan of ethnic ornaments, then we recommend using this beautiful weaving pattern, which uses eight different shades of beads.
- This delicate white and pink necklace with a Sakura ornament can be made by weaving a rope of ten beads. A bracelet with the same ornament will complement the ensemble and highlight your sophisticated style.
- This black and white necklace, woven with a strand of beads, will fit perfectly into any look and will be an excellent addition to it. Determine the length of the necklace yourself, based on your appearance and personal preferences.
- And this chic braid is woven in combination with small beads. Use the scheme and try to repeat it in other shades.
Master class - Bead strand for beginners
Watch the master class and you will learn how to knit a rope of beads with your own hands. On the basis of this cord you can knit a bracelet, necklace or lariat.
Beaded rope
This lesson is aimed at needlewomen who are taking their first steps in weaving beaded ropes. Today we will learn how to knit a thin braid in a half-stitch, using the example of a “Rainbow” bracelet. We knit in a circle (in a spiral), without a lifting loop.
For work we will need:
- Czech beads (color of your choice);
- Bead needle size 12 (convenient for collecting beads);
- Knitting threads CANARIAS or MICRON 20S/3 (you can also use MICRON 20S/2 threads, IRIS threads);
- Crochet hook;
- Pins;
- Connecting rings;
- Limit switches;
- Toggle lock;
- Scissors;
- Wire cutters;
- Round nose pliers.
First, you need to put beads on the thread (on which we will knit). To do this, we make an adapter: take a piece of monofilament 15-20 cm, fold it in half and thread it into the needle. On one side there should be a loop - we thread the knitting thread into it.
Now we collect beads: one bead of each color (and so on in a circle).
Since I was making a children's bracelet, I collected about 1 meter of beads per thread.
- After the beads are collected, we remove the adapter to the side (it can be reused).
- Let's start knitting
- Take the thread with the short end towards you
- grab the index finger
- affairs one turn around the ring finger
pinch the thread with your little finger. This is done to ensure that the thread does not run too freely; a certain tension is necessary (if it is not convenient to hold the thread this way, you cannot create tension - you can simply hold the thread with your knees and set the thread tension that way).
- We place the hook under the thread on the index finger
- make a turnover
- You should get a twisted loop.
- We pick up the thread
- and pull it through the twisted loop.
- The twisted loop is pulled into a knot and there is one loop on the hook.
- Again we pick up the thread and pull it through the loop.
- In total, 7 such loops (air loops) need to be made, since we will knit 7 beads in a circle.
This is how you should get a braid of seven air loops. The loop on the hook does not count.
- We insert the hook into the upper part of the first air loop.
- Now there are two loops on the hook, pick up the thread
- and pull it through both loops, thereby closing the braid into a ring.
- To begin with, we will knit several rows without beads to form a “tail”, which will be more convenient for holding the work and attaching accessories in the future.
- Insert the hook into the next slice
- Now they (slices) are on the outside of the ring. There are two loops on the hook again, pick up the thread
- and pull it through both loops.
- And again we insert the hook into the next slice.
- This, in fact, is the method of knitting with a half-staff.
- So we knit 2-3 rows.
- There is now a ponytail and the braid is still visible.
- Let's start knitting with beads
- Move the first 7 beads closer to the work.
- Place the hook under the next bead and push the first bead tightly
- and pick up the thread behind the bead.
Pull the thread through both loops. This is what the first knitted bead looks like.
- We repeat the procedure.
- And now two beads have already been knitted.
- We do the same with the third bead.
- We knit the entire first row in this way.
- This is what the first row looks like from the side.
- The first row is connected.
- We begin to knit the second row
Now we will insert the hook into the segment on which the bead of the previous row is, i.e. under the bead.
- An important point: when we inserted the hook under the bead, we put the bead behind the hook.
- Then we move the bead and make sure that it lies on top of the previous row.
- We pick up the thread behind the bead
- and pull it through both loops.
- Place the hook under the next bead, hold the bead by the hook, move the next bead and place it on top of the beads of the first row
- We pick up the thread behind the bead and pull it through both loops.
- This is what two knitted beads of the second row look like.
- We continue to knit in the same way.
- Second row from top
- and from the side.
- It can be seen that the beads of the first row lie horizontally, and the beads of the second row stick up diagonally.
- To understand whether everything is working out correctly, you need to knit at least 1-1.5 cm: the beads should lie in a brick pattern.
Two-color rope of beads
The tradition of decorating your clothes and outfits with sewn beads has been around for over a thousand years. Archaeologists have found ancient clothes of Egyptian pharaohs with bead decoration. And the word “beads” itself is associated by etymologists with the ancient Egyptian “busra”, which means “not real pearls”.
The heyday of beadwork came in the 19th century, when beadwork became an integral part of everyone’s life - not only women, but also men were fond of exotic creativity. Even then, unique techniques for weaving bracelets, earrings and beads began to appear.
It is not surprising that this art with a centuries-old tradition is now experiencing a rebirth - high-quality bright materials are available to everyone, and after several hours of work, even the most inexperienced needlewoman will be able to create round strands of beads and other decorations.
What it is?
A rope is a tight beaded weave that can be used as a base for necklaces, bracelets and other jewelry, as well as as an independent accessory.
The first strands were a flat weave, which was then twisted into a hollow tube.
This technique is used less often today, because needlewomen can weave voluminous decorations using new developments in needlework.
Not only the methodology for making jewelry has undergone changes, but also its color scheme. Thanks to the huge selection of materials, you can create not only monochrome jewelry, but also strands that combine two colors, three-color and multi-color jewelry.
Variety of colors in bundles
It is experiments with color combinations that allow beaded jewelry to always remain on the crest of fashion. Experienced craftswomen combine trendy colors or create timeless classics. It is noteworthy: not only women choose original colored jewelry for themselves.
Thus, the combination of green and yellow is the coat of arms of the English city of Norwich. Every fan of this city's football club loves to wear a round beaded cord in these colors. Football fans are happy to choose jewelry with the symbols of their favorite club.
Fortunately, the modern palette of materials allows you to create jewelry in almost any color combination.
Tools and materials
To create your first harness or bracelet, just carefully study a special video tutorial or master class. And, of course, you will definitely need the following materials:
- beads - the quantity and required colors depend on the chosen pattern;
- beading thread;
- needles and a thin hook.
For additional decoration, you will also need jewelry pins and clasps. In some cases, the set of materials may change. For example, if you want to create a two-color thick rope of beads, that is, a decoration with a large diameter, some workshops may recommend using additional hollow plastic tubes that will help the weave keep its shape.
And if your handicraft goal is a lariat - a strand of beads made of two-color materials without fasteners, also called a lasso, then you will not need fasteners, but you will have to buy additional materials to create elegant tassels that end the lariat.
When choosing materials, you should pay close attention to their quality, because both the beauty of the finished product and ease of use depend on this, which is important for a beginner. For example, beads made in the Czech Republic or Japan are the same in size and shape and do not lose their color over time.
Jewelry made from high-quality material will delight you for a long time. The same rule should be applied when choosing a weaving thread.
Some beginning needlewomen use not specialized monofilament thread, but ordinary fishing line. The material is not intended for complex weaving, and therefore is not always convenient to work with; preference is still recommended to give to items purchased in specialized handicraft stores.
Techniques and patterns of two-color bead strands
Today, volumetric bundles can be created using various techniques:
- Mosaic weaving is one of the simplest and most understandable technical techniques. The main secret is to use an odd number of beads for the first row. Subsequent rows are woven using the classic mosaic method.
- The American technique is also called openwork: the surface of the rope when using this technique is uneven. It is due to the relief that the beauty and originality of the product can be achieved. A two-color strand of beads, the pattern of which is designed for a raised edge, already looks beautiful even without additional pendants and decoration.
- Crochet weaving allows you to obtain a cord of uniform weaving of any thickness; the pattern is formed depending on the set of beads on the thread. The hook speeds up your work, provided the technique is mastered.
Each of these techniques has its own varieties and subtypes, but if the basic principles of work are mastered, then creating a variety of jewelry will be easy. Various patterns of bead strands using a varied number of colors will help to expand the range of products - from 8 beads of different shades, from 6, and so on.
Master class for beginners: how to weave?
So, you are inspired by the examples of experienced craftswomen and are ready to start creating your first mosaic strand.
Where to begin? Choose a pattern of bead strands in 2 colors that will inspire you to create further masterpieces.
Why two colors and not 8, for example? Because a two-color strand looks incredibly impressive, its creation will require care and scrupulousness, but will not burden you too much with complex calculations.
The weaving order is as follows:
- The required number of beads are strung on a thread and closed in a circle. Do not forget to leave the edge of the thread free in order to secure it later - make several stitches through the finished rows, the rest of the thread can be cauterized or cut off. It is convenient to burn with a burner.
- In the second row, weaving is carried out through one bead - 2, 4, 6 are skipped, and the thread passes through 3, 5, 7. Do not forget to string a bead of the corresponding color after each fixation of the thread. To get a beautiful strand of beads in 2 colors, the pattern diagrams must be followed completely.
- In the third row, the thread passes through both the beads of the first and the second row.
- Alternate between a row of mosaic braiding and a row of full threading until you get the required length of cord.
- Weaving patterns
- Mosaic weaving looks neat if the base is an odd number of beads.
Video Lesson: Mosaic bead strand
For an even number, a transformed technique is used - first, a kind of flower of 4-6 (according to the pattern) number of beads is closed, and then a row of “bead over bead” is woven. Such bundles are called Ndebele.
Master class: how to crochet a rope?
- Combining crochet and beadwork is not a new technique, but with the help of traditional techniques, jewelry has seen the light of day and has become the property of art.
- The technique is quite simple to master:
- Place beads on the working thread in accordance with the color scheme. If each bead is in its place, then the desired pattern is formed during knitting.
- Place a chain of air loops on the thread in the amount required by the pattern.
- Next, you can crochet single crochet stitches, pulling the collected bead to the hook before each loop. The result will be a uniform round strand.
Knitted plaits
This type of product is made according to a simple principle. The master class on bead strands in this case is simple. First, beads are placed on a thread in a certain sequence. Then, using columns and half-columns, the entire product is knitted.
There are different types of such accessories:
- thick (up to 15-20 beads in diameter);
- medium (8-10 beads);
- thin flagella (4-6 beads).
Thick products are knitted as finished decorations. They are made in a large number of colors with a selection of complex patterns. You need to choose colors carefully. It is necessary to take into account tones, transitions and shades.
The set must be done with special care. If even one mistake is made, the drawing will not work out. One of the popular bead strand patterns is “Rose”. It may consist of two or more colors.
Medium strands are often used as a base for jewelry made from natural stones or other types of beads. They are often performed according to a simple pattern that contains 2-3 colors . Creating them is not difficult.
Subtle types of jewelry are made without a pattern. They are usually single-colored and long. They are used to create lariats - jewelry that is a long rope up to 1500 centimeters.
This product is tied into knots and worn as a belt on clothes. If you choose the right combination of colors, then such decoration can transform any outfit. To knit a simple version of the lariat, you need the following materials:
- beads of different colors;
- beading needle;
- fishing line 5-7 centimeters long;
- cotton thread;
- crochet hook.
First you need to find a suitable scheme. You should not take a complex option; at first it is enough to use 2-3 colors.
Typing can be done by looking at the diagram on the monitor or by printing the sequence on a separate sheet. But there is an easier way - you can use a voice recorder. a set of one rapport on it and then act on this recording.
We knit a rope of beads in a column. Master Class
Let's look at the principle of knitting a string of beads in a column. In this technique, it is better to knit thick flagella, at least 12-14 beads in a circle. First of all, let’s remember how to crochet fabric in a column (without beads). We found a video tutorial and a photo tutorial on this topic.
Let's decide on the threads that we will use when knitting the rope. It is better to learn on threads of medium thickness. We recommend Canarias threads.
Now let's move on to knitting the rope.
We will need: Round Czech beads PRECIOSA 10/0 or Japanese MIYUKI or TOHO 11/0; Hook of a suitable size. Each master chooses it for himself independently, during the knitting process.
We recommend that you start with the most common size No. 0.8; Thread on which you can string beads. We recommend Canarias; A small silicone hose to fill the harness.
The tourniquet can also be filled in a different way; Caps/ends for the tourniquet;
String the beads onto the selected thread. Alternating the colors of the beads at this moment is very important, since you cannot swap the beads, and the pattern depends precisely on their alternation.
For a training rope, it is better to collect beads of two contrasting colors, alternating them through one (white, black, white, black, etc.).
Then, for the second strand, you can use different colors to create a complex geometric pattern.
After you place the required amount of beads on the thread, you can begin working. We form the first loop for the hook, and move the first bead. We hook the thread after the bead and pull it through the resulting loop. We tighten it, securing the bead in the work, and move the next bead closer. We do the same with her.
Depending on the thickness of the strand, the number of beads will be different. The author used 18 beads to form the first row of the rope. We connect the resulting strip into a circle using a connecting loop.
If you are working according to a ready-made pattern, then in the first row you need to collect the number of beads indicated in the pattern! Otherwise you won't get the drawing!
Move the next bead closer to the hook, insert the hook into the thread of the first row, pick up the thread behind the bead, and pull through the loop. Next, we again pick up the thread behind the bead and pull it through two loops. This way we secure the bead in the second row. We do this for each bead until all 18 beads are secured in the work.
- We move in this way until the tourniquet reaches the length you need.
To finish the product, form several rows with single crochets (and without beads), and secure the thread. A silicone hollow tube is inserted inside the tourniquet, which will maintain the volume of the tourniquet. We attach the end pieces to each end of the strand, hiding from view the end of the work without beads. Here we talked about the types of limit switches and methods of attaching each of them.
- Result:
- Even loops for you!
- Source
Source: https://salon-bisera.ru/patterns/vyazhem-zhgut-iz-bisera-stolbikom-master-klass
Crochet bead strand for beginners: master class
Today we will tell you how to crochet a rope of beads for beginners with your own hands. A master class with a photo and weaving pattern will be a good lesson for beginners.
Tools and materials Time: 1 hour • Difficulty: 2/10
- Crochet hook;
- fine yarn for knitting;
- beads with holes of such diameter that they can be strung on the selected yarn.
Very interesting decorations are made from knitted ropes. You can place a pendant on them, attach interesting details, or simply tie them in an unusual knot and wear them just like that.
Step-by-step master class
For the first test strand, you better take a thick hook and very large beads. This will help you understand the principle, and then you can move on to more elegant and thinner products.
Step 1: string beads
First we string beads onto our thread. The more beads, the longer the rope will be. The thread is not cut off; you string it almost onto a ball. We take the hook in our hands and secure the first 6 beads in the work, gradually moving them closer to the hook.
Step 2: connect the bottom into a circle
After the first row is ready, we connect the resulting bottom into a circle using a connecting loop. Next, we continue to attach the beads row by row, using the previous rows as a base.
To do this, we move the next bead closer to the hook, insert the hook into the base of the previous row, and pick up the working thread under the base through the loop. We do the same with the next bead.
How the product is made
There are not many ways to crochet a strand of beads. There are only two of them. In the first case, the method of knitting in a half column is used, in the second case, in a column. These methods are used depending on the type of product. For thicker types, half-stitch knitting is not suitable. This method is looser, and the beads will not fit as desired in the given pattern.
Crocheting a rope of beads for beginners means that you need to choose the right option. Patterns for crocheting bead strands are presented in large quantities online. They can be designed for two colors and for multi-color options. There are very complex schemes. They may even contain 10-15 colors.