Bracelet made of rubber bands on a slingshot “Sidewalk”. Master class with step-by-step photos.
Bracelet “Sidewalk”: beauty and elegance are in simplicity.
Among the abundance of drawings, patterns and figures made of silicone rubber bands, the “Sidewalk” weaving technique is considered the basis (so to speak, the foundation). It is not for nothing that this bracelet has gained immense popularity among craftsmen and beginners: despite the ease of execution, it will certainly please its owner with a beautiful appearance.
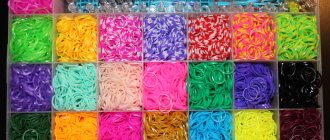
By combining different colors, you can find a suitable option for any style and for every taste. Today’s master class will be entirely devoted to creating a “Sidewalk” in a simple style (as an alternative to bright bracelets).
The weaving process does not require significant effort and complex, bulky devices. To create a bracelet you will use:
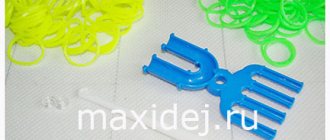
1. Standard slingshot (small machine with two posts). 2. Hook. 3. Small double-sided hook-and-loop fastener. 4. Rubber bands in 2 colors (for example, black and white - a classic combination).
№1
As noted earlier, weaving a “Sidewalk” bracelet is not just an easy process, in fact it is very easy!
Step 1. Turning the “Slingshot” towards you with the open side, put on the first pair of black elastic bands, like in most bracelets, twisted in a figure eight. Thus, the correct beginning of the bracelet is formed. Later, a fastener will be attached to this elastic band. Each time two elastic bands will be thrown on.
№2
Step 2. From this point on, there is no need to twist anything else. Now take two white rubber bands and place them above the black ones.
№3
From the left column, a pair of lower black elastic bands is removed upward. The rubber bands cannot be removed from the right column. This is how the weaving process begins.
№4
№5
Step 3. Place two more black elastic bands over the pair of white elastic bands. After this, two pairs of elastic bands (white and black) rise from the left column to the center.
№6
№7
№8
Step 4. The principle of weaving is simple and clear: a pair of black and a pair of white elastic bands are put on in turn. The two bottom pairs are removed to the center from the column on which three paired rubber bands are formed.
Following the order, you need to place two white rubber bands above the black ones.
№9
Since there are three pairs of rubber bands on the left column, the bottom two rise to the middle of the “Slingshot”. Then a couple of blacks attack again.
№10
№11
The bracelet is woven to the end in exactly the same way; the main thing is not to get confused in the order of putting on the rubber bands, so as not to break the pattern.
№12
№13
Step 5. When the bracelet is at its final stage, it’s time to think about “closing” it. It is advisable that the last one to be put on is a pair of black rubber bands (since the first rubber band was black).
After two black elastic bands have been put on, you need to send up all the lower elastic bands that are located under them. So, two pairs of rubber bands go from the right column to the center, and one pair from the left.
№14
№15
№16
Now there is only one pair of black elastic bands left. Using a hook, the elastic bands from the right column are changed to the left (or vice versa - it doesn’t matter).
№17
Pulling the rubber bands on the left column a little, a clip is threaded through them.
№18
Now you need to go to the very beginning of the bracelet and find the first black rubber band. The second edge of the fastener should catch on it.
№19
№20
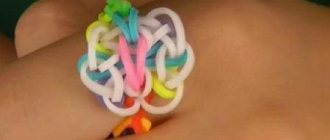
As you can see, the bracelet is really easy to weave, and most importantly, quickly. The “Sidewalk” pattern will look great both in bright colors and in strict classic ones, as was shown in this lesson.
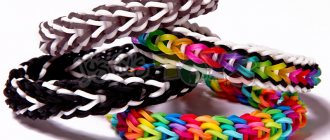
The final look of the craft. Photo 1.
The final look of the craft. Photo 2.
And for those who do not want to bother themselves with complex weaving processes, we would like to invite you to make a bracelet from rubber bands “Lazy”, in which the name itself speaks for itself!!!
How to weave a bracelet from rubber bands using the “Sidewalk” technique using a slingshot
A bracelet made of silicone rubber bands in bright rainbow colors is a bright accessory that is suitable not only for girls, but also for young people. Such decoration changes its affiliation with one gender or another depending on the chosen colors. For romantic natures, delicate pastel colors are ideal: soft pink, beige, lemon, mint. For brave and self-confident girls - a combination of rich bright colors. The male population gets the prerogative of calm, confident colors in a massive frame: all shades of blue, dark shades of green, red, black and white combination.
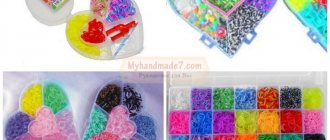
To create this accessory you will need:
- White elastic bands in the amount of 52-54 pieces
- Blue elastic bands in the amount of 52-54 pieces
- Slingshot
- Plastic crochet hook No. 4
- S-clasp
The basic principle of weaving in this technique is based on stringing rubber bands in pairs onto the teeth of a slingshot. For greater convenience when making jewelry, the elastic bands can be folded in pairs in advance.
The slingshot or, as it is also called in another way, a mini-frame is taken in the hand, turned with open grooves towards you. The first ones on the instrument are two white rubber bands, twisted in a figure eight. Following them is a pair of blue elastic bands, which are put on in the usual way, without any twisting.
Using a crochet hook, the two bottom elastic bands are hooked onto the left tooth of the mini-frame and dropped into the middle from the outside between the columns.
Next, a new pair of white elastic bands is strung, onto which, using a hook, two elastic bands of white and blue colors are thrown from the right clove into the middle.
A new pair of elastic bands is again strung onto the slingshot, but this time blue. Two elastic bands of different colors are hooked and thrown into the center from the right column of the tool.
This algorithm of actions for stringing a pair of elastic bands and dropping the loops into the middle from the columns on which there are 2 elastic bands is repeated until the desired length of the bracelet is obtained. Alternate alternation of colors of pairs of silicone rubber bands occurs through one weave during the entire production.
After the accessory is woven to the desired length, it must be finished correctly. Upon completion of the weaving, you should have two pairs of rubber bands left on your instrument on one tooth and one pair on the opposite one. This is clearly shown in the photo below.
The bottom pair of elastic bands is hooked with a crochet hook on the post where there are two such pairs, and dropped into the middle between the teeth.
The remaining pair of rubber bands is transferred to the opposite column.
The elastic bracelet is slightly stretched on the mini frame, and the two end loops are caught by one of the hooks of the S-shaped clasp. Next, the wrist accessory is removed from the tooth of the instrument. The second free hook of the plastic fastener hooks two loops of the first pair of elastic bands, twisted in a figure eight.
That's all, the bracelet made from rubber bands using the "Sidewalk" weaving technique on a slingshot is ready!
A similar tightly knit bracelet made of multi-colored silicone rubber bands does not have to be woven using a slingshot. A decoration woven on a machine will turn out no worse. Depending on the number of columns left on the collapsible machine, the width of the bracelet using the sidewalk weaving technique will increase. The main condition is that the number of columns must be a multiple of two. The pattern of weaving the decoration will be similar, the only difference is in increasing the number of colored elastic bands and stringing several pairs of elastic bands in one row.
In addition, such a bracelet can be made without using a machine or slingshot, for example, using an ordinary table fork, or even weaved on your fingers. A small selection of video clips after the article will clearly show how such decorations are woven step by step.