The question of how to make Santa Claus with your own hands arises very acutely on the eve of the New Year. Crafts competitions in kindergartens and schools, matinees, decorating offices, as well as home decorating chores, and more gifts... See the options on what you can make our grandfather out of for the coming 2021. And send your photos and master classes to our New Year's competition with prizes and diplomas!
How to make Santa Claus from fabric
A master class on how to make a Grandfather using the “sculptural textile” technique from Natalia Kudinova became the winner of our New Year’s competition. The work, of course, will require a lot of time and effort, but as a result you will receive a toy that is in no way inferior to factory ones in quality, but with its own character, appearance, and in an individual suit.
There is a similar video master class on YouTube:
Another version of Grandfather. The base is a plastic bottle. Description of work
Video on how to make a cute Grandfather from socks quickly and easily:
Felt craft
Recently, homemade New Year's toys have become very popular. With their help, you can create a unique festive look for your Christmas tree. Today we will sew a Christmas tree toy in the shape of Santa Claus from felt. Master class with a pattern from Anna.
To make such a toy you will need:
- Felt red, beige, white;
- Needle;
- Sewing thread;
- Knitting thread;
- Sintepon;
- Scissors;
- A sheet of paper and a pen;
- Black nail polish.
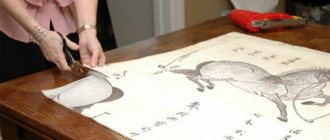
First, as usual when sewing from felt, let's draw a template on a sheet of paper. All details can be drawn together. Photo 1
Now you need to cut out all the parts from felt. You can make such a toy from any felt, both soft and hard.
First we will work with the red material, that is, with the main one. Cut out Santa Claus from paper and trace him on felt. Cut out 2 identical figures. This will be the front and back of the toy. Now we cut out the mustache and beard from the paper template. Can be cut in one piece. Then we trace the part on white felt and cut it out in 1 copy. Now we cut out the frill element of the cap. We also trace it on white felt and cut it out in 2 copies, since the toy will be double-sided. All that remains is to cut out the details of the face and nose. They will require beige felt. We cut out these parts 1 piece at a time.
Now let's start stitching. First we need the front part to be red. We sew the face, nose and beard with mustache onto it.
Now we put the back part of Santa Claus on the back and start sewing the 2 parts. In this case, you need to place the details of the cap's frill on the back and front. When we sew 2 parts, we will sew the frill at once, so as not to make unnecessary seams. We’ll also sew on the pompom right away. Cut out 2 identical circles from white felt. Between them we place the tip of the cap and stitch it.
Then we sew to the bottom, connecting the 2 parts. At this stage we fill the part with padding polyester. But not too tight so that the toy does not swell.
All that remains is to design the face. To do this, it is more convenient to use black nail polish and a needle. We blot the tip of the needle with varnish so that a small drop forms at the end. We drip it into the place of the eye, and then repeat again, forming the second eye. Lightly apply blush to your cheeks and nose.
We will attach a red knitting thread to the back so that the toy has a loop for hanging. The felt Christmas tree toy is ready, is it Father Frost, or Santa Claus, or maybe a Christmas gnome?