What can be made from burlap?
Jars for storing cereals and spices in the kitchen cabinet, flower pots with living plants, pencil holders, key holders, boxes for storing all sorts of necessities - burlap can be used for everything. If only you had the time and desire to do handicrafts! Agree, crafts made in the same style (vintage, eco-style) for the kitchen, bathroom, hallway will look harmonious in any interior, even if you take objects of different shapes and colors. Products made from burlap and twine, such as a board for jewelry storage, a stand for keychains, a thematic panel, a photo frame, are equivalent in beauty and uniqueness to paintings. What kind of burlap products can you decorate the interior with? In addition to the above, these can be napkins, fruit baskets, boxes for storing postcards dear to your heart. On the Internet you can find patterns for various products, but you can do without them. Sew a sofa cushion, beautiful curtains, a tablecloth, decorate a lampshade with burlap, make an interesting and unusual toy, a talisman, a flower arrangement - we suggest you familiarize yourself with a selection of ideas for crafts from burlap, and get inspired by beautiful photographs. Just use ready-made patterns and step-by-step job descriptions.
Burlap bird
Decorating a burlap vase
Piece by piece
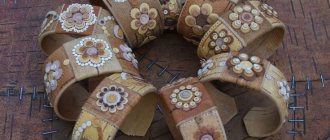
In the days of our great-grandparents, a hand-sewn quilt was a must-have item in every home. Times have changed, and so has the technique of patchwork - patchwork. Blankets, rugs and pillows, rugs have complex patterns. New ways of folding patches have emerged, resulting in different styles of patchwork:
Traditional, which is based on the folding of ornaments from scraps of geometric shapes - triangles, squares, rhombuses, which are stitched together to form a single canvas. This technique is used for sewing blankets, chair cushions, and rugs.
Crazy patchwork does not require the use of patches of the same shape, strict lines: the more intricate the shapes, the more chaotic the patterns, the more interesting the final product will be. This technique is used to sew decorative pillows, bedspreads, wall panels and other decorative items.
Knitted patchwork combines two types of needlework: sewing and knitting. With the help of a hook, scraps of fabric are connected to each other, or elements are knitted entirely from yarn (in addition to the traditional “granny squares”, new technologies and patterns have appeared - for example, “African knitting”).
There are other technologies for creating unique products from scraps of fabric, which will find a worthy place not only in vintage interiors, but also in bright oriental and even fashionable modern ones - loft, hi-tech.
Burlap panel in a marine theme
If you like to bring numerous shells, pebbles, and corals from vacation, then most likely all this wealth is stored in boxes or bags. However, both you and those who were with you during your trip or trip to the sea will be much more pleasant if the seafood is on public display, and even decorated appropriately in the form of a unique individual panel.
Marine style panel
What you will need to make the panel:
- A glue gun (if you don’t have one, a regular tube of glue will do), which will significantly speed up the process of making panels
- Scissors
- Knife
- Sackcloth
- Wooden plank
- Twine (from linen or jute) Thick paper (the size of the paper should correspond to the size of the board)
- Wooden sticks
- Wood cuts
- Moss (pieces)
Manufacturing process:
We cut out a piece of burlap, lay the fabric on the board and fold the fabric over the underside. We crumple the paper a little. This will give it texture. After this, we glue the paper onto the front side of our craft. It’s time to use sticks and twigs. We place them on the craft in any order, grouping them together. When the composition of sticks and twigs is firmly attached to the craft, place shells on top of it and glue them. To make sea waves, we will need pieces of twine or jute. We imitate the sea surface by gluing a rope in waves. We cut equal-sized pieces of twine or jute, twist them into rings and glue them along the edges of the panel. The finishing touch is to take moss and glue it onto the panel, giving the appearance of algae. The original decoration for your home or garden is ready.
Nuances of preparing material
The first step is to buy enough burlap. You can purchase it at any retail outlet that specializes in selling creative kits. This type of textile is sold in a ready-to-use state.
The process of preparing burlap yourself includes the following steps:
- wash;
- drying;
- soaking in a solution of onion peels or tea leaves (recommended time - 1 hour).
Video: Master class: marine-style panels
Adviсe:
If you don’t have a wooden board, you can replace it with a plastic one. Twigs and pieces of wood can be replaced with artificial sticks. You can also replace moss. However, natural materials will look better and more natural on the panel. Do not cut the required piece of paper exactly with scissors, but deliberately roughly tear off the edges to give brutality and a marine spirit to the product. If the twine or jute is too thick, then do not rush to divide it into parts. Perhaps in this form it will look good, reminiscent of ropes and yards on ancient ships. Get some glue. Otherwise, your panel will look sloppy. If glue remains on your fingers while working, it is better to get rid of it immediately, because dirty marks will spoil the impression of the work, no matter how hard you try to hide them later. It is also important to take care of the “correct” proximity: place a product of a similar style next to it. This could be another panel made in a coffee theme. To make a “coffee” panel, you can use natural coffee beans, delicate lace napkins, beaded or pearl jewelry, and dried flowers. Made according to the same principle, such paintings will set off and complement each other.
How to sew a folk doll from burlap?
Modern hand-made products are made according to the customs and traditions of folk crafts and arts. Home amulets created in this style are increasingly being purchased as souvenirs. As a rule, natural materials, such as burlap, are used to make such amulets. Step-by-step photographs and descriptions will help you create an original amulet that will attract good luck to your home. It will take very little time to make a doll, and the result will definitely please you, because no special skills in working with fabric are required in this matter.
Important: you can start working on the amulet only if you are in a good mood in order to transfer a charge of positive energy to the doll.
Amulet doll made of burlap
To work you will need:
Burlap - 30x50 cm. Scissors (preferably with shaped teeth to prevent cutting and fraying of the fabric) 0.5 liter plastic bottle, which we will use as the basis for the doll. Threads matching the color. Jute twine or gray threads. Filler for a doll (holofiber, padding polyester).
What you need to make a talisman
The magical process of creating a folk doll consists of several stages:
We make the doll's head: cut out a square from burlap. The square size is 10x10 cm. We sew along the edges with thread, rounding the corners. We put the filler inside and tighten the thread so that we get a round head.
Cut a piece of burlap for the head
Connecting the ends
We twist the ends of the resulting part tightly and tuck it inside the neck of a plastic bottle. To be secure, you can apply a thin layer of silicone glue along the inner edge of the neck.
We tuck the ends into the neck of the bottle
Let's move on to making hands. We cut out a strip of fabric, sew it along the long edge with a seam and turn it inside out. We should get a part in the form of a pipe.
Preparing the part for the hands
We mark on the bottle symmetrically the places for attaching the arms and make cuts. We stretch the burlap piece made in the previous step into the holes.
We stretch the bottles into the cut-out holes to make for hands
We tie the edges tightly on the hands
Using a jute cord, we tighten the edges of the parts for the arms and tightly tighten the knots, thus imitating the sleeves of a shirt. We decorate the body of our doll from a piece of burlap. The length of the fabric should correspond to the height of the bottle without a neck, and the width should correspond to the diameter of the bottle.
Cutting the burlap for the body
We make holes in the flap for the arms and “dress” the doll. Cut out a thin strip of burlap and wrap it around the doll’s neck.
“Dressing” the doll
Wrap a strip of burlap around your neck
Cut out another piece of burlap (a square measuring 15x15 cm). This will be an apron for the doll. We make a lace from a coarse thread, measuring the required length and tying knots along the edges. We sew the cut flap on three sides, first tucking the edges by 0.5 cm. We retreat a centimeter from the edge of the upper part of the apron and pass the lace.
Cut off a piece of burlap for the apron
Threading the twine
Fold the edge of the apron above the threaded lace. We put it on the doll immediately under. hands, pulling and tying the lace tightly.
We put on the apron and tie it tightly with a lace
Our doll is ready. It can be given to friends or relatives who welcome folk traditions, for housewarming, Christmas, or just for no reason. After all, this is a talisman - a kind of talisman for the family
