Needlework
06/20/2018 Anastasia Prozheva
Sequins are thin shiny plates made of plastic. They are used to create various decorations and for embroidery on clothes. But, in addition to all of the above, they also allow you to create wonderful paintings from sequins with your own hands. Large works made with sequins look beautiful, especially in combination with beads and beads. The material has gained such popularity among needlewomen due to the fact that it has a large selection of colors and shapes and allows you to create narrative paintings.
Necessary materials
The choice of materials for work depends on the basis of the future painting. The most standard set should contain sequins, beads, sewing threads, a needle, glue, fabric or cardboard. Sequin paintings can be made by sewing them onto fabric or fixing them on a solid base.
- sequins are produced loosely in bags or assembled on a ribbon. The latter type is convenient for decorating clothes. Sequins in bulk come in a wider variety of shapes, sizes and colors. When choosing, you should pay attention to quality. Painted ones can quickly lose a layer of paint and look unsightly. Colored plastic sequins will retain their original appearance longer. These come in the form of circles, leaves, hearts, stars, squares, flowers;
- the size and type of needle is selected depending on the size of the hole in the sequins and the type of fabric;
- It is better to choose a strong thread - lavsan, silk, monofilament, thread for beads. The color can be the same color as the sequins or contrasting;
- beads can match the color of the sparkles or have a different color;
- You definitely need to stock up on a diagram, drawing, photograph of the finished product.
Craft ideas
Products made from sequins can be used not only as sewn decoration on clothes.
Flowers made of sequins and beads can become a decorative item for any interior, thanks to the ability to use different colors.
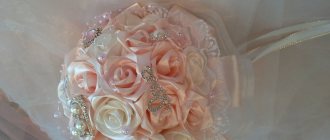
You can make a beautiful bouquet consisting of flowers of one or more types. This arrangement of flowers made of sequins and beads will become a truly brilliant decoration for even the most ordinary interior.
To create a cute bouquet of sequins in the shape of shells, follow the simple steps of the master class:
- To form a petal, take a piece of wire about 15 cm long.
- You need to pass a wire through the top hole of the sequin, then thread the bead. We repeat the process twice, stringing the last bead in red.
- The other end of the wire must be threaded back through the bottom holes of the sequins.
- Twist the ends with pliers. As a result, you will get a triple petal. It takes five identical petals to make one flower.
- To form a flower, twist the petals together.
Such flowers can become the basis of a bouquet, bonsai, or be used to decorate clothes.
Weaving with beads and sequins is a creative process, thanks to which you will not only decorate and give your home a hand-made comfort, but will also be able to show your imagination and escape from everyday life.
Crafts made from beads and sequins are also used as souvenirs. A themed beaded bonsai can be presented as a gift by decorating the tree with flowers made from shiny plates.
A beautiful product made of beads and sequins will be a wall panel consisting of flowers, spikelets, leaves of different shapes and sizes. All that remains is to frame the craft and hang it on the wall.
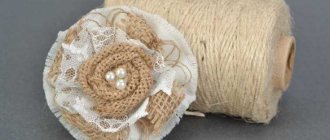
Flowers made from sequins can also become an element of jewelry that will add originality and brightness to your look. Using embroidery on felt with sequins and beads, craftswomen create beautiful brooches in the form of poppies, roses and any other flowers. A dress, blouse or coat decorated with such an accessory will sparkle with new colors.
Also, by creating a flat flower from sequins, you can use it as an applique for tired clothes.
Manufacturing option
Sequins on a dense base can be secured with glue or nails. If the base is thick, you can use small thin nails for fastening. For work, you can take thick cardboard, a wooden board, or polystyrene foam.
To create a panel or painting you need to prepare:
- base – cardboard, paper, foam;
- glue or nails;
- sequins;
- diagram or drawing;
- frame for decoration.
Article on the topic: Women's knitted cardigans: patterns for obese women, DIY jumpers for girls with photos and videos
Additionally, you may need: tweezers, beads, a small container from which it will be convenient to collect glitter. Before starting work, a sketch of the design is applied to the base by copying or extruding. After this, you can start laying out and attaching the sparkles. Fasten using two techniques - simple rows or in the form of a mosaic. Simple rows are used to create lines and outlines. The mosaic technique is convenient to use to “fill” the volume of a picture. First, the first row is attached, and the next row is shifted by a step equal to half a sequin.
A beautiful frame will give your work a finished look. This option for creating a picture is suitable even for preschool children. But you should remember that you can only work with nails and a heat gun under adult supervision.
Spot laying method
This method is interesting because it requires applying glitter in the desired colors to the base. Not only children love to assemble such a dot pattern, but also adults enjoy assembling such mosaics.
We will need:
- Sequins,
- Carnations,
— Foam for the base and frame.
We place the image with the diagram on the foam base and secure it with nails. It is more convenient to start creating a picture from the sides to the central part. The sequins are secured with the convex part facing up using nails. Once the picture is laid out, we attach the foam frame to the picture.
Brilliant panel
Sequin embroidery on fabric allows you to decorate clothes and create an original picture. The embroidery process requires some effort and patience, but the result is worth it.
Important points to consider when performing work:
- strictly adhere to embroidery patterns.
- It is recommended to do the work on a hoop; this will speed up and facilitate the sewing process and help attach the sequins more evenly.
- sewn sequins should not change their position and bend if you run your hand over them.
- Do not iron. This may result in loss of color and appearance.
- The thread should be securely fastened at the beginning and end of the work, thereby preventing the embroidered fragment from unraveling.
- You can use a glue gun to attach glitter to fabric.
Now let's look at the main types of stitches for securing sparkles:
A 4-stitch seam is used if you need to securely fasten the sequins. Each of them is secured with several stitches. Take one, apply it to the fabric, thread the needle and thread from the wrong side, stitches are made in the direction from the center to the edges. The stitches need to be hidden under two or three beads.
Related article: Elephant made from towels using origami technique
The “fastening with beads” type is known for the fact that here the needle is brought out at the place where the sequins are fastened. Next, glitter, beads and a needle are put on it, which goes through the sequin hole to the wrong side. It is possible to sew on a few pieces of beads.
There is a “back needle” seam, where the needle and thread enters the face of the fabric through the middle of the sequin, then sticks in on the right, exits on the left and, through the middle of the sequin, goes to the wrong side of the fabric. This seam provides a reliable fastening due to the fact that each of them is sewn with two stitches. A continuous seam is made with the needle forward, stitches on the right side of the fabric securing the sequin securely.
“Blind stitches” They are performed like a “back needle” seam, but in this case the subsequent sequin half overlaps the previous one. This allows you to completely hide the fastening threads. But it should be borne in mind that doing the job with such a seam will require more glitter.
The creation of the picture itself is similar to that described above. A sketch of the design is applied to the fabric and first a number of sequins are sewn or secured along the contour. And then the main picture and background are filled in. Creating panels and paintings from sequins is quite easy, the main thing is to understand the process.
Features and attractiveness of sequin paintings
A panel made using this technique always looks very impressive and bright .
Due to the special shine, even products made in monochrome immediately attract attention. They look completely different in daylight and artificial light, which makes the paintings even more interesting. Sequin panels are easy to create and do not require any special skills. All you need to make a painting is accuracy and attentiveness . If they wish, even school-age children can master the technique of mosaic using sequins.
Tips for designing a finished composition
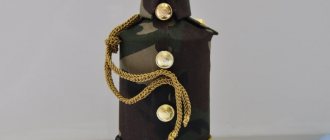
If desired, you can put a bouquet of sequin flowers in a small vase or “plant” it in a pot. To do this, use a container of the required size and a piaflor sponge, which can be purchased at flower shops. Piaflor is easily pierced, and blanks can be glued to it using a glue gun. It is recommended to decorate the pot using burlap or other fabric, harmoniously matched in color.
[Total votes: 1 Average: 5/5]
Irina Vyshivaikina
Professional skills: Clothing designer; Artist
Brief biography and personal achievements: “I am inspired by the things that are around us.” Since childhood, I was interested in art and crafts, so I decided to devote my life to it. She received a higher education in design and released a collection of designer jewelry made from simple materials that can be found at home from any needlewoman. Afterwards, I decided to conduct master classes on creating similar accessories for everyone. She became a blogger and the author of the website domigolki.ru.
Work sequence
We present a master class on creating a bouquet of sequins and beads that will lift your spirits and make you happy at any time of the year.
We begin to weave petals
The petals consist almost entirely of sequins: take a wire 40 cm long - this piece will be used for a flower of five petals.
We string sequins and beads onto a piece of wire, starting and ending with a string of pink beads.
We move the sequins and beads to the end of the wire, forming a petal; the wire must be twisted at the base under the loop.
Next, we again string the same amount of material onto the wire to make the second petal. Similarly, we form three more to get a total of five petals.
Forming a flower
We connect all the elements together and twist them using pliers, then carefully straighten the petals with your hands.
To make the core for the flower, take a piece of wire 35 cm long. Thread three red beads through it, bend the wire and twist it. The length of the stamen will depend on the size of your flower.
We repeat the process of forming different stamens until the wire runs out. Next, all the stamens need to be collected into a bunch.
We connect the stamens and the flower to each other. In order to add buds to the composition, we make them in the same way as a flower, only we use only three petals.
If you want to make a lush bouquet, we create a large number of flowers.
We weave a leaf
The leaf will consist of two tiers. To do this, take a piece of wire and thread first five beads through it, and then sequins and beads in turn until you get a sheet of the desired size. Next, we form a loop so that one of the ends is slightly longer.
We again string beads and sequins onto the long wire end in the same order. We continue to do this until the second tier fits snugly around the first. Add five green beads, twisting the whole structure together. Thus, we will get a double leaf.
Dalem twigs
To make the flower arrangement look complete, you need to form several branches from green beads. To do this, take a piece of wire of the required length. To make the end of the branch aesthetically pleasing, we thread a bead and sequin through the wire, move it towards the center, bend the wire and again move it towards the center through the hole in the sequin. Next, you should string sequins and green beads one by one.
Photo source: https://pleteniebiserom.ru/
Attaching a leaf to a flower
To do this, attach the leaf to the stem, screwing it with the long end of the wire. To make the flower more natural, it is better to use leaves of different sizes.
We give the stem strength
For this, it is best to use floral tape that has an adhesive side. If it is not available, use a green thread, having previously coated the wire with glue.
When all the elements are ready, we connect them together and form a beautiful composition.