Sweet housekeeper: decoupage and ideas
The key holder itself can look like anything: it can resemble a window with beautiful firanochki, a painting, a photo frame. If you want something cheerful for the interior of the hallway, it would be, for example, a key holder with sunflowers. If you want to do something amazing, it could be voluminous decoupage with Sicilian lace.
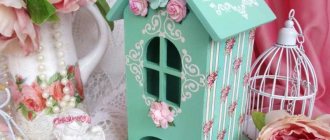
A cute housekeeper in the shape of a house with a window will fit perfectly into the interior of a Provence style hallway.
But the most preferred idea today is, perhaps, a housekeeper. It really looks very cute and would be a good gift for any occasion. So you just need a wooden blank in the shape of a house, and you can attach hooks and decorate the key holder with your own hands.
Basic styles
All types of decoration can be done in different styles. Each of them will be unique and beautiful in its own way.
The following styles are popular today:
Provence. This style is characterized by the use of light surfaces, which may be slightly rubbed. The best images are flowers, namely lavender and sunflowers. Drawing pictures with houses or grapes is also relevant for this topic.- Shabby chic. The peculiarity is that the drawing must be worn. This will give the item an antique look. Decorated surfaces should be pastel shades. Characteristic images for this style: small and large flowers, ornaments, angels and various figures.
- Simple City. This is a kind of deco patch. But for decoration, newspapers or magazines with torn edges are used.
- Victorian style. It originated during the reign of Queen Victoria in England. This style is characterized by the use of red, gold and green shades. On the surface you can apply images of animals, roses, still lifes, as well as hunting scenes. Most often, this style is used to decorate furniture or boxes.
Wall key holder: house, decoupage
The technique is simple, especially if you have already worked in decoupage. Essentially, you are making a panel that will also serve as a place to store keys. Craftsmen usually work on wooden blanks; plastic and metal are less common.
You will need:
- Wooden blank house;
- Metal hooks;
- Varnish with 3D effect;
- Acrylic paints in the desired colors;
- Decoupage cards;
- PVA glue;
- Craquelure.
You should select a picture for decoupage of a key holder taking into account the design of the room where it will hang
Sand the house, if necessary, rinse, degrease with alcohol. Then paint the future key holder with acrylic paints. After the first layer has completely dried, you need to apply the next layer of paint. Everything is painted over except the hooks.
What kind of decoupage cards you will use depends on your ideas. Some people will prefer the theme of hunting lodges, others – a vintage theme or a bird in an openwork cage. There are no strict restrictions here.
Attach the cut out drawing to the key holder and draw the contours. You need a pencil and a ruler, you need to trace the outlines so that you don’t forget where and what will be glued. The blank is cut along the marked lines, and fitting is done on the key holder.
Decoration technology
Any key holder decoupage master class includes the following steps:
- We prepare the product for decoupage. The surface of the key holder must be dry and clean. Any contamination, cracks and roughness are unacceptable. With them, the finished product will look sloppy and careless.
- We prime the base. To do this, carefully cover it with one or two layers of acrylic paint. The most commonly used composition is white, which emphasizes the colors and design of the decoupage motif. If the image is on a dark background, select a color to match it.
- We determine the places where decorative motifs will be located. We experiment by moving the images until we find the best option. If you decoupage a key holder with a door, do not forget about the design of the inside of the product.
- Glue on the motif. Apply a thin layer of glue to the base. Carefully place the design on top and coat it thoroughly with glue. If we use PVA, pour a little glue into the center of the paper motif and carefully “disperse” it with a brush from the middle to the edges. This way, no creases or folds will appear on the surface of the image, and the paper will stick securely to the base. Carefully remove excess composition.
- Give the glue time to dry completely.
- Cover the paper image with a layer of varnish. After it has dried, you can begin tinting the decoupage motif. We use suitable acrylic paints for this. Depending on the style in which the hand-made wooden key holder is decorated, different solutions are chosen. Colors can contrast sharply, or, on the contrary, softly complement and slightly shade each other.
- The final finish consists of applying several layers of varnish, with each previous one having to dry completely before applying the next one. To ensure that the surface of the key holder is perfectly smooth and the boundaries of the decoupage motif are invisible, we will go over the product with “zero” sandpaper.
Decoupage of a key holder is a fascinating activity, the result of which will be a practical little thing that will decorate your home.
After its appearance in the hallway, you will immediately stop losing your keys. Of course, you can buy a wall-mounted key holder, but making it yourself is much more interesting. A lot of similar work has been collected on the Westwing website, where you should definitely visit for inspiring ideas. Decorate your hallway with useful and beautiful things. Let the order in your home be perfect!
House: decoupage of the key holder, master class
Next, you need to prepare a container with warm water and place the selected pattern in it. This is done in order to wet the drawing. While the pattern is soaking in water, you need to coat the surface of the key holder with PVA glue.
Before you start decoupage, you should prepare the necessary materials and tools for the job.
Then do this:
- Place the decoupage card on a plane, gluing it evenly;
- The roof of the craft and the bar for hooks can be covered with acrylic gouache;
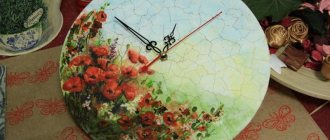
- Wait a couple of hours until the paint dries, after which craquelure is applied to the surface, this is done in one direction;
- After a certain time, after the previous layer has dried, paint is applied that contrasts with the first tier;
- Next, you need to apply acrylic varnish in one layer until it dries completely, and then paint over it again.
And then you start applying dark paint, watching as large cracks appear. Let the key holder dry thoroughly, and then you can highlight some elements of the design with golden paint. Some fragments can be highlighted with voluminous varnish; cracks along the edges are covered with the same varnish. The result will be a very cute key holder, and your keys will always be in the house. The work is worth it.
History of decoupage
This type of decoration first appeared in China at the end of the 15th century. It was there that people began to decorate furniture with various images. Decoupage came to Europe only in the 17th century. Craftsmen in Venice cut out pictures and attached them to wooden furniture. Afterwards, at least 30-40 layers of varnish were applied to the surface. This was necessary to ensure that the image retained its original appearance for as long as possible.
At that time, not all people could afford Japanese or Chinese furniture, which was very expensive. Therefore, the craftsmen used decoupage, applying various applications to the surface. This is how the second name of this decor appeared - “art of the poor”.
The 19th century is considered the peak of the popularity of decoupage in Europe. It was used in every home. At the same time, images of sentimental motifs (angels, flowers and various figures) were selected.
This type of art came to America much later - during the First World War. Most often, decoupage was used as a hobby for women.
Today, decorating with appliqués has not lost its popularity. It is used to decorate Christmas tree decorations, handbags, Easter eggs, caskets, boxes and other items.
Which ones are suitable for the key holder decoupage pictures
This is not to say that the choice of topics is somewhat limited. You can make a key holder, for example, in the form of a large keyhole or in the form of an umbrella. And you can decorate such an item with images of children walking in the rain or a curious child peeping through a keyhole.
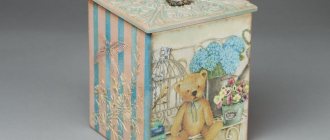
A picture with a vintage theme is perfect for decorating a wooden key holder.
Craftswomen especially like vintage themes - images of golden-haired babies, angels, retro cars and cute patterns typical of the era of real glamor are what are always interesting to make as decorative material. It turns out to be a thing from ancient times, as if in a beautiful nostalgic haze. The main thing is that it does not resonate with the situation.
Types of napkins for decoupage of a key holder
To get a beautiful drawing, you need to know some features. Wipes you can use:
| Types of napkins | Characteristics |
| Three-layer napkins 33×33 cm | They can be incredibly beautiful - the kind of goods you can find in a supermarket. There are packs with the same motifs, and they can also come in 4 different colors. The advantage of such napkins is their low cost. The disadvantage is the limited choice of decor, and it is sometimes impossible to consider different design options in one pack. |
| Paper handkerchiefs (four-layer napkins) | They come in sizes 21x21 cm, there are also many of them on sale, the price is low. Here the pros and cons are the same as in the previous version. |
| Products from a specialized store - napkins for decoupage | They consist of three layers. Available in sizes 33x33 or 25x25 cm. They are sold individually and are much more expensive than those found in the retail chain. One of the advantages is a large selection of options for decoration. |
Three-layer napkin - ideal material for decoupage
Decorative element of the hallway interior with an antique effect
Advice! Very beautiful options can be brought from abroad - they have a large selection of beautiful napkins. However, you can also use single-layer napkins in your work if you come across some nice ones. Just don't have to separate them.
Beautiful napkins will help you create extraordinary things
Original pictures for decoupage of key holders
You can do this too - process your personal family photos in a special photo editor, stylizing them as retro. It turns out that you yourself are the heroes of the vintage key holder. Only in an unusual form. You can make the main character of the image on your dog’s key holder, again, using the services of photo editors.
Beautiful pictures depicting cities are also suitable for decoupage of a key holder.
A key holder with a picture of your favorite place - your native village, a seaside town, your father's house - will definitely be cute. All this from the photograph can be transferred to special paper, and the memory of your favorite corner will always be with you. And if you are giving such an item as a gift, then definitely try to match the theme - how much attention and warmth there is in such little things.
Where to get a blank key holder for decoupage
You can, of course, cut such a key holder yourself, but this requires experience and tools. There will definitely be such specimens in craft stores, and, as a rule, they are inexpensive. It could be a banal wooden blank for painting. And by attaching hooks to it, you get a key holder.
You can purchase a blank for a key holder in a store or make it yourself
You can also:
- Order the production of blanks from craftsmen; if you take several blanks at once, they will definitely reduce the price for you;
- Find a blank on craft sites;
- Such blanks can be sold in the drawing and creative departments of department stores and bookstores.
Or you can make something more interesting and complicated - this is a key holder with a door. As you might guess, the keys are hidden behind the door. This accessory will come with a surprise.
Required materials and tools
To decoupage your key holder yourself, you can choose a master class to suit every taste and level of difficulty. Detailed step-by-step instructions allow you to be confident in achieving excellent results.
To decoupage a key holder with a door, you will need to stock up on the following materials and tools:
- Blank for a key holder. It can be any shape of an object made of any material. Wooden products are best suited for a key holder, since they are much easier for a beginner to work with.
- Napkin. You need to choose a design you like that will match the interior of the house.
- Acrylic paints. They are selected accordingly for a certain style. For example, for Provence you will definitely need white acrylic paint.
- Glue. PVA is excellent and should be diluted with water in a 1:1 ratio. But you can buy special glue for decoupage, but it costs a little more than regular PVA.
- Acrylic lacquer. It will be applied last to the key holder to secure the picture. This varnish dries quickly and is odorless. You can also purchase yacht varnish (colorless), but you need to be prepared for the fact that after working with it you will need to ventilate the room.
- Brushes. You should stock up on several types. An ordinary fan is needed for gluing an image to a key holder, and bristles are needed for applying acrylic paints (this type is easier to work with acrylic).
- Acrylic primer. Necessary to create a working basis.
- Fine and coarse sandpaper.
- File.
- Additional decor.
Features of decoupage key holder with door
You will end up with a box similar to a chessboard, which is turned vertically. So they are fixed on the wall, open, and inside there are hooks and keys. You need to decorate both outside and inside.
To make such a key holder, you usually need the blank itself, a printout, a stencil, white primer, acrylic paints, pastels, a craquelure pair, acrylic varnish, and sandpapers.
In order for your key holder to be beautiful and practical, experts recommend selecting only high-quality materials for the job.
A distinctive feature of such a key holder can be voluminous patterns that are made using a stencil. You can use an adhesive stencil, or any other one you like. In another, the decoupage process will not be much different.
Always pay special attention to creating scuff marks. You need to wipe off the paint from the protruding parts of the key holder with the rough side of a sponge. You can lightly wet the sponge. But don't overdo it, otherwise you'll rub off the dark paint and the scuffed color won't be as convincing.
Decoupage
It's time to start decoupage. We cover the place for our picture in two layers of white primer. Let it dry and then sand it thoroughly with 500-800 sandpaper. Using tape, thin the printout and cut it to size.
In this work, I used a paper printout; I used pigment toners for the printer, because... Pictures printed on water-based toners spread when interacting with water.
Keep in mind that when soaked, our picture will stretch horizontally by about 5 mm. Soak for about 3-5 minutes. We glue it using a file and remove all air bubbles with a roller or cloth. Our printout should dry well. Cover with 3-4 layers of acrylic varnish.
