Today, the knot weaving technique – macrame – is gaining popularity again. By the way, this type of needlework has been known since the time of the Incas! And despite such a respectable age, nowadays needlewomen happily intertwine threads, tying them into knots to get interesting products.
What is macrame?
So, the art of macrame has been around for many, many years. At first these were the simplest knots, but over time they became more complex and interesting. Later, sequences of their different types laid the foundation for the whole art of weaving.
It is worth noting that macrame united many cultures of successive eras. Knot weaving was quite common in Europe in the 19th century. It is known that the birthplace of macrame is the Ancient East. Perhaps that is why the term “macrame” translated from Turkish sounds like “an elegant shawl with fringe.”
Types of threads and decor options for macrame
Before you start making a product using the macrame technique, you need to provide yourself with materials. The main and main components, of course, are threads. They come in different types; you need to choose based on the idea of the future finished work.
For example, if you intend to make a thin product, choose threads made of silk, nylon or cotton. If this is a piece of clothing, a wool thread will do (look at the degree of twist; in the case of clothing, you need a tightly twisted thread). Macrame of various accessories (bags, belts, etc.), as well as jewelry, involves the use of thick cotton, synthetic or linen threads.
Preparing for work
Preparation for work takes a lot of time (about 10%) and consists of several stages.
- Execute the sample and determine the density of the sample.
- Cutting working threads. When measuring, do not stretch to avoid length errors.
- Sealing the fluffy, hot ends over the flame of a candle or lighter, smeared with glue or varnish.
- Smoothing the threads over steam.
- Hanging on the base in one of four ways.
- Shortening to avoid tangling by winding into “butterflies”.
Required Tools
No less important work tools are the following components:
- crochet hook;
- tailor's scissors;
- measuring tape (or ruler);
- sewing pins (they will be used to secure the printed work);
- a padded base (this could be, for example, a pad with filler (foam, foam rubber). In fact, the base of the work will be attached to it);
- clamps (needed to attach the product to the table surface if necessary).
Methods for attaching thread
Thus, there are about four main ways of attaching the working thread to the base:
- Purl cast; Macrame. Fastening the thread. Purl cast
- Facial sketch; Macrame. Fastening the thread. Facial sketch
- Double knit cast (resembles a knit stitch with the difference that both the right and left threads are attached on both sides again); Macrame. Fastening the thread. Double face throw
- Rep throw.
By the way, the types of sketches are also very diverse.
See also:
- Ganutel. Basics
Rep look
This is one of the most popular knots in macrame.
Using these knots, horizontal, vertical and diagonal bridles are woven. This is the name given to rows consisting of rep knots.
Horizontal brids. Attach as many working threads as you like to the base. The outermost thread on the left should be especially long, as it will be the main thread. You don’t have to cut it off from the ball at all. The remaining ropes should be 4.5 times longer than the future product.
The thread on the far left must be pulled horizontally to the right above the other threads and secured with a pin. From the next thread on the left, 2 one-sided loops are made on the base. Then it is pulled tight and the working thread is left hanging vertically. Take the next thread and repeat the weaving - you get a horizontal bridle.
Related article: Knitted hat for a round face: diagram with photos and videos
After weaving the knots with all the working threads, the warp is turned to the left, horizontally. With your right hand you weave a horizontal brid from right to left.
At the turning point, secure the thread with a pin, otherwise it will come out sloppy.
Diagonal bridges. These knots are very popular in macrame style. You can use them to weave crosses, diamonds, circles, flowers, petals.
Pull the right thread at an angle down and to the left, above the other threads. Throw in 2 single-sided knots with each working thread. You just need to secure the thread with a pin in the upper right corner.
In brids that are woven to the right, you need to pull the leftmost thread down and to the right.
If you weave 2 brides close together, then for each next one you need to take the outermost rope and pull it near the previous one.
It is possible to start from the center and weave diamonds - first the left side, then the right.
Vertical brids. Here we get a tight weave. Typically used for weaving rugs, belts and other products that require tight knitting. The thread on which others are hung is the working one. There is no need to cut it off from the ball. The remaining threads are the warp and their length is the basis of the finished product.
You should start from the top right corner. Secure the threads with a pin. With your right hand, pull the first warp rope and weave two one-sided knots onto it. Continue the row to the end. Unfold the working rope to the right and secure with a pin. Pull the warp threads with your left hand, and with your right hand weave one-sided knots with a working rope. Continue to the end of the row. And so on.
This is what the main knots for beginners look like in macrame.
Types of nodes
As you know, a knot is nothing more than an interlacing of threads. It’s interesting, but knots are used today in a variety of areas, for a variety of purposes. We hear about weaving knots, sea knots, sewing knots, tie knots - these are generally classics. But strictly speaking, there are only two types of weaves - simple and double knots.
However, let's return to the macrame technique. Obviously, the nodes are the main component here. Let's talk about them in more detail. In this type of needlework, the following types of knots are distinguished:
Methods for processing the edge of a product
When finishing making a product using the knotted macrame weaving technique, you need to beautifully and carefully process its edges. This can be done using two options:
- A clean edge means finishing the needlework with grosgrain knots and using them to pick up the extra threads that secure the work.
- Use of applied decorative fringe. True, in this case you still need to remove the protruding excess threads with rep knots, as in the first case. And only then sew a beautiful fringe onto the finished work. It will be interesting to look at.
How to make macrame correctly using weaving patterns
Introduction to macrame weaving patterns for beginners
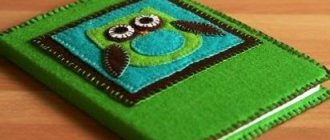
You can weave not only panels and hammocks using the knot weaving technique. Craftswomen create earrings, necklaces, belts and lace to decorate clothing items.
First you need to decide on the quality of the threads for weaving and take into account several nuances:
- It is better for beginners to practice on cords of different colors;
- for work you need to choose threads with a round cross-section;
- synthetic threads are too slippery and difficult to fold into a beautiful knot;
- wool threads should be thick and well twisted;
- To prevent the threads from unraveling during work, you need to tie them at the ends into knots or melt them over a fire;
- weaving from rigid ropes will become easier if you wear thin knitted gloves;
- threads with noticeable pile are woven easier if you wet your palms with water from time to time.
To work, you will need a board or a book in landscape format. Some craftswomen attach threads to a special tube or rod of small diameter. But weaving knots in a canopy requires some preparation.
Preparation before work:
- Place the board in front of you with the wide side down.
- Make a loop out of the thread and wrap it around the board parallel to the floor (the knot should be on the reverse side). This thread will act as a bar on which you attach the working threads.
- Each knot has working and knotting threads. Knotted threads should be 5-7 times longer than working threads.
- Cut the required number of threads, fold them in half and fasten them as shown in the diagram.
Now you can weave the first training knots on this blank.
Macrame weaving knots and patterns for beginners
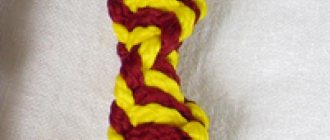
The square flat knot is the most popular element in the knot weaving technique. Macrame bracelets are woven using square knots.
A single flat knot consists of one loop. How to do this can be seen in the diagram.
A double flat knot is used for weaving floss baubles or other types of threads. Pay attention to the weaving sequence: each next knot should be a mirror image of the previous one. Otherwise, the resulting flat thread will begin to twist in a spiral.
From square knots you can weave a rhombus, as shown in the diagram.
The number of nodes is measured in tens. We will look at basic techniques with corresponding diagrams.
Knot chain.
Chameleon knot.
Tatting knot.
In the diagram you can consider and try other, no less beautiful techniques for creating knots.
Schemes for weaving panels on the wall using the macrame technique (with step-by-step photos)
A wall panel is a great opportunity not only to practice weaving techniques, but also an opportunity to create an original piece for your interior with your own hands.
For the panel you will need:
- 10 threads, 5 m each; scissors;
- wooden plank 45-50 cm long (it will become part of the future panel).
Operating procedure:
- fold each thread in half and secure it to the bar;
- distribute the threads so that the distance between them is the same (about 7-8 cm);
- from 1 and 2 threads weave a double flat knot in 3 passes;
- perform a similar operation with each subsequent pair of threads;
- separate 2 threads from the first knot (those that are closer to the center) and 2 threads from the second knot;
- weave a double flat knot from them in 3 passes and perform a similar operation with each subsequent pair of threads;
- repeat step No. 3 and secure the threads with knots located diagonally.
diversify your home decor and create original decorations with the help of “beaded flowers.”
How to weave a macrame belt (master class for beginners)
To work you will need:
- beautiful buckle with cross fastening for threads:
- silk or synthetic threads – 3 pcs. 10 m each;
- scissors.
Operating procedure:
- first you need to master weaving a double flat knot with a central thread (you can choose a different color for the central thread);
- attach the threads to the buckle as shown in the picture;
- weave until you get a belt of the desired length;
- to finish weaving, use the “diagonal bead roller” knot, as shown in the diagram;
Using this technique you can weave a watch strap.
Pattern for weaving macrame for flower pots (step by step for beginners)
DIY weaving patterns for macrame flower pots are varied and popular among craftswomen. Some people weave flowerpots from the top edge, others start weaving from the bottom. Let's look at simple schemes for beginners.
For work and training, you can use threads cut from old colored T-shirts . How to make such yarn can be seen in the photo.
Scheme for weaving flower pots from below:
To work you will need:
- 8 thread blanks, 2-3 m each (depending on the height at which you plan to hang the pot);
- a flower pot; scissors.
Operating procedure:
- Connect the ends of the blanks and tie one common knot. The resulting brush will be located at the bottom of the pot and will serve as an additional decoration.
- Separate the first and second threads and tie 1 flat knot at a distance of 5 cm from the main one.
- Connect all the other threads of the workpiece in pairs. As a result, you will have 4 nodes.
- Separate 2 strands from adjacent knots and tie them into a double flat knot.
- Repeat the operation with other threads so that adjacent nodes are connected in pairs.
- Repeat step 2 and check how securely the pot fits inside the finished planter.
Using the same pattern, you can weave a flowerpot, starting from the top. To do this, you will additionally need a ring for attaching threads. The lower part can be tied with a common knot and a second tier can be made for the second pot.
Here are some examples of interior design using simple flowerpots.
If you have a ready-made flowerpot, but no fresh flowers, you can make beaded trees with your own hands.
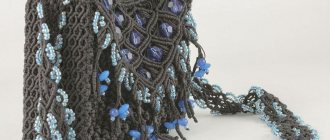
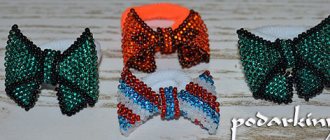
Stylish macrame jewelry
Knots can be used to create many practical and sophisticated things. Designer jewelry is highly valued, and the abundance of blanks for jewelry and decorative elements in handicraft stores will allow you to create original pendants and earrings. Original beaded bracelets will be a worthy addition to the set.
To begin with, you can practice on simple patterns and weave, for example, a keychain. For additional decoration you will need large beads, a key ring and multi-colored cords . How to do this can be seen in the diagram.
Handicraft stores are a separate universe, once in which it is no longer possible to leave without buying something. -Beaded brooches look exquisite and elegant, because no one else in the world will have these.
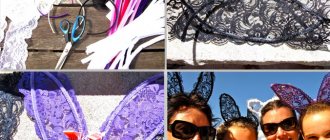
Pendants and necklaces can be made from any available materials. Lace, multi-colored threads and cords, multi-colored beads and openwork decorations are used. The operating procedure and diagram can be seen in the photo.
Video
Master class: “Trap” technique
Cord bracelet
Macrame lessons: Basic course No. 1
Basic course: Lesson 2 - “Square knot”
Basic course: Lesson 3 - Loop knot
Decorative heart knot
Chinese Lotus Knot
Basic macrame knots
To master the art of macrame, you need to master the technique of knitting basic knots.
The main knots are the simple Herculean knot and the square flat knot . Although there are a great many different knots in macrame, they are most often based on these basic knots.
Simple Herculean knot
Secure the two cords. Then place the right cord under the left one, and braid the left one into a loop. Pay attention to the diagram:
Right-handed and left-handed flat knots
Why are they called that? What is the difference? And they differ only in the thread with which weaving of the knot began. If you start from the right side, you will get a right-handed flat knot; if the first working thread is on the left, you will get a left-handed flat knot.
For a sample, take a couple of short length threads. Secure them vertically to the pillow. Threads No. 2 and No. 3 in the middle (axial) are the base, and we will knit with working threads No. 1 and No. 4.
We take thread No. 4 with our right hand, place it on the axial threads, and then under thread No. 1. With your left hand we pull thread No. 1 under the warp and pass it from below into the loop between the warp and thread No. 4. The figure clearly shows the sequence of work.
Then we tighten the knot. Now you see why the knot is right-handed. Because we start knitting with our right hand and the working thread on the right lies on top of the warp, and the left on the bottom. The horizontal thread is used for fastening.
The left-handed flat knot is woven exactly the same as the right-handed one, only in a mirror image.
We start working with the left extreme thread No. 1. With your left hand we place it on the axial threads in the middle and under thread No. 4. Then with your right hand we grab thread No. 4 on the right, pass it under the warp and pull it from below into the resulting loop.
Square flat knot
To weave it, you need to master the technique of knitting flat knots: left-handed and right-handed. By combining these knots with each other, you will get a square flat knot. It is necessary to finish with a lock so that the product holds tightly.
Dasha Space shows how to weave a square knot:
Having mastered weaving a square flat knot, you can create various patterns and simple products.
Chain of square knots
We attach 2 threads to the base using an uneven fastening. Then we begin to alternate the left-sided flat knot and the right-sided flat knot to the length we need. We will get a beautiful chain that can be used as a bracelet, a handle for a bag or a decorative basket.
Rep knot
Another basic knot in macrame is the rep knot. It is very similar to a voluminous lace and is called a brida.
Rep knots can be vertical, diagonal and horizontal. It all depends on the location of the axial thread.
By combining different rep knots, you can weave decorative elements into the product.
How to knit a horizontal rep knot ? Pull the first thread (axial) horizontally near the working threads. Then make two turns from bottom to top and tighten the loop between turns. We repeat in the same way with another working thread. And so on until the end of the row.
If we need a vertical rep knot , then we do the opposite. The working thread here is the main thread, located vertically. Practice tying a series of rep knots, horizontal and vertical brids.
Lesson from Svetlana Shchepkina on knitting rep knots:
Tatting knot
The edge of any of your products will look great, decorated with a wonderful pattern with such a frivolous name. It is woven quite simply, but looks very impressive. A tatting knot can be woven from either two or four threads. In the first case, one thread is braided by the second, and in the second, two outer threads braid a group of main threads.
Secure the working thread with a lock to the face. Bring the left thread under the warp, then over the warp and into the loop. Then bring the left thread back over the warp, then under the warp and into the loop.
How to weave a beautiful ribbon from tatting knots, knitted in pairs, see the mini master class by Yulia Zheglova:
Chinese knots
Chinese knots very often carry a hidden sacred meaning. They are quite complex, but look elegant. One of them is called "Lotus". It is often used for weaving various pendants and laces.
How to knit a Chinese Lotus knot. It is necessary to place two threads on the pillow, one on top of the other, and secure them with a pin. Then alternately lay the ends of the threads in a circle: the first - on the second, the second - on the third, the third - on the fourth, and thread the fourth into the loop of the first thread. Gently pull each end in a different direction until a nice knot is formed.
How to tie a Chinese Lotus knot, watch the video from Svetlana Shchepkina: