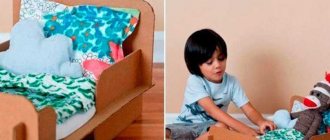
general information
Nowadays, there are many enterprises in the world both for the production of dolls themselves and for the production of accessories for them. Sometimes even world-famous designers take on the task of creating a new outfit for a Barbie doll. Doll shoes are one of the most important accessories in the arsenal of the toy owner. After all, it is impossible to accurately recreate a human image without its inherent shoes.
All these items are overpriced for such objects. Very often they are created with their own hands, since the dimensions of the product itself simply do not give their creator the opportunity to turn to modern technical devices. This makes their price skyrocket.
Before asking how to make shoes for a doll with your own hands, you need to prepare all the required patterns and several sketches of future shoes. You need to familiarize yourself with several variations available for manufacturing - not only such as DIY Barbie shoes. Boots for tilde dolls or Monster High characters are also popular. All of these dolls have different structures and leg dimensions , but any such new thing is guaranteed to improve the child’s mood.
How to correctly take measurements from a doll's leg
When considering the question of how to make boots for a doll with your own hands, it is important not to forget about the measurements.
Important! The finished result of the work directly depends on the quality of their removal.
You might be interested in: What glue is best to use to make your own slime?
To ensure that your shoes are not too big or small, you can resort to several measuring methods:
- Take measurements using a measuring tape and ruler. This is convenient if we are talking about a centipede doll, because there are quite large specimens, 32-36 cm in height. You need to measure the length of the sole and foot, as well as its girth. The ankle circumference should not be ignored either. Depending on the type of shoe to be sewn, additional measurements may be required in other areas of the foot. Let’s say, if you need to sew boots, you need to take measurements of the area from the heel to the desired point of the shin (knee), and determine the circumference of the widest part of the shoe.
- Outlining. This is a suitable option for beginners, since it is enough to attach the doll’s leg to a sheet of paper and trace it with a pencil. If it is small, then all other parts can be easily adjusted. The disadvantage of this method is that there is a possibility of incorrectly tracing the contour of the leg. To prevent mistakes, you should press the pencil tightly against your foot.
Measurements are taken from a doll's leg in different ways: it all depends on its size
Variety of ideas
Before you start making a pattern, you need to create a sketch of a doll shoe or boot suitable for a particular model. Some craftsmen are able to sew even miniature sneakers or slippers. Often shoes are made with thick soles, which also have a large heel. The last for these boots can be completely different.
You can make boots for a doll with your own hands in addition to the following toys:
- Barbie dolls. In the modern world, absolutely every girl has at least one Barbie in her arsenal of toys. Often the set consists not only of a doll, but also of her friend, a horse, a huge dollhouse and many additional accessories, furniture, decorations and other things.
- Second on the list are the Monster High series dolls. These girls are gaining more and more popularity every day. They are distinguished from Barbie by their unusual appearance, green or blue skin, unusually atrophied limbs, head, feet and, in fact, legs.
- Tilde dolls. Cute and funny creatures with an unusual body structure.
- Children's large baby dolls and dolls that closely resemble the appearance of little girls and boys. A knitted copy of the shoe can most often be found on these toys.
To draw a suitable sketch, you need to have a clear idea of what appearance the future pair of shoes will have. Sometimes craftswomen prefer to make crocheted or knitted shoes. However, they are not suitable for all toys. Most often, they prefer to wear such shoes on tilde dolls.
The actual idea of the shoes should be developed and matched to the overall appearance of the doll, its main costume. Sometimes it is preferable to make a pair of shoes after sewing the doll’s clothes. In order to start making boots for a doll with your own hands, you can first look for patterns in fashionable women's magazines or among those shoe models that are presented in a wide range on store shelves.
If the image of a children's doll gravitates towards some historical figure or personality, you can turn to the following sources in search of an idea:
- Historical books and films.
- Vintage illustrations and paintings.
- Thematic documentaries.
Inspiration can be found anywhere. A master can be inspired by his favorite blogs, YouTube videos, master classes, even crafts made from paper, cardboard and other similar materials.
Stylish shoes
Let's look at a master class using the example of making cute spotted high-heeled shoes.
To do this, we will take: cardboard, glue, scissors, two beads, fabric, two small pieces of wood, thin elastic, sealant for processing fabric.
Step 1. First of all, we will treat the material with sealant. If you can't find one, just take a thicker fabric.
Step 2. A couple of small pieces of wood need to be covered with fabric, leaving an allowance in order to then glue the heel.
Step 3. Using the fabric pattern, you need to cut out two parts for shoes: two insoles, two socks and two heels.
Step 4. We also cut out several pairs of insoles from cardboard, then glue them together and glue them to the fabric insoles. In this way, the sole of the doll's foot will be formed.
Step 5. Glue the back of the shoes to the part obtained in the previous step.
Step 6. Then you need to glue the toes of the doll's shoes.
Step 7. Carefully connect the sole and heels using glue. Remove excess fabric with scissors.
Related article: Ebru (water painting) with home remedies with photos and videos
Step 8. Beautiful shoes - beautiful fastener. On one side we sew a loop, and on the other a bead according to size.
Step 9. To finish the job, paint the white sole a dark color using a pencil or marker. Here you have a pair of wonderful shoes.
Using this example, you can make a large number of shoes to match any outfit in different colors.
Creation methods
You can make boots for a doll in many different ways. Shoe parts can be glued together. This method is considered one of the most common among modern craftsmen for creating doll shoes.
Another option is to embroider shoes. This is especially true for those specimens that do not have a sole on a hard base or contain among their constituent parts a high boot, etc. Examples of such objects:
- Boots. Their boot can be very short and inconspicuous or reach the middle of the lower leg or even the knee.
- Slippers. This stylish element will perfectly complement the doll’s wardrobe, her room, and will fit perfectly into the overall atmosphere of the doll’s house. It is the slippers that add coziness to the toy house. Such shoes can be made using a hook or knitting needles.
There is also another proven method that can be used with particular success in the case of textile dolls. A pair of shoes just needs to be painted using acrylic paints. The advantages of this method appear where there are absolutely no restrictions on the scope of creativity.
With the help of paints and brushes, the creator can draw anything, without thinking at all about whether it will be possible or not to fulfill his idea. It may also happen that the necessary materials are not available. There is also one additional disadvantage. Shoes like this take forever to make. It will be impossible to rid your own doll of it.
The most convenient and interesting option would be to reproduce beautiful, unusual and realistic shoes, which can be easily replaced if desired. It is in this case that the master cannot do without the necessary patterns.
Master class “How I make shoes for my dolls..”
Good afternoon). I will describe the process of creating shoes for dolls. I know...that finished patterns need to be adjusted to fit the leg, so I’ll show you the process from scratch). We need: leather or thick cardboard for the sole, double leather or thick fabric for the insole and sealing the pattern pieces, transparent glue, suede or leather, laces, lace, oil paints or pastels, scissors, thread, needle. Be careful there are a lot of photos)
I take a piece of foil and crush it on the leg. You can use masking tape...also convenient.
remove the “foil” boot).
On the “boot” we draw with a felt-tip pen a model of future shoes: boots, slippers, sandals, boots, etc. In my example: a shoe.
Carefully cut out what you have outlined.
We trace the patterns on paper..
Now we have ready-made patterns specifically for “your” leg..
The shoes will have heels..we outline them on the pattern..
We trace the pattern details on the selected materials. My leather is thick from the sole belt - 4 pieces. plus 2 pieces - heel (also made of leather belt).
We cut out “backdrops” from suede - 4 pieces. You can immediately sew decorative stitching on the sides and top to suit your taste.
We cut out the “front” from suede..here I decided to make the front part rounded..and already painted it on the suede..There is no need to cut out the darts..just stitch it. There should be 2 such parts - suede, 2 pieces - dublerin or thick fabric (linen, thick cotton).
My insole is cut from dublerin. These are the details that should be ready at this stage.
We glue the dublerin with an iron and sew the darts. Take the threads to match the material of the shoe...my suede will be tinted with oil...so the color of the threads does not matter)..
The two “fronts” of the boots are ready..
We glue the insoles with dublerin and glue the “front” to the sole. Apply glue along the edge of the sole...I have Moment crystal (transparent). We wait a couple of minutes and glue the “front” part of the boot.
We glue the “backs” in the same way).
We have already used two leather belt soles, now we glue the remaining two. Be careful...do not confuse the right and left parts).
We cut out heels from thick leather and glue them to the sole.
Almost finished stompers))...but I need to bring them to mind)
I glue lace along the edge of the shoe... you can glue a cord or a ribbon... or not glue anything)) it all depends on the idea... and the image.
I squeeze out some oil paints...two shades of brown...on a napkin or piece of paper. I wait 10-15 minutes... until the oil is absorbed. I use a flat brush to go over those places that in real life have abrasions and marks)
Using a thick needle, awl or knitting needle heated over a fire, I make holes for the lace ties. You can use eyelets and a punch... but here they are superfluous)). I made the laces from floss threads, which I kept in water diluted with PVA glue and dried.
The boots are ready. You can see how they look on a doll here.
Thank you for your attention).
Polymer clay
Once all the necessary components and materials have been purchased, you can begin the manufacturing process. In this case, a rather unusual but well-suited material will be taken - polymer clay.
Many mini-master classes show how to make stiletto heels for a doll using polymer clay. This is one of the easiest ways to make doll shoes among those that have been invented so far. The crafter has the opportunity to reuse the polymer and make more than one pair of shoes before disposing of the product.
You can recreate a pair of Barbie shoes that are hot pink. They can also be depicted in the sketch as black using acrylic paint. Later, you can add sealant to the patterns - this will prevent the paint from slipping when using the shoes in the future. You must remember to attach several straps to the finished product. This way the products will look more realistic.
In addition to shoes for Barbie, you can create several plaster objects for Moster High dolls. First you should start creating the sole blank. For this you can use a small wooden block from which part of the sole is cut out. Now it should be sanded and painted in the color that the shoes will eventually acquire. After this, the base of the shoe is modeled on top of the sole. When the process of creating the silhouette of the shoes is completed, you need to leave the product for a while. This will give it the opportunity to fix the shape in which it will remain for a long time.
In addition to polymer clay, latex molds may also be needed. In this case, in addition to the painstaking manufacture of the main sole, you will need to spend some time modeling the silhouette of the shoes from latex parts.
The simplest option would be to form the back of the heel at a right angle. The hole for the heel is made where it touches the heel of the object.
Then the resulting product should be carefully treated with paint. This must be done in several layers. Such measures are necessary to ensure that the product is of high quality and serves the master and his children for a long time. It is also worth leaving it to dry for a while after processing. This will prevent the main layers from cracking or slipping at the most inopportune moment. Do not forget about coating the main product with varnish or a varnishing component.
Sneakers for Barbie
And a simpler master class - about remaking sneakers for the Lisa doll; her collection of costumes can be viewed here. At some point, Lisa decided to play sports and began to urgently demand sneakers for herself! Sewing sneakers for a doll is still an impossible task for me, a microscope is lost somewhere, and such work requires fingers - five millimeters in size... Therefore, we decided to take the already existing plastic sneakers, disgusting yellow in color, and remake them.
First, we sanded off the plastic burrs from the sneakers so that they would become smooth, even and pleasant to the touch:
Painted with pink gouache (Lisa's favorite color)
The existing drawing was drawn in darker pink.
So that the gouache does not stain either me or Lisa, we fix it with transparent nail polish
And on top we make a decoration - a bow:
Looks good on legs))))
Lisa is a football player))))
I wish you good luck in your work! Your Irina, puppet master.
I think that after such master classes, our readers’ dolls will definitely have new shoes made with their own hands.
You can see how to knit shoes for a doll here.
The rest of Irina’s works can be viewed on her page
Video on the topic of shoes for dolls (also master classes by Margarita Adamovskaya):
In order not to forget the page address and share with friends, add it to your social network:
More interesting:
Heat shrink plastic
Masters of their craft can also experiment with heat-shrinkable plastic. This is a thin sheet of plastic (white or clear) that shrinks and hardens when placed briefly in the oven or oven. First of all, it is necessary to carry out basic modeling of the shoes, then leave the products to dry at high temperatures for some time. This usually takes from 20 to 40 minutes. Do not overcook the material in the oven . Such actions threaten it with loss of shape or cracking.
The scale of objects drawn on a piece of plastic should initially be no more than 5 cm in length. When baking pieces or parts, they should first be curled and then shaped. The master receives flat elements if the temperature in the oven meets all the required standards.
You can use similar plastic sheets to make the same heels for cardboard shoes. The main rule is to adhere to the dimension , which should not go far from the sketch drawing. When reproducing a sketch on cardboard, you should take into account the dimensions of the plastic heel, which will be located inside the product. Experienced craftsmen always take this slight difference in thickness into account. As a result, the product always turns out neat and quite realistic.
You should attach the pieces into place very carefully and carefully. You can mark directly on the cardboard used for the insole - this will be neater than gluing individual pieces of the shoe together in place. Even if such an action is practiced for the first time, sufficient attention should still be paid to accuracy. The better the doll’s shoes look, the happier the child who owns the new thing will be.
When making doll shoes, you need to consider various options for creating shoe patterns.
It is also worth taking into account the presence of decorations on the surface of the shoes, as this gives them a certain charm and elegance. Details and decor make the doll's shoes unique. Every master wants to achieve this, regardless of whether he makes a thing for himself or for sale.
There is no need to be afraid to show your imagination - this rule is relevant for both beginners and experienced craftsmen. The main thing is to remember that in everything it is necessary to observe moderation and principles of compatibility. Good luck and have a nice time!