- March 6, 2019
- Needlework
- Alisa Frolova
Every student has a favorite teacher. To whom you want to give a card for no reason, just to cheer you up. On a holiday, you really want to highlight it, for example, make a gift with your own hands. An excellent option in this case would be a homemade card for the teacher. We will tell you in detail how to make an interesting and beautiful craft in the material presented below.
Preparatory stage
You can make a planned thing out of anything, it all depends on the child’s imagination. However, in most cases, postcards are usually made from paper. Especially if a junior school student takes on the job.
Needlewomen specializing in decorative and applied arts advise that the first step is to carefully consider what an original postcard for the teacher should be like. Ideally, you need to draw up a kind of plan in which you indicate all the important features. This will help you make a really interesting craft that will be a pleasure to give.
Required material
To make your own card, you will need four basic items: a piece of cardboard, scissors, glue and a colored pen. But this is not all that is useful for bringing the idea to life. However, each child will have his own set of necessary materials and tools. The list will change depending on what the idea is. For example, you can make a card for a teacher from colored paper, use paints, colored pencils or felt-tip pens, natural materials, beads or beads for decoration. Some even use candy wrappers, foil and other improvised materials.
Postcard with autumn leaves
One of the simple ideas for the craft we are studying is the postcard shown in the photo. To do this, you need to have:
- sheets of cardboard in blue, orange, yellow, red and green;
- scissors;
- glue;
- a simple pencil;
- dark blue marker.
Having prepared everything you need, we study the instructions on how to make a card for the teacher and get to work:
- Take blue cardboard and fold it in half. The base of the card is ready.
- We draw silhouettes of leaves of any shape and size on cardboard of other shades. But let's not get too small!
- We cut out our sketches and glue them on one side of the postcard as shown in the photo. This concludes the main part of the master class “How to make a postcard for a teacher.” We proceed to the final one, but first let the finished craft dry for several hours.
- In the middle we write in large and beautiful letters “Happy Teacher’s Day!”
- Then we add a congratulatory inscription inside the card. You can choose a beautiful poem or write it in your own words, but from the heart.
Postcard for Teacher's Day using scrapbooking technique
Materials for work:
- thick cardboard with a decorative texture of gray color;
- scrappaper with a pattern of autumn motifs;
- various cuttings in the form of leaves and flowers from paper, cardboard and foamiran; you can also use self-drawn flowers and leaves;
- a school-themed picture depicting the office, schoolchildren, and so on;
- scissors;
- glue;
- golden half beads;
- blue pen and stamp pad or ready-made inscription suitable for the holiday.
How to make a postcard using scrapbooking technique step by step:
Take gray cardboard and suitable decorative paper, you can also choose your own color scheme.
Make a base for the postcard from thick cardboard. Punch it with a ruler and a thin stick and bend it.
Based on the size of the prepared base, cut out a rectangle from decorative paper.
Stick the prepared backing onto the gray base.
Take cutting sheets with school-themed pictures and select any fragment you like.
Cut out a picture that interests you and add any stationery motifs, such as a ruler, to be used as a border.
Stick a ruler horizontally at the bottom and above it, moving it away from the center, attach the selected picture. It is advisable to lift it with foam tape or cardboard.
Prepare any greenery to fill the composition - drawn yourself, in the form of a cutting or die-cut from cardboard, foamiran, and so on.
Prepare a few more flowers. You can print them out and cut them out, or make them yourself.
Since the picture was raised, you can insert leaves, flowers and other decorative elements from below, creating a lush autumn bouquet. Start doing this by choosing all kinds of options. Insert leaves and twigs from different materials on both sides of the picture.
Any flowers will also look beautiful.
Choose thematic pictures, for example, from old magazines in the form of pencils, paints or other stationery, they can also be humorous.
Glue the prepared parts near the central element, and also make the inscription “To the Teacher”, it is advisable to repeat the colors of the picture, use a stamp pad so that the whole card looks harmonious.
Finally, attach some pretty half beads and your card is ready.
Original postcard “Cool Magazine”
If you want to do something really unusual, but simple, you can use the following master class. To complete it you need:
- a sheet of white cardboard;
- felt (or colored paper) in green, red, yellow and orange;
- satin ribbon; ruler;
- glue;
- scissors;
- Red pen;
- a simple pencil;
- red colored paper;
- several album sheets;
- a picture with a globe, a brush and a simple pencil for decoration.
Having completed the preparation, we begin to study the instructions for making a voluminous postcard for the teacher:
- Take a sheet of white cardboard and fold it in half.
- Cut out a smaller rectangle from a landscape sheet. Glue it in the center, hiding the ends of the tape.
- Draw silhouettes of leaves on felt or colored paper. Cut it out.
- Cut out a rectangular frame from red colored paper.
- Glue it on the top of the card.
- We decorate the card with a cut-out image of a globe, prepared leaves, a simple pencil and a brush. Experienced needlewomen recommend attaching the last two items using Moment glue. It is recommended that elementary school students complete this stage of the instruction “How to make a card for a teacher” together with their parents.
- We leave the craft for several hours so that it dries thoroughly.
- Using a red pen, add a few lines in the center of the red frame.
- We write in printed font “Class Magazine Class No.”
- Open the card and add a beautiful wish.
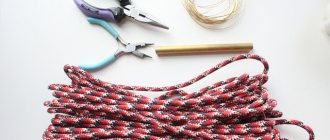
Chocolate pen or pencil
This gift looks interesting, and putting all the components into one is much easier than it seems. To begin with, we twist two landscape sheets diagonally as tightly as possible - this tube will be our basis. For reliability, it can be glued with PVA glue. Cut off the excess so that the tube is even. Next, cut out a semicircle from a 5x5 cm cardboard square and make a cone. Use black gouache or a marker to paint over the tip (this will be the “lead” of the pencil). We decorate the remaining part with paper (to match the color of the “wood” of your pencil) and fix it with glue from the invisible backside. Using glue from a hot-melt gun, firmly fix the base tube in the cone. We attach thin chocolate plates in mini-packages to the resulting base with hot glue: with standard sizes there will be 6 of them - three sides of two plates in length. When they are all in place, we decorate the joints with ribbon or twine, and do the same with the top of the pencil. We decorate the back of the pencil with the same ribbon, twine or colored paper. You can also decorate the pencil with a ribbon, flower or feather by attaching it to the back. To make a pen instead of a pencil, complement the design with additional cardboard elements - a “pen” and a “clip”. A detailed manual can be found here:
Postcard “Teacher at the blackboard”
To complete the following craft, you will need:
- yellow, brown and white cardboard;
- pale green colored paper;
- red marker or felt-tip pen;
- packaging of colored pencils;
- glue;
- ruler;
- scissors;
- a simple pencil;
- a sheet of colored paper of any color.
So, how to make a postcard for the teacher with your own hands:
- Fold a sheet of yellow cardboard in half. But we are not pushing the border too far yet.
- On the right side we make two even cuts at a short distance from each other. Thus we outline the table.
- A little further away we make cuts that are closer to each other. We will place the teacher in this place.
- We wrap the rectangles inside the card.
- And we push through both borders thoroughly.
- We draw a teacher on a sheet of white cardboard, carefully cut it out and glue it onto a smaller rectangle.
- We cut out a rectangle from brown cardboard - the upper part of the table - and something like the letter “P”, these are the legs.
- Glue it as shown in the picture.
- Cut out a rectangle from pale green construction paper. We draw rulers on it, imitating a board. We write the letters, and in the lower right corner we draw a cup with pencils.
- Glue the rectangle so that the pencils are on the table.
- We cut out additional attributes from white cardboard, such as a notebook and a piece of chalk. We place it on the table.
- We write a congratulatory inscription on the bottom of the card.
How to make a postcard for Teacher's Day with your own hands - master class
Be patient, use your imagination, and make your work unique and creative. Believe me, it's not difficult at all when you understand what you want. So let's get started.
What we need for work:
- Cardboard A4
- Multicolored paper
- Pencil
- Scissors
- PVA glue
- Butterfly decor
Perhaps you have interesting flowers, butterflies, leaves or fragments on your old notebooks; they are usually located on the cover; if you want to leave the notebook intact, you don’t need to cut it out; if not, you can carefully cut it out with scissors.
I'll probably start with the main thing, the protractor, and the ruler. I thought so, if it’s Teacher’s Day, then it’s better to use something from this topic, it’s more interesting.
Making school supplies is very easy. To do this, take them as a sample. You can even do it on colored paper, then glue them onto cardboard, and they will be dense, no one will see the back side anyway, we will glue it.
I'll do it on double-sided paper. I circled the protractor, it is the same size as the original. And I made the ruler a little smaller. Then sharpen the pencil sharply, and begin to make markings and numbers, I want everything to be like the real thing. In order not to bother with millimeters, I put a blank and a ruler next to it, and mark it with a pencil.
Then we move on to the attribute of autumn, to bright autumn leaves, because it is in autumn that they are so beautiful and colorful: red, yellow, brown, orange.
I draw the leaves by hand, I had leaves from the herbarium, so I had a sample. But you can print out the leaves and decorate them, for example. I draw the veins on the leaves with a black pen. But you can use a brown pencil, for example. My paper is double-sided.
You need to make the inscription “Happy Teacher's Day”, it is better if it is by hand, you will have to try to make it come out beautifully, write in beautiful handwriting. I cut a small rectangle from my notebook on a bias line. I write with a black pen. I traced the letters twice for clarity.
Here, by the way, are my flowers and a twig, all this was drawn by hand, on paper, I used it as a template. Whatever you like, you can use everything. True, I bought the butterfly at the store.
I also prepared various rectangles to give the card some dimension and make it look prettier. I have curved scissors, they are not expensive, but they cut paper with a grooved edge. Very useful for applications and for working with paper.
Also, I bought corrugated cardboard, but you can do without it. I also had polka dot cardboard. In general, everything that was in my reserves went into use.
For the paper card itself, we need paper. Thick cardboard. I bought it at a craft store. This is thick colored cardboard in A4 format, it is very convenient for postcards.
My children make postcards from ordinary white A4 cardboard, fold it, I buy them white double-sided cardboard, it is sold in absolutely any stationery store.
I also glued a rectangle of white paper onto the cardboard. I measured the length and width of the card, and stepped back from the edge by 5 mm. You may not glue, or retreat more. Why am I doing this? In the white drawing, the figures made of cardboard look clearer, the same ruler made of paper.
I glued everything with regular PVA, this time I didn’t use a glue gun, and that’s it. Everything stuck together perfectly with our traditional glue.
We start gluing the parts, placing them the way we like. But first, I advise you to apply everything, or even better, to place the full picture, as you see your postcard, where everything will be located.
To be honest, I tried three times to understand what I wanted, how I saw this range of colors and shapes. I start gluing, using the same surfactant, coat it well, glue it and hold it. We do it carefully.
Well, that's it, almost ready. You can cut out completely different shapes and place them however you like. Twigs, leaves, butterflies.
I paste the inscription “Happy Teacher’s Day” onto the card and it’s done. What could be better than a handmade card? You can show your imagination and be more creative. I hope my work will inspire you and you will get an interesting idea.
Glued the butterfly and you're done. I also want to show you several options for postcards that can also be made from paper. Can be done with children.
Postcard from a box of chocolates
In high school, a student can give the teacher a more serious gift. We will study one of the ideas in the current paragraph. To complete this you will need:
- a picture with any suitable background, which must be printed on a color printer;
- white cardboard;
- two pearl beads;
- satin ribbon;
- colored paper in blue, red, brown and beige or other shades that match the background picture;
- glue;
- scissors;
- black gel pen;
- a box of chocolates that opens like a postcard (for example, “Korkunov”).
So, how to make a beautiful card for the teacher with your own hands:
- Cut out rectangles of suitable size from the prepared picture.
- Glue it to the front side of the box, securing the tip of the tape.
- Add a small rectangle on which we will write a congratulatory inscription.
- Decorate with pearl beads.
- Cut out flowers from colored paper. Using scissors, slightly deform it, creating folds. Glue it.
- Let the crafts dry.
- Decorate with the inscription “To my favorite teacher.”
Postcards made of paper and cardboard for February 23 for elementary school children (templates inside)
Let's start with a very simple card. Every child can make it, because the gift is made according to a template. The only disadvantage of the proposed technique is that it may not be very interesting for active children. But the guys who prefer a quiet holiday will be happy to attend the master class.
Materials:
- PVA glue;
- A2 sheet of whatman paper;
- Colored paper;
- Simple pencil;
- Ruler;
- Markers;
- Scissors.
Subsequence:
We use a simple embroidery pattern as the “source” of the image. You can take another one.
Cut out squares measuring 1x1 cm from colored paper of different colors.
You will need quite a lot of them.
Now let’s draw out our Whatman paper. The size of one cell should correspond to the size of the paper squares.
And we begin to post the image. It may take several days to complete the work. It’s better to do this kind of work with the guys collectively.
This is the result the author got by the fourth day.
Very painstaking work. When everything is finished, colorful flomas
We write the text of the congratulations using eraser and place the resulting poster in a visible place.
You ask: “But what about the postcard?” A similar technique can be used to create postcards. Only you will need smaller squares and the image should be even simpler. Or you can invite the children not to paste out the picture, but to color the cells, for example, using felt-tip pens. At the end, you can complement it with voluminous decor: for example, ribbons, beads, etc.
Here are a couple more ideas that you can implement with the guys on the eve of February 23rd.
The image doesn't have to be complex.
Be sure to experiment with materials. If you use felt instead of regular paper, you will get a completely different result.
This idea is for lovers of origami technique.
Dad will probably be very happy with this funny postcard in the form of a tie.
Card from the whole class
If not just one student, but the whole class wants to congratulate their beloved teacher, it is necessary to make a collective craft. For example, the one illustrated in the picture. To make a postcard you should prepare:
- any flower pot;
- colored paper;
- scissors;
- PVA glue and “Moment”;
- white or colored cardboard;
- green or brown corrugated paper;
- a simple pencil;
- set of skewers;
- a piece of foam plastic that will fit into the prepared pot;
- photographs of all students and teachers.
When everything you need is at hand, let’s start studying the instructions on how to make a teacher’s card for Teacher’s Day:
- We cut the corrugated paper into long and thin “pasta”.
- We decorate the pot and put foam inside.
- Generously grease with PVA glue and pour prepared green or brown strips on top.
- We cut out circles with faces from photographs, glue them onto flowers made of colored cardboard, and then onto skewers of different lengths.
- We stick sticks with photographs into the pot and let the crafts dry thoroughly.
As you can see, making a card for a teacher is not at all difficult. The main thing is to approach the task creatively.
Master class: New Year's endless card
Share this article:
Master class: New Year's endless card.... Not much time is left before the long-awaited New Year holidays, which we always look forward to with special trepidation. These holidays are always filled with mystery, gifts, surprises and very pleasant impressions, which then inspire us for the entire previous year.
In some families, preparations for the New Year begin a couple of months in advance, since everyone needs to think through the New Year's menu, decorations for the house and the New Year's table, choose the color scheme for your outfit, prepare a bunch of different gifts for family and friends, in general, there is a lot to do, one might say. , so you need plenty of time.
Traditionally, we congratulate everyone, of course, with New Year's greetings, which we write in a greeting card. To have something to remember for both you and your loved ones, it is advisable to make a gift with your own hands, leaving pleasant memories from the process, and your loved ones will receive a pleasant and warm surprise that will remind them of you.
A New Year's card will look incredibly beautiful if it consists of four spreads that complement each other and are endless congratulations. This card is also called endless, because no matter how much you unfold it, the congratulations do not end.
New Year endless card. Manufacturing process:
Let's get started. We lay out the template, it consists of three parts, according to this template from red and green paper, cut out two red and green rectangles measuring 7*14 cm.
The most important thing in this postcard is to understand the initial manufacturing principle and to crease the lines correctly and evenly so that the postcard can open freely.
We take one rectangle, lay it out on a hard surface, you can use a board or a book, and according to the very first sheet of the template, divide the upper and lower parts of the rectangle into equal squares of 3.5 * 3.5 cm and make creasing along the lines using a ruler and scissors. If you have a special creasing stick, you can use it. We make bend lines on all four rectangles.
We take the second sheet of the template, for convenience we place two green rectangles vertically and tightly to each other, so that we get an even square measuring 14*14 cm. Spread the upper and lower corners of the squares with PVA glue. On the template, the gluing points are marked with Roman numerals and shaded.
Now we take the red rectangle, turn it horizontally, apply the upper corner squares according to the third sheet of the template, turn it over and also horizontally apply it to the green vertical square.
We do the same with the second red rectangle, only we smear the lower corner squares and apply them horizontally to the first red rectangle. Press the glued squares. The most important principle: we place the green rectangles close to each other vertically, and the red ones horizontally. And we glue the upper and lower corner squares.
Give some time for the glue to dry. Now we unfold the spreads one by one. There are only four of them. If everything is done correctly, they open easily.
If suddenly something catches, the edges can be trimmed a little.
Popular articles Water with lemon and honey: properties, uses, recipes and contraindications
Now for the first and fourth spread we cut out two 6.8*6.8 cm squares and eight 3.3*3.3 cm squares. For the second and third we cut out two 6.8*6.8 cm squares and four 3 ,3*3.3 cm. We select the pictures, glue them onto large squares, apply grosgrain ribbon at the bottom and sew them on with a machine. For example, let’s take the first spread.
Using acrylic stamps we make inscriptions on white watercolor paper. Cut out “Happy New Year” and machine sew it below the picture. Below the picture we attach lace with a ribbon and sew it on. On the left we glue a cut-out green Christmas tree.
Use a hole punch to make paper lace from leftover paper.
We are preparing pictures for the remaining spreads. We glue all the squares with double-sided tape.
Using a glue gun we glue snowflakes, butterflies, buttons, half beads and bows with flowers.
We receive an interesting New Year's card with endless wishes.