Dog made of cones and plasticine
You will need:
- a few bumps
- plasticine
- nut
- beads
- toothpicks or twigs
- glue
- a small sheet of colored paper (to represent the mouth)
Let's start making:
1. Using two cones of different sizes, make the body and head of a dog.
2. Make paws, a tail, ears from plasticine and fasten all the parts together.
3. To make the craft more durable, connect the head to the body using a toothpick or a twig.
A simple pattern of a dachshund dog for draft doors.
The dachshund has a big advantage - its long body, which allows it to climb into holes. It can also be used in everyday life to create comfort in the apartment. Sew a dachshund to protect against drafts that come through doors. You will have a practical toy, especially since the pattern of a dog made of fabric for a draft pillow is very simple.
When translating and printing the dog pattern, be sure to scale it so that the size of the pillow fits the door.
The dog is a character in many fairy tales, cartoons, and movies. Remember how kids love the movie about 101 Dalmatians? We are sure that you will really enjoy making fabric dogs, and our patterns for sewing a dog with your own hands will help you with this!
There is one trick for beginners. You can cut out only the front, front side of the dog pattern in the amount of 2 pieces and sew them together. And then sew on the ears on both sides. Such a dog will have only two legs and will make excellent keychains or souvenirs for friends. And you can sew them twice as fast.
Beginners usually have difficulty sewing on dog bellies. But there's nothing wrong with that! You are just learning and your main task is to enjoy the process of creating soft toys. Let your friends have as many symbols of friendship and good luck as possible!
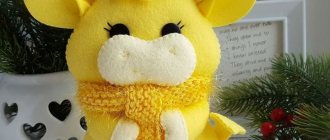
Felt dog
You will need:
- yellow, brown, black and white felt pieces
- glue
- scissors
- thread and needle
Let's start making:
1. Cut out 8 parts from felt - paws, tail, head and body.
2. Sew the cut pieces together using even stitches.
3. If desired, you can also make a collar from felt or fabric.
Salt dough dachshund
Making such a dachshund will not require as much effort and time as you think. So, you need to prepare: dough, knife and rolling pin, gouache and brushes, varnish for coating.
First of all, it would be wise to draw a sketch. Cut out the design by cutting off the protruding elements. Roll out the dough into a 3-centimeter layer and cut it into the shape of a stencil. The remains should be put aside; they will be used to make parts. The contour can be smoothed with a wet brush.
Take 2 small pieces of dough and roll them into ovals. Then place them on top of the dog's muzzle, previously moistened with water. These will be the eyes. Roll a nose out of a smaller ball. To imitate eyelids, create a transverse dent in the eyes. Using an incision, you can get the dog's mouth slightly open.
Next, prepare a fairly large sausage from a piece of dough by narrowing one of its edges. Place the narrow side of the sausage on the cut behind the eyes. Hide the attachment point and flatten the dachshund's ear a little. Now you come up with and attach decorative elements in a similar way, for example, a New Year's hat or bow.
The next important step will be painting the dough dog. We paint the main part with dark yellow (ochre). Without waiting for it to dry, paint the edge of the ear with darker brown paint.
Read here: How to make sugar at home? The best recipe for making sugar with your own hands + tips and video instructions
The main thing is that the base color does not dry out, in this case you will get a smooth transition between the two colors. Next, decorative elements are painted, and at the very end - the eyes (white background and a small black oval) and nose.
The finished product is varnished. You can also add decorative rhinestones, ribbons, etc.
Sock dog
You will need:
- socks
- thread and needle
- beads
- cotton wool, padding polyester, holofiber or pieces of fabric for stuffing
Let's start making:
1. Cut off the toe and top of the sock to make the body of the dog.
2. Sew one edge of the sock, fill with stuffing material and sew.
3. In the same way, make a head from the second sock and sew it to the body.
4. Use the remaining parts of the socks to make ears, paws and a tail.
Option 4. Crochet a toy
Crocheting is one of the most exciting types of needlework! By the way, you can decorate your house on New Year's Eve with ready-made toys.
Of course, you will need some basic knowledge of knitting, but even if you are new to this business, don’t be discouraged. Diagrams, pictures, and videos will help you figure out what's what.
Let's start with the preparatory stage. You will need:
- Yarn of different colors. Your imagination will allow you to make a truly unusual toy! Don’t be afraid of bright and even flashy colors - they will add a “zest” to the product.
- Suitable hook. It is selected relative to the thickness of the threads of your yarn. If you cannot choose the size yourself, then ask for advice at a specialized store that sells handicraft supplies. You will certainly be given valuable advice.
- Filler. This can be cotton wool, padding polyester, or even cereal (which is pre-heated in the oven). The most practical option for stuffing is padding polyester.
- Scissors.
- Glue.
- Beads or any other small details that will serve as eyes and decorations.
Once you have prepared everything you need, decide on the size of the toy and you can start creating the craft!
You can get the most useful information about crocheting dogs from the video. A visual master class will allow you to quickly understand all the intricacies of crochet.
It is possible that you will like this needlework so much that you will decide to take it seriously!
- Video tutorial on crocheting a dog.
2.
Video tutorial on crocheting in amigurumi style.
We can't help but focus on the amazing Japanese art technique called amigurumi. Crafts are made from colored yarn, and the simplest knitting method is used - in a spiral.
The trick of amigurumi is that the toy is made in parts. Small parts are knitted separately from each other and then joined. To give “weight” to the product, pieces of plastic are placed in the limbs of the toy along with filler (paralon or cotton wool).
Experts recommend stuffing the dog's body with fiber filler.
And for experienced craftswomen we have several knitting patterns!
And a few more photo ideas for knitted dogs. Agree, one of these toys will become the most memorable gift for the New Year!
Dog made from plastic bottles
You will need:
- plastic bottle
- glue
- scissors
- colored paper
- cardboard
- acrylic paints (yellow and black)
Let's start making:
1. Paint the bottle yellow and the cap black. Cut out parts for the dog's body from the bottle.
2. Glue the parts together and make a muzzle, ears and paws from colored paper.
Making toys for dogs: step-by-step master classes with photos
Below we will show you how easy it is to make a wide variety of toys for your four-legged friend. Most of them are extremely easy to make.
Fleece rope
A fleece rope is a convenient and simple toy for your pet. And to make it, you only need fleece of any color and a little patience.
Step 1 . Cut four strips of fabric equal in length and width from the fabric. To make the toy more beautiful, take fabric of different colors.
Use fabric of different colors
Step 2 . Place the strips together and tie them all into a tight knot on one side.
Tie a knot
Step 3 . Next, hold the knot between your knees and begin weaving the rope. First, lay out the strips of fabric in a cross pattern, as shown in the photo.
Start weaving a rope
Step 4 . Then fold the “side” strips towards each other, as shown in the photographs.
How to fold the “side” tapes Another photo of the process
Step 5 . Next, take the top strip of fabric and throw it over one of the white stripes, but at the same time bring its edge under the second white stripe.
The tape is wound under the second white stripe
Step 6 . Do the same with the bottom band (which is closest to you).
Same with the bottom band.
Step 7 . Carefully tighten the resulting figure of fabric ribbons, forming a beautiful knot.
A beautiful knot is formed
Step 8 . Repeating steps 4 to 7, weave a rope of the desired length.
Rope braiding
Step 9 . Tie a knot on the other side of the rope after finishing the weaving.
A knot is tied at the end
Step 10 . Trim any fabric ponytails that are too long, but this is not necessary.
Trimming ponytails
Step 11 . The toy is ready.
Finished fleece rope
→ Read also: How to make street lighting in your dacha with your own hands
Rope toy: triple rope
In pet supply stores you can find various toys made from ropes. They are sometimes inexpensive, but often have low quality. It is much better to make such a toy yourself, spending a couple of hours on it.
Step 1 . Take six pieces of rope - in this case, each length is 120 cm. It is better to take cotton rope and synthetic rope.
Six lengths of rope
Step 2 . Seal the edges of the cotton rope with tape, and burn the edges of the synthetic material in a flame so that they do not unravel.
Take care of the edges of the segments
Step 3 . Next, remove two ropes of different colors - they will not be needed for now. Fold the remaining four exactly in half.
Fold the ropes exactly in half
Step 4 . At the bend, tie the ropes together using regular threads.
Tightening with threads
Step 5 . Leave one half of the ropes, starting from the middle, and divide the second in half into two ropes of different shades.
Half the ropes are divided
Step 6 . Take the two ropes you set aside, fold them in half and place them between the two previously separated ropes (see photo for an idea of where to place them).
Where to put the ropes
Step 7 . Secure the ropes together in the center. The result should be three identical bundles of four ropes.
Three identical bundles
Step 8 . Now start weaving ropes from every four ropes according to the same pattern. Let's start with the top beam from us. Bend the “top” and “bottom” ropes as shown in the picture.
Start weaving ropes
Step 9 . Pull the side (red) ropes into the “loops” made from the white rope.
Red ropes are pulled into loops
Step 10 . Tighten a well-made knot. In short, the pattern is the same as when weaving a fleece toy.
The knot is tightened
Step 11 . Weave the ropes from one bundle to the end.
Weave the ropes
Step 12 . Using a screwdriver and pliers, tuck the ends of the ropes inside the cord.
Hide the ends inside the rope
Step 13 . Now weave the same rope from the next strand of rope. Don't forget to remove the regular threads marking the center. And also weave a rope from the third strand.
Weave the same rope from the next strand of rope
Step 14 . This is the preparation we got. Now all that remains is to hide the ends of the rope in the cord again.
Blank
Step 15 . This is what the finished toy looks like.
That's it, the toy is ready
On a note ! Using this type of weaving, you can create toys of many different shapes and sizes.
Defender from a bottle
Using an old chair and an ordinary plastic bottle, you can create an interesting defender that will not only entertain your pet, but also train its mental abilities. To create this toy you need a plastic bottle, masking tape, a long knitting needle, a chair, and dry food.
Step 1 . Take a regular plastic bottle and make two parallel holes just above the middle.
Make holes in the bottle
Step 2 . Pass a long knitting needle through the holes. The bottle should spin easily on it.
The bottle should spin on the spoke
Step 3 . Place a treat or dry food in the bottle.
Feed is being poured
Step 4 . Place the knitting needle on which the bottle hangs between the legs of the chair.
Installation between legs
Step 5 . Secure the knitting needle well to the chair using masking tape. The toy is ready. Trying to get a treat, the dog will spin the bottle with its paw or muzzle, thereby entertaining itself and rewarding itself with a piece of tasty food for each successful attempt.
Attaching the knitting needle with tape Ready-made Defender toy
Kong from a bottle
Plastic bottles themselves are dangerous for dogs - they can damage the oral cavity. However, you can use them to make interesting and funny toys that will be safe for your pet. Let's see how easy it is to create a funny Kong for your pet - again from a plastic bottle.
Attention ! Only a dog that is not inclined to chew these products can play with a plastic bottle without the owner’s supervision.
Step 1 . Take a stationery knife and use it to cut holes of different shapes and sizes in the walls of a regular plastic bottle.
Holes are cut with a knife
Holes of different shapes and sizes
Step 2 . Now take adhesive tape or tape and cover each cut in the bottle. This will protect your dog from sharp edges. You can also decorate the bottle itself with adhesive tapes.
Sections are pasted over
All sections are covered with adhesive tape
Step 3 . Pour dog food or treats into the bottle through the neck.
Food is poured into a bottle
Step 4 . Place the cap on the bottle. Kong for the dog is ready.
Close the bottle with a cap
Homemade Kong for a dog
The pet will roll the bottle along the floor, and food will fall out of it through the holes. This will keep your pet occupied for a long time. At least until the food inside the bottle runs out.
The bottle needs to be rolled on the floor
Egg carton toy
An extremely simple toy can be made from an ordinary egg carton. The main thing is to take regular cardboard packaging, not plastic, and spend 5 minutes of your time.
Step 1 . Take a clean egg carton.
Egg carton
Step 2 . Take small pieces of treats or dog food and place a piece in each slot.
The food is placed in the cells
Step 3 . Close the box. To prevent your dog from opening it quickly, you can wrap it with masking tape.
Close the box
Such a toy is not dangerous for the dog - you can chew it, trying to pull out tasty pieces from it.
Homemade toy in action
Monkey knot toy
You can make another interesting toy for your pet from ropes. It is made using the “monkey fist” type of weaving. Thanks to the clever weaving of ropes, you can get a real rope ball for your dog.
Step 1 . Cut 3.5 meters of regular rope. You can use cotton rope or synthetic rope. Also take a ping pong ball.
Rope and ping pong ball
Step 2 . Since the rope is synthetic, melt the edges in a flame to prevent it from unraveling.
The ends need to be melted
Step 3 . Start winding the rope around your open palm, make five turns (more or less is possible - the size of the future toy depends on the number of turns). Leave the small end of the rope untouched.
Winding up the rope
Step 4 . After the fifth turn, pass the rope between the little finger and ring finger of that hand.
After the fifth turn, pass the rope between the little finger and the ring finger of this hand. Another photo of the process
Step 5 . Now change the direction of weaving - make five turns, but passing the rope behind the palm and wrapping the already completed five turns perpendicularly. Hold the loop with your little finger at all times. But don’t make the coils themselves tight just yet. They can be tightened up later.
Change the direction of weaving
Always hold the loop with your little finger
Step 6 . Take a ping pong ball and insert it into the middle of the knot.
The ball is inserted into the middle
Step 7. Change the direction of the braid again: bring the rope into the middle of the turns on top of the ball.
Change direction again
Place the rope in the middle of the loops on top of the ball
Step 8 . Run the rope down under your palm and insert it into the loop where your little finger was.
Insert into the loop where your little finger was
Step 9 . Make five turns again, passing the rope through the bottom loop.
Make five more turns
Step 10 . Return to the end of the rope where it all began. Pull it towards the braid and hide the ponytail under it. You will get a loop from this tail.
The ponytail will make a loop
Step 11 . Now do not lose sight of this “loop” and, moving along its course, tighten all the turns of the knot.
Tighten all the turns
Step 12 . You should end up with a fairly dense rope ball.
The rope made a ball
Step 13 . You can cut off the excess rope and hide the ponytail in a ball, or weave a braid out of it. This is the kind of toy you'll get.
The result is such a toy
Video - How to make a monkey fist knot with your own hands
snuff ball
Here's another interesting fleece toy. Conventionally, it can be called a sniffing ball. It is created from fabric, filled with treats and then gives a lot of “delicious” minutes to your pet.
Sniff ball for dog
Step 1 . Take a lot of fleece, you can have different colors, but it is advisable that they match each other.
Bring more fleece
Step 2 . From each type of fabric, cut out circles of the same diameter: 20 cm for a small dog, larger for a larger pet. For convenience, fold the fabric in half.
Prepare the fabric
Step 3 . The easiest way is to cut out circles using a template. Take a plate of the appropriate size or cut out a template from cardboard. Trace it onto the fabric.
The easiest way is to cut out circles using a template.
Step 4 . Cut out the drawn circles.
Circles are cut out
Step 5 . In total you need to cut 30 pieces of such fabric circles.
30 fabric circles
Step 6 . Now fold each circle four times.
Fold each circle into quarters
Step 7 . Use scissors to make a hole at the base of each folded circle. Pierce all four layers of fabric.
A hole is made
Pierce all layers
Step 8 . Then take a regular strong and fairly thin lace (preferably smooth) and start stringing triangles on it, alternating colors.
String triangles on a string
In progress
Step 9 . For convenience, divide the total number of circles into three parts and string each part onto a separate cord. As a result, you will get three such “pompoms”.
What happened in the end
Step 10 . Pull the string and each pompom tightly and tie it.
Pull the lace
Step 11 . Then tie all three pompoms together.
Tie the pompoms together
Step 12 . The snuff ball is ready. All that remains is to place a finely chopped treat between the folds of the ball and you can give the ball to your pet to play with.
Place a treat between the folds
The snuff ball is ready
Look how many funny and interesting toys you can create with your own hands for a dog if you apply a little imagination, effort and desire. And believe me, such toys will cost you very little, unlike those purchased in stores, and the quality will be much higher.
Pillow dog
You will need:
- thread and needle
- soft fabric
- padding polyester
- scissors
Let's start making:
1. Mark the details of the dog on the fabric with chalk and carefully cut out.
2. Sew the parts, filling the body with padding polyester.
3. You can make the eyes and nose from fabric or using beads.
Why are dogs made?
Dogs are cute animals, but we can’t always keep them at home. Children ask to buy a four-legged friend. By doing dog crafts with it, you partially compensate for their needs. But there are reasons why you should get a small pet.
- This is a gift for birthdays, New Years, International Women's Day and other holidays.
- You can give it to family, friends, teachers and colleagues.
- Decorate the Christmas tree, table, room, house facade, fence. A large dog made from plastic bottles looks good on the porch.
- Children's development.
We should do crafts for dogs and children more often, it brings us closer together. Helps you understand your child and find a common language with him. This is a way to relax and unwind. Helps to put thoughts in order and calm down after a busy day at work.
You can make different dogs, the process of creating them can be very simple, or it can take a lot of time and effort. Materials for them can be expensive or free. It all depends on your desire and imagination. Realize your ideas for creating unique dogs. Come up with new images and models using unusual materials. And you will have amazing dogs living in your home or at work, bringing joy, happiness and friendship.
Pom pom dog
You will need:
- pieces of felt
- Knitting
- scissors
- glue or glue gun
- beads
Let's start making:
1. From knitting threads you need to make 2 large and 1 small pompom (for the nose).
2. Sew the pompoms together and make ears and a nose from felt.
3. Make eyes out of beads.
