Needlework
07/11/2018 Anastasia Prozheva
What is weaving from a dropper with your own hands, are patterns needed or not for this? These and other questions can be answered in the article. Everyone remembers their childhood years when they wanted to make crafts on their own. They usually used paper, thread, plasticine - everything, just like now. But products made from droppers are still considered real works of art. In Soviet times, used material was more often used.
When patients lay in hospitals without televisions, phones or the Internet, they looked for ways to solve the problem - boredom. Of course, communication is good, but you must admit, sometimes you want to lie in silence and occupy your hands with something. Therefore, people organized their leisure time by weaving.
This type of handicraft has survived to this day. Medical material has its own advantages - the availability of new ones in pharmacies and a large number of used ones, strength, quality, etc. Such products are stored for a long time, do not break and remain in memory forever. Another advantage is the convenience of the material. After all, even children can create with it, but preferably under the supervision of their parents. This master class will help you master medical materials and teach others how to make interesting crafts.
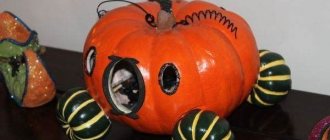
Hospital toy
The weaving technology is quite simple, it is similar to macrame - knots and weaves. It’s easy to work with, you can create a variety of compositions - accessories, baubles, earrings, figurines, toys and pens. But these are not all products that are created from the material. To work, you will need diagrams, of which there are many on the Internet and in books. They will help you understand where to put what, where to cut, where to add, etc.
Fish always remain especially popular. They can be made in different colors using dyes.
But remember that before working with used medical material, it needs to be processed. To do this, place it in a solution of potassium permanganate or brilliant green. Do not forget that after such a “bath” the product will be painted a new color.
Let's study the stages of work step by step.
Related article: How to remove scratches from glasses
We will need:
- 2 tubes of 40 cm;
- clamp wheel.
- Cut the dropper into 2 parts lengthwise. We unfold one segment, creating a stripe. The difficulty of working is that the edges are constantly curling. Follow the work, constantly promote it.
- We wrap the strip around the tubes 3 or 4 times, tying them together. We work with eight. Wrap the strip around tube #1 and then around tube #2.
Scheme for eight:
- We braid this way several times. Let's start creating the nose. We cross the two tubes, directing the ends down the body. We apply the ends to the product, grabbing the ends near the main tubes. Their lower flagella will be the tail, and from the sides we will make fins.
- Instructions follow. Take the wheel. Cut the tube in half. We take one strip, which will become the eye. Wrap the wheel with a strip. Tip - remember the cuts. They should curve outward from the center. The eye in the hole should match, placement near the spout. The eye must go in with force so that it does not fall out or fall apart.
- Fins and tail. Cut these tubes into strips lengthwise. All this for the pomp of the product. It's easy to curl - run a knife blade along the strips.
Look at the photo! What a beauty it should have been:
Weaving from a dropper. Original DIY crafts: surprise your friends!
You are here: Home » Home and family » Knitting, sewing, weaving » Weaving from a dropper. Original DIY crafts: surprise your friends!
In Soviet times, weaving from droppers was a very popular activity. At that time, there were no televisions or other entertainment in hospitals. Patients needed to somehow organize their leisure time, which is why this kind of art of weaving from used IVs was born.
Now many have forgotten about this. The reason for this is not only the development of technology, but also the fact that used medical kits are cut up and quickly disposed of. However, those who still remember the basics of this art willingly share their knowledge.
Weaving from a dropper. What can you weave?
The dropper weaving technology is based on fairly simple weaves and knots taken from macrame. However, these simple techniques allow you to create entire compositions. Devils, ballpoint pens, medallions, pendants, bracelets, various animals - this is not a complete list of what can be made from this unusual material. Patients who had been in the hospital for a long time made compositions from all available droppers. It resembled large installations. Those who are simply interested in trying out what weaving from a dropper is, should master the patterns and make the most popular figures - fish or devils.
Weaving from a dropper: instructions
Materials:
- IV tubes
- Dropper clamp wheel
Manufacturing:
- To start weaving a fish from a dropper, you need to cut the tubes into 2 parts lengthwise. To make a body, take 2 tubes, 40 cm long. Unfold one piece, you should get a flat strip. However, its edges will always curl up and you will have to unwind them.
- Wrap the resulting strip around the tubes 2 or 3 times, so that they are, as it were, connected by it. After this, the tubes need to be wrapped in a figure eight strip. This means that you first wrap the strip around one tube, and then around the second.
- After braiding several figure eights, make the nose of the fish. To do this, you need to cross two tubes, and point their free ends down along the body. These ends need to be attached to the craft and the same weaving should be continued, but at the same time grasp not only the base tubes (which were braided before), but also the ends near them.
- Those ends of the tubes that remain at the bottom after you have tied the tubes together will be the tail, and the upper and lower fins will form from the side ends.
- The next step is to remove the wheel, which is used to adjust the drop frequency. After you take it out, cut another tube in half lengthwise. You will need one strip again. You need to make an eye out of it for the fish. To achieve this goal, simply wrap a strip cut from a tube around the side of the wheel. Please note that the cuts should not bend towards the center of the wheel, but outwards from it.
- You determine the size of the eye yourself. Now you have to insert it into the fish’s body. When braiding the craft, leave a space near the tip of the nose, this is where the eye should be placed. The size of the space left must correspond to the size of the part. In this case, the eye should go in there with a little effort so that it is well secured. The strip with which you braided the fish should end in the middle of the figure eight so that the structure does not unravel.
- The tubes that make up the tail and fin must be cut into thin strips lengthwise. This will make the tail and fins look fuller and more beautiful. Now the fish is ready. You can curl the tail and fins by running a scissor blade over each strip. This will give the fish some fabulousness. By the way, the length of the tail can be adjusted in advance - just leave longer ends when tying.
You can color your craft with iodine, brilliant green or potassium permanganate. If you don't want to color it, you can purchase more modern IV kits that have colored tubes. Then you can give your fish any color you want. If you make several fish of different colors, you can end up with a whole aquarium. Such crafts can be used to decorate a room by hanging them, for example, from the ceiling or curtain rod.
Weaving fish from droppers is a short process, but very entertaining. Involve your children in this creativity. Surely they will be interested, especially if you use colored tubes during your work. Fishes are one of the simplest crafts. Use a little imagination, and you can create interesting things from this amazing, but, unfortunately, forgotten material.
Liked? Share the link!
lucky-girl.ru
Progress
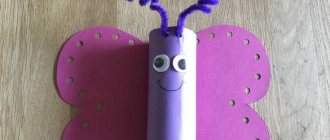
Many are faced with the problem of a shortage of material for the manufacture of products from droppers. But it is easily resolved. Similar crafts can be made from tubes, which are similar in structure to a medical pipette.
The work differs only in different colors. Scooby's flagella are multi-colored, and the medical assistant's are white. You can easily make a beautiful keychain that can be worn on your keys, bag, etc.
To work, use a cord instead of tubes. You need to cut it into two parts and start working miracles. Let's look at the example of working with harnesses.
- Let's make a cross. Remember the cord numbers to avoid confusion.
Related article: Types of DIY handicrafts: how to find yours in a large list
- We wrap the cord from below around the top. And then from the top (pink) we will make a loop, as in the picture. We twist according to the diagram.
- Then the product must be tightened tightly. Remember that the material is difficult to tighten, so apply some force. Advice - do not pull too tightly so that the product does not break.
- Repeat until the job is complete.
Even a child can make such an accessory. The product is suitable for beginners in needlework.
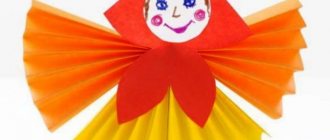
Master class on creating a devil
Instructions for creating another craft - a mischievous little devil:
- First you need to make the arms and legs of the devil. Take a tube and cut two pieces of the required length from it. Then use small scissors to cut each tube into a spiral. You need to retreat 2 cm from the beginning of the tube and cut the tip with scissors. These will be your fingers.
- The weaving of the body and head occurs like a Chinese knot. You need to take 2 pieces of tubes and fold them crosswise. This will give you 4 working endings. The first tube is placed on top of the second, the second - on the third, and the third - on the first and inserted into the loop. The ends are shaped like a square. They can be tied into a knot. Everything is repeated until all the necessary parts are of the required length. When working, it is important not to forget to secure the legs and handles in certain places.
- In order to attach the head to the body, you need to take a needle from the dropper, remove the tip and attach the parts to each other. The part can be planted either directly in the center or pushed forward a little.
- Finally, you need to trim the remaining ends. On the head, 2 ends are completely cut off, the remaining ones are used to create horns, cutting them diagonally.
Dropper fish, like the devil, are considered quite simple crafts. If you show a little imagination and diligence, you can create more interesting things from such accessible material as droppers.
What can be done
Whatever you want. The success of the work and the result depend on desires and imagination. If you don’t find a diagram on the Internet, then try to make it yourself. Of course, you need experience. Try to think through every step, every detail. In Soviet times, devils were very popular. They're easy to make too. In the end you will get a friend like this.
If you paint medical material, it will acquire an emerald color from brilliant green or amber from iodine. In addition to all the above options, you can make bracelets that will be no different from branded ones or those made from flagella or threads.