What is a notepad for?
Who needs a notepad? Every person needs it. The notebook is ideal as a gift. It doesn’t matter to yourself, friends, relatives or loved ones. This is one of the most universal things that will be useful to every person, regardless of whether he is creative or not.
There you can write notes, ideas, recipes, draw and write anything at all. But now you decide to go to the stationery store to buy a gift. However, the prices are obscenely high, and the quality leaves much to be desired, and in general this is not your ideal.
It is for these reasons that many people make them with their own hands, and they turn out even better than store-bought copies.
Various techniques
In the creative world, there are many interesting techniques that are perfect for this work, such as origami, scrapbooking and applique.
Applications made from buttons, multi-colored paper, cardboard, cotton wool discs, ribbons and sparkles will look unusual on the pages of notebooks. You can design pieces cut out from magazines and newspapers as a television screen and so on.
Related article: DIY pasta snowflakes
Products using the origami technique in the form of bows, animals, envelopes, and so on will also be an interesting design.
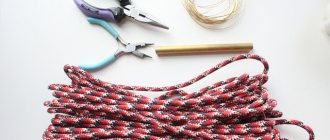
Required materials and tools
How easy is it to make a notebook with your own hands? Everything is very simple. Before you begin, you need to buy or make sure that you have all the necessary materials. You can easily find them in theme stores. To work you will need:
- Leather or fabric. This is necessary for the notebook cover. In fact, there are no specific parameters here. Take what you need. Think in advance about the size of the future product, and take a couple more centimeters in reserve.
- A4 paper. The quantity also depends on how thick your notebook will be. You can use regular printer paper, or go to art stores and find paper with interesting textures and colors. Now the stores are full of it.
- Cardboard for endpaper and spine. It is advisable to take a loose one. Plain cardboard can also be found in any office supply store.
- Thick cardboard for the cover. If you can’t find it anywhere, then just look for an ordinary box of shoes or household items. This density is ideal.
- Hot glue or glue in tubes.
- Synthetic threads of a suitable color. They are needed for stitching the notebook.
- Scissors, ruler, needle, pen or pencil for markings.
- Acrylic paints on fabric + synthetic brush. This is only necessary if you are using fabric and you are not satisfied with its color or want to make a design.
Paper notepad for notes
You can use note paper, which is sold in blocks, to make cute notebooks with your own hands. For this you will need:
Note!
Learning to make a cat house with your own hands: easy instructions for creating simple and complex options (130 photo ideas)
DIY piñata at home: master class for children of any age (125 photo ideas)
How to make a smartphone stand with your own hands: a review of the best ideas, as well as step-by-step instructions
- · Square sheets glued together;
- · Cardboard or craft paper;
- · Fabric for cover;
- · Hot melt adhesive.
The work is carried out in the following sequence:
1. To begin, separate about 20-30 sheets from the block of leaves. Separate them from the block carefully. They must remain attached to each other;
2. Attach them to the cardboard and trace them. Next, cut out the resulting outline, this will be the basis for the notebook cover;
3. Place the cover on the wrong side of the fabric, trace and cut out. If you don’t have suitable scraps at home, you can buy 1-2 squares of patchwork fabric. They are sold in craft stores;
4. Hot glue the fabric to the cardboard;
5. Apply glue to the part of the cover that will be adjacent to the spine;
Glue the cover to the block of sheets, secure the spine with paper clips and let dry.
Preparation of materials
How to make a notebook individual and unusual? You can use several methods to diversify it. There is nothing difficult about it, but the result will pleasantly surprise you.
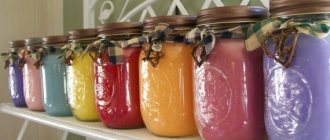
We age the paper . Surely on the Internet you have seen beautiful, new notebooks with seemingly aged sheets. This technique can be repeated at home. All you need is a tray/baking tray and strong black instant coffee or tea. Place the sheets you want to age on a baking sheet. Next, brew tea or coffee. Fill the paper and wait about 15-20 minutes. Afterwards, take out the paper and let it dry well. To get rid of the not very beautiful relief, iron the paper with the iron turned off when it dries.
Printing drawings . If your drawing skills are not brilliant, or the drawing is very heavy, then no one is stopping you from printing it. Drawings must be printed in black and white and exclusively on a laser printer. If you ignore this point, the ink will spread in the future and will not look attractive.
All these pleasant details will make the finished work catch your eye. Thanks to these methods, the notebook will look presentable and stylish.
Stylish diary
A creative person will definitely want to make the notebook not only have a nice cover, but also an interesting design inside. So that his daily management is as pleasant and unusual as possible. Below you will find tips for filling out pages in an interesting way.
First you need to choose the color scheme of the notebook and prepare the required number of leaves. To make it more interesting, you can use multi-colored sheets, for example, several calm, matching shades, or a rainbow version of seven colors. Another popular option is aged leaves. For variety, you can make inserts from dark-colored sheets; you can then stick envelopes, drawings, images on them, or simply use them as separators between the topics of a notebook, or months or seasons of a diary.
The notebook will look prettier and more unusual if you make curly edges on all pages, several options:
- Lace side edge;
- Torn side edge;
- Rounded corners;
- Carved corners.
Then we select leaves for the endpapers; if a hard cover is planned, it is best if these are some color options with drawings that reflect the theme of the notebook; this option looks more interesting than the classic plain background. Or we simply select thick sheets for the cover, in this case preferably plain ones, and place them on both sides of the stack of inner leaves. Then, using a hole punch, we punch all the leaves on the left in two places, then insert the rings into the holes and you get a finished notepad.
Related article: Charming openwork jacket with knitting needles
If you don’t want to do it entirely with your own hands, then you can buy a beautiful notebook and decorate only the inside.
In a notebook, it is important for a woman not only to make beautiful leaves, but also to think through the contents well. You can create, for example, the following sections:
- Motivational Quotes;
- My thoughts;
- Future plans;
- Achievements and failures;
- Important events;
- How was your day?
- Good memories;
- Notes and reminders;
- Photos;
- Interesting articles from magazines and newspapers;
- What am I grateful for today?
- What did I learn today?
- What good deeds did you do today?
And many other useful, creative, motivating and informative sections can be made in a notebook, the main thing is that you don’t need to limit your flight of imagination.
You can make pages with hidden pockets using clear plastic or by placing envelopes on the pages.
A very interesting idea would be to make a thematic notebook, perhaps in the form of a diary on the following topics:
- "The Life of My Family";
- "My life";
- About the child;
- Goals and desires: career and personal;
- Achievements.
If you want to decorate the pages with illustrations, the result will depend on your personal artistic skills. You can make cute borders on the pages, for example by drawing flowers or colorful lines. On separate sheets you can make drawings of your favorite characters, landscapes, still lifes, abstractions, and so on. Or draw small images on each page: butterflies, ladybugs, fruits, berries and other things that fit the theme of the notebook or its section.
If the notebook is about a child, then you can use the drawings he drew as a memory and decoration.
Start of production
We fold the paper in half, paying attention to the edges, which should be even. If desired, we give the sheets a shape by trimming them. When you have decided on the number of sheets to insert, we place some kind of press on our structure, for example, books.
Place thick cardboard around the edges so that the paper does not wrinkle, and attach it on both sides with binders (clothespins) to definitely secure the shape. Leave the sheets under pressure for several hours.
Upon completion, remove the press, transfer the cardboard and clothespins to the side that will need to be sewn later. Leave the cardboard to make holes for the needle. Mark a distance of 3 cm along the entire length.
The markings can be applied just to the cardboard, which is located above the sheets. Then, using a stationery knife, we make small cuts, approximately 3 mm deep. Preferably, a little more than the thickness of the incoming needle.
We unravel the paper from under the binders and open them exactly in the middle in order to sew them together. We start stitching from top to bottom with an ordinary, simplest seam. We start from the very bottom leaf. We will place the subsequent paper on top, stitching it in the same way.
Consider the order of the sheets in advance if they differ from each other. First, leave the thread up to 15 cm for further fastening. At odd intervals, starting from the third, we apply strips of fabric that are approximately equal to the distance of the segments themselves.
They are necessary for fastening sheets between their endpapers. When you get to the fabric, sew the thread from the top, not the bottom.
Using this technique, we stitch the finished assembly of leaves to the end. Again, when we reach the fabric, we thread the thread so that we get a cross. After you reach the edge, tie the thread with the 15 cm that you left at the beginning of the work.
Thus, we sew together the number of notebooks required for you. We glue the finished block between the assembly to secure them together.
Making the cover
Using the same glue when gluing the frame. We spread it along the entire spine, securing the edge with cardboard and clothespins in advance. Glue the same fabric that was used for stitching.
We cut out two symmetrical rectangles that are equal to the format of the sheets. Between them we put fabric, which is absolutely identical in size to the size of the spine. This diagram should be on the fabric or leather that will be the cover. The indentation should not exceed 4 cm.
We glue the fabric onto both parts of the cardboard, not forgetting the spine. The notebook cover is almost ready. All that remains is to attach it to the sheets, which won’t take much effort.
We also coat the first sheet with glue, do not overfill it, but so that there are no empty spaces. Glue it to the finished cover. We do the same on the other side. And now, the notepad is ready. It is suitable both for your own use and as a gift to relatives, friends or loved ones.