Required materials and tools
For beginners, before making a photo album with your own hands, you need to study step-by-step instructions, be patient, and have the necessary tools and materials. The easiest way is to buy a ready-made kit for creating a photo album in a store, but it is much more interesting and cheaper to create using improvised means. In addition, all family members can participate in this entertaining process.
Looking at the finished album, one gets the impression that it is simply unrealistic to recreate this on your own. But nothing is impossible!
So, to create such a masterpiece you will need:
- thick white cardboard;
- paper;
- fabric for cover;
- soft lining;
- ribbons or rings;
- small scissors;
- hole puncher;
- stapler;
- stationery knife;
- ruler;
- scotch;
- glue;
- pencils and paints.
It is important to use decorative details when decorating. This could be lace, fur or leather details, chains, beads, clasps, etc.
Composition: learning to design photo albums
Selecting beautiful photos and stocking up on decorations is not all you need to create a photo album with your own hands. All elements must form a visual unity.
Related article: Bright design of bottles and glasses for a wedding
Each sheet is filled out according to scrapbooking rules:
- select the semantic center of the page;
- choose a harmony of shades for photographs, inscriptions and decorative details;
- choose decoration that matches the meaning of the photo;
- balance the proportions of large and small parts;
- make bright accents;
- do not overload the page with decorations;
- outline the triangle “photo – title – signature”;
- place an odd number of details on each page.
Create contrast from one large element and several small ones in the opposite corner. For example, at the bottom right there is a large snowflake, at the top left there are three small stars.
How to make an album cover
First you need to decide on the size of the future photo album and choose a design style. There are a lot of interesting original ideas for design. The cover can be soft fabric, leather, paper, decorated with various elements.
To make the back cover of an album measuring 25x25 cm, you must perform the following steps:
- Measure and cut out a square of thick cardboard, with a side length of 25 cm.
- Cut a soft lining from synthetic padding polyester or foam rubber to the same size.
- Connect these parts using glue.
- Cut a square of the selected fabric, measuring 26x26 cm. This extra centimeter is necessary for the convenience of folding and gluing the material to the lining.
- On top you need to attach a sheet of white cardboard, which will hide the foam rubber and the edges of the fabric.
- The back cover of the photo album is ready.
The algorithm for making the front cover is slightly different due to the use of decorative elements. For example, you can make a window for a photograph that will tell you in advance about the contents of the future photo album instead of the name.
To do this, the following steps are required:
- Again, measure and cut out a square of the given dimensions from cardboard, but in the center you need to cut out another square or rectangle.
- The soft lining and fabric for the cover are also cut out with a hole.
- Connect all parts together using glue.
- Insert and secure a photo into the window from the inside.
- The top is covered with a sheet of white cardboard.
Then, using a hole punch, neat holes are made in both blanks at a distance of 1.5-2.5 cm from the edge. Rings or tape are inserted into them to connect the parts of the cover.
Albums using scrapbooking techniques
Using the scrapbooking technique, you can create not only postcards, but also a variety of albums for all occasions, displaying your most significant and memorable events.
They can be large, almost grandiose, or small, neat, that fit in your hand.
Review of a travel album using scrapbooking technique
Mini album
A good start for beginners in scrapbooking is to create your own mini-album. It’s bold to take on large-scale work right away, but it’s better to start small.
Master class: mini - bound album part 1
Master class: mini - bound album part 2
First steps to make an album:
- Take some strong scrap paper and divide it into 12 equal square or rectangular pieces. Cut the sheet evenly in rows, but be sure to leave one square (rectangle) with an unseparated side. It is these two uncut lines that will need to be glued together.
- Fold the sheets like an accordion and collect all the future pages of the album together, and then glue them on the inside. Use ribbon as the spine of the book. The album layout is ready.
When you have a completed but empty book in your hands, it’s time to begin the creative stage of creating an album. Guided by the experience of the craftsmen, make a sketch of the product in a thin blank notebook or on blank sheets of paper, which you then staple together. Sketch the location of the photographs, the principle of their division, inscriptions and design. Decide what decorative elements and in what quantity you will need. Let there be a little less detail, without going overboard - this overloads the work and spoils the overall picture of the album in assembled form.
Mini-album with accordion binding
Album with binding
The album on the rings looks great, but it looks solid, of course, with a binding.
Cut narrow strips of strong paper to glue the album sheets together. On each of them, mark a section 2-4 mm wide in the middle. A gap of this width will allow you to use volumetric elements when decorating.
The most important part of the album is the binding.
Cut the extreme parts of the strips diagonally. Leaving a marked gap strip in the center, fold the sides over and glue them to the pages. Thus, you get two sheets connected to each other. Next, you will glue the sheets to them using the remaining strips. Do this work carefully, otherwise the album will end up uneven.
The internal content of the album is ready, it’s time to move directly to the binding. You will need gauze that is as long as the height of the album and as wide as its thickness plus a couple of centimeters. Attach ribbon along the horizontal edges of the binding.
The spine is made of a thick sheet of paper with a margin of 1-2 cm in width. Place it evenly on the base of the resulting book, and glue the cover to the album to its protruding stripes. Now the base of the album with binding is ready, then it’s just a matter of imagination.
Album from scratch part 1 - binding
Album from scratch part 2 - cover
Binding with hidden rings
Pages and binding
You can not connect the photo album with ribbon or rings, but arrange it in the form of a voluminous book with binding. Accordingly, then there will be no need for holes in parts of the cover. For album pages, it is better to take thick white paper.
The sheets are connected to each other as follows:
- It is necessary to cut strips of white cardboard 3 cm wide. They will be used to connect the main pages.
- Then bend each strip in half lengthwise. To get a wider distance between the sheets, bend the connecting strip in the shape of the letter P.
- Carefully glue the folded strips to the pages. The uniformity of the entire photo album depends on this process.
The number of pages can be arbitrary and is determined only by the desire of the master and the availability of the necessary materials. After this, you can begin making the binding.
To do this you will need:
- Take a bandage or thick gauze, cut a rectangle 25 cm long and 3 cm wide larger than the resulting album blank.
- Glue the fabric to the seams of the pages.
- Then you need to secure a piece of braid or tape along the upper and lower edges of the future binding. This will give the album a more neat and aesthetic appearance.
- We make a spine from thick cardboard of a suitable color that will hide the entire binding.
- Parts of the cover are glued to the folds of the spine.
Do not attach the spine to the pages of the product, otherwise they may not open properly.
That's the whole secret of how to make a photo album with your own hands. Step by step, it won’t be difficult for beginners to create such a masterpiece. Now all that remains is to fill the album with photographs.
Decorating a page in a homemade photo album
A sketch of the photo album page must be drawn in advance. On a regular page there are 5 main components: title, photographs (1-2), inscriptions for them, background, decorations and additions. The page is marked with a simple pencil.
First, do all the work with paints and felt-tip pens so as not to smudge it later. Fill out the page starting from the top. When the artistic elements have dried, stick the photo in the intended area.
Inscriptions on album photographs are made with ink, gel pen, and felt-tip pen. Then flat decorations are attached. It is more convenient to attach volumetric elements when the album is fully assembled. They are glued, sewn or nailed. It is convenient to use a glue gun when decorating photo albums.
A variety of materials are used to design photo albums: paper, fabric, wood, metal, plastic, felt. The subject of the pictures will tell you how best to decorate your photo albums. A wedding photo album is decorated with lace and pearls, a traveler's album is decorated with pebbles and shells. You can make decorations with your own hands: knit, cut out of paper.
You don't have to buy appliques from scrapbooking stores. Dried flowers and leaves look even better than plastic ones.
The Internet and special reference books contain thousands of extraordinary tips on how to make photo albums of any subject with your own hands. Experts conduct master classes on scrapbooking. But it’s much more fun to invent and create on your own!
Master class: scrapbooking (3 videos)
Various album design options (45 photos)
The best posts
- 5 DIY ideas: how to decorate the interior without spending money?
- Features of the production of fire dampers
- Base for DIY bracelets made of plastic
- Tiles on a concrete wall: how to glue tiles, stick them and lay them correctly
- Crochet bath mat: pattern with description of owl knitting
- Original do-it-yourself panel: options and production
- How to make a clothes dryer with your own hands?
- Features of lighting in the kitchen: what is it and how to organize it? (current ideas)
Scrapbooking technique in creating a photo album
Scrapbooking is an art form with which original photo albums are created and designed. Transforming an ordinary boring photo album into a unique story of our life.
The origin of this technique goes back to the distant 16th century. At that time, notepads for recording important dates, valuable advice, recipes, etc. were at the peak of popularity. By the end of the 17th century, books began to appear with additional blank pages for making notes and pasting in illustrations. This was the birth of the scrapbooking technique.
In the 19th century, with the beginning of the mass distribution of photographs, a real revolution took place - special pockets were made for photographs, and the pages were painted with different colors and designs. Albums for girls with pictures, photos and various inscriptions were especially popular.
Today, there are many ways to design photo albums, and scrapbooking is popular all over the planet.
Small album: wonderful memories
Sometimes a whole series of photographs are accumulated, connected by one subject. For example, a romantic walk with your loved one, a friend’s wedding, the smiles of a baby. These images can easily be combined into a mini album.
There are several options for how to decorate an album with photographs in an unusual way:
- use half size paper;
- use a purchased small-format album as a basis;
- make a book that folds out like an accordion.
When decorating a mini photo album, only 1 photo is placed on the page. Inscriptions, decorations, quotes are placed on a parallel page.
Related article: Wall decoration: making bright paper crafts with your own hands
Designing a photo album page step by step:
- background – “Dandy” scrap paper;
- on the page on the right is a photograph cropped at the edges with comb scissors;
- in the upper corner of the photo there is a heart chip;
- on the left page there is a blue inscription “The two of us under an umbrella”;
- under the inscription there is a fabric autumn leaf;
- along the edge of the left page - a vertical strip of decorative tape;
- on the tape there is the inscription “Autumn is...”.
To create a mini photo album with your own hands, you will need double-sided paper. Tilting the photos will add dynamism. You can glue scraps of bright fabric or lace under the pictures.
In the “mini” style, you can perform a large family cycle: “I was born!”, “First steps”, “Walks with grandma”, etc.
Ready-made sketches for pages
A sketch is a small page template for a future album. In scrapbooking, a sketch is a prepared sketch to speed up and convenient the work process. Ready-made sketches are a godsend for beginners who are wondering how to make an original photo album with their own hands. By step-by-step selecting shades and photographs, you can easily create inimitable pages of your future album.
These ready-made sketches are simply an inexhaustible source of ideas and inspiration! Gradually, as the work progresses, templates will be used less and less, and soon they will completely fade into the background, clearing the way for the uncontrollable imagination of the master. Everything depends only on the desire to act and create. Such ready-made sketches are also useful for visualizing a future photo album.
After all, this is still a draft, in which there is always the opportunity to change and correct something, without causing damage to valuable creative materials in the process of making amendments. Sketches are used not only by beginners, but also by experienced professionals. After all, sometimes one glance at the finished sketch is enough for your own idea of designing the pages of a photo album to begin to emerge in your thoughts.
Thus, it is easy and simple to create unique masterpieces with your own hands.
Themes of homemade albums
Before making a photo album with your own hands, step by step for beginners, you need to decide on its theme and select suitable decorations for the album.
Making an original photo album with your own hands if you have the necessary tools and materials, as well as ideas for its design, is not at all difficult.
All that remains is to choose a plot and some significant life event, for example:
- the birth of a baby;
- the first year of a child’s life;
- graduation in kindergarten or school;
- wedding;
- birthday;
- trips.
In general, the theme of a homemade photo album can be any bright event in life, the memories of which you want to keep in your memory for a long time.
Another reason to do this kind of handicraft could be creating a gift for relatives, colleagues or friends. It’s enough just to make an original photo album and present it for any holiday of a loved one. Such a surprise will not leave anyone indifferent!
Wedding album. Step-by-step instruction
The process of creating a wedding photo album is extremely interesting and exciting, because a piece of your own soul is put into it. Beautiful happy newlyweds, their sincere smiles, are the main characters of the emerging fairy tale, the beginning of a completely new life together.
It’s an extraordinary feeling to pick up a tattered, dusty photo album after many years, flip through it and understand that love, true love, is beyond the control of the years.
For beginners, before making a wedding photo album with your own hands, you should study the step-by-step instructions for its design:
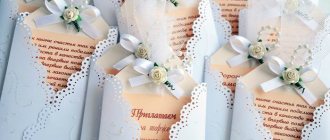
- Cover. You can decorate the cover with various elements. Flowers, butterflies, snow-white doves or connected wedding rings are perfect for this. A win-win option would be to use photographs of young spouses. Such tricks will suggest in advance the thematic direction of the photo album and help create the appropriate mood before viewing.
- Name . It is recommended to indicate on the cover the names of the newlyweds and the date of this special event. Famous quotes can be used as the album title.
- Pages. It would be appropriate to arrange the pictures in chronological order. You can even create a detailed story, a wonderful fairy tale plot in photographs. You should not place many small photographs on one page. They will only distract the viewer's attention. One of the album pages can be left blank. On it, guests will be able to write their wishes to the young spouses, for example, on their first wedding anniversary.
- Decoration . Sometimes it seems that photographs alone are not enough to express all the emotions and feelings of that day. In this case, various details will come to the rescue: ribbons, beads, sparkles, lace, some wedding decorations, napkins, a piece of veil. Everything that can awaken pleasant memories.
- Photo captions . As photo captions, you can use quotes, poems or lyrics that correspond to the special occasion.
In the process of creating an album, it is important not to overdo it with additional elements and decor, because the main thing is still the photographs.
Captions for wedding photos in an album: how to keep photos the way you saw them
» » How important it is to capture the most important moments and sincere emotions on your wedding day!
A talented and experienced photographer will provide you with beautiful pictures, and an additional bonus will be a stylish wedding photo book and video.
On the Svadebka.ws portal you will find out why wedding books are an excellent alternative to traditional albums and what design ideas are offered by photography masters. A modern wedding book is an opportunity to preserve each photograph for many years to come, without worrying about the pictures getting lost or fading. After all, the photographs themselves are the pages of the book.
The ability to choose absolutely any theme that will correspond to the ideas of the wedding photo shoot; A designer photographer can create a completely new and original design for each spread. The placement of photographs is carefully thought out, the “match” of the photos to each other is taken into account and, if necessary, inscriptions of the required style are created; Save time if you order printing of wedding photo books from the photographer who directly photographed your celebration; Photos on the spread are printed without tearing.
This makes it possible to put a photograph on the entire spread, highlighting their significance for the couple; Wedding photo books allow you to conveniently store photos. Albums are made in thick binding, which guarantees the safety of photographs for many years; The most important and beautiful photographs are collected in one place.
Beautiful words, quotes, comments to photos on Instagram, VK, Odnoklassniki: words, text.
Beautiful words, quotes, comments under photographs of children, sons, daughters, girlfriends, friends, girls, women, men, boys, girls, mothers, weddings: text
In this article you will find options for comments and captions for VKontakte photos. Contents Sometimes signing your photos on social networks with simple words “my daughter” or “my son” can be quite boring.
It’s much more pleasant to include necessary and important words or beautiful quotes that will create a mood and inspire reflection. In this way, the photograph itself will become more meaningful and valuable.
What can be used as a signature:
- Movie quotes
- Book excerpts
- Personal philosophical thoughts
- Memories
- Words and statements of famous people
- Emotional stories
Of course, each child is individual and good in his own way.
For his parents, he is the most special and the best.
By posting his photo on social networks, parents, of course, are proud of their child. It is very easy to convey this note of mood by making an accurate and very sensitive caption for photos.
Even if you don't include photos of your children, you can always comment on someone's posted photo, showing off your good side and leaving a mark on your friend's page. Choose the most beautiful and wise sayings that can “awaken” emotions and make a positive imprint.
A beautiful photograph of a woman cannot be ignored.
It evokes a lot of positive emotions and forces any social network user to react in some way: like it or leave a personal comment.
To ensure that your words do not go unnoticed, you should choose the most effective and beautiful quote, or a personal emotional statement.
DIY album for a newborn
The birth of a baby is a new exciting stage in life together, filled with emotions and experiences. I so want to remember every moment, every smile of a child, his first inept steps. But over time, even the most vivid memories are erased from memory and dissolve in the everyday bustle. Therefore, it is worth thinking in advance about preserving these emotions.
A handmade photo album for a newborn is perfect for this purpose. It will be interesting and exciting not only to look at pictures of the baby in the future, but also to participate directly in the process of making it. Loving parents can show all their creativity and imagination, putting a piece of their love into their work.
Decoration materials
When designing a newborn's album, you want to use the softest materials and the most beautiful, elegant elements. So that tenderness and boundless love for the baby can be conveyed even through them. Velvet or velor in pastel colors is perfect for the cover.
Additionally, it can be decorated with the following details:
- small plush toys;
- felt figures;
- lace;
- satin ribbon bows;
- beads and sparkles;
- lace cap, booties, romper strap, pacifier;
- tags from a newborn's hand;
- buttons and rivets.
In the decorating process, it is important not to overdo it with the number of additional elements and combine them harmoniously with each other.
Designing photo album pages step by step
For beginners, before making a photo album with your own hands, it is recommended to pay attention to the step-by-step instructions:
- It is better to make album pages from thick white paper or thin cardboard.
- It is better to paint them in the color you like with gouache, given that the dried paint becomes lighter in tone.
- It is worth adding PVA glue to the paint - this will prevent it from smearing from the pages after drying.
- You can paint all the sheets with one color, or you can use shades to divide the first year of the baby’s life into periods (trimesters or half-years).
- It is allowed to use any design techniques - cutting off corners, creasing them, drawing patterns, gluing appliqués.
- The album must include the following headings: height, weight of the child, date of birth;
- a photograph upon discharge from the maternity hospital;
- first steps;
- photo with parents;
- first birthday;
- hand and foot impression.
- If you wish, you can attach an ultrasound image and even a positive pregnancy test.
- It is advisable to supplement images and photographs with inscriptions and comments from parents.
The homemade album is ready. All that remains is to put pictures of the baby in it, and it is important to fill out the pages of the album regularly and with love.
Ideas for decorating a children's photo album
There are many ways to design a children's photo album and make it unique and inimitable.
Here are some of them:
- It is better to save more little things, which in a few years will seem even more significant and interesting. For example, a tag from a child’s first clothes, a label from the first jar of puree or juice, the first diaper, a cut strand of hair.
- Entry of the child's name is encouraged. What does it mean and why was it chosen?
- You can attach photos of your favorite toy and your baby’s first drawing.
- It is permissible to write down the words of your child’s favorite lullaby.
- It is recommended to describe the process of introducing new products into the child’s diet, consider his daily routine: rest, wakefulness, meals.
In general, you should listen to your heart and don’t be afraid to experiment! And then you can easily create a wonderful gift for a child.
Family photo album step by step for beginners
You can make an album with your own hands not only for some special event, but also for telling a story about family life in general.
To create it, you can use the following sections:
- Candy-bouquet period. With the help of photographs, you can tell about where and how the spouses met, how their relationship developed, and celebrate their first joint holidays.
- Family life itself . You can start the story from the wedding day. Let the photographs tell in general terms about the past celebration, the young spouses and the invited guests.
- Rest. It would be a good idea to include joint travel, family holidays and traditions in a separate section.
- Children and pregnancy. You should definitely pay attention to children, their birth and subsequent growth and development, attaching more general photographs to the album.
- Shared life . It is worth telling about everyday life with the help of photographs, how they made repairs or how everyone prepared Sunday dinner together.
Creating a family album will require you to spend time and effort, but the result will definitely be worth it.
Photo album in vintage style
An interesting idea for creating an album with your own hands would be a photo album in a vintage style, i.e. "antique"
This genre of creativity has a number of features:
- It is necessary to artificially age the pages as if they were made many years ago. This effect can be achieved, for example, by staining paper with strong coffee or tea.
- All decorative elements should be selected in accordance with the chosen style.
- Pages can be made from textured beige wallpaper. The edges of the sheets must be cut unevenly, crumpled or folded in places, and made a tone darker than the main sheet.
- It is allowed to use bows, antique lace, paper or fabric flowers, and embroidery on paper.
It should be noted that black and white photographs with frayed edges will look more organic in such an album.
Photo album as a gift for a teacher
Traditionally, gifts are prepared for the graduation party for the class teacher and the first teacher. The best way to capture childhood memories is through self-made photo albums. They include the most striking photographs from school life: lessons and excursions, concerts and work in the school grounds. There are many styles for designing a photo album: children's theme (for the first teacher), computer theme (for the computer science teacher).
Related article: Decoupage technique on fabric using PVA glue (master class)
The “school” style is popular in albums for teachers - notebooks with a slanted ruler, a chalkboard, autumn leaves. The photographs are accompanied by funny illustrations: scanned “notes” from schoolchildren’s diaries, fragments of school essays. Often graduates make photo albums as gifts with wishes.
Ideas for the page:
- light paper background;
- in the center - photo;
- to the left of the photo is a strip of decorative tape with maple leaves;
- above the photo is a monthly calendar (printed or made by hand);
- to the right of the frame is a checkered sticker with the inscription: “History lesson, 02/04/2019”
- at the bottom is the inscription in blue marker “One day in our life.”
All students can sign the graduation photo album for the teacher. Homemade teacher albums are a great addition to pockets filled with CDs of memorable videos.
How to decorate pages and cover in an original way
Before starting work, it is imperative to think through the idea of the future creation and sketch out sketches. On the draft, depict everything that is planned to be included in the album, down to the smallest detail. This will allow you to clearly examine the result of the work, taking into account all the nuances. The number of pages is calculated based on the number of photographs.
Each album sheet must contain:
- the picture itself;
- name of the photo;
- description of each frame;
- decoration;
- additional decorative elements.
It is important to think in advance about what ink, color, font size and inclination of letters will be used to describe the photographs. You can also use letters cut out from a newspaper or magazine and assembled into whole words.
First of all, flat parts are attached to the album, and at the very end - three-dimensional decorations.
For an original cover design, you can use a collage made from small photographs. It can be created in the form of a simple geometric figure or come up with a more complex artistic design. For beginners, before making a photo album with your own hands, you should step by step understand how and how the finished copies are decorated.
Otherwise, the process of creating your first album may cause some difficulties. It will be more convenient to design the pages before they are stapled into the finished product. It is important to remember that on one sheet of paper attention should be focused on one bright element in order to avoid information overload on the page.

