Earrings with beads shaped like a bunch of berries
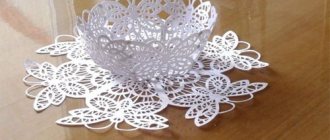
What could be more graceful and elegant than lace? At all times, patterned canvases were highly valued, being the privilege of the royal nobility. Looking at the fantasy openwork, associations with frosty patterns on the window are involuntarily born.
The luxury of elegant lace cannot be overestimated; it is delicate and painstaking work. The title of the simplest weaving technique belongs to needle tatting. For beginners, it will not be difficult to learn the ancient art that arose back in the 15th century.
Features of art
The history of the extraordinary direction of applied creativity originates in the Ancient East. It was in this simple knotted way that fishermen made their nets. Later, the art gained popularity in European countries, and the name “tatting” was invented by French fashionistas, from the word frivilite, which translated means “empty, weightless.”
Openwork bracelet and earrings made of red thread
Threads of silver and gold were used as materials for making patterned guipure. The rich outfits of the royal nobility and court ladies were decorated with cuffs, frills and collars. Today, the base material can be simple threads of cotton or linen. Such products will decorate fashionable outfits and accessories no less luxuriously. The art of tatting is often used in creating collections of original costume jewelry.
Where to start learning
In order to master ancient needlework, you will need imagination, a desire to create, and also a little “ABC”:
- Selection of raw materials. To make fabrics that are luxurious in their beauty, you will need yarn. This type of creativity is not only beautiful, but also economical. Yarn can be selected in any price category, the main criterion is strength and high quality threads. These can be simple cotton threads, wool, linen or silk yarn.
- Selection of tools. To begin with, you will need a minimum set. Every craftswoman has all kinds of hooks and needles in her chest, and you can make a shuttle with your own hands.
Materials and tools
- Basic schemes. They will help beginners make lace step by step, following the basic rules.
Having prepared an arsenal for weaving tatting, you can safely get to work. Rest assured, the process will captivate you, drawing you into the extraordinary world of creativity.
Tatting weaving technique with shuttle video
For this technique, you can use not a needle and thread, but a special oval-shaped tool - a shuttle. The device is made from different materials and different structures. For beginners, it is better to have two shuttles, which are subsequently selected for the appropriate yarn size. I bring to your attention, dear needlewomen, a clear video on how to learn how to do shuttle tatting:
Video master class on tatting a floral motif:
Alternative way
The classic version of the tatting technique is weaving using a shuttle. It is a simple petal device that can be bought in hardware stores, or you can make it yourself. What to do if the desire to start the process immediately is so great that there is no time to buy or make a shuttle? There is an alternative - tatting on a needle.
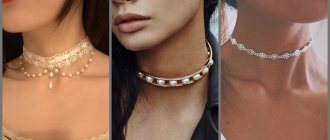
Jewelry using tatting technique
[Show slideshow]
To implement creative plans, it is enough to have a simple set on hand:
- Yarn (iris, acrylic or cotton).
- Needle (special or sewing, but as thick and long as possible).
- Thin crochet hook.
- Scissors.
The appearance of the finished product, made with a needle, cannot be distinguished from lace knitted using traditional techniques. Needlewomen, having tried both methods, often settle on the needle, considering it more convenient and easier to perform.
Tatting with a needle
Preparatory work
Before engaging in interesting and exciting art, we need to prepare material that will be useful to us during the execution of the actions. Necessary materials:
- Thin single hook - for connecting parts.
- Cotton, silk, linen, wool, synthetic thread. It is important that it is sliding.
- Sharp scissors.
- Thin needle.
- A long thick needle with a small eye. It is with this needle that we will produce masterpieces.
- Pebbles, beads, beads for decoration.
- Two rings and an English clasp.
master class tatting lace with a needle
Features of thread selection
Lace can be woven from any thread, it’s all a matter of skill, imagination, and preference. But there are two requirements that must be strictly observed when selecting yarn.
To make the decoration neat and beautiful, you need to choose the right threads
Firstly, high strength indicators. When tightening elements such as rings, arcs or half-arcs, a large breaking load is placed on the thread as the knots are tightened. Secondly, it must be twisted, with a smooth, evenly colored surface. The lint prevents the knots from moving freely. Tying is an obligatory component of the process, because they can accidentally break off under strong tension or simply end. To tie the thread while continuing weaving, the knot should be as inconspicuous as possible, so as not to disrupt the magic of sophistication and special grace of the fabric. The most popular technique is the following: we connect the ends of the old thread and the new one, turning them so that a loop is formed. Until the knot is tightened, a needle is inserted into it, which moves it close to the lace.
Threads for tatting
How are beads and beads woven?
While looking through the master class for learning tatting, you probably noticed that beads and seed beads are often woven in there. This will make the product look more elegant. When stringing beads, remember the order in which they are woven. The bead strung first will be used last in the product. If you are not yet completely confident in your abilities, it is better to study the lessons that show how to work with beads and beads when knitting using the tatting technique. This master class will help you gain experience, and in the future you will be able to create your own projects and schemes. It is better to start by using beads of the same color. Then you can move on to more complex options (multi-color beads, alternating beads and beads).
The easiest way to weave beads is where the picot is knitted. If it is placed on a ring according to the pattern, then the beads move to the loop that creates the ring. This should be done before weaving the first knot begins. Other beads are located on the shuttle. The beads that remain should be moved towards the little finger, so they will not interfere with knitting. At the moment when you have already reached the picot, you should move the beads towards the knots and knit further.
You can also find a master class where beads are woven along the leading thread. In such a situation, the beads are not moved to the ring, but simply moved to the knots in the right place and weaving continues.
You should work with beads a little differently. If they are used together with picot, the product will not look very beautiful. A bead placed in the center of the ring looks much better. To achieve this effect, the first half of the ring itself is knitted as usual, and then a picot is made and the ring is woven. Then use a needle or hook to thread the bead and move it onto the picot thread. Then use a needle to pry up the loop of the picot thread that passes through the hole of the bead and pick up the working thread. The latter is pulled through the pico.
Basic set of elements
The uniqueness of ancient art lies in the ability to combine it with other handicraft techniques. Patterns can be complemented with macramé, beading, knitting, crochet, weaving or embroidery. The main element is nodes. There are many of them; a detailed master class will help beginners. Having mastered the implementation of simple elements that form openwork patterns when woven, you can create an incredibly beautiful masterpiece of applied art.
Knitted earrings using tatting technique
The first thing that is necessary for a successful weaving process is to learn how to read patterns. These are the main “helpers” for creating costume jewelry, collars, and cuffs.
Lace is knitted with a needle quite quickly. An experienced craftswoman will need no more than an hour to make a lace bracelet or necklace. The main types of nodes are as follows:
- Direct and reverse. When combined they form a flat double knot.
- Hercules' knots. They allow you to connect broken threads or weave lace from several colors at the same time.
- Pico. This is an elegant decorative element that allows you to combine several separate motifs at once.
- Ring. The name of the weave in Italian interpretation sounds like occhi, which means “eye”. It is the subtle “holeiness” that adds notes of airiness and sophistication to the product.
- Arcs. Open rings can be the finishing touch to products.
Having mastered the technology of creating knots, you can knit elegant and original accessories that can decorate any fashionable look.
Tatting with a needle, double knot tatting, picot, ring and arc
Basics of tatting technique
MATERIALS
Shuttle Shuttles are usually oval in shape. Initially, they were made from the same materials as the tools for weaving fishing nets: wood or turtle bone. They were quite rude. In the 18th century and until the end of the last century, shuttles formed part of the bride's dowry and were often made of precious materials: gold, silver, ivory. Today, shuttles are most often plastic and multi-colored; the low price allows you to purchase them in large quantities. For weaving lace, it is preferable to have several shuttles of different colors. Some shuttles have a moving wheel inside, which can be used to quickly wind the thread. Others have a “beak” at one end, which allows you to work without a hook. For the most demanding and for collectors, there is, especially on the American market, a whole series of shuttles of various shapes and from a variety of materials - from plastic to silver. Shuttles with a “beak” are most suitable for weaving lace - in addition to the fact that they allow you to work without a hook, they can also be used to control the size of the width of the loops without resorting to other tools.
Hook Its sole purpose is to connect the loops while working. It should be very fine, or at least proportional to the size of the yarn used. Whatever model you choose, you will undoubtedly need hooks No. 8, 10, 13.
Yarn You can use any commercially available thread: cotton, silk, linen, wool, synthetic and metallized threads, as long as they are well twisted and slide freely. Usually twisted cotton is used, which has all the necessary qualities: durable, easy to slide and well twisted. Of course, to get light and delicate lace, you need to use thinner threads.
BEGINNING OF WORK
Using the Shuttle The shuttle consists of a central body closed between two oval plates that almost meet at both ends. The center bobbin has a hole through which you need to thread the thread before you start winding it around the bobbin itself. The shuttle plates have an oval shape, which is convenient for work and at the same time prevents the wound thread from unwinding during lace weaving. Some shuttles are equipped with a movable wheel instead of a bobbin to make winding the thread easier.
How to thread a shuttle Insert the end of the thread into the hole of the shuttle bobbin, secure with a knot and, passing it through the edges of the oval plates, wind the thread so that it is inside the shuttle. It is advisable that the thread does not extend beyond the edges - this will protect the yarn from getting dirty and breaking during work.
BASIC TERMS
You need to remember a few terms for the different elements and techniques of lace weaving. You will often encounter them on the pages of the book.
Knot : consists of two half-knots tied over a thread with which rings and arcs will be formed. Pico : a decorative element that also serves to connect rings, arcs or one piece of lace to another. Giuseppina knot : a small ring created using a series of half knots - its number usually ranges from 8 to 12. Ring : a figure that is created from a series of knots and picots placed on a thread closed in a circle. To close the ring, you need to pull the thread from the right shuttle, pulling it inside the knots until the first and last knots come together. Arc : An element that allows work to continue until another ring is formed or a picot is secured. If you want to make rings inside the arches, you need to connect the thread with another thread from a ball or another shuttle.
Knot
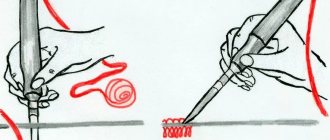
This is the main element of lace, necessary to weave a ring or arc. 1. To make a knot, secure the thread between the thumb and forefinger of your left hand and wrap it around the remaining fingers, keeping them slightly apart; secure the thread again with the same fingers, thus forming a ring. Take the shuttle with three fingers of your right hand, trying to hold it so that the side from which the thread coming out of the shuttle is wound is turned towards the little finger or ring finger around which the thread will be wrapped. The little finger (or ring finger) plays an important role: it must regulate the tension of the leading thread. 2. Pass the shuttle through the ring formed by the thread wrapped around the left hand, so that the shuttle enters from the bottom and exits from the top (that is, between the index and middle fingers of the left hand). Loosen the thread of the ring by folding the middle finger of your left hand so that the resulting knot is placed on the thread that forms a ring around the fingers of your left hand. 3. Hold the resulting element firmly between the thumb and forefinger of your left hand. The thread tightening the first half-knot should pass close to the fingers that hold the ring (i.e., the thumb and index finger of the left hand). 4. Make the second half of the knot, mirrored in relation to the first, this time passing the shuttle from top to bottom through the ring. 5. Loosen the thread of the ring so that the half knot is close to the previous one. 6. Having made the required number of knots, pull the thread from the shuttle until the ring closes.
Pico
Loosen part of the thread before tightening the first half of the knot. Then make the second half of the knot, which, approaching the previous one, forms a small loop.
Ring
The ring is the main element of tatting lace. It consists of a series of nodes and/or picots, the number of which can vary. To get the ring, you need to use a shuttle. Having made the knots, pull the shuttle thread in your right hand: when the thread begins to stretch inside the knots, this will allow them to be brought together and close the ring. As you weave the knots, the ring will gradually shrink. If you make the knots correctly, they will allow the shuttle thread to pass in such a way that you will again have a fairly wide circle within which you can continue working.
Arc or arch
Make a series of knots and picots in the same way as for the ring. Use a shuttle with a leading thread and a loose thread (from a ball or wound on another shuttle). The second thread should be held between the thumb and forefinger of the left hand and passed over the other fingers, wrapping it around the little finger two or three times (to secure it and keep it well taut).
Connection of rings and arcs
If, when weaving rings and arcs, you need to attach the piece you are currently working on to a finished piece, you will need a hook (unless you are using a hook with a “beak”). Enter the existing picot, hook and lift the thread in your left hand to form the ring you are working on. Pass the hook of the leading thread into the loop from bottom to top. Pull the thread with your right hand to tighten the knot that should form when the loop is pulled together. Continue working until you have completed the ring or arc.
Giuseppina knot
This is one of the options for weaving a ring: it consists of a series of half-knots, numbering from 8 to 12, and is a decorative element, just like picot. Make a series of first half knots on the thread (ring), pull the leading thread and close the small ring.
Additional elements: beads Beads can replace picot in a ring or in an arc, but only for decorative purposes: they must be strung on the working thread before combining both threads (working thread and thread from the shuttle). Try to calculate in advance what length of thread you will need and how many beads, what colors and sizes you need. To complete the work efficiently, without unnecessary knots, beads should be taken in excess, and the thread should be taken longer; it is better to cut off the excess with scissors. It is not recommended to add thread as it may degrade the appearance of your lace. Add beads one by one as you work on the knot or ring, then tighten the half knot and continue working as you did after doing the picot. For some types of work, especially the most complex ones, beads can also be strung on a leading thread.
WORKING WITH MULTIPLE COLORS
Tatting, compared to many other techniques, has the advantage that during weaving you can use different colors of threads, without the need to tie, cut, skip and hide threads that should not be visible in the finished work. Remember that the leading thread (the one you hold in your right hand) remains always hidden; so when you decide to change the color, you need to change the shuttle thread ("change hand"). The additional thread, if wound on the second shuttle, thus becomes the leading thread, and the only knots visible in the lace are the starting and ending knots (if the yarn you are working with has run out, then see the section "Combining two threads "). To obtain beautiful lace, it is necessary that both yarns have the same size, brightness and quality, otherwise you will have to change the number of knots (increase or decrease according to the diameter of the thread). Some of the works presented in this book were deliberately made from threads of different sizes (particularly because it is not always easy to find threads of the desired color and number). The proportions have already been calculated in the presented diagrams. If you want to experiment, you can freely use any types of threads, especially for lampshades, photo frames, and flowerpots. You have the opportunity to vary colors and diversify all the models presented in the book to your pleasure. The only necessary element is imagination!
Merging two threads
Working with one shuttle allows you to make only rings; any other elements of the work require two skeins of yarn (1 shuttle and 1 free thread or 2 charged shuttles), the threads of which must be connected at the beginning of work with a strong knot - a weaver's knot or a flat knot. Only in this way can one move through arcs from one element to another without returning to the starting point (as happens with rings). And only in this way can you change the color during work. If the extra thread serves you only to make arcs, you can take it directly from the ball. To start making rings, you need to wind it on the second shuttle. If the thread runs out during work, you can attach another one to it, but only at the beginning or end of the ring or arc. Otherwise, the knot made inside the work will prevent the thread from sliding and will become too noticeable.
weaver's knot
This knot is used to connect two threads of different colors at the beginning of work, but it is also useful when the shuttle thread runs out or when, due to an error, you need to cut and rejoin the thread. Pay attention to the tension: if you only have one thread taut when tightening, you will end up with a slip knot. Start from the right: thread AC crosses BD, passing under it. End A is wrapped around B, passing forward from left to right. End B passes over C and A, entering the loop formed by end A. Pull strands AB and CD at the same time to tighten the knot. Flat Knot The Flat Knot is a simple knot like we usually use to tie shoelaces. Only here you need to do it twice in a row, and try to keep all four ends of the thread equally tight. A crosses B and turns around it (first part of the picture). B crosses A and turns around it (second part of the picture). Pull both ends of thread A and the ends of thread B at the same time. If you do this correctly, one thread should not move inside the knot: this knot will not untie itself. At the end of the work, such a knot can be repeated twice for greater reliability.
Attaching lace to fabric
Lace seam
This seam is made blind to the right. After preliminary sufficiently dense basting, a seam is laid along the traces of the pattern with vertical stitches located very close to each other.
Turkish seam
Performed from right to left. First, two horizontal stitches are made on the fabric, then a transition is made using a bias stitch a few millimeters upward, and then two more stitches are made, joining the fabric and lace together. Then from below everything is repeated from the beginning.
Scallop Stitch Proceed as follows: Baste the lace to the fabric using short, tight stitches to create a strong base for the scallop seam. Attention: the lace must not move! Bring the needle to the right side, slightly beyond the edge of the lace, and hold the thread under the thumb of your left hand. Point the needle vertically from top to bottom so that when you pull the thread, you get a small loop. The following stitches are made in exactly the same way, you just need to make sure that they are close to each other and the thread is always evenly stretched. The basting will be inside the scalloped seam.
Blind Stitch Sew the picot loops using small blind stitches using thread of the same color as the lace.
WASHING AND IRONING TATTED LACE
Like any handicraft, tatting lace requires special attention during the washing process. Typically, natural fabrics are used (linen, cotton) that can withstand fairly high washing temperatures, so we recommend immersing them in hot (but not boiling) water with the addition of neutral washing powder. For very dirty white lace, you can use bleach (there are different types available). Follow the dive time specified in the instructions to avoid trouble. There are also various tricks to preserve the color of dyed fabric or yarn: put the lace in cold water with vinegar for several hours, and then rinse well with enough water. When washing in the washing machine, remember that especially light and delicate lace should be placed in a closed pillowcase. Select the minimum speed and do not wring out the lace. Leave it to dry in the shade. Ironing embroidered fabrics and lace also requires little tricks that will make the job easier:
• moisten the lace with a spray bottle and fold it several times; • spread a terry towel and place the lace on it with the wrong side up; • to avoid deformation of the circle, pin it with pins; • iron the lace; if you want the lace to be denser, spray it with starch; • always iron the lace from the inside out, making sure that the rings, arcs and picots are turned in the same direction; • In addition, ironing can correct some defects in your work. However, try not to make mistakes at the lace weaving stage.
Marilisa Edoni “Tatting Lace”
Tying rules
Using a needle you can create airy and delicate guipures. This technology is used to create costume jewelry, napkins, and all kinds of elements for decorating outfits. The work is extremely painstaking, so craftswomen rarely use this method to create bedspreads, curtains or tablecloths.
Set of thread jewelry
Next we will tell you how to knit knots:
- We secure the end of the yarn between the thumbs and forefingers.
- The remaining part of the thread is wrapped around the other three fingers, thrown like a loop.
- Next, we return the thread again to the thumb and index finger, forming a ring.
- The needle is passed through the ring, the instrument moves in the direction from bottom to top.
- The middle finger is folded in half, the thread of the ring is slightly weakened, as a result, the first knot is formed on the thread.
- We hold the element between the thumb and index finger of the left hand, perform mirror actions, the tool now moves in the opposite direction from top to bottom.
Thus, making a given number of knots according to the pattern, we pull the thread and knit until a ring is formed.
Important! The main advantage of knitting with a needle is the ability to make the knots the same, which means the work has a more neat and elegant appearance.
Necklace knitted according to the pattern
Earrings for the fashionista
When initially learning needlework, it is enough to have basic knowledge of working with knots. By the way, try making simple home accessories. But let's get back to fashion. For the product you will need:
- lavsan thread, preferably No. 33. You can use nylon thread;
- wire for beads;
- small beads;
- two earrings for threading the product;
- 16 beads, 2 faceted beads. The diameter of the beads should be 5 mm;
- 2 drop beads, but not more than 10 mm.
It is easier to do ordinary weaving, but you also need to learn complex weaving. Remove unnecessary material from the table and place a towel. Thread the thread into the hook. Use a needle to thread the threads into the beads.
Now let's look at the diagram. It is on this basis that the work will be carried out, pay attention even to the little things. We will have a "full node". Instead of picot, we will weave beads step by step. About 1 or 3.
We finish the work with beads. We will braid the rounds into rings and place the droplets at the bottom. Then you can decorate it yourself.
Here are more options for decoration patterns:
Now let's look at lighter earrings:
Let's take thread, needle and hook.
- We put 8 knots on the needle and make a picot. We collect a half knot. And now we finish it by dialing 3 more.
- We pull them off the needle, pulling them along the thread, without tightening them. At the end a loop is formed; we thread a needle into it, closing the ring. Again a regular knot for fixation.
- Again we take 4 knots. We hook the thread with a hook, putting a loop on the needle. This is how they connected it in the first ring.
Related article: Schemes of paper snowflakes
- We again weave 8 knots, picot and 4, closing the ring.
- Let's repeat the first steps, where we weave 4 knots, crochet the third with the second, finishing the work.
- We weave 16 knots, pulling them off the needle. Don't close the ring. Pull the thread, creating an arch. It needs to be secured with a knot. Let's connect the arch and the ring. This is how we complete the product.
- We connect 12 knots with a hook to the center of the arch. Let's do it from the new side.
This is how the product ends.
