Today it has become fashionable to decorate a room with small unusual trees called topiaries. The created masterpieces are similar to real trees only in external features: they also have a crown and a trunk. As for the topiary crown, it can consist of anything.
These can be coffee beans, nuts, pebbles, flowers made of fabric or polymer clay, ribbons, beads and many other floristry attributes. Everything will depend on the imagination of the creator of this marvelous piece of furniture. The creation of topiary from all kinds of fruits has also become widespread.
Making topiary from fruits with your own hands is quite simple. To do this, it is enough to collect a set of simple household tools that are found in every home. Fruit topiary will look good both in the kitchen and on a large table in the living room. This beautiful and simple product can serve as decoration for a long time, delighting not only the owners, but also the guests with its appearance.
Fruit topiary is considered a symbol of wealth and prosperity. To make topiary with fruits, you can use fresh fruits or dummies of various fruits. Making such an unusual tree with your own hands is not at all difficult. The master class described in the article will help you understand the whole process.
Using the recommendations, you can complete the task. You will certainly be able to make a wonderful accessory for your home or an excellent gift item. For example, you can make topiary for March 8 and pleasantly surprise your loved one or friends.
Such a gift will certainly be appreciated.
Fruit topiary
You can make a lot of useful and beautiful things with your own hands. Let's try and make a bright and memorable topiary. For manufacturing you should prepare the following accessories, materials and tools:
- ready-made ball made of plastic or foam;
- decorative fruits;
- glue and glue gun;
- straight branches for the trunk;
- flowers, greenery and sisal;
- Styrofoam;
- skewer;
- gypsum;
- leg-split;
- plastic glass or flowerpot.
So let's get started:
- Use a foam ball as a base. Cover it with decorative fruit using a glue gun.
- For the tree of “happiness” you will need two curved trunks. Intertwine them with each other and secure them in the crown.
- You can then add flowers and greenery to your arrangement.
- Be sure to fill in the gaps between the fruits.
- To better secure the branches, first make a depression in the foam with a skewer. Next, apply Moment glue to the artificial greenery and secure well.
- In a plastic container, dilute the plaster with water. Then secure the tree and allow the solution to harden.
- If necessary, the height of the plastic flowerpot can be reduced to the size you need.
- Then wrap the pot with twine and secure with glue. If desired, decorate your pot with sisal and cover the inside with a green cover.
- For decoration, you can use decorative figures, rattan balls and blades of grass.
As you can see, the work turned out to be simple and interesting. The topiary you created (for March 8 or any other holiday) is delightful and beautiful.
Master class: fruit topiary Vegetable topiary
The following materials are used in this work:
- glue gun, glue;
- newspapers, foil, masking tape, thread;
- dummies of fruits and berries, ribbons, leaves;
- wooden stick, corrugated paper, twine (string);
- a beautiful stand-pot or cup, artificial moss or grass;
- scissors, stationery knife, awl, toothpick, floral sponge
Instructions for performing the work:
So, let's start making fruit topiary with our own hands. The master class reveals the secrets step by step:
- The base ball for fruit or vegetable topiary can be made from newspapers, crumpled up and wrapped in foil. After this, the newspaper ball is wrapped either with masking tape or with thread in several layers. Make sure that the lump remains a uniform round shape.
- Then a wooden stick is taken and attached to the ball. For density, it can be strengthened with glue.
- Continue using thread or twine to wrap the ball along with the wooden stick. Lubricate the trunk with glue to ensure a firm fit of the string.
- Then take the prepared pot, put weights on the bottom (you can use large river or sea pebbles), and place a floral sponge on top, into which you will need to stick the trunk with the crown. You can decorate the stand with artificial moss or artificial grass.
- We make small holes in the base ball using an awl. We place fruits or vegetables on toothpicks, and then connect them to the base, not forgetting to coat them with glue.
- Finishing touch. The tree can be painted using leaves, ribbons, and berries.
So your DIY fruit topiary is ready or your vegetable topiary is ready.
With this master class you can make fruit topiaries with bunches of grapes, apples, peaches or currants. For example, a craft with grapes can be combined with wine corks. Looks very original and creative. Floral topiary with sunflowers also looks bright and summery.
If you have learned how to create such crafts, then maybe it’s time for you to open a section with your own fruit topiaries? Master classes can be replenished with ideas and new topiaries made from artificial fruits and flowers with a step-by-step description of their implementation.
This article examined different trees of happiness: flower topiaries, vegetable topiaries, fruit topiaries, and berries. Such crafts will decorate not only your home, but also your office or special event. These small trees will delight both children and adults with their beauty for a long time.
Fruit topiary "Walk in the Garden" elegantly combines natural and artificial materials. Foam fruits, vegetables, berries and mushrooms of various sizes were used, as well as artificial flowers: roses, daisies, small inflorescences. In addition, the crown of the fruit topiary is decorated with dried chestnuts and snail shells. On opposite sides of the ball there is a nest and a straw cap.
Contents of the master class
was used . with a diameter of 15 cm will also work .
The total height of the fruit topiary is 47 cm , the bucket is 11 cm , the diameter of the crown with decor is 19 cm . 3-5 hours to make a tree of this size .
Required tools and materials
Before you begin the creation process and find out what to make your topiary from, you will need to prepare the following:
- newspapers;
- pot;
- threads;
- foil;
- floral sponge;
- artificial vegetables, fruits;
- wooden skewers;
- wooden stick;
- scotch.
As an alternative, you can use a ready-made ball - for the base of the topiary, made of plastic or foam. Having prepared all the necessary materials, you can begin production.
Minimum equipment - maximum pleasure
Making topiary from fruits with your own hands is quite simple and does not require virtually any material costs. For this process you just need:
- artificial fruits;
- pot;
- threads and glue;
- wooden skewers;
- floral sponge;
- wooden stick;
- tape and foil.
When designing and decorating fruit topiaries, you can use any available materials, in addition to artificial fruits, which are their distinctive feature. Imagination in the use of decorative elements is an indispensable condition for creating an original and unique composition.
Let's create fruit topiaries together: master class
Preparation of the base:
- To create the base of a fruit topiary, you need to crumple up several newspapers and wrap them in foil.
- Wrap the resulting newspaper ball tightly with masking tape. It is best to make two more layers so that the base does not lose its shape.
- The wooden stick will later become a tree trunk, which will be attached to the resulting ball.
- Then wrap the ball with twine or threads, evenly changing the direction - for the correct application of the turns. After wrapping the ball, you can begin wrapping the tree trunk, moving from top to bottom.
- Make a small hole in the ball using an awl.
Then pierce the fruit with a pointed stick and fix it on the ball. - Similarly, place the remaining fruits over the entire surface of the ball.
Your fruit topiary is almost ready, all that remains is to decorate it.
Master class: artificial grass topiary
The following materials are used for this work: heat gun, glue, base ball, artificial grass, thick pencil, twine, original pot stand, decorative stones, stationery knife, plaster (alabaster).
Instructions for performing the work:
Artificial grass topiary is made in the same way as in the master class presented above, but the only difference is that the grass must be glued to the base ball. You can also combine artificial flowers and grass. This craft looks very harmonious, creating an imitation of a lawn with flowers.
Well, your DIY topiary made from artificial flowers and grass is also ready. Delight your family with another floral topiary, a small masterpiece that will add coziness to your home.
Some recommendations
- To ensure a good fit of the twine to the trunk, you need to apply glue and wait until it dries completely.
- For topiary, you can use both artificial and real fruits.
- You can combine any details and fruits, making them a bright highlight of the tree.
- Try to make topiary in bright colors, using various accessories and details in colorful shades.
- The beauty of topiary lies in the combination of bright fruits and delicate flowers.
- You may need weights to keep your fruit topiary stable.
Vibrant summer colors all year round
When creating topiaries from artificial elements, people usually time them to coincide with a specific holiday or special date. New Year's, wedding, Christmas or financial reasons for topiary largely determine the specifics of the material used.
The reason for fruit topiary may simply be a good mood, a thirst for creativity, or a desire to decorate your home. Moreover, there is nothing complicated in decorating with fruit - pierce it with a toothpick, the other end of which is coated with glue, and stick it into the prepared ball.
But topiary, made with your own hands in the summer, can please the eye all year round, reminding you of the time of creation.
Making dummies of fruits
To create fruit dummies, you will need:
- newspaper;
- foil;
- colored paper;
- glue;
- scotch.
To give the fruit dummy the desired shape, carefully crumple the newspaper. Then you need to secure the newspaper form with foil and secure with tape. Next, apply layers of newspaper and glue. Then leave to dry. For ease of use, during the process of applying layers of newspaper and glue, you can pierce the dummy with a wooden skewer.
Cover the finished form with colored paper: covering it in layers until the desired color is obtained.
The provided variation for creating dummies may also involve drying natural fruits.
To do this, wash the fruit well and dry it in the sun. Turn the fruit once a day. This natural model will be ready in two weeks.
Fruit topiary “Walk in the Garden” - photo presentation
See all the photos of topiaries from Alena Tikhonova in the general selection!
Did you like the master class on topiary made from artificial vegetables and fruits, with flowers, sisal and small decorations? Subscribe to our newsletter and leave comments!
Preparing and decorating the pot
Do you want to, but don’t know how to decorate a pot? If you don’t have a pot, you can make it yourself from thick cardboard, gluing the shape well. Then the pot should be wrapped with twine or thread and the entire surface should be covered with transparent glue.
Then you can put a floral sponge at the bottom of the pot and stick a tree trunk into it. All that remains is to fill the pot with plaster or foam.
If you prefer to use polyurethane foam, then after complete drying you need to cut off the excess fragments.
Do-it-yourself dummies of fruits and vegetables: master class
We present to your attention 4 ways to create dummies.
Fruit dummies: method 1
You will need foil, newspaper, tape, colored paper and glue.
Crumple the newspaper and create the shape of the item you want to make. Next, secure the newspaper form with foil, securing with tape. Then apply layers of newspaper and glue, then leave the finished form to dry.
The true beauty of topiary lies in the combination of juicy fruits in rich and delicate shades
To make it more convenient, pierce the dummy with a thin wooden stick and, holding it in your hands, continue to apply layers of newspaper and glue.
Once the form is ready, start gluing layers of colored paper onto it until you get the desired color.
The second method of making artificial fruits
You will need a model of a fruit or vegetable, glue, brushes and paints (gouache).
You can make topiary from any fruit you have on hand.
This method repeats the process of the first option, only we will use the vegetable or fruit itself to ensure the accuracy of the desired shape. For example, to make a banana, you need to take a real banana and apply layers of newspaper and glue on it. After drying, cut the shape with a sharp knife and remove the fruit from the middle and glue the edges. All that remains is to color the resulting dummy as desired.
Method - 3
As a base, take a foam frame and apply layers of colored paper and glue, leaving it until completely dry.
Topiary is a flight of fancy
Method - 4
A great opportunity to keep yourself and your children busy creating artificial vegetables and fruits, which you can then simply play with or make various crafts with. Such fruits will never wither and will always delight you. This option for creating a dummy involves drying in the literal sense. It is better suited for vegetables such as pumpkin, squash and others. To do this, wash the vegetables thoroughly and place them in the sun. Be sure to turn the vegetables once a day. This dummy will be ready in two weeks.
Assembly steps
Support
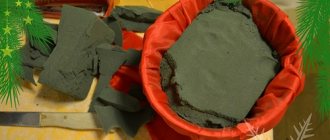
To support the weight of the strung fruit, the base must be heavy enough and must be reinforced. At the bottom of the vase we place metal products - nails, nuts, any metal things. This will ensure stability. Then we pour construction plaster. If it is not there, you can use putty. We insert the barrel into the solution, screwing a couple of screws into its base - this will prevent it from subsequently spinning or accidentally jumping out. We fix the workpiece strictly in the center until the mass hardens completely.
Crown
After the plaster with the trunk has completely hardened in the vase, we form the crown. It can be made from polystyrene foam, for example, by gluing two hemispheres into a ball, crumpling the canvas from newspapers soaked in PVA glue, etc.
Styrofoam ball
Advice! If you choose the newspaper version, the product should dry for at least 10 hours. Only after this will it acquire the required strength.
Strengthening the foundation
Despite the apparent strength of the trunk, grasped with plaster, the base should be strengthened. To do this, soak a rope or cord in epoxy glue and wrap it around the trunk, simultaneously gluing it to the plaster. Thus, fill the neck in a spiral to the brim. We wait a day until everything dries.
Pyramid decorations made of fresh fruits and berries
Improving the crown
To prevent foam or newspapers from showing through between the fruits, you should initially create a background. To do this, dip the crown model in glue and roll it in ground coffee or small tea leaves. In addition to the uniform color effect, you will also get a pleasant aroma. Dry and place on the trunk. To do this, make a hole at the bottom, fill it with glue and put it on the tip of a wire, beam, or branch (depending on what material is chosen for the trunk). Waiting for it to dry.
Connection of crown and stem
“Growing” fruits
We prepare dummies, toothpicks, glue and tape.
Easter style idea
Stages of work:
- Place each mini-model on a toothpick and coat the bottom with glue.
- We stick it into the crown so that the bottom of the fruit sticks to the crown blank.
- Sometimes, for extra strength, additional tape is carefully used. In this case, the gaps are hidden under small objects - nuts, candies, berries or flowers.
Real fruit options
Festive strawberry tree
In any dish, not only taste is important, but also its presentation. If you are a sophisticated esthete, you can serve fruits to your guests in an unusual way.
For living topiary, small tangerines, mini bananas and any small “overseas” exotics are suitable: lychees, Thai “dragon eyes”, feijoas, etc.
Strawberries are the most common berry for decorating the holiday table.
Summer is a great time for crafts from berries and fruits
Strawberry roses for decorating the crown of an ornamental tree
The principle of operation is the same, but since the weight of natural products is many times greater than the dummies, you will have to take a heavy pot for the base, choose a more powerful trunk and a dense crown. More metal objects will be needed to weigh down the bottom and plaster for pouring. Instead of toothpicks, you will have to use pieces of wire, having first washed and thoroughly disinfected them.
Topiary made from live or artificial fruits is a great idea for interior decoration or an original gift for friends and family. Even if you are a strict skeptic and doubt that this cute tree can attract good luck, it will bring a lot of joy and give a great mood to your guests who accidentally notice the topiary on your window. Believe it or not, the law of the Universe says: whatever you bring into this world, it will answer you in kind. In the process of work, you invested a lot of positive energy, which will subsequently be multiplied by the positive emotions of those contemplating and ultimately give a cumulative effect. The feeling of happiness is based on this principle!
It is fruit topiary that is a symbol of prosperity and wealth. To make topiary with artificial fruits, you can use not only fake fruits, but also fresh vegetables and fruits. Making such an unusual tree with your own hands is not at all difficult; the master class below will help you. You will make a great accessory for your home or a wonderful gift for your loved ones.