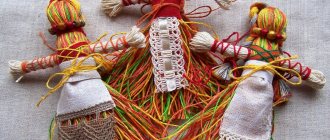
Which material is suitable?
Many years of practice have shown that it is possible to create magnificent hair even from threads.
Here is a list of what is suitable for doll hair:
- silk thread;
- yarn of different types;
- wool for felting;
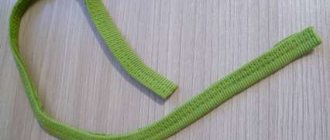
- satin ribbons;
- felt;
- goat hair;
- shreds and strips of fabric;
- fluff, feathers.
Doll hair materials
To make a beautiful hairstyle that will stay well on a doll’s head, you must first determine for what purpose the doll will serve. If this is an interior doll and was created to decorate a room, then the hairs can simply be glued on. But if the doll is going to be playful, then the hairstyle should be held tightly and should be secured with threads. A correctly chosen hairstyle will give the doll its own unique character. To get started, you need to select a material.
To create doll hairstyles, you can use a variety of materials:
Ready-made hair tresses.- Goat fluff.
- Threads.
- Wool yarn.
- Floss.
- Wool for felting.
- Strips of fabric.
- Ribbon yarn.
- Yarn for laces.
- Tow.
Let's start doing
A master class on making hair for a doll will help you prepare good, solid hair. First you need to build a device out of cardboard on which the threads are wound. This “device” will allow you to make your hair the same length very quickly.
The winding is done tightly, the threads need to be moved from time to time. Thus, the wig will turn out dense and thick.
Thread the needle and start stitching. First do this on one side, then on the other. It is necessary to intertwine the hairs. At the end, the thread is cut to the length of all the hair.
Now use scissors/a stationery knife to cut the workpiece along the edges. For reliability, stitch on a typewriter. Then we make bangs. Also wind the threads, cut them, fold them in half, and sew them to the head.
The finishing touch is to apply the wig to the center of the head and sew it on. That's it, a doll with beautiful hair. Now it’s clear how doll hair is made from yarn.
Hairstyles made from hair wefts
You can purchase tresses in a store, make your own using a tress bank, or cut a wig into tresses. Using ready-made tresses, you can make curls or straight hair.
Materials for work:
- Hair tresses.
- Glue "Moment".
- Threads.
- Pins.
- Needles.
- Pencil.
- Scissors.
- Doll head.
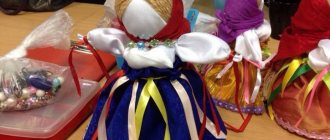
Before sewing tress hair onto a textile doll, you need to make markings with a pencil. Then the tress is glued along the markings and secured with pins. After the glue has dried, you need to stitch the hairstyle with threads and remove the pins. You can glue and sew the tress in a spiral or in separate rows. The future hairstyle will depend on how to sew tresses on a textile doll. After all the tresses have been attached, you can beautifully decorate your hair using ribbons or hairpins.
The basis will be the cap
First you need to crochet a hat from the same raw material as your hair. After the base is ready, let's start designing the hair.
- First, we strengthen the “hair” with an elastic band so that it fits tightly. Using a crochet hook, thread the elastic band to the edge of the product and sew the edges. If the wig is not removable, then there is no need for an elastic band, because it will stick to the head.
- Now you need to cut and unravel the yarn, although the latter is optional. The length of the sections should be twice as long as the hair you intended.
- Fold the cut piece in half and secure it with a loop on the edge. The work is done with crochet. Make a circle by inserting yarn into each stitch. The following rows can be done less frequently. In the area of the crown, make it thick again.
That's it, the wig is ready. All you have to do is put it on the doll and do her hair.
For a strong head
You can sew anything you want onto a soft doll. But what if she has a plaster or plastic head? We simply crochet a small hat from the same yarn we will be using for the hair.
And then we proceed like this:
- Using a hook, thread a regular linen elastic band along the very edge of the hat and sew the edges.
- You won't need an elastic band if you decide to make permanent hair instead of a removable wig. In this case, you can simply glue the cap to the doll's head.
- We begin the master class on making curls by cutting pieces and unraveling the yarn. The last procedure is optional. The hairstyle can be made from whole threads. Measure the length equal to the length of the hair multiplied by 2.
- Take a piece of yarn in the middle and secure it in a loop on the edge of the hat using a crochet hook.
- Go around the circle, inserting yarn into each stitch.
- The remaining strands can be threaded through one loop and through one row.
- Having reached the top of the head, you need to make the rows a little tighter again.
We got such a beautiful DIY hairstyle.
INTERESTING: We sew clothes for dolls
Fulling option
Felting wool looks great on neat doll heads. This is incredibly docile material. Even beginners can use it. One condition is a soft head.
Master class on felting hairstyles
Necessary materials:
- Sheep wool for felting or curls of goat hair.
- Needles for felting.
- Pencil for marking.
- Mirror.
- Scissors.
Working technology:
- Draw a line around the circumference of the doll's head. Sheep wool must be cut into strips of the required length. If you use goat hair curls, they should be combed.
- You need to start rolling the wool from the central seam on the doll's head, moving along the intended line.
- First, roll the curls on one side of the head, then on the other.
- Insert the needle into the head strictly perpendicularly.
- You need to distribute the hair evenly over the head, periodically assessing the result using a mirror.
- After all the wool has been rolled down, you need to make a parting. The parting is usually done from the forehead to the crown. When creating a parting, it is better not to get the needle into the central seam. It may bend or break.
- Now you need to beautifully style your hair, carefully distributing the curls on your head.
Hair for a doll
In this MK I will show how I make hair for a doll - tresses. What are tresses? Not long ago this question tormented me too :)))
A tress is a flat strand of hair that is used for extensions, in hairstyles, to create hairstyles (products made from artificial and natural hair: wigs, chignons, braids, curls, curls, etc.
To create tresses we will need any paper-based hot-melt material. This can be a web in a roll or a sheet for gluing fabrics or thermal transfer paper. It is desirable that the adhesive surface is uniform.
I use thermal transfer paper. On the reverse side it is lined.
Cut 2 strips of the same size
Place one strip with the adhesive side up
Let's take the hair. In this tutorial I use a 60 cm hair extension curl, dyed blue.
Carefully lay out the hair on the paper as shown in the photo.
Place the second strip on top, adhesive side down.
Iron with an iron preheated to the highest possible temperature.
IMPORTANT: If you are using artificial curls or natural ones for the first time, they may melt and stain the surface of the iron, so I advise you to start heating the iron at the temperature for artificial fabrics and then bring it to the highest possible temperature. You can also place an ironing cloth on top and iron through it.
Let it cool and carefully remove the paper layer from both sides.
Having measured the same distance from the glue, we cut off the hair from the main curl.
Cut the adhesive surface in the middle.
Look how flexible tress becomes, unlike industrial ones.
We sew the tress on a sewing machine with small stitches several times.
We fix the tresses on the doll's head in any way convenient for you.
It just so happens that sometimes good ideas come to mind at night J. And my MK is no exception. I want to add a little to it. You can do this.....
In this case, specifically for example, I take a hot-melt adhesive web with a non-uniform structure (I decided to complicate J), reminiscent of a mesh. Why complicate it? Because it is more fragile!
Lay out in layers: One strip of web with the glue side up, then the hair, then the second strip with the glue side down. Iron it with an iron. Let it cool and carefully remove the paper layer from both sides.
We cut off the hair from the general curl so that there is an equal distance on both sides of the glue.
We fold the web in the middle and pin it together for convenience.
We sew several times on a sewing machine....and...the tress is ready!!!! Unlike the first option, this tress is more magnificent...
Judge his durability for yourself...
And in conclusion, I would like to add: I wanted to make this MK to help beginning craftswomen who, like me, are looking for more acceptable methods in working with dolls. Industrial wefts cannot always satisfy our desire, because... for the most part, they have a thicker hairline, which makes it difficult to work with miniature creatures; there are few color options, which forces us to either limit the image or resort to different dyes. By mixing strands of different colors (fortunately, they are sold in a rich color palette), you can achieve unusual, beautiful combinations to create a more harmonious image of the doll. Well, and of course, it is important that my MK will help you save a little.
Source: livemaster.ru