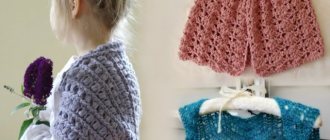
Purple hat with ears
Stylish youth style
A beautiful and practical design of a hat with purple ears, knitted with a braid pattern and a 1x1 elastic band. You can make a model from either plain or melange yarn. You will need: - medium thickness yarn - 100 grams (for example, Lanagold 240); - knitting needles No. 5, additional knitting needle for braids.
Knitting pattern for a hat
- For the first ear, cast on 3 stitches and knit with a 1x1 rib, adding 1 stitch on both sides at the same time, including them in the pattern. You need to make 8 additions. Then another 4 rubles. straight and leave knitting.
- Tie the second ear in the same way.
- For the back of the head, cast on 15 sts, attach the first ear to them, for the front - 25 sts, then the second ear. Combine the product into a circle and knit 2 cm with an elastic band.
- Continue knitting the hat according to the pattern.
- When the product is knitted to the required height (about 18 cm, maybe more if you want a longer beanie style model), switch to a 1x1 elastic band and start decreasing. They need to be done every 4th row, knitting every 3 stitches, 3 stitches together, purlwise. Make decreases 4 times.
- Then all the loops are 2 together. Pull the remaining ones together with a working thread and secure.
- For ties, take a double thread and tie a chain of air loops 25 cm long - 2 pieces. Sew them to the hat. Make 3 pompoms from leftover yarn and attach to the hat and strings.
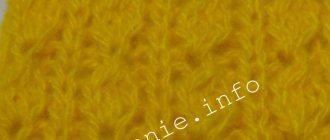
Openwork hat for girls with “Waves” pattern
To knit a hat for a head circumference of 50-52 cm, you will need 50 g of yarn (200 m/50 g). We work with circular knitting needles No. 2.5. Knitting is done with patterns such as 1x1 rib and openwork patterns according to the pattern.
The following conventions are used in the master class:
- The letter A means that you need to add a P from the broach of the lower P, and tie it with a front loop (LP) behind the upper bow.
- The letter B means that you must add a P from the broach, but knit it behind the lower bow.
- Twisted ABC, which means you need to remove 1 P, then remove another 1 P, but in the same way as when knitting a purl crossed P. Then we will return the 2 removed Ps back, but in a new form. Next you need to remove 2 P together, 1 LP, and stretch the 2 removed through the last LP.
Read
Learning techniques for knitting machine booties for babies
The density of the fabric under all the above conditions will be 24 P x 36 R, in a square of 10 x 10 cm. Let's start knitting with a set of 126 P with knitting needles No. 2.5. Then we put a marker and close the work into a ring. After this, we perform 9 R with an elastic band, and begin to add loops. We will add P using the following technique: * 1 IP, A, 2 LP, A, 3 LP, A, 2 LP, B, 1 IP*. Next, we repeat from * to * throughout the entire R. As a result, there should be 182 P on the knitting needles. Now we need to continue working on cx No. 1, while one circle should have 14 repeats out of 13 P. We knit 4 times eight R cx 1, after which we repeat the first and second rows again. Then we use cx 2, repeating its horizontal repeat 7 times. Now we have 175 P in our work. When we finish knitting 26 P of pattern 2, we need to cut off the working thread and pass it through the last P. Next, we tighten them, bring the tip to the wrong side, where we secure it.
With ears and leaves
Original youth design
Stylish unusual hat with ears in the style of earflaps. Density: 28 p. = 10 cm You will need: - Phildar Pure Laine Merinos yarn (100% merino wool 118m/50g) or another with the same characteristics - 100 grams; - knitting needles No. 3.5.
Cable Pattern: Knit 6 stitches from the middle of the diamond pattern. Repeat 6 times.
Description of knitting a hat with ears
- For the ear, cast on 16 sts and knit as follows: 3 sts in garter stitch (all stitches are knit), 2 sts in purl stitch (on the right side of the stitch, on the wrong side - knit), 6 sts in a braid pattern ( see above), 2 p. purl stitch, 3 p. scarf. mating. The fifth crossing of the braid corresponds to the crossing of the pattern where the diamond begins. After 18 p.m. put the earphone down.
- Tie the other ear in the same way.
- Cast on 26 stitches (half of the back part), include the loops of the first ear, 50 chain loops for the front part, the second ear and 26 chain stitches for the second half of the back part. Distribute the loops like this: * 2 stitches in purl stitch * - 3 times; 2 p. purl stitch; we continue the rhombus, replacing the scarf. stitch knitting; * 2 p. purl, 6 p. braids * - 6 times; 2 p. purl stitch; continue the rhombus, * 2 p. purl stitch, 6 p. braid * - 3 times, 2 p. purl satin stitch.
- When there are 4 crossings on the frontal part and back of the head in the braid pattern, go to the knits.ch. Knit braids over the diamonds until the end of the work.
- To form the crown, evenly decrease 15 sts at 21, 27, 31, 35, 37, 39, 41, 43, 45 r. after braids
- Pull and secure the remaining ones. Sew the seam. Knit 2 ropes using a purl stitch of 4 stitches and sew to the hat.
A detailed video master class describing a knitted hat with ears for women using an interesting brioche technique. This model can be worn on both sides according to your mood. The pattern is quite complex, but in MK the author explains everything step by step:
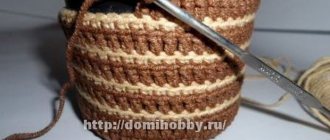
We knit a hat with ears across
The idea of hats with ears on the top of the head belongs to American designer Anna Sui. The creativity was picked up by all leading fashion houses. They are mainly worn by young people and children, but models are also appearing for older women. A brown women's knitted hat with ears is knitted with braids on knitting needles in the transverse direction. The pattern is a regular rectangle.
You will need: - Valencia yarn (43% wool 7% angora 50% acrylic 100gr/220met); - knitting needles No. 3.5
Braid pattern: 1st row: knit 2 and all even ones: according to the pattern 3rd row: 4 stitches transferred to additional sp. before work, knit 4, loops with additional sp. knit from 4 to 12 rows: according to the picture, repeat the pattern from the 3rd row.
How to knit a hat?
- The height of the hat is 24 cm. Knit the sample and make your own calculation of the loops. In our case, you need to cast on 44 sts. Distribute the pattern like this: 3 sts in 1x1 rib, 7 sts in garter stitch (all sts), first braid for 8 sts, 6 sts in garter stitch, second braid, 12 p.plat.v.
- We knit straight 25 cm (in a slightly stretched form, as it will sit on the head). Next, you need to make a wedge using the shortened rows technique. Let's agree: where the elastic is, there is the front part. Short rows must be done in the opposite part. Knit a row, not reaching the end of 7 stitches, turn the product, now back. Next r. knit 1 stitch more and turn around, etc. How to knit shortened r. without holes see here.
- Next, knit until you have the desired volume of the hat (about another 25 cm). Try the workpiece on yourself and you will understand how much more knitting you need to do.
- Sew the hat along the short side. Fold so that the seam is in the middle and sew the top seam. In the corners at a distance of 5-7 cm, make an invisible stitch to secure the eyelet.
You can knit a hat not with one sector of the shortened r., but with 2 or 3. Then the ears will turn out more neat.
More cat hats here
Hats for babies
Even a novice needlewoman can knit a hat for a boy with knitting needles. The yarn consumption here is small, there are several knitting methods, and the simplest patterns can be used. First you need to determine the volume of the child’s head and the desired height of the headdress. Afterwards, you need to find out the knitting density based on the sample knitted in advance and calculate the loops for casting on. Then you can start working. There are different options for knitted hats for boys with descriptions.
The simplest model
If a hat is knitted without any special tricks, this does not mean that it will look ordinary. A pleasant yarn color, an interesting pattern or an original design will make it charming. A simple cap is the basis for many variations. Having mastered the principle of knitting it, you can take on more complex patterns with ears, lapels, visors, etc.
You will need 70-100 g of combined yarn in two threads. It is proposed to knit a hat for a boy. Detailed job description:
Cast on 96 stitches on 2 needles No. 4.- Begin to knit the headband with a 1x1 rib. Its width will be 4 cm.
- Switch to the main pattern. In this case, the front stitch is used, that is, the front side is sewn with knit stitches, and the reverse side is made with purl stitches. The total height of the canvas including the rim should be 16 cm.
- To create a curve at the top of the head, begin to decrease the loops. The easiest way is to reduce their number by knitting all the loops two together in every second row. The purl rows are knitted unchanged.
- When 7-10 loops remain, the thread is cut and pulled through them. The remaining tip is used to sew the hat at the back along the edge.
Using the same principle, you can knit a striped cap for your baby, like Pinocchio’s. The only difference will be in the decreases, which should be done not every other row, but every third. The last loops are not closed immediately, but knitted without shortening to the desired length. After stitching, the tip of the hat is decorated with a large pompom.
An interesting option is a hat with cars. To decorate it, stripes or thermal stickers in the shape of a car are used, and the road is knitted by alternating white and black stripes. It's easy to do. After knitting a few centimeters of satin stitch with the main color after the elastic, you need to go through 2 rows of white thread, then 6-8 rows of black. Road markings are made on the next two rows by alternating 3 white loops with the same number of black ones. Afterwards the second part of the road is knitted. Finish the work by returning to the main color.
To make the hat warmer, knit a lining. You can get a double fabric right away if you use the “Hollow Elastic” pattern for knitting.
How to knit a hat-helmet
For work, you should prepare 100 g of wool and knitting needles No. 3.5. Head circumference is measured from the crown through the area under the chin. The hat is designed for 3 years of age, it is made according to the following plan:
- 103 loops are cast on the knitting needles, which are knitted with a 2 cm double elastic band. This knitting will allow you to get a double headband. You can also use a regular elastic band, but then its length must be doubled. This edging will need to be folded in half and hemmed to the main part of the hat.
- Next, knitting is done with English elastic, which allows you to get a thicker and more voluminous fabric.
- At a height of 13 cm, the loops are divided into three groups: there will be 37 pieces on the sides, and only 29 of them will remain in the center. Now you will only need to knit the middle, but at the end of all rows the last loop of the middle part is always knitted together with the first from the loops of the side group. Because of this, the width of the sidewalls will gradually disappear.
- When only 29 central loops remain in the work, 34 edge loops should be picked up on both sides of them. These 97 pcs. you will need to knit with the same English elastic band, forming the neck of the helmet cap, until the height of this part reaches 13-16 cm.
- After this, the loops are closed, and a seam is made on the neck part.
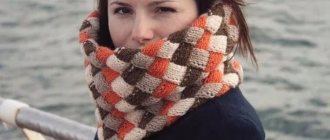
For the winter cold
Frost and wind are not scary in the new set.
For winter it would be nice to have warmer things. Look at the white winter hat. It will not only warm you up on a cold day, but will undoubtedly attract attention with its original design. We will also tie a scarf to it.
For two sizes: 54-56 cm and 58 cm You will need: - Eskimo yarn (100% wool 50mt/50g) - 150 grams for a hat, 100 grams for a scarf; - knitting needles No. 8 Density: 11 sts = 10 cm
Knitting pattern
- For the ears of the hat, cast on 3 sts on the knitting needles. Add on each side every second p. 1 loop each - 6 times (= 15 stitches). Knit in garter stitch (for straight knitting, knit all stitches). After knitting 7 cm, set the eyelet aside. Tie the second one in the same way.
- We cast on 6/7 sts (for different sizes), attach the first ear, cast on 15/16 sts with air loops, put on the loops of the second ear and cast on another 6/7 sts. Combine into a circle. Mark the beginning of the row with a marker. Knit the hat with circular knitting needles in garter stitch 5cm (when knitting in the round - knit 1, purl 2).
- Then change the pattern to stocking stitch (knit stitch). At a height of 17/19 cm, evenly decrease 9 stitches in every second row - 4 times (=21/24 stitches). After 24-25 cm, pull the remaining loops and fasten.
Scarf: Knit in 18 stitch stitch. You must first knit 9 cm, then continue knitting only 9 stitches - 13 cm to make a cut. Next, knit the other half separately, now combine all the loops and continue straight until the length is 68cm.
Classic hat with ears
This model of earflaps has been popular for several years. But, nevertheless, there are quite a lot of questions about how to knit an ordinary Scandinavian hat with ears. Therefore, I propose a knitting pattern for the accessory. You will need: - wool yarn with characteristics 66m/100g; - circular knitting needles No. 8, stocking needles No. 5.5 - for finishing. Density: 11 p. = 10 cm
Progress:
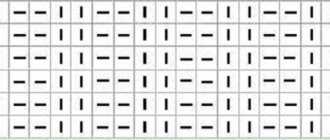
We start by knitting a hat ear with knitting needles No. 8. Cast on 3 stitches and knit according to the pattern from the 1st to the 8th row.
Make the second one in the same way.
We connect the parts: we cast on 7 stitches for the back of the head to the loops of the right earphone, attach the second ear until we combine it, and knit the pattern according to the top pattern. Turn the work back and work a purl row according to the pattern. Turn the work over and knit the front row. Having knitted to the end, we cast on 19 sts for the part above the forehead, combine the knitting into a circle (= 54 sts).
We continue working according to the pattern on the left from rows 1 to 32. When knitting on circular needles becomes inconvenient, switch to stocking needles.
Finishing the edge of the cap. Cast on 3 sts on a stocking needle, then from the face of the hat from the center of the back of the head: * hook 1 loop from the edge, move these 4 sts to the opposite end of the knitting needle (do not turn the work, the thread is behind) knit 2 knits, then knit 2 together * . So tie it around the edge.
Video master class on knitting a simple style with ears:
Openwork summer hat for girls
The calculation of P of this model is made for a girl’s age from 3 to 5 years.
Read
Basic rules for knitting a raglan sweater on top with knitting needles
The circumference of the cap is from 40 to 50 cm, and the length from the bottom to the top is 16 cm. Handicraft is done with knitting needles No. 2.5 and No. 3, from cotton or linen yarn. The work will use patterns such as garter and stocking stitch, as well as openwork patterns according to the pattern.
Before starting work, it is necessary to knit a sample of an openwork ornament measuring 10x10 cm in order to correctly calculate the density of the fabric and the number P of the set row.
Now we cast on 91 P with knitting needles No. 3, and perform 4 P in garter stitch. This section of the canvas will become the edging of an openwork hat for a girl.
After this, we transfer the work to knitting needles No. 2.5, and begin knitting the fabric of the cap, repeating three times from 1 to 15 R.
Next, we begin to reduce the number of P throughout the entire duration of the canvas. For this purpose, in three facial R's we knit together 3 central P's of each rapport. In a row, these Ps are the 4th, 5th and 6th.
Having knitted the fabric and the final P, we perform all P 2 together, reducing their number by half. We transfer all the last Ps to the hook, after which we cut off the thread and leave a tip about 30 cm long. Using a hook, we thread the thread through all the Ps, then tighten it.
To complete the work, use the same end of the yarn to sew the side seam of the product.
On a ski trip!
A woman is a woman, and she will always be looking for new models of hats. Even when he's going skiing. And for sports, new equipment is needed. Try knitting a sports model with ears with a multi-colored pattern. If you are not afraid of painstaking knitting patterns. There are two styles to choose from.
Size: 52-56 cm To knit a hat you will need: - Schachenmayr Universa yarn (55% wool 45% acrylic 125met/50g) - 50g each in beige, brown, gray and dark gray; - knitting needles No. 4.5, hook No. 4.5. Density 17 p. = 10 cm
Knitting pattern
- Cast on 3 stitches with gray yarn and knit in stockinette stitch. Add 1 p. on each side every other row 9 times (=21 p.). After 9.5 cm of the ear, the first earphone is ready. Repeat the pattern for the second ear.
- Using brown yarn, cast on 9 stitches (half of the back), attach the first earpiece, add another 34 stitches (front), then the second eyelet and cast on 7 stitches for half of the back (=91 stitches). Knit 18 circular rows according to the pattern on the right, then 10 r. according to scheme A, evenly decreasing three loops (= 88 p.).
- Next, alternate 5 stitches of gray and 3 stitches of beige. At 4 p.m. from the beginning of the vertical stripes, decrease 1 p. in each gray stripe (= 77 p.). Repeat these decreases 3 more times in every fourth row (=44 stitches).
- Now we decrease after 3 rows in beige stripes by 1 p. (= 22 p.)
- We tighten the remaining loops and secure them. We make a seam. Tie around the edges with single crochets in beige.
Read 5 male models with diagrams and descriptions here.
Stylish winter model