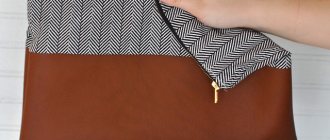
A cosmetic bag is an indispensable accessory for girls. It serves to keep different makeup products in order. The rest of the article will describe how to sew and make a cosmetic bag with your own hands.
Girls constantly carry many different things in their purses. Of course, you need to always be beautiful, so you should always have a mirror, lipstick, mascara with you (just in case you need to touch up your eyelashes) and a cosmetic pencil, as well as powder and much more. The only problem that arises is if all these items are just lying around in your purse, and they are difficult to find right away. You have to waste a lot of time searching.
For this you need a cosmetic bag; your beauty products will definitely be in perfect order. I just don’t want the product to look like others. Women love accessories - one and only. Such an item can only be made with your own hands. Next, we’ll look at how to sew a cosmetic bag with your own hands, and find out how you can make an accessory without a single seam in just fifteen minutes.
How to sew a cosmetic bag with your own hands?
To sew a product, you can use not only new fabrics; it is enough to take material from a dress that you no longer wear or use old small jeans for needlework. Sewing a cosmetic bag will not be difficult, but what design to choose is up to you, because a bag for lipstick, mascara, eyeliner, etc. can be decorated with any accessories. In this case, your imagination can work at full capacity.
Makeup bag - do it yourself
In order not to be distracted by trifles while working, prepare everything right away. It’s convenient when you have all the materials and tools at your fingertips.
You will need:
- Paper - you can use a regular double sheet of paper from a notebook to make a pattern.
- A simple pencil, ruler, scissors.
- Zipper - the required length and color, the shade should be in harmony with the material for the cosmetic bag.
- Fabric for the product, threads of a suitable shade.
- Material for the lining, if you initially decided to sew the product with it.
- Special pins for fixing the fabric so that it does not move during stitching.
- Sealant, if required, on the bottom so that the cosmetic bag keeps its shape.
- Material for finishing the product.
- Marker - just in case, to make markings on fabric, preferably water-soluble.
The image below shows a pattern; the size of the accessory can be large or medium, depending on what kind of cosmetic bag you decide to sew. Here you can substitute your values and adjust them.
Accessory cutting diagram
Process :
- On paper, draw a diagram for cutting the cosmetic bag. To make it convenient, use a ruler and pencil. When the pattern is ready, cut it out.
- To transfer the pattern onto the fabric, use tailoring needles, or pins as they are also called, this will make it easier for you to trace the lines of the parts for the accessory. Don't forget to leave 0.5 centimeters seam allowances.
- Also make a pattern with a lining, and to make the fabric harder, it doesn’t hurt to use interlining or other dense fabric that you insert between the lining and the main material for the cosmetic bag.
- When everything has already been transferred to the fabric, take scissors, cut out all the details of the cut, carefully and evenly.
- Sew the finished parts together, folding the material with the right sides facing each other. Sew three identical cosmetic bags using lining material, thick and basic.
- Finish the edges of all seams with a zigzag to prevent the fabric from unraveling along the thread.
- Now all that remains is to sew all the parts together and decorate the cosmetic bag, but before that you need to carefully smooth everything out, not to miss the corners and seams.
- The stitches should be done exactly along the lines that you drew, transferring the cut details onto the fabric.
- Next, start sewing in the snake. Note that the zipper should hang down a little, see the picture above. Therefore, leave the edge of the lock a little longer than the cosmetic bag itself. Use pins to secure the zipper between the main (beautiful) part of the cosmetic bag and the lining, which should be in the middle of the accessory.
- At the back, secure the zipper with fabric, sew stitches on all four sides, and at the front, the zipper should go slightly into the middle of the cosmetic bag between the lining and the front of the product.
- Make lines so that the zipper is finally fixed on the cosmetic bag, be sure to evenly grasp both sides of the cosmetic bag (lining, main fabric of the product).
- This seam will always be noticeable, so it must be made even in strict order, even if you do not have a special foot for stitching snakes.
For beauty, you can use special threads with a golden or silver tint. Experienced craftswomen can deviate from the norm and change the cut at their discretion. The cosmetic bag can be slightly rounded, and it can also be made large or small (optional).
It is also allowed to combine materials, and even better are accessories made from old leather bags, etc. If you like products with a plump base, then for the shape it is advisable to place dublerin in the middle of the cosmetic bag (between the lining and the main material).
IMPORTANT : You can decorate a cosmetics accessory with sequins, beads, beads, stones, embroideries, special rhinestones, ruffles and other materials that are sold in fabric stores. To ensure that such decorations stick well, it is better to use a glue gun. Be sure that they will not fall off, the glue will hold them well.
How to make a cosmetic bag without a single seam?
Pattern
But what to do if you don’t have a machine in the house, but you really want to make a cosmetic bag yourself and not have to worry about sewing it by hand with small stitches. Not everyone has the patience to do hand stitching. Therefore, sewing can be abandoned for a long time until the next inspiration. It turns out that making a cosmetic bag is easy and without a single seam, using glue. More details below.
Cosmetic bag without seams
Tools, materials:
- Fabric for a cosmetic bag, preferably dense, so that the product holds its shape well and has an aesthetic appearance.
- Glue, or rather a glue gun, a snake, a cardboard box.
- Accessories for cosmetic bag design, scissors.
Process:
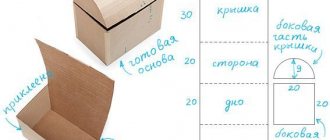
- Make a pattern of a rectangular parallelepiped, the same size as the box itself. To do this, you need to transfer six rectangles (the base of the box and the sides) onto the fabric.
- Cut these rectangles on the main and lining fabric. Just leave seam allowances of 0.3-0.5 centimeters.
- Using a glue gun, glue the seams of the cosmetic bag on both the base material and the lining fabric. Just glue them so that they are visible only from the inside out.
- Make a lid for the cosmetic bag, see the picture above. To do this, glue the fabric with the lining, when the seam is secured, turn the fabric inside out, place the cardboard inside, and carefully fold the edge into the middle and glue it with an invisible seam.
- Organize your cosmetic bag. Place the fabric on the box, place the lining inside, glue all the parts so that the seams are invisible.
- Accessorize the item and glue a zipper to the lid and bottom.
Glue one bead to the very center of the flowers. This cosmetic bag can be made as a gift to a friend or sister for her birthday or other occasion.
Leather cosmetic bag
In most cases, leather products look high quality and luxurious. In order to create a leather cosmetic bag for yourself, you just need to have the desire, the necessary items for sewing and free time.
Leather option
Genuine leather requires a special approach and care. It is important to be careful not to spoil the material. You need to buy leather needles in advance and use a special Teflon foot for your sewing machine. Working with leather is not difficult. Even if you don’t have the required size piece in your arsenal, but you have several small ones, they can be sewn together, creating a single piece of material.
When creating an accessory, it is important to give the snake its due. It is recommended to choose a high-quality zipper that will not only look good, but also function perfectly.
Important! When working with a workpiece, a person must remember not to use pins to secure patterns. Otherwise, the material will deteriorate, as holes and marks from injections will remain on it.
Expensive and unique
In addition to leather fabric, you will need to arm yourself with a metal ring, leather threads, scissors, glue and several additional tools. In this creation process, two colors of leather will be used: the first - 34x27 cm, the second - 2 pieces of 5x4 cm and 1 piece of 2x9 cm.
- Leather parts of the same color are folded in half and glued together. This way you get 2 parts 2x4 cm and 1 slightly smaller - 1x8.
- The folds formed during the gluing process are tapped with a hammer for folding.
- The short sides of the second skin are folded 1 cm inward and glued with glue. During the process, the fold is fixed with a clothespin.
- Threads for leather are placed in the machine, and a zipper fastener is placed under the leather of the second color, which is attached to the material.
- The threads are pulled out from the wrong side and secured with a drop of glue. After 2-3 minutes for the glue to dry, you can continue the process.
- Threads of a different color are placed in the machine, matching the color of the skin, and the details of the first color are stitched along the thickness of the foot. The threads are pulled out, a knot is tied on the wrong side, which is secured with glue.
- It is necessary to make two parts according to point 5, which subsequently need to be glued in half and treated with glue along the edges.
- The parts from the first skin are located along the edges of the zipper so that the sections are aligned with each other. They are sewn on a machine from the edge, and the thread knots are fixed with glue from the wrong side.
- The resulting rectangle needs to be turned inside out and the zipper cut to half.
- On the side, the product is stitched along the width of the sewing machine foot, while the edges of the threads remain free. From each corner you need to mark 3 cm, leaving marks with a pen or non-sharp pencil.
- The corners need to be fixed with clothespins and a line drawn from the mark to the fold at an angle of 90 degrees. (A right angle is formed to the line). It is necessary to stitch along the intended line on a machine, again securing the threads with a knot and glue.
- The remaining threads are pulled out and also secured with a double knot and glue.
- It's time for the lining. The material on the short sides of the rectangle is folded 1 cm and secured with an iron. From it you need to create a model of the product that will correspond to the leather item.
- The leather product is turned right side out, and a cosmetic bag from the lining is inserted inside it.
- The lining fabric must be sewn to the edge of the zipper by hand using a blind stitch.
- At the end, one piece of fabric of the first color remains, into which you need to insert a metal ring or half-ring. It is inserted into the snake slider to simplify the opening process and make it look beautiful.
You might be interested in Ready-made patterns and the order of sewing warriors with your own hands
The result is a very beautiful cosmetic bag pocket, which does not even need to be supplemented with any decorative figures.
Sew a cosmetic bag with your own hands - patterns
Below, see what other cosmetic bags you can sew with your own hands and patterns for them.
Makeup bag - do it yourself
Diagram for a cosmetic bag
You can make this colorful cosmetic bag yourself at home if you sew the red lines indicated in the second image below. And cut the middle of the cosmetic bag in half and insert a zipper there.
Beautiful cosmetic bag with flowers
Product cut details
Denim cosmetic bag
This accessory is suitable for women who love rigor in everything; there is nothing superfluous on the cosmetic bag, it is spacious and sewing it will not be difficult, you just need to follow the pattern suggested below.
Cutting pattern
Satin cosmetic bag
Satin products always look delicate and feminine. We offer you a master class on sewing a cosmetic bag with your own hands without a pattern.
To work you will need 15 m of satin ribbon, bias tape, zipper and lining fabric, interlining:
- · Weave braids from ribbons, try to keep them even and flat;
- · Place each braid on non-woven fabric and iron it;
- · Cut the resulting fabric to the size of your lining;
- · Sew fabric with braids, zipper and lining;
- · Turn the product inside out and lower the zipper a centimeter inward;
- · Fold the edges of the makeup bag along the zipper and finish it with bias tape.

