Selection of materials
We have to figure out what is best for use. For those who are just starting to get acquainted with this type of handmade, we recommend using trimmings in their work. Worn T-shirts, dresses, shirts, and other clothing will come in handy.
Try to select materials of approximately the same thickness so that the finished product looks as presentable as possible.
You can buy fabric and cut scraps for work.
Here are some tips to help you make your choice. Of all the varieties, cotton stands out. It will be easy to master any master class with it, it does not fade, retains its characteristics after washing, and is quite thin, thanks to which it can be sewn together without problems for beginners.
Linen is excellent: hypoallergenic, conducts air well, does not accumulate static tension, and is extremely durable.
Silk allows you to make creations of majestic beauty. Those who are just getting acquainted with the method will find it difficult to work with it.
Wool is becoming increasingly popular in patchwork due to its warmth, practicality, and prevalence.
About the fabric
Simply choosing a fabric is not enough. Even if you want to cut patches from brand new chintz, it needs to be washed and ironed, and this, oddly enough, is not so easy. It is necessary to wash (or simply wet) the fabric, because after washing it can shrink, and in the finished product this is fraught with unpleasant consequences in the form of distortions, wrinkles and ties. In addition, many fabrics may fade during the first wash. By the way, such preparation also has a professional name - “decatation”.
Next, it is advisable to starch the fabric - this will make it more convenient to work with. After this, the material must be dried (to light moisture) without squeezing, but simply by hanging it on a rope or on a crossbar. And the next stage of preparation will be ironing. You need to iron the fabric along the grain, from the wrong side, and it is best to use an iron with a steamer for this.
Sewing methods
We suggest we take a closer look at the existing methods. At the very beginning of your creative journey, it is better to use existing templates. In the future, you will understand all the stages of creation, gain experience and be able to compose them yourself.
Quick squares
This is probably the simplest option. It will definitely work for everyone. Measure the parameters of the desired blanket and determine the size of the parts. Make a cardboard blank to make it easier to cut identical elements.
Don't forget that you will be connecting them together, so make increases. Then stitch with a sewing machine or hand stitch until the desired width is achieved.
Thus, combine all the squares into one. As a result, a number of stripes are formed. Iron them, carefully smoothing the seams. The next step is to sew everything together.
Decorations for the New Year: decor ideas and options for decorating a house and apartment for New Year's celebrations (135 photos)- Window decoration - simple ideas and step-by-step descriptions of do-it-yourself window decoration (110 photos and videos)
Diaper cake - a step-by-step description of creating a diaper cake. 115 photos and videos of creating a gift
Then all that remains is to sew on the padding polyester and lining. A little time spent and you become the owner of a unique piece of furniture.
Patchwork for everyone: we sew colorful hexagons from stripes
Many patchwork patterns have been known for decades. But patchwork does not stand still and classic patterns are being developed in new versions. I will introduce you to one of these options - assembling hexagons from strips.
So, for a baby blanket size 75 * 130 cm we will need:
- sewing machine, sewing threads;
- fabric pieces 50*30 cm - 18 pieces;
- cutting tools: mat, knife, ruler, scissors;
- tailor's pins.
Stages of work.
1. First, let's align the edges of our flaps. We find a split thread at the cut - along it the fabric will stretch less. You can also determine it by the edge.
I find it more convenient to cut stripes if the piece of fabric is small. So I fold the flap in half and iron the fold well. Fold the cut so that the fold is perpendicular to the grain thread. I combine the fold of the fabric with the markings on the mat and on the ruler, and cut off the excess. The piece of fabric is ready for cutting.
2. From each piece of fabric we cut out 4 strips 7 cm wide. We unfold the cut strips - they are ready for further work.
We do the same with all prepared pieces of fabric. If you have a knife with a diameter of 45 cm or larger and a new sharp blade, you can cut several layers of fabric at once, ideally up to 4 layers, to prevent movement. As a result of this stage, we get a stack of multi-colored stripes.
3. Initially, we selected 6 color stretches, each with 3 tones of the same or neighboring colors.
In accordance with these stretch marks, we group the resulting stripes. My first group of stripes is a blue stretch.
4. Take one strip of each tone. We place the stripes in the order we like. We take into account that in one block the stripes will be arranged in direct order, in another block - in reverse order.
When stitching strips, it makes no difference which strip is first, so we choose one order that is convenient for us (either straight or reverse) and stitch all the strips in the same sequence, along the long side. It is more convenient to grind the strips if the parts are fastened with pins.
We stitched the first and second stripes, then stitched the third.
As a result, 4 identical blanks should be obtained from one group of strips.
The stripes may differ slightly in length, so when stitching, focus on one side and make it even.
The result of this stage is a stack of three-color strip blanks.
5. Iron the resulting pieces. Iron the allowances in different directions.
6. From each blank we will cut equilateral triangles. We cut using markings on a ruler - guides at 60°. For convenience, I mark the required markings with paper tape so as not to confuse the guides in the process.
To begin, we combine the 60° marking with the upper edge of the workpiece and cut one side of the future triangle.
Then we unfold the ruler and combine the 60° marking with the much-cut side of the triangle.
Thus, we cut out three triangles from the workpiece.
7. We cut two blanks as shown in step 6. We turn the remaining two blanks upside down and cut out three triangles with the opposite color layout.
In total, we got 6 parts for two different blue hexagons.
8. Similarly to steps 6 and 7, we cut out triangles from the remaining three-color blanks - we cut two blanks with one strip up, the other two - we turn the blank upside down.
In total we get 12 stacks of different triangles, each with 6 triangles.
9. Now we will sew the triangles into halves of the hexagons. Each half consists of three identical triangles.
Take the first pair of triangles and fold them face to face, exactly matching all the vertices and seams.
We pin the triangles together with pins and sew a stitch.
Iron the allowances.
We fold the resulting part face to face with the third triangle, so that the vertices and seams of the two triangles align exactly.
We pin, sew a seam and press the seam allowances.
The halves of one hexagon are ready.
If you have assembled everything correctly, then on the front side there will be even lines-borders of the flowers.
View of seams from the inside out.
Similarly, we sew the halves of all other hexagons.
10. We draw up the overall composition of the quilt, focusing on a preliminary sketch in color or on our own feelings. We lay out the hexagon halves horizontally.
11. After the order of the hexagons is determined, we sew them together in rows. To do this, take the first half horizontally and fold it face to face with the second in this row. The halves will turn out to be at right angles to each other, and you need to accurately align the vertices and seams of the outer triangles, similarly to what was done in step 9.
11. After we have assembled all the rows, we begin assembling the quilt. I recommend making rows of two, then making two pairs of quilt halves and then joining them together. When assembling rows, pay attention to the exact alignment of the vertices of the triangles. Pinning with pins will help with this: after you have folded the rows facing each other, you need to stick a pin exactly into the vertices of two triangles, then pin both layers to the right and left of this pin.
The central pin can be removed and two further rows can be pinned along the entire length.
With precise assembly on the front side, you will get smooth border lines both inside each hexagon and at the junctions of multi-colored hexagons.
Press all seam allowances.
Our top is ready.
You can leave the edge in such an interesting openwork form, or you can achieve a rectangular shape with parts of multi-colored hexagons or even just plain fabrics. Everything is limited only by your imagination!
Note:
When stitching, the allowance is 1/4 everywhere. In order to maintain the same allowance throughout the entire seam, use a special foot or change the position of the needle relative to the center. You can also simply draw the required allowance with a marker using a ruler and sew along the drawn line.
Mill
It is characterized by the use of triangles. They are sewn into squares, then by analogy with the previous method.
Using triangles of different colors, you can easily create a variety of templates, or try using ready-made ones available on the Internet.
Roses
No less delightful are the “roses”, whose contours resemble a flower. This is a rather labor-intensive process that requires certain skills.
But the effort is worth it - the completed work comes out very nice. Let's take a step-by-step look at what needs to be done to make them.
- Tilda doll - a master class in sewing toys with your own hands. 125 photos of the best toy models
How to make a car out of paper: step-by-step description of how to quickly and easily build a high-quality car (75 photos + video)
- Paper toys - diagrams, ideas and options for making various toys with your own hands (110 photos)
First of all, you should draw a diagram and cut it into fragments. Be sure to number them so as not to get confused during the assembly process.
Next, you need to cut out similar parts from the fabric, not forgetting about the allowances. Gradually connect your flower from the center to the edges. And do this until you sew everything into a single fabric.
Honeycomb
No less popular are “Honeycombs”. To do this, you need to sew hexagons together in the shape of a honeycomb.
You can also sew strips strip to strip. Thanks to the different color options for combining them, you will come up with wonderful things.
Patchwork granny's garden or honeycomb
The block in the Grandma's Garden patchwork or honeycomb consists of regular hexagons and looks like a honeycomb - hence the name.
You need to start a block with a template. Your “honeycomb” can be either very small or large, but I suggest sewing a medium-sized honeycomb to start with - with a side of 5 cm.
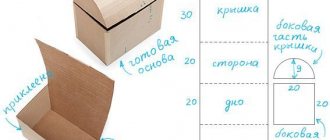
- Cut a square of cardboard with a side of 10 cm. Using a compass, draw a circle in it and divide it into 6 parts. Connect the dots - you will get an inscribed hexagon with a side of 5 cm, as shown in the photo.
- Cut out 6 more of these hexagon templates from cardboard.
- Use the following patchwork technique: Place the first template on the fabric for the center of the block and cut out a hexagon, taking into account the seam allowances. In the same way, cut out 6 more hexagons of different colors.
- Then place the template on the wrong side of the piece, pin in the center and iron the seam allowances, folding them to the wrong side.
- Pull the corners of the fabric on the wrong side with a needle and thread. To do this, first pin the corners together so they don't come apart, and then sew each corner together with a simple over-the-edge stitch.
- All finished parts need to be assembled into a “flower”. Select the central hexagon and join it to the others using hand-blind stitches. On the sides of the honeycomb the seams remain open for now.30
- Then carefully remove the template from the central part.
- Sew the sides of the elements together using hidden stitches.
- As you sew them together, carefully remove all the templates from the already sewn fragments.
- You will have a ready-made honeycomb block. Then everything depends on your idea. You can continue sewing hexagons to create a larger fabric or sew your “flower” as a decorative element onto a bag or pillow, stitching it along the very edge along the entire perimeter of the product.
Finally, watch the basics of patchwork technique in the video, which demonstrates step by step all the stages of patchwork sewing:
Pizza
Another interesting option is “pizza”. It doesn’t need a template; you can take scraps of any shape and realize any of your wildest ideas. The parts must be placed in random order on the prepared cut, which will be used as a base.
Dymkovo toy - modern collections, their creation and features of making Dymkovo toys (115 photos and videos)Knitting openwork patterns - diagrams and step-by-step master class on how to knit an openwork pattern quickly and easily (95 photos + video)
Flowers from foamiran - how to make stylish and original crafts from modern material with your own hands
Afterwards we place a layer of organza and iron it. We lay out another layer of shreds and also cover them with organza. And then we quilt the resulting layers on the machine. You will receive a unique bedspread.
In addition to those listed, there is also a knitted version. It is very similar to the usual one, but instead of stitching, the finished elements (usually crocheted) are crocheted.
You can easily find a large number of video lessons that will show you in detail how to make products using this technique.
Create a unique throw, blanket, panel or stool cover. Your interior will be transformed beyond recognition.
Video tutorial: Patchwork “Random Color”
Patchwork style in the interior.
Many designers use this style to create zest in the interior. It transforms the space, making it bright and fresh. Patchwork is considered quite economical. To use patchwork in the interior, there is no need to buy expensive finishing materials.
The use of this technique is not limited to patchwork quilts and pillows; patchwork motifs are added to the design of walls, ceilings and floors. For these purposes, tiles and laminates, stylized as patchwork, are used.
Decorative patchwork elements look harmonious in rustic and country styles. The simplicity and at the same time roughness of the rustic style readily lends itself to adding patchwork to wallpaper or upholstery on furniture. Also, modern fashion has very easily accepted patchwork in classical or even Scandinavian style rooms.
For high-tech and Provence style, patchwork decorative elements such as bedspreads, ottomans or panels are suitable. For strict classics or minimalism, you can use pillows made in the English style.
If desired, we can create an extravagant and unique interior from the rustic style. When adding patchwork to a space, one main rule to remember is not to overcrowd the space. For example, for a rustic style, you can make up to 4 accents in one room. Whether classic or minimalist, one accessory is enough.
Creating your own unique style does not require large financial expenditures. All you need is your imagination. To begin with, you can master napkins and bathroom rugs in patchwork style.
A wall panel made from old things will perfectly complement your interior. Covers for upholstered furniture and ottomans for the living room, pillowcases and bedspreads for bedrooms, tablecloths and oven mitts for the kitchen - all this can be made with your own hands from available materials. Don't be afraid to experiment and bring your ideas to life.
Sewing skills will certainly be useful to every person. By doing patchwork, you not only develop a sense of style and cultivate artistic taste, but also get positive emotions during the process.


