Christmas angel
We will need:
- beige calico;
- colored cotton fabric;
- white and red fleece;
- lurex and iris threads;
- synthetic filler;
- dry blush;
- black marker.
Pattern
We print all the details in full size, having previously decided on the dimensions. The optimal height of the Christmas angel tilde is 18-19 cm.
Description
We combine beige and multi-colored fabric. We lay out the patterns of the parts so that the head and arms fall on the beige color of the material. We also place the legs on beige fabric. When marking, the fabric must be folded in half.
We make a line along the contour of the elements. Please note that we need to leave gaps. On the patterns they are shown with dotted lines.
We cut out the blanks, leaving an allowance of 2 to 3 mm.
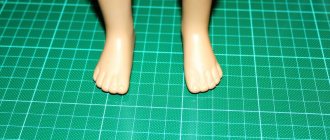
We turn the parts inside out and stuff them with filler. We fill the head, neck, hands and feet especially tightly. Sew up the remaining gaps.
We bend the bottom of the panties inward, slightly tighten them and, carefully inserting them, sew in the legs with hidden stitches.
We sew on the handles, performing forward and reverse stitches with one thread. This way we provide mobility to the tilde handles.
Since our Tilda doll is a New Year's angel, we will sew her a warm dress, made of fleece.
Fold the fabric in half and mark the pattern. We sew along the contour. Cut it out, leaving a small allowance, and turn it inside out. We decorate the outfit with lace and embroidery - it all depends on your imagination.
Now let's work on the wings. Fold the colored fabric in half and mark the details.
Sew along the contour, leaving a gap.
We cut out the wings, turn them inside out, and fill them with padding polyester. This should not be done very tightly.
We sew up the gap left and stitch the wings, creating a relief of the plumage.
Sew wings onto the dress. We cut out felt boots from white fleece using a pattern for the feet. We add cuffs to the pants. If desired, you can sew a loop on the wings.
Now let’s do our doll’s hair. We use iris threads to wind onto any template of a suitable size. You can make it from thick paper. We sew a parting in the center.
We cut the thread from the reverse side and only then remove the workpiece from the paper. It turned out to be a small wig.
We sew it on the head. The choice of hair styling is at your discretion. You can imitate braids, ponytails, or just straighten them and leave them as is. Draw the eyes with a marker and highlight the cheeks with blush.
Angel for Christmas and New Year is ready!
Christmas Doll Guardian
Do not be disdainful of protective dolls. Even if you do not believe in the protective power of such a thing, this does not mean that the doll is completely useless. This is a folk art form that has safely survived to this day, although it has undergone some changes.
Such an angel cannot be made as a simple souvenir, especially not for close people, but for distant friends and people who, by and large, are not close to you. The whole point is that by creating a small amulet doll, you charge it with your energy, invest a sincere desire to protect it and protect it from evil. Therefore, such amulets are usually exchanged with children, parents, loved ones and close people.
The common distinguishing feature of all protective dolls is that they do not have facial features. It is believed that through the painted eyes, someone evil can enter the doll. It is also not customary to decorate figurines - excessive pretentiousness and brightness attract attention, which is absolutely not required. Several master classes on how to make different protective angels.
Angel made of threads
This amulet craft can be hung on a Christmas tree during the winter holidays. To work you will need:
- Thick natural yarn in white, brown or beige.
- A piece of cotton wool.
Sequencing. Divide the bundle of yarn into three unequal parts. Most of it will be needed for the body of the angel; arms and wings are made from the smaller ones.
First step. Fold the larger bundle in half and place a cotton ball in the fold. This is the head. Carefully distribute the threads so that the cotton wool is not visible; tie the bundle under the ball with a separate thread.
Second step. Under the neck thread, divide the yarn into front and back. Fold the front part over your head and place a smaller bundle of thread perpendicularly in the middle. Return the folded yarn back to its place.
Third step. Make several constrictions with threads, forming the arms and waist of the angel. Separately knit the third bundle of threads - first pull along the edges, then in the center. Pull the threads so that you get two rounded triangles with a constriction.
Fourth step. Tie the wings to the back of the figurine, tying the chest crosswise in front. Weave a braid-hoop from three separate threads and tie it on the doll’s head. The amulet is ready!
Handkerchief amulet
The simplest options, which even a child can master, do not require the ability to sew or any other skills. You will need a square of white fabric, a ball of cotton wool, red and white threads.
Spring angel
We will need:
- beige body fabric;
- fabric for top and pants;
- fabric for wings;
- denim for a jacket;
- doll hair;
- filler;
- white beads – Ø 3-4 mm;
- thin threads for knitting (you can use floss).
Description
On the fabric for the body, folded in half, we mark out the details of the angel tilde according to the patterns.
Be careful: the doll’s legs and arms consist of two parts (alignment line a-c).
We sew the parts together and cut them out, leaving an allowance. Sew along the seams. At the places where the contours bend, we make cuts so that the fabric does not pull.
We turn the parts inside out and iron them.
Fill the legs up to the knee and stitch. This will allow the leg to bend. Then fill in the rest.
We fill in the body and sew it together. Sew on the legs.
We fill the handles and attach them with thread in place.
For the suit, cut a rectangle of fabric measuring 10x20 cm, leaving allowances.
Fold it in half, sew along the long side, and turn it inside out.
We gather the fabric in the center with a few stitches.
We have a topic. Having thrown it over the neck in a narrow place, we spread it across the chest and fasten it to the waist.
We will make the jacket and trousers according to the patterns.
On the fabric folded in half, mark, baste and cut out the details of the trousers, leaving allowances.
Turn the trouser legs inside out and fold them end to end. First we sew the top of the panties, then the trouser legs.
Turning the pants inside out, iron them. Fold and press the seam allowances at the waist and bottom edge of the legs. We put panties on the doll, if necessary, we adjust them to fit. For example, reducing the size at the waist can be achieved by symmetrically placing pleats in front and back.
After making sure that the trousers fit well, we sew them to the doll along the waist and along the lower edge of the legs. Moreover, we first gather the bottom of the trouser legs onto a thread and place them in place. We fasten the thread.
The next stage is sewing a denim jacket. By spring, such an outfit will come in very handy.
Since there are many small parts in the jacket, it is advisable to choose thin fabric. Fold it in half and re-cut the pattern. We sew together the parts, cut them out, leaving allowances.
Sew along the contour and turn it inside out. Iron it.
On the wrong side of the fabric we copy the pattern of the shelves, back and sleeves. Cut out the parts, leaving allowances. Sew pockets on the front side.
Iron the pockets and make a decorative seam. It will secure the pocket.
Mark the collar on a double layer of fabric.
We fasten the parts with a basting seam, cut them out with allowances, and stitch them.
Turn it inside out and iron it. We sew with a decorative seam with an indentation of 3 mm from the edge.
Place the front and back pieces right sides together and stitch along the shoulders.
We sew in the sleeves.
We perform sleeve and side seams.
Fold the allowances along the bottom edge of the sleeves and iron them. Hem with white thread. We make notches on the allowances. Turn the jacket inside out. Sew on the collar.
We tuck the edges and stitch with white thread.
Sew on buttons - beads. More precisely, we glue them - it’s just a beautiful prop. How to sew a wild rose flower
We select beads according to the size of the flower.
From fabric matching the color, cut out 5 petals without seam allowances. Having folded each piece in half, we baste it along the edge with one thread - see photo.
Having strung all the petals, tighten the thread and sew through the middle, fixing the folds.
We sew on beads, alternating them in size - large and small.
Attach the flower to the jacket. We dress up the tilde by fixing the jacket at several points along the fit.
From the double fabric for the wings, cut out the wings with allowances, having previously marked and basted.
We turn it inside out, iron it, stitch it, marking the feathers.
We fill the wings with filler and attach them to the back of the doll.
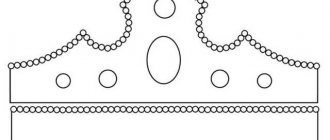
cap
To work, you need to prepare hook No. 2 and a tightly twisted yarn of suitable thickness.
We perform a chain of 24 v/p, closing it into a ring. Next we perform circular rows:
- 1st row: 1 v/p lifting, 23 stbn, 1 stbn in v/p lifting;
- 2p.: 2 v/p lifts and 1 dc in the 1st stl, 23 dc, 1 dc in the 2nd v/p lift;
- 3rd row: 2 VP lifts and 1 stc in the 1st stl, 23 sts, 1 dc in the 2nd pt lift;
- 4p: 2 VP raises and 1 dc in the 1st stitch, 1 dc, skip 1 dc, 2 dc, skip 1 dc, continue until the end.
We tighten the last stitches on a thread and fasten them.
We put a few strands of hair into the hat and put the hat on the doll's head.
We straighten the hair so that the spring angel's hairstyle is symmetrical and beautiful.
We fix the hair and the cap with several stitches.
Let's create the face.
Angel from the semicircle
It is advisable to make such an angel from felt. First you need to draw a semicircle pattern. Trace it onto the fabric and cut it out. Lay out the pattern horizontally, with the cutout facing away from you. Pull the two ends of the product to the center and move them back a little. Sew the fabric in this position.
Next, the head is cut out. It will be made of two circles sewn together. Make the doll's hairstyle your choice. At the end you need to sew the wings. They are made of white material. The shape and type of wings can be varied. Sew them to the back of the toy. At the end, decorate with beads or rhinestones.
You might be interested in this: The sewing machine does not work: causes and solution to the problem
Tilda angel with bird
The size of the original doll is 62 cm. Having printed out the patterns of the parts, you can adjust them as you wish. You can buy a bird with a cage ready-made, or you can embroider it or make it yourself.
The following photo shows step by step the details of making an angel with a bird.
Flower angel tilde
To work you will need:
- different fabrics: beige, as well as for clothes and wings;
- felt for slippers;
- sewing threads, hair yarn, decorative jewelry;
- sewing tool;
- glue gun;
- acrylic paints, blush.
Flower angel tilde: master class
The proposed pattern is designed for a tilde with a height of 35 cm.
We cut out the parts in natural size.
We select scraps of fabric with different colors in pairs. The body and arms with legs should be made of two colors of fabric: beige and multi-colored. Therefore, we sew the shreds in pairs.
We attach the patterns, matching the color transition lines. We pin it with pins to secure it. Let's re-cut the pattern.
We draw the contours of the parts.
We cut out the belt and wings.
We cut out all the parts with an allowance of 3 mm. On the fold lines (neck, waist) we cut the allowance so that the fabric does not pull.
We turn out all the details. This is convenient to do with a thin stick or pencil.
We stuff the parts, except the belt, with synthetic down. We put a stitch on the legs, in the area of the knees.
We attach the arms and legs of the doll.
For the skirt, take fabric with flowers measuring 35x50 cm. Fold it in half with the right side inward and sew along the long side. Iron the top by one and a half cm, the bottom by 1 cm. Sew in a circle, leaving a small gap.
We insert an elastic band into the waist and put on the skirt. We make a belt and decorate it with flowers.
Attach the wings.
To make hair we need pins and yarn. We stick pins (see photo) and wrap the threads around them. We fix the hair with a regular thread and a needle. Remove the pins.
Decorate your hair with a flower.
We decorate the face with acrylic paints.
The doll is ready!
Tilda autumn angel: master class and pattern
Tony Finanger, a craftsman from Norway who specializes in the sale and manufacture of tildes, believes that you should not buy interior toys, on the contrary. It is in similar products that you need to invest a part of yourself, and for the doll to protect the house.
Autumn is an ambiguous period of the year. Some people like the golden leaves, while others are saddened by the everlasting rains. You can sew your own autumn angel, master class to help a beginning needlewoman. The most popular style in which similar samples are made is Provence.
Tilda angel doll life-size pattern
We sew the angels ourselves from the pattern. But before you build a pattern, you will need to prepare everything you need:
- paper;
- scissors;
- pencil;
- threads;
- needle;
- filler;
- turning stick;
- pins;
- yarn for hair;
- textile adhesive composition.
Attention! The pattern of the vintage angel and the autumn one are similar, only the product will have a slightly different mood and size of the wings.
You might be interested in this: Beautiful patterns for wrap skirts: sew it yourself
Sewing a sewing angel body
To make an autumn angel, the fabric of the body and dress will be sewn together.
After the fabrics are sewn. The workpiece is folded right side into several layers, the pattern is outlined, and the product is sewn on a machine.
Body for a doll
Wings
To make it you will need white cotton.
The autumn angel has wings with loops that are sewn on the inside. The finished wings are put on the back using loops;
All that remains is to rouge the cheeks, and the autumn angel tilde is ready.
Platice
Dress for an angel
When the parts of the body are stitched, they are carefully cut out, making seam allowances of 0.5 cm. All parts are carefully turned out, ironed, and stuffed.
The next step will be hemming the bottom and sewing on the legs. To do this, you need to place them against the back of the hem. Everything is stitched together with the front part.
The question often arises: how to sew hands on a tilde doll? There's nothing complicated about it. The arms are sewn on after the piece is pinned to the shoulders. A blind stitch is used for sewing.
Ready product
Hair and makeup
The next stage is the hairstyle. The bangs are embroidered with yarn, the shape is outlined with pins, and the wire is passed through the head of the product. The yarn is wound onto one end and the hair is “intertwined” in a shuttle fashion. The binding ends at the other end of the wire.
Attention! There is no need to rush, before the pins are removed, the hair is stitched in the middle.
The eyes are embroidered with black thread.
Making clothes: the volume parameters of the doll blank are measured - FOB, cutout for connection and DI.
The skirt is made from a rectangular piece, gathered at the top, hemmed at the bottom, and decorated with braid, ribbon, and lace. A button is used for fastening. Everything is attached to the body.
The outfit is complemented by boots made of felt and glued with textile glue.
Threads – “imitation” of lacing.
It is taken from 4 wedges and sewn according to the size of the head.
The top is decorated with rhinestones. The rhinestone is attached to textile paste or stitched using a hidden seam.
You might be interested in everything about manual sewing machines for leather sewing
Felt is used for coats. The base and sleeves are cut out. Everything is swept away and then ground down.
Lavender Angel
Such a miracle can be made using the proposed patterns. Details of the exquisite toilet - see in the photo.
Another Lavender Angel – Jane Austen
Jane Austen doll with a bouquet of lavender is very romantic and beautiful. The pattern for it is presented below.
For the body you will need beige fabric, for the dress - lilac.
Burlap angel
Such toys are similar to those that grandmothers made for their grandchildren in childhood. Making an angel from burlap is quite simple. Roll a cone out of cardboard and cover it with fabric of your choice. It is recommended to simply stick the burlap to one side of the cardboard. Roll the fabric into a cone and secure it with hot glue or a stapler. Next you need to make the head.
You might be interested in learning how to cut and sew correctly from scratch alone
Toy with hanging ribbon
Cut out a circle, fill it with padding polyester and sew it up. The hairstyle is made from yarn that matches the color of the burlap. Make several ropes and sew them to the head. You can weave a halo from white yarn. It needs to be sewn just above the head. The gap between the head and body can be hidden with lace. Sew a small bow from a satin ribbon and attach it to the chest.
The last step, making the wings. They are also made from burlap. But along the edge they are decorated with lace.