The gathered skirt (or tatyanka skirt), popular for many decades, is again at the height of fashion. Curvy midi and maxi length models are now popular. The skirt can be made with either an elastic waist or a belt fastener. This product model is perfect for the base of a dress. Having learned how to sew a gathered skirt, you can easily make a pattern for a dress.
This is a simple skirt model, on the basis of which you can create other, more complex options. Sewing practically does not require a pattern: you just need to make the necessary calculations. This article will help you navigate the process and sequence of work, based on which you can sew your own skirt.
How to make a pattern
The pattern can be made directly on the fabric: it is quite simple. The pattern looks like a rectangle. The measurements are also simple: you only need to measure the length of the skirt and the waist circumference. Stages of work:
- We pin the fabric, which we place with the right side along the edge.
- Draw a rectangle: one side will be equal to the waist circumference and the increase in gathering (you can use the entire width of the fabric), the second will be equal to the length of the product.
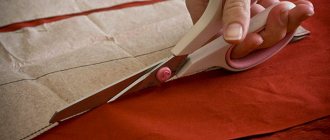
- Since the skirt is sewn with one seam, we will cut it out on the fold of the fabric.
- Determine how much fabric you will need to create the gathers. Set this length aside from the main length to the left of the vertical border of the skirt.
- If you plan to sew a skirt with an elastic band, then you need to set aside a portion of the fabric equal to twice the width of the belt. In addition, we set aside another 1.5 centimeter width for the hem.
- To sew a skirt with a zipper with a detachable belt, you need to do the following: add a couple of centimeters to its length so that the skirt fits loosely around the waist, as well as 2-4 centimeters for the allowance for the fastener. Alternatively, you can make the belt 7–10 centimeters longer, and cut off the excess in the process.
The process of sewing a gathered skirt
As mentioned above, a Tatyanka skirt can be sewn either with an elastic waistband or with a fastener and a tight belt. In this case, the additional fabric left for indentation will be used to form the gather. Another detail that may be needed for sewing a skirt is the lining. It is used if the skirt is made of light and thin fabric (for example, chiffon).
Taking into account the various accompanying details, the sewing technology itself changes. But at the same time, the following instructions are suitable for sewing any full, gathered skirt:
- We made the pattern according to the recommendations indicated in the previous paragraph with all the necessary allowances.
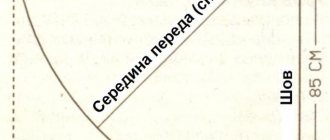
- How do we decide where our only longitudinal seam will be? It’s very simple: most often it is placed at the back, because there will be a clasp there.
- Fold the fabric face to face. At a distance of 2 cm from the edge (excluding the edge), we sew a line to the bottom. In this case, you need to leave 13–15 cm on top.
Next you need to gather the skirt.
We have prepared for you a detailed video course “Sewing Basics”
Get it now for free!
get a course
How to gather a skirt at the waist
To do this, on the sewing machine, on the stitch length regulator, select not three, as usual, but 4–4.5. Where there will be a zipper (top of the skirt), at a distance of 1 cm from the edge, we make a line in one layer. The knot needs to be made on one side only. On the other side, you should leave the threads.
If the fabric is with the right side on top, then you need to pull the lower free thread. You need to pull it carefully until the top cut with gathering is equal to the waist circumference (you need to leave an additional two to three centimeters).
We tie a knot on the thread so that the gather does not fall apart, and then carefully distribute the gathers throughout the fabric.
Related materials:
tips | style tips | expert advice | Antonina Shapovalova | Marika | Alexandra Serova | Dmitry Loginov | Masha Tsigal | Pro Tips | McQ Alexander McQueen | Rick Owens | Helmut Lang | Michael Kors | Bottega Veneta | pencil skirt | midi length | maxi skirt | Alexander McQueen | Theyskens' Theory | Altuzarra | style | opinion | sexuality | casual | mood | wardrobe | designer
Articles
- Advice from professionals. Universal tops May 27, 2012, 01:50
- Advice from professionals. Summer dresses: length, style, color August 11, 2012, 00:00
- Winter has just arrived: a cozy white sweater January 01, 2021, 00:25
Video
- Sexy look by Michael Kors September 26, 2014, 11:00
- Glam look by Michael Kors September 26, 2014, 11:00
- New men's fragrance Michael Kors for Men March 03, 2015, 17:30
Sew the belt to the product
First you need to build the belt itself. To do this, you will need to cut a strip of fabric, the length of which is equal to the waist circumference, and also add three centimeters (1.5 cm on each side for the seams and stitching at the back of the zipper). The waistband width is double the width and seam allowances. Thus, if the finished width of the belt is three centimeters, then the width of the required fabric is 8 centimeters (3 centimeters for double width and 1 centimeter for allowances).
Any fabric stretches over time. To prevent this from happening to the skirt, the belt fabric needs to be duplicated. Dublerin is an adhesive fabric that needs to be glued to the waistband of the skirt. You can also use interlining, but it is more suitable for thin fabrics.
To begin, we cut out a strip of dublerin equal to the belt. We apply it with the adhesive (rough) side to the wrong side of the fabric. Cover the belt with a cotton cloth and steam well with an iron. After the dublerin is glued, fold the belt in half (with the right side of the fabric facing out) and iron it.
After this, you need to process the belt on one side with an overlocker.
We apply the raw edge to the assembly. We connect the edge of the belt and the edge along the back cut (on the front side), attach with a pin. We repeat this first from the other end of the skirt, and then pin the belt in the middle and along the entire length. Then you need to give a line at a distance of one centimeter from the edge.
The next stage is attaching the zipper. To determine the level of indentation at which you need to make a zipper, apply its middle to the seam and see how the zipper is positioned. The edge of the seam allowance should match the edge of the zipper (sometimes it can come out: it depends on what the seam allowances are). After that, we put the zipper on top. The dog should reach the bend of the belt (we ironed it). Then we pin the zipper along its entire length with pins. It is important that the cuts along the seam of the belt stitching on the wrong side are tucked towards the belt.
Unzip the zipper and stitch it on one side (fixed) to the skirt.
Afterwards, close the zipper and apply it on the other side. Care should be taken to ensure that the stitching seam of the waistband matches on both sides. To do this, you need to pin the zipper at the same distance from the edge of the fabric at the place where the belt is stitched (after pinning, check on the front side to see if the line matches and there is no skew). If everything is correct, unzip the zipper and stitch it on the other side.
All that remains is to process the edges of the belt. Along the fold, turn the belt inside out (the tail of the zipper should be visible), and pin short sections of the belt across. A little closer to the edge (not along the line of stitching the zipper) we add a line. We repeat the same with the other edge of the skirt waistband.
We fasten the zipper and check that both ends match.
Sew the belt to the skirt. To do this, we tuck all the seams inside (along the assembly line) and cover them with a belt, pinning them along the entire length.
Lastly, you need to sew a seam along the front side of the fabric along the line of sewing the belt to the skirt.
LiveInternetLiveInternet
Quote from Hugo_Pugo_handicrafts message
Read in full In your quotation book or community!
HIGH WAISTED SKIRT.
BACK IN FASHION. SHALL WE SEW IT? I have always had problems with skirts, ever since my pioneer childhood - I never liked the way skirts fit me. Those single instances that suited me are stored in my memory to this day. So, for example, knowing all the advantages of high-waisted skirts for my figure, I placed such a thing in my wardrobe only once, and even then at the dawn of my youth... And I remember very well that I looked amazing in that skirt - I felt like not just a person, but a woman, a WOMAN with a capital W! (Did you smile at these formulations?). But it was difficult for me to choose blouses for a high-waisted skirt...
The idea of updating my wardrobe, and even sewing something myself, had been wandering in my head for a long time, and then I accidentally came across this article: “ High-waisted skirts where they explain in an accessible way how and with what to wear different models of such skirts correctly, that’s all - my fate is sealed - I’ll try to sew a high-waisted skirt myself. I have already selected the model, pattern and comments for it. Who is brave, who will try to create this miracle with me? I just feel like I might not be able to cope, so I’m looking for companions and support.
And now into battle!
They say a high-waisted pencil skirt looks great on any figure. Let them say, don’t flatter yourself, you still need to be able to choose your own model. So in my case, it happens that a pencil skirt strongly emphasizes, even (sometimes) the missing tummy, and in the process of wearing such a skirt uncontrollably tends to crawl too high under the chest and it has to be constantly returned to its place, and persuasion does not help here and everything has to be done do it with your hands. Sometimes such an irresponsible skirt also pulls the blouse tucked into it, then in order to get yourself in order you need a secluded place to tuck the blouse.
I repeat, if you find your high-waisted skirt model, then it will only delight you with its impeccability.
Studying this topic, we create patterns for a conventional figure of size 48 (as an example), and you take measurements from your figure or from the figure of your client. In the previous article we looked at the option of constructing a pattern for a pencil skirt with a one-piece belt 3-4 cm high, and in this article (as an example) we will raise the waist line by 7 cm. This construction is similar to the first option, but it is still worth paying your attention to following. Depending on the amount of rise in the waistline and the configuration of the top line of the skirt, some of the nuances of constructing the pattern will change.
Namely: if the height of a one-piece belt is more than 4 cm, in its upper part the solution of darts can be reduced. The upper cut of the belt in the area of the side cut can also be widened to approximately 0.5 cm. I write approximately 0.5 cm, since there cannot be an unambiguous recommendation in this regard. How to proceed? The answer to this question will be given by your figure. Stand in front of the mirror and direct your attention to the waist area (from the front and in profile), you can use a centimeter as an assistant. And then analyze what you saw and make a decision by how much you should reduce the darts or expand the side cut to suit your figure. We are all different and the difference in girth is also different, and the configuration of the sideline is also different.
And now, important: It is very easy to adjust the belt after the first fitting! If you doubt the correctness of your decisions, then the first fitting will put everything in its place. The main thing is not to forget about allowances!!!
The style in question is based on the pattern of a classic pencil skirt, which we created in one of our previous articles. A classic pencil skirt, in turn, is based on the basic pattern of a straight skirt. If you have not previously participated in mastering design with us, you can use our step-by-step instructions and make patterns for these skirts for your figure. In the future, you will need them more than once when modeling various styles of skirts. Or use any other pattern, the choice is always yours.
The main thing to remember is that you should start modeling only after you have checked the base, made adjustments (if necessary) and made sure that the skirt fits perfectly on your figure.
We will take the pattern of a classic pencil skirt and continue building on its basis. Copy the front and back panels of the pencil skirt onto a blank sheet of paper.
Rice. 1
NOTE: If you have a narrow waist and wide hips, in this case it is preferable to make two darts on each panel to ensure a perfect fit of the skirt on your figure. We will discuss this in more detail in one of the following articles.
In this example, we will raise the waistline by 7cm. By construction, we can say that a skirt with a high waistline in our case is a skirt with a one-piece belt, the height of which is 7 cm. The height of a one-piece belt can reach 10 centimeters or more, turning into a kind of corsage and requiring a specific processing technology in each specific case. It depends on the model of the skirt, on the properties of the fabric, on your plans, on the wishes of the client, etc.
The configuration of the top line of a one-piece belt can also be different.
In this option, the upper section of the belt runs parallel to the upper section of the base pattern of the skirt (waist line). In the following articles we will look at other examples.
From points T and B9, on the rear panel and from points B11 and T1 on the front panel, draw upward vertical lines, 7 cm long (inflated height). The ends of the lines will be designated by points P and P1 on the rear panel and P2, P3 on the front panel. We connect the resulting points with a smooth line parallel to the upper section of the skirt, as shown in the figure below.
Rice. 2
From points B7 and B6 on the rear panel and from points B3 and B2 on the front panel, draw vertical lines upward until they intersect with line PP1 on the rear panel and with line P2P3 on the front panel. We denote the intersection points as P5, P6, P7, P8. (See Figure 3).
Rice. 3
IMPORTANT! The resulting segments B7P5 and B6P6 should be equal to each other. The same applies to similar segments on the front panel B3P7 = B2P8. If necessary, align them in length and adjust the top line. (See Fig. 4)
Rice. 4
Along the upper cut we reduce the dart opening by 0.5 - 0.7 cm on each panel. To do this, from points P5 and P6 we put the reduction amount in the middle of the dart, designate these points with numbers 1 and 2 and connect them with points on the waist line B7 and B6. Similarly, we will reduce the dart opening on the front panel of the skirt and place points 3 and 4. See the figure below. The structure is indicated in red.
Rice. 5
It is recommended to raise the top line of the belt at the side cut of the skirt (points P1 and P2) by 0.5 cm so that the finished belt does not bend. To do this, we put 0.5 cm upward from the above points and designate the resulting points 5 and 6. See the figure below.
Rice. 6
The upper edge of the side line can be slightly widened up to 0.5 cm. This is done if the waistline is significantly higher and, first of all, depending on your figure or the figure of your client.
For example, let's imagine that the figure of our conditional client has all the data so that the upper cut of the side line is expanded by 0.4 cm. To do this, from point 5 to the right, and from point 6 to the left, set aside 0.4 cm, put points 7 and 8, respectively, and connect them with points on the waist line B9 and B11 and with points 2 and 3, respectively. See fig. 7 and fig. 8.
Rice. 7
Rice. 8
This completes the main changes.
Rice. 9
NOTE: The top line of a one-piece waistband should be smooth and should not have any sharp bends. Align the waistband pieces along the vertical lines (closing the darts) and, if necessary, adjust the top edge of the skirt.
Please note that the technology for processing the upper cut of a high-waisted skirt depends on the amount of inflation, i.e. from the height of the one-piece belt. For example, padding of different densities is used, and with a high belt that resembles a corset, bones, etc. are inserted into the relief and side seams to maintain the shape.
In our example, we will process the upper section of the skirt with a hem.
To draw the facing of the belt, copy the upper part of the skirt onto a separate sheet, matching the lines of the darts. In our drawing, this part of the skirt is indicated in blue.
Rice. 10
We get two facings for the front and back panels of the skirt.
When cutting, do not forget about seam allowances.
Rice. eleven
All. The pattern is ready. Based on this pattern, you can also model various styles of skirts.
In the next article we will describe the construction of a pencil skirt pattern with a high waistline with a curly top cut line in several options. This also has its own subtleties that should be taken into account when creating a pattern.
Follow the site news, subscribe to our RSS news feed and you will always be up to date.
Rice. 12 Cutting details.
Don't take everything written here for granted. Of course, there are other modeling options and other descriptions.
Authors of the article: Valentina Nivina Alexander Nivin https://www.newsewing.com/view_post.php?id=401
By the way, if my skirt doesn’t turn out perfect, then I’ll go to the same women’s magazine (https://www.refashion.ru/) to calm down and read entertaining articles (https://www.refashion.ru/ ), and for the first time I could barely tear myself away from it...