Do-it-yourself volumetric snowflake with step-by-step descriptions
To begin with, I want to offer you this way of working, maybe you will like it better than the following:
This type of work is a little more complicated, but it is the most interesting in my opinion, because such a snowflake looks as if in 3D form. Of course, it’s time-consuming, but it’s worth it, my child and I made such a masterpiece in 1 hour. We are happy to share our step-by-step master class with you.
Stages of work:
1. You will need 6 squares of paper (blue and 6 of another white color), we took ordinary squares that we already had, they are sold as notes for notes. If you don't have these, then make your own.
Fold each square in half from one end to the other.
It will turn out something like this, and the last figure lies on the table, this is the result of the work.
2. Then fold the two ends of the paper to the fold line on both sides.
Turn the finished templates over to the wrong side.
3. Next, bend again to the fold line, as shown in this photo:
Now turn the craft over to the other side again and push out the parts that stick out.
4. This is how it should work out, absolutely not difficult.
The next step will be to prepare 6 white squares, from which we will make the following blanks.
5. So let's start, this work is even easier than the previous one, let's make origami out of paper again.
This is how it should turn out, there should be 6 blue blanks, and also 6 white ones.
6. Well, after you have cut the white squares, fold each leaf in half by taking one end and placing it on the other.
Do it after the envelope.
7. Now turn all the envelopes over to the other side.
My youngest son also helped, and the eldest joined a little later.
8. Fold the sides.
Turn it over and fold out the sides, then fold them towards the center. Cut out a small circle from paper and attach all the modules.
9. Now start gluing.
Take your time, do everything carefully. Use a napkin.
10. Almost everything is ready, all that remains is to decorate and cheer up yourself and those around you.
So I called my eldest son for help, and this is what we did to him.
11. We glued a photo in the middle, it turned out to be such a funny and mischievous modular paper snowflake. Tomorrow we will hang this beauty on a booth in the kindergarten. It looks simply amazing and much brighter live). So be sure that absolutely everyone will like this miracle!
In fact, there are quite a lot of three-dimensional options; they can be made using the origami technique, or in the most ordinary way.
I found these on the Internet, I hope you find them useful, take paper, scissors and glue:
Here is another similar option.
If you have a lot of time, then you can make more complex voluminous snowflakes; I know that the halls of kindergartens, schools, universities, universities and even shops are usually decorated like this.
Interesting! You don’t have to glue the parts together, but use a stapler to do it faster.
With Christmas trees
Once again, the modular design consists of 6 parts.
Making 1 fragment:
- Fold the sheet in half.
- Draw half of the Christmas tree at the fold, and on top of it are 2 semicircles.
- Cut out the workpiece.
- We bend the middle strip back and glue it.
- We assemble the model. We fix all 6 modules with the herringbone facing outwards.
Preparatory stage
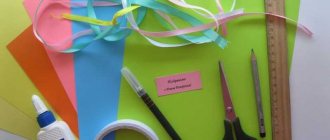
It is important to approach the creation of any craft in a planned manner. The master, in addition to ideas, must have all the necessary materials and tools.
Material selection
In principle, you can take any paper: from napkins to regular A4 sheets. Each material has its own advantages. It all depends on the idea. If you need to decorate your window glass with the finest snow patterns, you can choose ordinary paper napkins. And there are several reasons for this:
- the density is low, they are easy to fold;
- cutting out patterns is much easier as it requires less effort.
But a significant disadvantage is generated by the same low density of the material - the napkins tear very easily, especially after cutting out all kinds of patterns. Therefore, you will have to be careful when unwrapping a delicate product.
For the same reason, it is hardly justified to involve younger children in independently creating snow-paper openwork creations from napkins. A torn craft will upset you and may provoke refusal from further participation in the work. To prevent this from happening, you can try the following algorithm: the child folds the napkin and cuts out the pattern along the intended lines, and the adult helps unfold and straighten the snowflake.
How to make a snowflake from a roll of toilet paper?
It turns out that to make such crafts, you don’t have to use regular paper; you can also use toilet paper rolls. And the work process is very simple, you only need to take one roll, PVA glue and paints, you can use acrylic, or you can use gouache. For decoration, use glitter, sequins or confetti.
Now just cut the toilet paper roll into equal parts, shape it into a flattened shape and glue it together. Top with material of your choice.
Here are a couple more ideas for designing structures made from rolls:
- use small and large pieces
- You can take different decoration elements from above
- Or you can just cover it with gold paint
Let's look at the options
The first option is the simplest. First, you need to fold a piece of paper five times. Four times in half, and the last fifth time diagonally. The ornament will be beautiful, but angular.
Very important! In order for the snowflake to be smoother at the end of the work, you should immediately cut off all excess parts.
Once you have mastered the simple method, you can move on to more beautiful and complex options.
Second option. Below is a diagram that shows a clear example of the correct folding of sheets of paper for a pentagonal product.
Third option. It's a little more difficult to fold a hexagonal snowflake.
- Take a square piece of paper and fold it diagonally. Then fold in half. Straighten out the last bend. Now you should take a compass and draw a circle. The maximum radius that will fit on the workpiece.
- Leaving the radius the same, place the compass needle on the edge of the circle where the leaf bends and make a notch. Do the same on both sides of the triangle.
- Fold the edge so that it is the same as the notch on the left.
- Turn the product over and bend the edges on the right side in the same way.
Fold it in half, if the extra tails are in the way, then cut them off, and if not, draw a beautiful ornament on them. There is another option to roll the paper for a six-pointed fluff. Take the paper and fold it diagonally, then trim off the excess paper. It should come out square. Fold diagonally a second time. You will get a triangle that needs to be divided into three halves, fold one half, trim the ends, fold the other half. Everything is clearly visible in the picture.
Related article: Bodysuits for young children: knitting pattern and description
Snowflakes in the interior (photo)
DIY Christmas tree decorations in retro style (video)
Just look at this beauty, the snowflakes are so cute, delicate and airy, and most importantly, everyone can make them, be it an adult, a schoolchild or a preschool child.
By the way, kindergartens and schools are often decorated with just such snowflakes. The diagrams presented above are ideal for beginner handicrafts, as well as children. Although in fairness it is worth noting that there are more complex schemes. In this regard, start creating this beauty with simpler schemes, and you will definitely succeed. Well, we invite you to visit the New Year's section of our website, in which we have collected the brightest, most interesting and fabulously delightful decor ideas, with large selections of various master classes. WE RECOMMEND WATCHING (we are giving a gift on MARCH 8):
How to cut a snowflake?
You can see the entire process from folding a piece of paper to cutting out a beautiful New Year's snowflake in the video below. Particularly complex curls and thin slits are best achieved with a utility knife.
If you already know how to fold paper to cut out snowflakes, then you can go straight to the templates. You can start with simple ones. Examples are shown in the figure below.
Snowflake patterns
Want to know all the different ways to cut six-pointed snowflakes? Watch a special video that clearly shows 3 such methods. Which one is better - decide for yourself!
From the following videos you will learn how you can draw a pattern yourself to cut out a beautiful New Year's snowflake.
How can you cut a beautiful snowflake from a folded paper triangle using patterns downloaded on the Internet? Everything is very simple!
Examples of patterns for cutting out six-pointed snowflakes
In the examples above, you need to cut out the snowflake according to the diagram shown above so that only the white part remains, the black part must be cut off.
Snowflakes are made by analogy, the cutting templates for which are presented below.
You can take even more patterns for cutting out easy-to-make snowflakes at the link -
Geometric snowflake
You will need: 2 sheets of colored paper, scissors, glue stick.
Master Class
- Cut each sheet into 3 equal parts.
- Take one piece and fold it in half.
- Make 4 cuts: 2 short and 2 long.
- Distribute the center stripes on opposite sides.
- Repeat this process with all the pieces.
- Glue the blanks together, alternating colors with each other to form a snowflake.
Geometric snowflake is ready! I recommend watching this video!