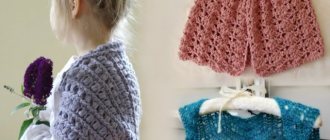
A little history
Bolero as a type of clothing owes its appearance to Spain. It was there that this type of clothing appeared in the eighteenth century. Moreover, it was worn mainly not only by women, but also by men.
Initially, the bolero was a costume worn by dancers performing the Spanish bolero dance of the same name. Subsequently, boleros were worn by bullfighters when performing in front of the public.
Later, the bolero became primarily an outfit for girls and young women.
Today, boleros are worn by young girls who want to emphasize their unconventional taste, real fashionistas. Also, the bolero is popular with parents of little girls, and the children themselves really like this type of clothing.
Knitted trendy bolero
Knitting a bolero of this model is extremely simple. For this purpose, you need to knit a fabric in the shape of a long rectangle.
We purchase mixed yarn (wool with acrylic), quite dense and thick. In this case, the knitting density should be thirteen P and fifteen rows (P) in a sample measuring ten by ten cm.
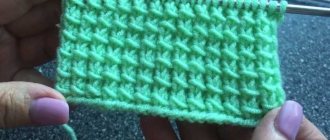
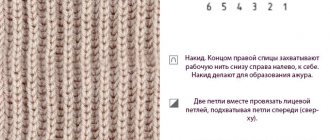
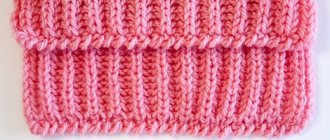
- We knit a long rectangle with a 2x2 rib and then sew it together. To knit a fabric of size forty-six, you will need four hundred grams of red yarn and number eight knitting needles.
- The pattern diagram contains all the necessary dimensions, expressed in numbers. These numbers are for sizes 36/38, 40/42, 44/46. When you see a single number on the diagram, it belongs to all previously indicated sizes.
- We knit a long rectangle with an elastic band. Its width should be twenty-eight cm, and its length 140, 148 or 150 cm, depending on the size.
- By sewing such a scarf, we will get the desired shape.
- The cast-on P should be thirty-six P, which is then knitted with a 2x2 elastic band.
- Having tied the fabric to the required length, the loops are closed.
- To assemble the scarf correctly, you need to sew its narrow parts with a mattress seam. As a result of stitching, you will get armholes on both sides.
- At the end of the work, put on the bolero and mark the fastener points with thread.
The main advantages of bolero
The bolero owes its popularity to the following characteristics:
- Versatility - this form of clothing is good and practical for any occasion, from walking in the fresh air to attending various kinds of celebrations.
- Keeps the temperature well - a bolero knitted from wool will retain heat well and will not only look beautiful, but will also protect the wearer from the cold.
- The bolero always emphasizes the image and style - those around you will be delighted with the taste and sophistication of the owner.
A few words about yarn and drawing
To make a bolero happy, it is important to choose the right threads for creativity. Thin cotton yarn with the addition of synthetics holds its shape well and is easy to wash. “Grass” hides knitting flaws and always looks elegant.
Acrylic, mohair, wool are functional threads. A bolero made from this yarn is very warm. Loose and voluminous designs look impressive. When choosing a pattern, preference is given to a pattern with a small report. Napkin patterns are used for lace trim.
They look quite modern and fresh. Based on existing models, you can always come up with something unique, so go for it!
Material selection
You need to start with choosing yarn. Initially, you need to decide what time of year you plan to wear the bolero. If it’s cold, you need to knit from wool or mohair. If it's warm - made of cotton, linen, silk.
In addition to yarn, we will need the third size of knitting needles, one bright button, and loops. We will focus on size 42.
Gamma "Iris"
This is what knitters recommend for openwork products of this type. I knitted my gray bolero from this thread. The characteristics of the yarn are good: 100% cotton 10 g/82 m. Of course, the yardage is small! But this does not prevent the yarn from being in demand among many needlewomen who prefer lace items and interior items.
Black thread is perfect for creating an openwork bolero. This wardrobe item can decorate any dress. The image immediately becomes catchy and unforgettable.
Knitting back
We cast on 97 loops, make 10 centimeters with a double elastic band, remove one loop in odd rows. Next we knit 20 centimeters and close the bevels. We make bevels in two loops. Next we knit 48 centimeters. We leave 13 loops on each shoulder. We close the middle of 72 loops.
Crochet white bolero
Size: 38
YOU WILL NEED:
- Yarn (44% cotton, 35% polyacrylic, 21% polyamide; approx. 90 m/50 g) 600 g white (= 12 skeins);
- circular knitting needles N° 5;
- hook number 5.
RIB: (knitting needles No. 5) alternately knit 2, purl 2.
PATTERN 1: knit according to crochet pattern 1, perform rows 1-3 once, then repeat rows 2 and 3 constantly.
Knitting density: 18 p. x 9 p. = 10 x 10 cm.
PATTERN 2: knit according to crochet pattern 2,
1st and 2nd circle.r. perform 1 time. 1 rapport = 2 tbsp. s/n, 2 v.p.
3rd, 4th and 5th circle.r. perform without increments (in each st. s/n group, knit 2 st. s/n, move using 2 ch. to 2 ch. of the previous round. r.) = 16 rapports.
6th circle.r.: perform increases as in the 2nd circle.r. (in each treble s/n of the group and in each vp of the group, perform 2 treble s/n, 2 vp) = 32 rapports.
7-11th round: knit without increases.
12th circle.r.: perform increases by analogy, as in the 6th circle.r. = 64 rapports.
13-22nd circle.r. knit without increases. Start each circular row with 3 ch. lifting instead of 1st st. s/n and finish with 1 connection. Art. in the 3rd ch. and 1 connection Art. in the 1st art. s/n.
Knitting density: 18 p. x 8-9 circle. R. = 10 x 10 cm.
BACK:
Using crochet number 5, make a chain of 6 ch. and knit pattern 2 once. 27 cm from the middle (central point) = 22 circular rows. Link 64 rapports. For the back neck, leave 6 repeats, for the side edges and the lower edge of the back, leave a total of 30 repeats (opposite the neck).
Meanwhile, put marks for the left shelf with the left sleeve, as well as for the right shelf with the right sleeve (= 14 repeats each). First, knit on 14 repeats for the left side (= left front and left sleeve) with pattern 1. In each next row, add 7 x 1 repeat on both sides = 28 repeats. Knit 6 rows straight. In the next row on the left edge, decrease 1 repeat = 27 repeats. Then knit 10 rows straight.
After this, divide the work for the sleeve and shelf.
Finish the left sleeve first. For this, already at the end of the 10th p.m. decrease 1 repeat and at the beginning of the next purl row decrease 1 repeat, in the opposite direction knit on 9 repeats. In the next row, decrease 1 rapport on both sides. At the end of the next row, decrease 1 repeat = 6 repeats. Finish the work.
Now do the left shelf. To do this, leave 5 repeats in the purl row and then knit on the remaining 11 repeats. In the 4th row, decrease 1 rapport on both sides. In each next row, decrease 3 x 1 rapport along the right edge. In the next row, decrease 1 repeat along the left edge and in the next 3rd row, decrease 1 repeat along the left edge = 4 repeats. Then finish the work.
Next, knit on 14 repeats on the right side (= right front and right sleeve) with pattern 1. In every 2nd row, add 7 x 1 repeat on both sides = 28 repeats. Knit 6 rows straight. In the next row, decrease 1 repeat along the right edge = 27 repeats. Next 10 rows knit straight. Then divide the work for the sleeve and shelf.
Finish the right shelf first. To do this, knit on 11 repeats in the purl row. In the 4th row, decrease 1 rapport on both sides. In each next row, decrease 3 x 1 rapport along the left edge. In the next row, decrease 1 repeat along the right edge and in the next 3rd row, decrease 1 repeat along the right edge again = 4 repeats. Then finish the work.
Now complete the right sleeve. In the purl row, leave 5 repeats and at the end of the row, decrease 1 repeat = 10 repeats. In the next row, decrease 1 rapport along the left edge. In the next row, decrease 1 repeat on both sides and in the next row, decrease 1 repeat on the left edge = 6 repeats. Finish the work.
ASSEMBLY:
Lightly moisten the parts, stretch according to the pattern and leave until completely dry. For a placket running along the contour of the jacket, on circular needles No. 5, cast on 336 stitches along the edge and knit 10 cm with an elastic band. Then close all the loops according to the drawing. For each cuff, cast on 44 stitches along the bottom of each sleeve and knit 10 cm with an elastic band. Close the loops according to the drawing.
Up
How to collect a shelf
Let's start with the right one. The left one is then performed in the same way. Using an elastic band, cast on 5 loops. In every second row we make an increase.
After reaching 18 centimeters on the right, every six rows we decrease one loop. After reaching 20 centimeters from the border on the left, close 1 loop in two rows, then one loop in one row. After reaching 28 centimeters, close 13 loops on the shoulder.
Crocheted openwork bolero patterns and description
A crocheted openwork bolero in tea rose color will add a touch of vintage to your look.
Sizes: (SM), L (XL)
Finished product dimensions:
- chest circumference - (92)104(116) cm,
- length - (33)35(38) cm,
- internal sleeve length - (23)23(23) cm.
You will need:
- Novita Cotton Bamboo yarn (50% cotton, 50% bamboo-viscose, 108 m/50 g) - (300)350(400) g tea rose color;
- hook No. 3.5;
- knitting needles No. 3.5.
Openwork pattern: crochet according to patterns 1-5 in accordance with the instructions.
Rib 2 x 2: knit 2 knits alternately. p. and 2 p. P.
Knitting density: 3 repeats of openwork pattern = 14 cm.
Attention! The bolero consists of two parts connected transversely from the sleeve to the center.
Completing of the work
Dial a chain of (72)82(82) air. p., knit according to pattern 1 as follows:
1st row - knit 1 tbsp. s/n into the second loop from the hook, then knit 1 tbsp. s/n in the next loop, dial 3 air. p., skip 3 loops of the initial chain, *knit 1 tbsp into the next loop. s/n + 4 air. n. +1 tbsp. s/n, then dial 3 air. p., in the next 3 loops of the initial chain, knit 1 tbsp. b/n, 3 air. p., skip 3 p. of the initial chain*, repeat *-* 5(5)6(6) times, knit 1 tbsp into the next loop. s/n + 4 air. n. +1 tbsp. s/n, dial 3 air. p., skip 3 p. of the initial chain, knit 1 st in the last 2 loops. b/n.
Next, knit according to the pattern from the 2nd row, in the 2nd row in the work (7)8(8) repeats.
Knit the 2nd-7th rows according to pattern No. 1 a total of 3 times, then knit the 2nd row again and cut the thread.
Next, knit according to pattern (3)3(2), starting from the 3rd row, as follows: dial at the beginning of the row (25)25(30) air. p., knit the 3rd row according to the pattern, at the end of the row, dial (25)25(30) air. p. Continue knitting according to pattern (3)3(2), knit rows (4-8)4-8(4-11) once. Next, for size SM, repeat rows 9-14 3 times; for size L - knit rows 9-14 a total of 3 times, then knit rows 9-11 once; for size XL - knit rows 12-17 a total of 3 times, then knit rows 12-14 once. Cut the thread.
Knit another piece in the same way.
Assembly:
stretch the parts on a horizontal surface according to size, moisten and let dry. By
Cuff:
Along the lower edge of the sleeve, evenly cast on (54)58(58) stitches onto the knitting needles and knit 3 cm with a 2 x 2 elastic band. Bind off the loops according to the pattern. Tie the second cuff in the same way. Sew sleeve seams and side seams. Connect the parts together in the middle of the back, leaving about 12 cm at the top.
For the border, attach the thread in the front left corner of the front, knit the bolero around the entire edge according to pattern (4)5(5), starting from the first row. Close the row of connections. column. Next, knit rows 2-7 of pattern (4)5(5). Cut and secure the thread.
Up
How to knit sleeves
We cast on 61 loops. We knit 10 centimeters with an elastic band. Decrease 11 stitches on odd rows. At the same time, in every tenth row we add one loop. After reaching 40 centimeters, we knit the rest of the loops.
We repeat all the steps to knit the second sleeve.
NOTE!
How to crochet a flower to decorate clothes: diagrams with explanations and photo ideas of flowers for clothes (80+ photos)The best options for DIY knitted hats: step-by-step instructions and tips
How to knit a shirtfront simply and beautifully with knitting needles for children, women and men: useful tips and instructions (80+ photos)
Description of the work on creating an elegant bolero
To complete this product you need:
- 200 grams of “grass” yarn with shiny threads will allow you to create a festive and elegant bolero.
- knitting needles No. 5 for circular knitting and straight.
Features of knitting
Knitting pattern for a bolero back
The peculiarity of this simple bolero is the use of beautiful material - shiny threads. Beginning knitters will love this easy pattern. Knitting is carried out with stockinette stitch from the neck down in a single fabric, followed by stitching in the sleeves along the raglan line. Using the pattern diagram you can see how our bolero will look during the process and at the end. Scheme:
Raglan lines for knitting bolero
If you use yarn with a bulky thread and knitting needles of a sufficiently large diameter, this significantly speeds up the work. For a product size 44 - 46, cast on 56 loops and distribute them as follows:
1 raglan loop, 12 sleeve loops, 1 – raglan, 28 – back, 1 – raglan, 12 sleeve loops, 1 – raglan.
Tips for beginner knitters
For beginner knitters, a useful tip is to use markers to mark raglan stitches. The marker can be a thread of a different color or pins. This is necessary to make increases correctly and evenly. In all front rows on both sides of the inner loops denoting the raglan, we make an increase; near the outer loops we make an increase only from the inside. When the raglan line reaches 26 cm, close the loops. Sew the sleeves at the connection points according to the diagram. Along the edges of the shelves, neckline and back, cast on loops and tie 15 cm in stockinette stitch. To prevent curling of the edges, you need to evenly add 8 loops in the third and fifth rows. Close the loops.
Boleros are used as a decorative element of a wardrobe. It can be decorated with ribbons and beautiful decorative buttons. Sometimes you can find models that consist of only sleeves and a stripe on the back; this type of bolero is popularly called “sleeves”. Knitting a bolero is a good opportunity for beginners to try their hand.
How to sew all the resulting fragments
First we make the collar. To do this, cast on 251 loops along the bottom. We tie 7 centimeters with an elastic band. We form a loop. After 8 centimeters we close all the loops. We sew the sleeves and also sew the sides of the jacket. All you have to do is attach the button, and your new chic outfit is ready!
Tip: after the item is knitted, the crocheted bolero needs to be steamed well with an iron.
We figured out how to knit an openwork bolero. However, you can show maximum imagination and knit a festive bolero. To do this, you need to select “Grass” threads.
The “shaggy” surface will not only look chic with high-heeled shoes and play with light, but will also help hide minor imperfections in knitting if you are not yet experienced enough.
As you can see, knitting a bolero with your own hands is not as difficult as it might seem at first glance. With a little practice, you can start knitting not only practical, but stunningly beautiful things, arousing genuine interest and admiration of others.
NOTE!
- Knit a tunic - simple patterns and recommendations for choosing models for children and adults (130 photos)
- Knitted overalls for newborns - knitting pattern and description of sewing the best modern models (105 photos)
Jacquard knitting patterns: knitting patterns and tips for choosing the best patterns for beginners and professionals (115 photos)
In the video, knitting a bolero is described in more detail.
Product made from motifs
For beginner knitters, making a bolero from motifs is a good option. Let's look at making such boleros using simple diagrams.
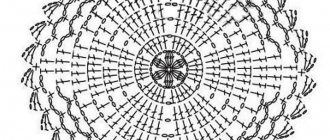
From round motifs
For this work you will need 300 grams of cotton yarn with a density of 170 meters per 50 grams and a hook number 2.5.
Bolero elements are knitted in the round according to this pattern. The photo also shows an example of tying the finished product.
The bolero is assembled according to this pattern.
From the square
In order to knit such a bolero, you will need 10 square motifs. To increase the size, motifs can be added both in width and in length.
An example of the motif used and the binding of the finished bolero:
Assembly diagram. The squares are sewn together one by one. The least amount of breaking of the gather thread should be done.
Circle bolero
A bolero crocheted in the round can be a festive and simple option. Knitted according to the napkin principle, its size and appearance can be very easily adapted to a woman’s individual parameters.
Related article: DIY knitted clothes for dogs: patterns with photos and videos
In this example, sizes 44-46, 360 grams of cotton yarn were used. The work was done with crochet size 1.75.
Before you begin, you should edit the proposed pattern to suit your parameters.
According to pattern 29, a circle is knitted, the diameter of which will be about 40 cm. Next, we knit a separate thread from air loops of about 17 cm and sew it to the armholes.
We continue to knit according to pattern 29a.
Pattern 296 is designed for knitting sleeves.
The bottom of the bolero should be designed according to this pattern. Moisten the finished bolero and let it dry. Ready.
From a rectangle
This type of bolero is the easiest to make. You can certainly knit it, if not in one evening, then in one day. To do this, knit a rectangle with the selected pattern. The width of the rectangle is determined by the width of the back from shoulder to shoulder plus 15 cm. The height of the triangle is equal to the circumference of the arm at the widest point + 7 cm. It is sewn in 2 places according to the diagram. A rectangular bolero can be both casual and festive.
For experienced knitters, we will offer several options for beautiful boleros. Below you will find diagrams and descriptions of the work in pictures.
Beginning needlewomen can take advantage of the video master classes below.
Photo tips on how to knit a bolero
Elegant openwork
Let's consider another version of the women's bolero. This time it will have an elegant festive look. The execution will be more difficult, but it will definitely be worth it.
Required materials: yarn in the amount of 200 grams, knitting needles No. 3.5. These materials are indicated for knitting density for a 10*10 cm square: 27 loops for 33 rows. Depending on the individual knitting density, more or less yarn may be needed. The calculation is based on European size 44.
Let's start the master class. The product is knitted according to these patterns. We begin work by knitting the back. Diagram “A” in the photo is detailed, indicating the addition and decrease of loops.
Related article: DIY willow twig master class for children with video
When the first part is ready, we will begin making the right and left shelves. The diagram is shown below.
Bolero sleeves are made using this pattern.
Let's do the assembly. We sew the right and left shelves to the back, leaving space for the armhole. Then we sew in the sleeves.
Let's start tying. The layout and strapping itself are indicated in point No. 1. Bolero is ready!
