Why do you need a connecting post?
The connecting post is quite versatile and multifunctional. They use it:
- in the process of knitting a pattern, using to attach its parts to one another;
- when processing and securing the edges of knitted fabric;
- for connecting a row both when knitting in straight and reverse rows, and in the round (it’s not for nothing that the stitch is called a connecting stitch);
- for rounding edges;
- when making decreases along the edges;
- when sewing blanks into a single product;
- for knitting a chain in which the back side is used (for example, when knitting Irish lace) to transfer the knitting from one place to another.
As you can see, this is a very useful thing and a must-learn.
Ss., p.s. and p.s. without n. – are there any differences between them? We boldly declare: no! They all knit exactly the same, but have different functions.
The connecting stitch, as is already clear from its name, serves to connect a row of knitting; it is often called a connecting loop. A half-column and a half-single crochet are knitted in the middle of the fabric and are often connected, for example, by chains of air loops with the main row.
The schematic illustration of the connecting post may vary. Here are the main variations of its designation:
Multicolor transition
When knitting in different colors, it may be necessary to introduce a thread of a different color so that the transition is not noticeable on the fabric. To do this, we knit the row to the last column and at the junction with the beginning of the row we make a connecting column with a thread of a different color.
Related article: DIY birthday card for grandma with photos and videos
How to knit a connecting post
In fact, it's ridiculously simple! We will need to knit a small sample in any way. It can be rectangular or round, like ours, here it does not matter. Ready? Then let's get started! We have highlighted a number of connecting posts with a contrasting thread for greater clarity.
We now have one loop on the hook:
We insert the working tool into the next loop, as shown in the photo below, and grab the working thread.
Now we pull it out through the loop and get two loops on the hook at once. Very similar to crocheting a regular single crochet, right?
And now there will be a fundamental difference: we pull the loop we just pulled out into the rightmost loop on the hook. Do not grab the thread! Like this:
That's all! Our connecting post is ready, and now there is only one loop left on the hook.
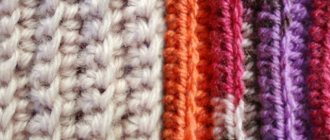
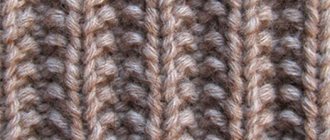
A row of connecting posts will look like this:
Please note that the connecting posts are crocheted along the outer edge of the previous row and look like air loops. The edge of the sample will become denser, but the circle (or square) we are practicing on today will not change in size.
Different designations for the same actions
“Close” into a ring
The sequence of actions is the same everywhere:
- one loop on the hook;
- the hook is inserted into the desired loop;
- grab the working thread;
- pull through two loops at once.
Thus, we connected a chain of air loops into a ring.
If you have more than one loop on your hook at the initial stage, and the word “close” , then this means that at the last stage you need to pull the working thread through everything on the hook at once. Or they say “close with a half-loop” or “tie a half-loop” . In general, all moves to connect rows are the same sequence of actions.
Connecting post in circular rows
When connecting rows in circular knitting, you need to understand which loop you need to insert the hook into to connect the row. It depends on what height the row needs to be connected.
For example, when connecting a row of double crochets, we insert a hook into 3 chain stitches, since the DC has a standard height of 3 chain loops .
Knitted to the end of the row.
Insert the hook into the 3rd lifting chain loop.
We grab the working thread, you can also say that we make a yarn over.
And immediately pull the thread through two loops - we connected a circular row.
This connection of rows occurs when knitting openwork napkins, light, summer hats, that is, in all works that we knit in the round.
Strengthening the knitting edge
To strengthen the knitting edge, it is sometimes tied with a tight securing loop . It is also simply called a tight loop . According to the technique of execution, this is the same half single crochet or connecting column.
Options for knitting this loop will depend on the number of threads captured in the columns of the previous row.
This photo shows the capture of 2 threads in a column.
In the same photo you can clearly see the top and bottom threads of the loop, through which you can also thread the hook.
Grabbing 2 threads in a column
Grabbing the top thread in a loop
When we grab 2 threads at once, we get a reinforced tight edge of a knitted item, it is even and practically does not curl.
When we grab only one thread in a loop, then we get a strip from the remaining thread - in the photo the strip is highlighted in blue. Accordingly, if you grab the bottom thread in a stitch, the strip will be on the wrong side of the knitting. This technique can be used in the decoration of knitted items.
It turns out that there is no single crochet as such in crocheting.
Men's socks for beginners
To reinforce the information, we suggest knitting simple but very cute men's socks together! The finished product will look like this:
They are designed for sizes 42-43, one might say, almost universal.
To work you need to prepare:
woolen or wool/acrylic yarn 50/50 of medium thickness (we use a thin two-ply yarn, but it is more convenient to learn with a medium, tightly twisted thread);
- hook No. 2.5-3.
Be prepared that each sock will take two to three hours, be patient.
We start knitting socks from the toes, using half-stitches (also known as connecting posts).
Description
Foot and heel
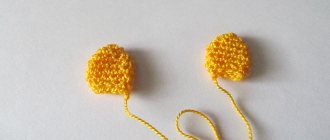
We collect 4 air loops and close them into a ring with a connecting post. Next, we adhere to knitting according to the pattern:
There should be exactly 52 stitches in the last row of the toe.
Having knitted the toe, we continue circular knitting with half-stitches, increasing in the first row after the toe by 2 loops, in the end there should be 54 loops.
We perform 20 rows of 54 loops. The seam must be located on the sole!
Now we divide all the loops in half to knit the heel. We continue knitting on 27 loops assigned to the sole: we move back from the seam using connecting posts (on 13 loops).
The bottom of the heel looks like a triangle. We continue to knit in half columns.
We knit a triangle on 27 loops, making uniform decreases in each row on both sides (one loop at a time, knitting two half-columns together). We continue knitting until there is only one loop left on the hook.
Instep wedge and back heel
Now we will start knitting the instep wedge and the heel of the sock together. So, we crochet 21 loops along the edge of the triangle on each side, on the front part, which we previously laid aside, we include 28 loops in the work, that is, in the first circular row we will get a total of 70 loops. In the photo below, this row is knitted with beige threads:
From the side, a knitted heel looks like this. Important! The triangle that we knitted earlier is not a full heel, it is just its bottom.
To form a rising wedge, we need to decrease on both sides of the upper part of the sock: we knit three half-stitches in one step (together). The photo below clearly shows how it should look:
We perform such decreases until the number of loops in the row is reduced to 46. A total of 10 rows should be completed in a circle.
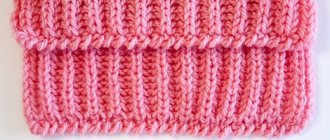
Rubber
All that remains is to crochet an elastic band that will help hold the sock. It is knitted according to the following pattern:
- 1st row: one double crochet in each of the loops of the row.
- Row 2: two air lifting loops, *knit. relief With. s n., simple s. with n.*, repeat from * to *.
- Rows 3-16: two chain lifting loops, *knit. relief With. in relief With. previous r., s. s n. in the village s n. previous r.*, repeat from * to *.
And this is what we can do! The height of the elastic band can be adjusted independently.
Today's crochet master class has come to an end. Still have questions? We will be happy to answer them in the comments.
In the meantime, we wish you pleasant knitting and even stitches!
How to crochet single crochet
This is the most popular method, which is suitable for knitting most yarn products:
- Step 1. We cast on the same 25 loops + one lifting air loop.
- Step 2: Starting with the second stitch, insert your hook into the loop and pull it out. There should be two loops.
- Step 3. We make a crochet yarn over and draw a thread through each of the two loops. We go like this until the very end of the row.
- Step 4. Rotate the product + 1 lifting loop.
- Step 5. We repeat when knitting at least 5 rows without a crochet.
Knitting technique
There are several ways to knit a lush column. It is also called “barrel” or “cones”. For all its varieties, there is a single execution technique: the columns are knitted from one loop and connected unknitted in one common loop. The appearance of the resulting pattern largely depends on the thickness of the selected yarn, the number of knitted stitches (most often, from three to seven), as well as the knitting method itself.
Symbols used:
- VP - air loop;
- sc/bn - single crochet;
- dc/dc - double crochet;
- st/s2n - st. with two nak.
Lush column
Before you start knitting a product, you definitely need to make a sample to understand how many unfinished stitches you will need to knit. The latter depends on the size of the thread used: the thicker it is, the fewer stitches will be required to obtain a beautiful pattern.
Description:
- Any crochet begins with knitting an air chain and adding several lifting loops to it. In this case it is 10 + 3.
- Yarn over, insert the hook into the third stitch. chains, grab and pull the thread - you should get three loops on the hook.
- Yarn over again, insert the hook into the same loop and pull out another stitch in the same way - you get five loops.
- Repeat yarn over and pull the yarn over again until you end up with seven sts on the hook.
- Knit the resulting loops together so that you get a “barrel”.
Between the “barrels” in a row it is necessary to make 2-3 VPs and skip the same number of loops at the base of the knitting, since the “barrels” themselves turn out to be quite voluminous.
Lush half-column
Most often it is knitted with a yarn over, but you can do without it, but the appearance of the pattern will change - this should not be forgotten.
Description:
- Knit a chain from VP, add two lifting loops.
- Insert a hook with a hook. in the sixth p. from the beginning of knitting, pull out a loop, make a nac., from the same p. pull out another one, again nak. and pull out one more stitch from the same loop. chains. As a result, there should be seven stitches on the hook - the first, three main and three yarn overs.
- Knit all the resulting loops together.
- Knit 2-3 VP (depending on the thickness of the thread).
- At the base of the knitting, skip the same number of sts (2-3) and similarly knit the next fluff. half-column.
The next row is half stitch. most often it is knitted exactly above the previous one - that is, the hook is inserted into the top of the lower column.
Single crochet
A lush double crochet is knitted on the basis of a regular double crochet, so you will need not two, but four lifting loops.
Description:
- Make a nak. and from the seventh paragraph air. Pull the chain through the loop.
- Grab the working thread and pull it through the stitch and yarn over obtained earlier. There should be two stitches left on the hook - the first unknitted part of the future fluff. Art.
- Make a nak. and in the same paragraph air. knit the chains with another similar unknitted st. Do the third one in the same way.
- Knit the resulting four sts on the hook together.
- Perform two VPs, skipping the same amount based on knitting.
- The next one is lush. The stitch should be knitted from the third stitch. chains.
- Continue in this manner to the end of the row, ending with a simple s/dc.
The subsequent rows are lush. Art. located exactly above the station. previous row.
With two yarn overs
The knitting principle here is exactly the same as in the case of s/sn.
Description:
- Knit out the air. chain + five sts of lifting. First Art. knitted in the fourth stitch of the chain.
- Make two yarn overs, insert the hook into the stitch and pull out the thread.
- Knit the first yarn over, then the second. This will create the first unfinished column.
- From the same point air. knit a few more chains of the same st. the same way.
- You should end up with six loops on your hook. Knit them together with one loop.
- Knit three VPs and, skipping the same amount at the base of the knitting, make the next lush stitch.
- Finish the row with one dc/s2n.
- The next row is lush. Art. knit from the loop in the middle of the lower column.
A pattern made with s/s2n turns out to be more voluminous and larger, so it is better not to use too thick threads for knitting clothes or accessories.
Convex columns
Convex or embossed lush columns are knitted almost the same as the rest. The only difference is the way the thread is captured. In order to get a convex column, the first row (after the chain chain) needs to be knitted with simple dc, and in the next row, start knitting the pattern, inserting the hook not into the loop of the previous row, but as if wrapping (from right to left) the column in the bottom row front.
Its variety is the concave lush. column. It is crocheted in exactly the same way, but the post is crocheted from the wrong side of the fabric.
How to crochet a half column
A half-column is also called a connecting column. It is one of the simplest, so crocheting a half-stitch is quite simple. To do this, you must proceed according to the following scheme:
- For the sample we make 10 air loops.
- We begin work with the third loop, leaving two for lifting.
- Insert the hook into the loop and pull the working thread through it.
- Then we pass the resulting loop through the loop on the hook.
- In the same way, all the loops are knitted to the end of the row.
- After which the work is turned over, at the beginning of the row the lifting loops are picked up again and knitting continues in the same pattern.
In addition to the fact that it can be knitted with half-columns for a future product, it is also used for:
- securing a row when knitting in the round,
- upon completion of work,
- to connect two parts of a product, and they can be crocheted or knitted,
- to give the product a finished look and process it around the edges.
In diagrams, a connecting column or half-column is usually indicated by a dot sign, or a rounded checkmark lowered down.
You can also crochet a connecting stitch with a double crochet; such a stitch also has a second name – a strong stitch. To create it, perform the following steps:
- The working thread is thrown onto the hook with the first loop.
- At the beginning of the row, the hook is inserted into the third loop, and then into each subsequent loop and a new loop is pulled out.
- After which the working thread is grabbed and knitted through three loops formed on the hook.
Bosnian crochet. The connecting column is the basis of an interesting pattern
In Bosnia and other Muslim countries, a special type of crochet is very popular - half-stitches behind the back wall of the base loop. It's called Bosnian. Products made using this technique are quite elastic, wear-resistant and durable. Often, it is with the help of Bosnian knitting that belts, mittens, berets, socks, rugs and many other products are made.
Also, using thin multi-colored cotton threads “Snowflake”, “Lily” and “Iris”, needlewomen create decorative braid with ordinary connecting posts and use it for finishing and decorating clothes. Let's look at how this crochet pattern is made. The connecting stitch in Bosnian knitting is always knitted on one wall - back or front. In this case, the VP lift at the beginning of the row is not performed. Instead, the first stitch in the row is knitted into the first loop from the hook, behind both of its walls. An important nuance of performing the Bosnian pattern is that you must always work in both front and back rows with one wall of the loop - back or front. If you alternate them, you get a fabric that looks like an elastic band. Thanks to the use of multi-colored threads and various combinations of the walls of loops and rows (purl and front), unusually beautiful patterns are obtained.
Let's make a beautiful rug with fringe
We advise you to choose a denser yarn for making the product or fold the thread in half. Start your work with a chain of air loops, the length of which should be equal to the desired width of the future rug (for example, 50 cm). Finish the row by fastening and cutting the working thread. Now make an initial loop on the hook, leaving a small tail (7 cm). You already know how to crochet a connecting post. Insert the working tool into the first loop of the base, grab the thread and make a “blind” loop. Continue doing half stitches until the end of the row. Remember that the hook should be inserted behind the back walls of the loop. When you have finished the row, cut the working thread, leaving a small piece (about 7 cm), and then secure the last loop by pulling the thread through it. Subsequently, these tails at the beginning and end of the row will become fringe on the sides of the product. Once you've learned how to crochet a jumper stitch, try creating this fun striped rug. It is performed very simply - using the Bosnian technique with blind loops. To work, you will need 250 g of acrylic yarn in two contrasting shades (for example, pink and lilac or white and red) and hook number 4.
Master classes on puff knitting
Products made using this pattern turn out to be quite dense, so this knitting is often used to make warm winter clothes - scarves and hats.
Scarf snood
Snood is a fairly popular accessory today, included in the wardrobe of many fashionistas. It can be used as a headdress or as a scarf, be warm or openwork - it all depends on the desire of the needlewoman and the chosen yarn. For the proposed version of the snood scarf, height 60 cm and circumference 100 cm, wool threads (450 g) and hook No. 3 were used. The model is knitted in the round.
Knitting density: 10 x 10 cm - 18 p. x 6 r.
Description of work:
- Knit a chain of 198 VPs, connect into a ring.
- 1st and 2nd r. need to knit s/bn.
- From 3rd r. - start the “pomp” pattern. Art. double crochet" according to the pattern - you get 33 repeats (repeat the pattern).
- Finish the row with a connecting loop in the third air rise.
- Start each row with 1 or 3 ch instead of the first dc or 1 dc, respectively, and with loops before rapport.
- Knit 60 cm and finish the work with two rows of sc and crab step pattern (sc from left to right).
- Tie the other edge of the finished product in the same way.
This model is openwork and will look good with a demi-season coat or jacket.
Hat made of melange threads
Products made from melange yarn always look very interesting, even if simple garter stitch was used to make them, but add a pattern and the item will become original. There are two ways to crochet a hat with lush columns: first knit the fabric and then sew its two sides, or move in a circle, starting from the bottom or from the top of the head - whichever is more convenient.
In order for the hat to be dense and warm, the elements of the pattern are not knitted on top of each other, but in a checkerboard pattern, that is, the “bumps” of each subsequent row are located between the columns of the previous one.
You will need to prepare for work: 250 g of melange yarn and hook number 3.
Description:
- Perform a chain of six VPs and close the ring.
- 1st row knit st/bn.
- From the second row, start knitting “barrels” of three dc (five elements).
- 3rd r. – three p. rise, puffy. Art. knit between st. previous row. You definitely need to remember about uniform increases: they can be done as needed, simply by trying on the workpiece, or you can add one lush column through each row.
- After approximately ten centimeters of the product have been knitted (depending on the size of the head), the addition should be stopped and knitted to the desired length using a pattern according to the pattern.
- Along the edge of the cap, make three rows of s/bn and one more, knitting alternately st/bn and dc/dc.
If desired, you can decorate the finished hat with a pompom made of thread or fur.
Scarf
Lush pattern. columns can be used as a basis for a “star” pattern. It is characterized by increased density, so a scarf knitted in this way will turn out not only beautiful, but also warm and cozy.
For knitting you will need: 300 g of wool blend yarn and hook No. 3. The length of the scarf is chosen as desired.
Description of work:
- Knit four VP rises, the first fluffy st. (of three dc) is knitted in the third st of the main chain.
- Knit three VPs, 1 fluff. Art. in the middle of the first lush. Art. Do not close the resulting sts, leaving them on the hook.
- Similarly, knit two more fluffy stitches. Art. in the third and seventh paragraphs of the main chain.
- Carefully pull the thread through all the resulting loops that are in operation.
- Continue knitting according to the pattern, alternating three VPs and three fluffy stitches. Art. to the end of the row. Finish the row with two pompous ones. Art. and st/s2n.
- Next r. start with four lifting VPs, then three VPs and three pompous ones. Art. (1st in the fourth st. rise, 2nd - in st/s2n, 3rd - in. Pull the thread through all open sts. fluffy st.
- Third r. knits like the first, the fourth - like the second, etc.
Knit the fabric to the required length, cut the thread. If desired, you can decorate with fringe or tie the edges with a “crawfish step” pattern.
Gallery of ideas
Universal seam
Connecting posts are used when sewing parts together or assembling the entire product. A seam made from half-columns is smooth, very strong and has low stretch. Since it is done very quickly and is also easy to unravel, it is convenient to use it to assemble a product for trying on.
Article on the topic: Application from plasticine on the theme “Golden Autumn”: presentation with photos