Products made from beads look very original and beautiful. Professional craftswomen know different methods of beading:
- brick
- mosaic
- French
- parallel
- monastic
- openwork
All crafts woven using these methods are inimitable and unique. The brick technique of weaving with beads has proven itself well.
Thanks to her, extraordinary decorative elements, flowers, keychains, jewelry and accessories are created. This technique can create even the most complex shapes.
Completed crafts are distinguished by neatness, even rows, density and integrity. In this article I will tell you how to weave a panda using the brick technique.
Before starting knitting, experienced needlewomen recommend that novice craftswomen pay attention when choosing beads. In order for the product to be smooth, beautiful, and without flaws, each bead must be the same size.
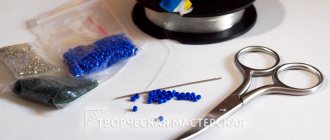
Working material
In the process of work we will need the following material:
- beads in white, black, gray (12), light green (2) and pink (6) shades;
- ring for keychain;
- needle;
- black thread;
- scissors.
Having prepared all the necessary material, you can begin the exciting creative process.
Brick weaving master class
I bring to your attention a detailed master class on panda brick weaving.
Panda diagram
First we study the weaving pattern. We will start weaving from the head. The column on the right shows the required number of beads in each row. On the left are the rows.
Beginning of work
We will skip the first row for now and start weaving from the second row, and then we will come back and finish the two beads of the first row.
We take a needle and thread and string a black bead, lowering it almost to the end.
Next, from the tip side, we pass the needle through the bead and tighten the thread.
We collect the next black bead. We pass the needle through the first element from the side opposite the working thread and tighten it.
Next, insert the needle into the second bead.
We collect one white piece of glass and insert the needle into the hole opposite the thread exit and tighten.
- Now we insert the needle into the white bead, as in the bottom photo.
- We put on another bead and insert a needle into the hole of the previous element.
We pass the needle through the last bead, pointing upward. Don't forget to tighten the thread.
- We take another bead and do the same steps as before.
- We continue to knit according to the pattern using the same technique.
- The first row is ready!
Head braiding
Next we will weave the third row. Having reached half, we will go up and weave the initial row, go down and continue what we started.
- We collect black glass and insert a needle into the thread between the beads.
- Now insert the needle from above and tighten the thread.
Take another bead and thread the needle through the same loop as before. We do this to create brickwork.
- We insert the needle into the hole from above and tighten the fiber.
- We take a white bead, hook it to the underlying thread, and pull it up.
- We insert the needle from top to bottom.
- Using the same principle, we weave two more beads.
- We pass the needle through the bead and weave two beads of the first row.
Thus, we knitted the first row. This is the top of the panda, where there will be a loop for attaching the keychain ring. So that we don’t have to come back, we’ll make the loop right away. We string ten black pieces of glass and lower them to a white bead.
- We pass the needle into the previous bead and tighten the thread.
- To be safe, we draw a circle with thread again.
- Then we pull the thread in the unfinished third row and continue to work.
- Following the schematic image, we weave further.
- Using the same method as before, we weave three white and two black beads.
- Subsequent rows are narrowed, so we will weave, grabbing one thread at a time between the beads.
- When the row begins to expand, we will need to thread it twice into one loop from the two extreme sides.
In this spirit, we continue to engage in an interesting type of creativity, strictly following the provided scheme. So we got the first element - the panda's head. It turns out very beautifully.
Torso
- We will weave the body, adhering to the sketch: one row for narrowing and the rest for expansion.
- With a little effort and perseverance, we were able to create a cool souvenir - a miniature panda.
- We hide the tails of the threads by threading them between the beads and cutting them off with scissors.
- Next, we attach a connecting ring to the loop on the panda’s head.
- The gift keychain turned out fabulous.
- Having understood the proposed description of making beaded trifles, it will not be difficult to make any other trinket.
Patterns of earrings using brick weaving technique
I would like to offer you sketches of various earrings using the same technique.
By creating such handmade earrings, you will captivate those around you with femininity and mystery. Homemade jewelry has always been valued by the female part of the population. Such jewelry will be a pleasant gift for a friend on her birthday or on another occasion, because hand-made earrings retain the warmth and care of a craftswoman. Create, create, give warmth!
Video master class Panda made of brick weaving beads
Source: https://podelkiruchkami.ru/kirpichnaya-tehnika-pleteniya/
Brick weaving with beads - diagram and description
Otherwise known as "Comanche weave". It resembles brickwork and allows you to create products from rows in a checkerboard pattern, slightly more flexible than with mosaic weaving. Such a product is very difficult to unravel, but the weaving technique is completely different.
- Measure a thread approximately 2 m long. Thread the first two beads of the first row onto the thread 15 cm from the end, then pass the thread through them again to form a loop.
- String the next bead of the first row, pass the thread up through the bead on the left to form a loop, and down through the bead you just added.
- String the next bead of the first row, pass the thread down through the bead on the left to form a loop, and up through the bead you just added.
- Repeat steps 2 and 3 until you have added all the beads from the first row.
- String the first two beads of the second row. Pass the needle under the loop of thread connecting the last two beads of the first row.
- Pull the thread until the two new beads are pressed tightly against the first row and pass the needle through the last bead added.
- String the next bead of the second row. Pass the needle under the next stitch and then through the bead you just added. Continue to the end of the row.
- Start the next row in the same way, but work in the opposite direction. Continue adding rows until you reach the end of the pattern.
Secure the ends of the thread and start a new thread in the same way as when weaving with a mosaic.
Sample of brick weaving. Notice how little it differs from mosaic weaving.
Reading the pattern
In brick weaving, rows are counted horizontally, starting from the bottom.
In the diagram, the first row is circled in red, the second in green, the third in blue and the fourth in purple. The beads are numbered in the order in which they need to be strung.
If you are weaving brick weave patterns, always start at the bottom right corner and work along the length of the first row from right to left. Then start the second row and work from left to right. Change the direction with each row, moving back and forth across the pattern, working your way up. Continue until the end of the pattern.
Beaded keychains
27 Jun 2021
Content
Share on VKontakte Share on Odnoklassniki Share on Facebook
Beadwork is an art that has won the hearts of many needlewomen. Once you learn the craft, you can make all kinds of beautiful products. It is amazing to see an accessory made with your own hands, especially as an exclusive gift. Even a beaded keychain can become a memorable one for your loved one if it is made with soul.
How to make a keychain with your own hands
Having everything you need at hand, you can make jewelry of any complexity. On the Internet you can find countless descriptions of any technique for making flat or three-dimensional keychains. Before starting work, craftswomen need to arm themselves with all the tools and materials. You will need:
- Beads of various shapes, colors, sizes, materials. Thanks to their diversity, you can make picturesque keychains from beads that will amaze with their uniqueness.
- Fishing line, strong thread, flexible wire, elastic band. In addition, you will need fasteners, snakes, buttons, chains, cufflinks, and a carabiner.
- A set of thin needles, scissors, tweezers, special pliers, a saucer, a ruler, a piece of fabric on which the beads will not slip.
Beaded figurines for beginners
It will be fun to weave beaded keychains for the littlest dreamers. True, initially you will have to use simple schemes. Once they get the hang of it, craftsmen will be able to come up with their own patterns and beading techniques. The main thing is not to discourage! To do this, you need to have a finished craft and a multi-colored diagram with a step-by-step description on the table, if possible. Then the child will be interested in doing everything from the beginning and showing his parents his master class. The simplest figures will be:
- looped flat butterflies;
- snakes;
- flowers;
- Sun;
- animal physiognomies.
How to weave a keychain
Learning how to make beaded accessories is not too difficult. The main thing is patience and attentiveness. After a while, everyone will be able to make keychains with their own hands.
Crafts will not only decorate your handbag, but will also become an unforgettable souvenir for your friend. When deciding on a scheme, be confident in your abilities, but be sure to prepare your workspace.
With good lighting, a clear schematic image and a great mood, you will definitely succeed.
For keys
How to make a keychain from beads? It's simple if you already know what will decorate your keychain. For example, it could be a flower, a large handbag, a beaded bow, an orange slice, a ball, a snake. Detailed instructions for weaving a starfish from beads in two colors will help you make your choice:
- We string 5 beads onto the fishing line and close the ring.
- We add beads one at a time, and at the end we thread the needle through 2 beads. You should visually get a star.
- We make the third row according to the same principle, but we already string two beads.
- Making star rays! We attach two beads in turn, then one, and so on until the circle is closed.
- In the fifth row, where the rays are, there will be 2 beads, and between them - one after another.
- We repeat everything according to the scheme, lengthening the rays (up to 6 pairs of beads) and adding peas between them according to the same principle.
- In the last row in a circle we add one bead at a time, making the rays pointed.
- We put the accessory on a metal chain with a ring.
For mobile phone
To transform things that you always have at hand, it is better to make keychains from colored material. These could be zodiac signs, different animals, berries, spiders. For beginning craftsmen, it will be easier to focus their attention on accessories made in one row. For example, you can take as a basis the instructions for weaving the “Orange Slice” keychain:
- We put 7 white beads on the fishing line. We make a loop by connecting the threads through the last piece of glass.
- We do the 2nd orange and 3rd white row like this: weave another one through one ball.
- Next, 2 peas are strung in a circle through each glass of the previous row.
- The next level is created again one ball at a time.
- Then two orange pieces of glass and one white piece alternate. The latter should coincide with the line of division of the lobules.
- Then we do everything according to the same principle, focusing on the two previous steps.
- Through 3 levels, 4 orange beads are woven between white beads. If desired, you can lengthen each slice in the same way.
- We add white beads around the circumference in two rows, and then complete the making of the keychain with orange beads.
DIY bead keychains in master classes (photo)
The tradition of decorating keys with pendants, toys or keychains made of beads has arisen since time immemorial. For some, this kind of souvenir is a reminder of an event or a loved one, for others it is a practical way not to lose the keys. Like any decoration, beaded keychains can be of various shapes and themes.
Animal figures, flowers, hearts or food (ice cream, fruits, vegetables) remain traditional. At the same time, you don’t need to be a skilled needlewoman to create such beauty with your own hands. Several simple weaving methods will bring pleasure while working and, as a result, an original souvenir for yourself or your friends.
The world of beading is very large. Beads make very beautiful and exquisite jewelry, such as brooches, tiaras and crowns for little ladies.
Beaded keychain “Starfish”
To work you will need:
- fishing line;
- needle;
- blue, blue beads;
- scissors.
Five blue beads are strung on a long piece of fishing line. Pass one end of the fishing line through the outer bead so that it forms a ring and tightens it tightly.
In accordance with the prepared drawing diagrams, the next row continues to be filled with blue glass beads in a circle, five pieces are woven through each bead of the previous row.
When the last bead is strung, the needle is inserted under two adjacent pieces of glass.
The third circle of weaving is filled clockwise, but at the junction of the second line, not one, but two blue beads are placed. In the fourth line of the future product, the rays of the starfish will begin to appear more clearly. You can avoid getting confused in this beading gap, since two blue beads will be located there until the end of the work. As for the segments between the rays, here the number of blue beads in the pattern will expand gradually, first one is added, then two, etc.
Continue weaving the beaded keychain until six pairs of blue glass are formed on each of the rays. The last row is woven again with the addition of blue beads, and the blue glass is added here only in the amount of one bead. The first half of the starfish, made by yourself, is ready.
The second part of the product is woven according to the same pattern, but without adding the last row. The finished elements are sewn together, alternating the beads of the first and second halves. In order for the starfish to gain volume, it is filled with a small amount of cotton wool or foam rubber.
Due to the fact that weaving took place in a circle, a small hole is formed in the middle of the product. You can hide the hole with a blue bead or decorate this kind of beaded keychains along the rays of the star with large beads.
The last stage of work is to sew a loop on top so that you can hang the souvenir on your keys, and the beaded keychain is ready for use.
Mosaic bow pendant
For work you need to prepare the following materials:
- red and green beads;
- a thread;
- needle;
- scissors.
A red bead is placed on a long piece of thread, the end of the fiber is pulled through the center of the ball, and tightened. The remaining tail is hidden in the product during weaving. Next, twenty-two green beads are strung and the bottom is covered with one red ball.
They get to work using the mosaic weaving technique. A red bead is placed on the thread and the fiber is brought out through the center of the adjacent (green) bead. Put a new green bead on the working thread, place it at the junction of the first two green balls, and bring it out through one bead. Fill the strip in this way until the end of the line.
Next they weave in the opposite direction, reducing the number of beads by one at the edges. Continue weaving beaded keychains upward until you get a figure that resembles half a rhombus.
Through a strip of outer red beads, they return to the lower (initial) row of weaving and fill the second half of the rhombus in the manner studied.
Now you need to make the second element of the bow - a smaller diamond. To do this, eleven green beads are strung on a new fiber, with a red ball on the sides, and the small element is filled with the same technique as the large figure. In total, the product will need two large and two small diamonds.
brick weaving in a step-by-step MK with step-by-step photos
Brick weaving in beadwork is similar in appearance to mosaic weaving, but is a more complex type.
Selection of material
To weave using this method, you need to choose high-quality beads that do not vary in size. If it is not possible to purchase suitable material, then before starting work you need to sort through the existing beads for uneven elements, which are immediately set aside separately.
As a base, you should choose a soft and plastic material: thread or very thin fishing line. Then the product will turn out pleasant and soft. You will also need a special bead needle, its number depends on the number of the selected beads.
Weaving principle
The principle of weaving is well depicted in the figure.
For those who find it difficult to understand the drawings, we add a description of the process.
- You need to string two beads onto a thread and place them 15cm before the edge of the base. Then pass the thread through them again to form a loop.
- Pick up the next bead of the first row. Pass the thread through the outer bead of the fastened elements up, and then through the new bead down.
- We string the bead again, insert the thread up through the fixed element to form a loop, and again insert it down through the new bead.
- Repeat the previous two steps until the desired row length is achieved.
- We string two beads of the second row. Next, you should pass the needle under the loop of thread that connects the two outer beads of the first row.
- You need to stretch and tighten the thread until the strung elements fit tightly to the first row. Then pass the needle through the last added bead.
- We string one bead of the row. The needle should be passed under the next loop of the previous row, then through the new element. Continue weaving like this until the end of the row.
- The next row is done in the same way, but in the opposite direction. Rows are added until the end of the pattern.
Reading the schematic
Patterns for brick weaving are read horizontally from below.
In the diagram above, the rows are circled from first to fourth: red, green, blue and purple. The numbering on the beads indicates the order in which to string them in order to obtain the desired image of the figure on the product.
The brick stitch is easiest to weave if it originates in the lower right corner and the work flows from right to left. While working on the second row, the direction of movement is reversed. And so on every time until the end of the pattern.
Weaving Tips
To ensure that this type of weaving is smooth, without distortions and empty spaces, it is recommended to use cylindrical beads. Then all the elements fit tightly to each other, like bricks.
If you need to expand the fabric not by one bead from the edge, but by several at once, then they are woven into the current row in the same way as when weaving the first row. If you need to narrow the fabric into several elements, then you should bring the needle along the weaving to the place where the new row will begin.
If you are working on a large fabric, it is recommended to weave the main part of it with mosaic weaving to speed up the process. Only complex and figured parts should be made with brick weaving, weaving bricks into the sides of the mosaic.
Expansion and contraction of the canvas
Let's consider a master class on narrowing and expanding bead fabric.
If you need to narrow the canvas, you can use several methods for this. First: at the beginning of the row, pick up one bead at a time, then a narrowing will occur. Second: if the decrease needs to be done in the middle of the row, then two beads are woven with one bead. Or one bead is simply missed.
If you need to make an extension, then there are also two ways to do this. First: we collect two beads at the beginning of the row and add one bead at the end of the row, clinging to the outer loop. Second: if expansion is planned in the middle of the fabric, then you need to alternately weave two beads into one loop.
How to hide a thread
The thread must be hidden so that the weave does not unravel after this, but also not leave a large knot. This is done by passing a needle and thread through the beads in a chaotic manner. After several stitches, cut the thread without knots. You can also add a new thread to the work.
Connecting the canvas into a pipe
If you need to connect the fabric into a pipe, you need to perform this operation before the ends of the thread are hidden. The connection is made in the same way that new rows are added. Only each new bead is already part of the first row. At the end of the product, secure the ends in the usual way.
Brick weaving is a rather problematic type of weaving, which is practically not used due to its inherent rigidity and inadequate strength of the fabric. Also, not everyone is satisfied with the complexity of drawing up diagrams for this technique.
Video selection
This selection of video lessons contains the most interesting examples of brick weaving.
sdelala-sama.ru
How to make a keychain from beads with your own hands using diagrams with videos and photos
Rating: 3/5 (2)
We invite you to take up a fascinating activity – beadwork.
You will need very little material, and thanks to your crafts you can transform the interior and create a Japanese corner with beaded cherry blossoms or place a beaded bonsai according to Feng Shui, decorate clothes, diversify accessories and even weave a Christmas tree from beads. In this article we will take a detailed look at how to make keychains from beads and patterns for weaving them.
How to weave a beaded keychain for beginners
There are a lot of bead weaving techniques; we will look at the “brick stitch” technique. This technique is used for weaving flat and three-dimensional figures and creates:
- keychains;
- - earrings -;
- bracelets;
- necklaces and pendants;
- brooches and hairpins, for which beaded butterflies are well suited.
Here is a diagram of weaving with a brick: the beads are stacked like bricks.
The second method of “brickwork” is mosaic weaving, the beads are woven vertically and not so twisted.
Flowers are especially successful in this technique: delicate violets made of beads or a royal flower, white lily made of beads.
When using the brick weaving technique, use fishing line or thread to match the beads. This will make the product look neater.
Patterns of keychains made of owl beads, made with brick stitch
These are patterns for weaving flat figures. They are made using the “brick” weaving technique .
Let's look at one scheme using a specific example and create a keychain from beads with our own hands using the “brick” technique.
- Here is a diagram of the craft:
- To create an owl keychain we will need:
- beads: white, black and gray;
- fishing line;
- needle;
- beads (various 4 mm) – 7 pcs.
Let's get started:
- String black beads - 2 pcs.
- Pass the needle through the beads again, tightening them with the holes facing up.
- Add a white bead and go through the black one and come out of the white one.
Source: https://www.joxin.club/rukodelie/biser/brelok.html
Beaded keychains: we make them step by step with brick weaving
The keychain is a decorative pendant attached to a ring. The best option for DIY creativity would be beaded keychains. This decorative material allows you to give the accessory any shape, without requiring special skill from its creator.
Until the second half of the 19th century, keychains were used as fashion accessories, and they were created mainly from expensive materials - gold, ivory, and precious stones. But gradually key fobs began to acquire a purely utilitarian function, becoming a practical mount for keys.
Beading technique
The most common and simplest in terms of execution are keychains made with brick weaving, since it allows you to effortlessly add and remove beads in a row, giving the product any shape.
Let's look at the technique of performing this method of bead weaving step by step.
- Take two beads so that the holes in them point straight up, and thread a thread through them, as shown in the picture. After coming out of the second bead, secure the next one by threading the thread through the previous bead and again into the last one. Continue these steps until you get the row to the length you need.
- To weave the second row, we collect two beads, thread the needle under the thread of the first row and insert it into the second bead. Next, we weave one bead at a time, also clinging to the thread of the first row. If at the end of the row it is necessary to expand and fasten two beads at once, we insert the needle between the last two beads of the first row. Each next row is typed according to the same principle and is woven in the opposite direction in relation to the previous one.
- To increase the row, cast on two beads (as was done to move to the next row) and braid the required number of beads to them, as when casting on the first row. Return to the beginning and continue weaving as usual.
- To reduce a row, pick up two beads (as you did to move to the next row), but still catch between the second and third beads of the previous row. Then continue with normal weaving.
Brick weaving with beads for beginners: master class with diagrams
Brick weaving with beads (or Comanche weaving) is very similar to mosaic weaving, but the technique is very different from mosaic weaving. It is a bit like brickwork and helps create more flexible products. Products made using this technique are very difficult to unravel. And the weaving itself takes a lot of time. In this article we want to look at the step-by-step production of brick weaving.
Familiarization with technology
The manufacturing process can be followed using the example of a master class.
In order to perform this technique, you need to take the beads themselves, fishing line and a beading needle. The entire manufacturing process is shown in step-by-step photos with descriptions for beginners.
Pattern of brick weaving with beads:
We string the first pair of beads onto the fishing line.
Then we pass the needle through the first, and then through the second needle.
The next step is to string the third bead, pass the needle through the second bead towards the weave. The photo shows the execution of this process step by step.
We bring it through the needle through the third bead, and then string the next bead in the direction.
We weave the fifth bead using the same pattern.
We go through the beads one by one to the first bead.
This is how we wove the first row.
We weave the next row with a slight expansion on both sides. The following photo shows the diagram.
We string a couple of beads onto a fishing line, insert a needle under the thread, which is located between the first and second loops, and then bring the needle into the second bead.
The next step is to put on the third bead and place it between the second and third beads and bring it out through the third bead of the second row.
Using the same pattern we weave the following beads.
Next, we string another sixth bead and weave it into our weaving.
In the direction of weaving, we pass the needle through each bead from end to front.
In the next third row we also make an extension on both sides.
We string a couple of beads and weave them into the product, inserting the needle into the loop between the fifth and sixth beads, and bringing it back through the second and first beads of the third row.
And we weave in the next beads in the third row.
We weave in the last bead by passing the needle through the first bead of the first row from top to bottom, and then through the second bead from bottom to top.
In the direction of weaving, we draw the needle along the entire row.
We braid the fourth row.
This is how it should turn out.
Reading diagrams correctly
During brick weaving of beads, all rows are counted horizontally, starting from bottom to top. In the following diagram, the first row is shown in red, the second in green, and the third in blue. The beads are numbered in the order in which they need to be strung. Most often, in diagrams, they start from the lower right corner, working from right to left.
Note! In order to join the edges, you must do this before securing the ends of the thread. The fragments need to be secured to each other in the place where the figures are staggered. To do this, there should only be an even number of rows.
Video on the topic of the article
We invite you to consider a selection of videos on the technique of brick weaving with beads.
Similar articles:
knittochka.ru
Keychains made of beads with brick weaving step by step for beginners
It's hard to meet a person who doesn't decorate their keys with keychains. Such charming decorations can easily be seen on backpacks.
For some people, keychains are souvenirs or mementos that are treasured as one of their most prized possessions, and for others it can be a way to avoid losing their keys. But many of these decorations can be made independently.
Beaded keychains are very popular among needlewomen, because they turn out very beautiful and you don’t need to spend a lot of time and money on creation.
The traditional design of the keychain is animals: monkeys, crocodiles, dogs, turtles, giraffes, hippos, snakes and others. Children really like these decorations.
And to create such an accessory, you don’t need to be a master, but simply find free time and follow the instructions provided, of which there are many on the Internet.
There are a huge number of beading techniques, and if you have the desire and the right figurine, you can create a truly masterpiece.
Fish for the fisherman
If you really want to make something bright, this master class will teach you how to make a wonderful bright royal fish keychain with your own hands.
This fish is made using brick weaving, which makes the product more voluminous.
Below we will describe step by step how to make such a decoration with your own hands, and if you follow all the instructions below, the result will really please you.
What we need to prepare:
- bead needle;
- special threads for bead weaving;
- beads No. 10, preferably Czech, in accordance with the shade of the fish;
- a cellophane bag, which we use as filler;
- fishing line 0.2 mm size;
- rings;
- the basis;
- pliers;
- scissors.
We start weaving from the longest row with brick weaving. You need to weave two halves of the fish. When the halves are ready, start weaving the fins using fishing line and gold beads.
Next you should sew them to the intended places, taking into account the weaving pattern. When everything is ready, you need to sew the two halves together using fishing line and sew in a ring for fastening.
Afterwards, we attach the ring for the keychain, and now our craft is ready.
Not everyone understands what brick weaving is. Next we will describe in detail how you can weave a fish using this technique.
Based on the diagram, we collect the first row of beads, weaving from bottom to top in parallel. Look at the photo below. After we have the first row, the next step will be the brick weaving itself - we will place the next beads between the beads of the first row. And so we weave all subsequent rows, but look at the diagram.
Read this: DIY beaded flowers: preparing an original birthday gift
These keychains are voluminous due to the fact that they have two halves and are very convenient to use. Mainly multi-colored and variegated keychains are used for children and women. They can be used on keys, phones, bags, and wallets.
Small guitar
Not only women love to decorate keys and phones, but also the male gender. Therefore, in this master class we will learn how to weave a keychain for men in the shape of a guitar.
The technique is called hand weaving, it is not very complicated. If you follow the detailed description, then the task will not be difficult for beginners.
Therefore, you need to be patient and try to give your man a pleasant gift that will always be with him.
To weave such a guitar, you need to take:
You may also find these articles useful:
Source: https://mvkursk.ru/xendmejd/brelki-iz-bisera-kirpichnym-pleteniem-poshagovo-dlia-nachinaushih.html
brick weaving of figurines and decorations, master class with diagrams
Since childhood, everyone has liked thick bracelets, earrings, and toys made using the “brick stitch”. Few people know that brick weaving and beadwork came to us from India; even in ancient times, Indian and African tribes decorated their homes and clothes using this weaving method. This article presents a short course on brick weaving techniques and a master class on making accessories.
The weaving method mentioned earlier cannot be replaced, firstly, because it is suitable for beginning needlewomen, because when weaving, figures of a certain given shape are obtained. Secondly, if 1 thread breaks, the product will not completely fall apart, it will be possible to correct it, and not assemble a new one. Thirdly, the method involves the smallest number of threads being threaded through 1 bead, which gives strength to the product.
Before starting work, you need to remember that the weaving process takes a lot of time and perseverance is required.
It is important to acquire very high-quality, preferably Czech, beads at the beginning of your work. Beads with chipped and uneven edges will not work here. It will be very disappointing if you finish the work and several beads crack, then the product will lose its beauty and strength.
First, let's decide on the arsenal: beads, a needle for stringing beads, thin fishing line, sharp scissors. For a trial product, it is better to take 2 shades of beads.
Begin. You need to take a fishing line and decide on the length of the product. We collect 2 beads, leaving the end free, about 15 centimeters. We pass the remaining end again through the center of the beads. This is how the securing stitch is made.
Next, we string 1 bead to form a loop, passing the end of the line through the center of the previous bead and the new one down. Then we change the color by collecting 2 beads and attaching the fishing line to the previously made loop. Stretch the thread and pull it up through the center of the second bead. To weave 3 rows you need to turn the product over. Weave in the same way as in the first and second cases, only in the opposite direction. Next, you need to connect the fabrics and secure the threads.
There are patterns for making earrings and bracelets of various shapes and sizes; everyone can choose the one they like, modify it to their liking and get something completely new. You can also weave figures using brick weave; they will be flat, dense, do not lose their shape, and are suitable for making toys for the Christmas tree, accessories for clothing and home. The brick stitch is also ideal for making keychains. Even the youngest needlewoman can handle this.
Keychain with fish
First, you need to start weaving a single chain of 18 rows from the middle of the monofilament using the technique described above. Then we lay out the resulting line on the table, bend the long thread upward (the next row will begin with it). We string 2 beads onto the other end of the thread and thread them under the very top of the fishing line that connects the 2 outer beads from 1 row.
We repeat the action, but you need to pass the needle in the opposite direction. Now you can tighten the line. Now the shape of the product emerges, the beads are located one above the other. We continue to weave the bead, pass it through the center of the line between the bottom two beads, and then pass the line through the center of the new bead and tighten it. Continue in the same way. Please note that the 10th bead must be black.
Continue the following rows according to the pattern:
Third row. 3 white, 2 black, 1 gray, 2 black, 7 white.
Fourth row. 5 white, 4 black, 1 white, 1 black, 1 blue, 2 black and 4 white.
Fifth row. 3 white, 2 black, 2 blue, 1 black, 1 white, 6 black, 3 white.
Sixth row. 3 white, 1 black, 1 blue, 1 black, 2 white, 2 black, 1 white, 1 black, 3 blue, 2 black, 1 white.
Seventh row. 1 white, 2 black, 3 blue, 1 black, 1 white, 1 black, 4 white, 1 black, 1 blue, 1 black, 2 white.
Eighth row. 2 white, 1 black, 1 blue, 1 black, 6 white, 2 black, 3 blue, 1 black, 1 white.
Ninth row. 1 white, 1 black, 3 blue, 2 black, 6 white, 1 black, 2 blue, 1 black, 1 white.
Tenth row: repeat ninth.
Eleventh row: 2 white, 1 black, 3 blue, 1 black, 6 white, 2 black, 3 blue, 1 black, 1 white.
Twelfth row: 1 white, 2 black, 3 blue, 1 black, 1 white, 1 black, 4 white, 1 black, 1 blue, 1 black, 2 white.
Thirteenth row: 3 white, 1 black, 1 blue, 1 black, 2 white, 2 black, 1 white, 1 black, 3 blue, 2 black, 1 white.
Fourteenth row: 3 white, 2 black, 2 blue, 1 black, 1 white, 6 black, 3 white.
Fifteenth row: 5 white, 4 black, 1 white, 1 black, 1 gray, 2 blue, 4 white.
Sixteenth row: 6 white, 2 black, 1 white, 2 black, 7 white.
Seventeenth row: 9 white, 1 blue, 8 white
Eighteenth row: 18 white
Following the diagram, you will get a keychain with fish on a white background.
Video on the topic of the article
webdiana.ru