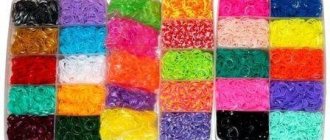
Having learned the basic technique of monastic beading, you will be able to make all kinds of jewelry and various items to decorate your home with your own hands.. Thanks to this article, you will learn what is the basis of this weaving and will be able to study not only patterns with detailed descriptions, but also watch video master classes from experienced needlewomen.
Benefits of beaded monastery weaving
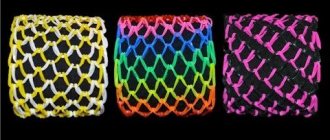
The basis of monastic weaving is the making of a cross. As a result, you have a mesh fabric from which you can make anything you want. For example, it could be exquisite jewelry. A bracelet woven in this way will look very beautiful not only on its own, but also when you decorate it with decorative stones and rhinestones.
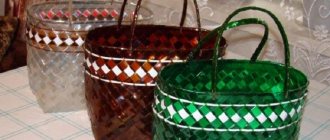
Skilled craftswomen have learned to decorate various interior items with beads. A simple vase or even a glass bottle, braided using monastic techniques with multi-colored iridescent beads, will definitely decorate your home or become an original gift that will have no analogues.
Learning to weave from beads
We invite you to consider a scheme according to which you can easily learn monastic beadwork.
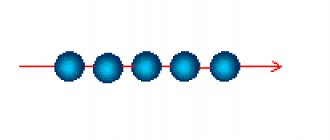
Take a piece of wire and string four beads onto it. Then pull one end through the first 3 elements, forming a beaded circle. In this case, you will not only be able to hold the colored elements on the wire, but also form the first cross, which was written about earlier. Next, put 3 additional beads on the needle, and insert it into the 4th bead of the last row. As a result, you will form the following cross.
Then you should bring the needle to the upper part of the resulting link, and continue to work as follows: 3 beads are strung on the main fittings, and then it is inserted into the last glass of the previous strip. If the bead chain begins to become uneven, then it is better to straighten it with your own hands, returning back the beads that got out of the general row.
The width of the product depends on how many links are obtained in one strip. As you can see, this method of beading is much easier than those that already exist in this needlework. And you can quickly learn this skill.
Work principles
There are several weaving methods:
- With one needle, work progresses more slowly, but, according to many experienced needlewomen, it is easier to work, since it is easier to keep track of one needle;
- You can also work with two needles, but you need to get used to this method.
Related article: Mint Jam - Super Recipe
For clarity, we suggest studying a detailed master class using the example of weaving a chain.
To get started, collect 4 beads.
In order to make the first link in the form of a cross, you need to close the ring. To do this, grab the 1st, 2nd and 3rd bead with a needle.
We put 3 more beads on the needle and insert them into the 4th of the previous link.
Insert the needle into the top 2 beads.
Thus, as we see, we have formed two full links in the form of a cross. Then we continue working according to the same pattern until the desired length.
Note! In order to strengthen our chain so that it is not so flimsy, it is necessary to thread the thread in the reverse order.
Your thread goes back to the first link.
If you want to start weaving fabric, then you need to follow the following pattern:
You can study this weaving technique in more detail in the video below.
Useful tips for beginners
You can weave using this technique, making the rows not only tight, but also loose. That is why the products will look completely different in this case. If you are an absolute beginner in this business and decide to make a simple hairpin, then make a large mesh for it with your own hands. The weaving process will become quick, and the decoration will not lose its originality.
Even using beads in two colors, you will get a very beautiful product. For beginners, this is doubly convenient, since they will not get confused in the weaving pattern while mastering the first steps in this needlework. You can choose color combinations yourself, and feel free to start weaving using monastic techniques.
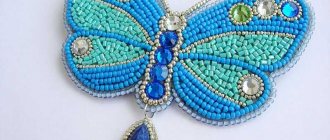
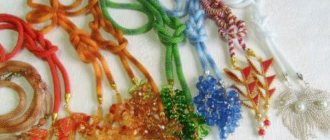
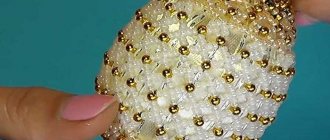
Options for experienced needlewomen include more complex motifs, consisting of ten or more colors, as well as having motifs with different patterns and ornaments. For example, you can make such a beautiful braided Easter egg with your own hands, as shown in the photo, or design another voluminous piece of furniture that can be used to decorate a holiday table and more.
Use your imagination, create and enjoy your creative activity, which will definitely bring you complete pleasure. With the help of detailed video instructions, you will be able to consolidate all the material covered and described above.
Monastic weaving
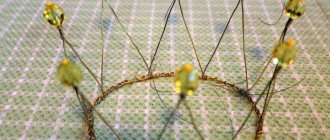
Weaving is done with two needles. To make a sample, you should draw up a diagram (an example is shown in Fig. 51). You can weave both the width and length of the product, since the cell is square-shaped.
Start weaving like a chain in a “square” (Fig. 52a) - vertically, and increase the width - horizontally. Select bead colors according to Figure 51.
When a chain equal to the width (or length) of the shape is woven, you should position it horizontally and pass needles and threads through the beads of the last square (cell) a second time: the right needle - from left to right through all four beads, and the left needle - from right to left through one bead (Fig. 526). Pull the threads. Now the needles are on both sides of the bead of the last square. Place two beads on the right end of the thread and needle, and one on the left end. Pass the right needle and thread through this bead towards the left one and then pass the same needle through the top bead of the penultimate square of the chain from right to left (Fig. 52c). Pull the threads. Place one bead on the right needle and thread, one on the left one, and pass the right needle through this bead towards the left needle (Fig. 52d). Pull the threads. Pass the same right needle and thread through the top beads of the third square (Fig. 52d). Pull the threads.
Then continue weaving in the same way, that is, pick up one bead at each end of the thread, pass the right needle and thread through the bead on the left thread and then, after attracting the threads, pass it through the top of the next left square. When the row is completed, pass the right end of the thread through all four beads of the last square a second time and tighten the threads (Fig. 52e).
To weave the third row, the product must be turned over and weaving continued (Fig. 52g) in the same way as described above. At the end of each row, pass the right thread and needle through the last square twice and turn the work over. Weave from right to left. Don't forget to pull the threads. The tension should be uniform. Sealing of threads is carried out in the usual way - with knots; melting of the thread is not done in all types of dense technology; After three knots, pass the end of the thread through the “labyrinth” of beads and cut “at the root”.
In this type of technique, you can also use fishing line. Fishing line better holds the shape of products woven using this technique. The diameter of the fishing line for small beads is 0.15 mm, for medium beads - 0.17 mm. for pendants - 0.1-0.12 mm. When using fishing line, seal the ends not with loop knots, but simply pass the ends of the fishing line through the “labyrinth” of beads (back and forth along the product) and bring them out along the edges of the product, but not in the middle, otherwise it will spoil the clothes on which the product is worn , and then cut off at the root. The line is not melted. (As previously mentioned, the fishing line should be cut not with scissors, but with nail clippers or side cutters).
This type of technique allows us to weave products of various shapes and purposes: collars, necklaces, pendants, headbands, gaitans, ties, hryvnias, handbags, as well as items for interior decoration: photo frames, book covers, napkins, boxes, vases.
When weaving products of complex shape, each element can be made separately, and then they can be connected according to a pre-developed pattern.
Monastic weaving goes well with other types of techniques: openwork weaving, various ribbons, etc.
M.Ya. Anufriev "The Art of Beading"