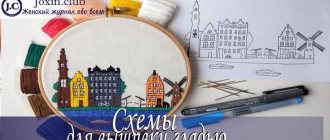
What is decoupage on fabric?
Decoupage is the decoration of objects by attaching a pattern or ornament cut out from somewhere using glue. The resulting composition is often varnished for beauty and durability.
Some people call decoupage on fabric appliqué. And, in principle, there is practically no difference, this is an applique on fabric, but not sewn with threads, but glued with glue or polyethylene. Sometimes mixed techniques are used, where embroidery, drawing on fabric, decoration with voluminous details, such as buttons, bows, kanzashi flowers, souvenir butterfly pins and other interesting things are additionally used.
What is used to hold fabrics together?
This technique can be performed in several ways, since decoupage on fabric can be done not only with glue. They also sometimes use clean plastic film to attach the appliqué. This method is also called hot appliqué.
But most often they use special glue for decoupage on fabric. Experienced craftsmen claim that there is enough of it on sale today. And despite the fact that the brands of adhesives and manufacturers are different, there is no particular difference in quality.
You can just use special glue. In some cases, even PVA will do.
DIY decoupage on fabric
Agree that it is very nice to use something that you created yourself, or at least had a hand in decorating it. Decoupage is one such technique. Now many people want to have individual things, in a single copy. Découper translated from French means “to cut out,” that is, cutting out any individual designs or parts, then gluing them to a surface, fabric, or wood. The result is a piece of individual design.
By doing this type of needlework, you will learn how to easily, quickly, and most importantly inexpensively decorate not only any item, but also change the entire interior around you. First of all, you need to know that synthetic and knitted materials are not suitable. But calico, poplin, linen are what you need. Also stock up on napkins with different designs. After all, in the cool autumn or snowy winter you will also be able to devote time to your activity. In a special craft store, purchase flat brushes of different sizes, decoupage glue, textile paints and outline. You can also buy stencils there that you can use to add elements.
Hot fixing the applique
To make decoupage on fabric with your own hands, you can use polyethylene to glue the picture. This method is especially convenient when the fabric is decorated with fabric, that is, the design is placed on the fabric.
The drawing, not yet cut out in detail, is placed on it, and a newspaper is spread down. The fabric should completely cover the polyethylene so that it does not stick to the iron. Therefore, the design itself is cut out first “with an overlap.”
Then, using a not very hot iron, iron this “sandwich” from the front side of the design so that the polyethylene slightly “grabs” the fabric. After this procedure, you need to cut out the design in detail.
It is very important to do this as carefully as possible, only then will the decoupage on the fabric look beautiful. How to make sure that the drawing is fixed firmly enough? To do this, the picture is placed in a permanent place, after which it is thoroughly ironed with a hot iron. You can do this through a cloth so as not to burn the fabric, especially if the design is made on silk or artificial fabric.
Decoupage of various surfaces
Why is such a technique as decoupage rapidly gaining popularity among many admirers of needlework? The answer to this question is very simple. Because, thanks to decoupage, you can decorate and restore almost all existing surfaces, from wood and metal to glass and plastic surfaces. Here are some examples of how to decorate a plastic flowerpot and decoupage a Raffaello box.
Decoupage on plastic will be demonstrated on a flower pot, which is recommended to be washed under running water and degreased with alcohol or solvent. Take measurements on paper that will fit the scale of the flowerpot, and feel free to cut the required length. Then, coat it with glue, preferably PVA.
The master class moves on to the most important stage, which is decoupage on plastic. Holding the pot with one hand, begin gluing the paper with the other, trying to avoid the formation of wrinkles and air bubbles. Be sure to make a small overlap in the place where the edges of the paper will meet. The bottom of the flower pot is also wrapped in paper, and do not forget to make holes for water to escape.
If wrinkles do appear, then use a brush to gently iron them out. Decoupage on plastic should dry for about one hour. Then, cover the surface with decoupage varnish and also leave to dry. Only after all the procedures have been completed, you can safely use the flower pot and be sure that the decoupage on plastic was done correctly.
Read
Basics of decoupage on wooden surfaces and planks in a detailed master class
Decoupage with fabric is great to use on various furniture. A small table and chairs for tea drinking, which can be placed on a country courtyard, have a wonderful view. In this case, you will need a fabric made of natural cotton fabric with a thick weave.
It is better not to use plastic furniture. Wood lends itself perfectly to work, namely fiberboard. Such surfaces are sanded and then treated with a light primer. And at the very end, acrylic varnish is applied, preferably in several layers.
The fabric should be moistened and applied to the table, previously coated with PVA glue. If you staple the fabric, it will make the task much easier. In this case, the material will not move and slide off the surface. Once you have removed the paper clips, apply several layers of glue to the fabric. At the end of the master class, polish the furniture. This will give the appearance of real furniture. You are probably convinced that decoupage with fabric is not a complicated technology and is suitable even for novice craftsmen.
In the same way, decoupage of the box is done, using the example of the packaging of Raffaello chocolates. Cut out paper that fits the scale of the box. Apply glue to the product, and then attach the paper to the craft. Using your hands or a sponge, you need to smooth out all the resulting irregularities and squeeze out air bubbles. Apply glue to the craft and wait for everything to dry. At the very end, all work and the material to be decorated is coated with acrylic varnish. In this case, it is considered that the decoupage of the box was successfully done. Now, your task is to decorate the resulting product to give it an aesthetic appearance. And use it as a box for storing needles and threads.
Step-by-step instructions for decoupage from strips of fabric on a bag
When decorating fabric products with fabric decoupage, you can use the adhesive method. But sometimes it makes sense not to attach the entire design completely, in one continuous piece, but to cut it into strips. For example, such decoupage on fabric is very suitable for decorating a beach bag. The master class for this process is quite simple.
- You should choose a colorful drawing of the appropriate theme, sew or buy a fabric bag, prepare glue for decoupage or for fabric, a ruler, scissors, a soft brush, and an iron. Before starting work, the bag must be washed, dried and ironed.
- Coat the design completely with glue before final cutting. Let the picture first become completely wet and then dry. Now you should mark equal stripes with chalk or a piece of dry soap (a disappearing marker will do). Then the master carefully cuts the fabric along the markings using scissors or a special knife. The cut out motifs will not fray as the fabric has been soaked in glue. But they will become as if rubber.
- Each part is attached in turn. The finished strip of the design is carefully smeared from the inside with glue and applied to where it will now be permanently located. Then use a rubber roller to carefully press the picture onto the base. After the part has taken its rightful place, the part is covered with a layer of glue from the middle to the corners with a brush. You need to try not to get out of the picture.
- Sometimes the motifs of a decoupage design are additionally outlined with a special outline or a thin line of acrylic paint.
- After all the strips are glued, the product should dry. This takes at least a day. After this time, you should carefully iron the product with a hot iron, first from the wrong side, and then from the front. Use when ironing damp fabric is encouraged.
Definition of “fabric decoupage”
Decoupage is an art that was especially popular in China, and later in France, where it got its name, which translates as “cut.” The meaning of decoupage is to glue cut-out elements onto wood, metal, fabric and other materials, and open the finished product with a special varnish. The birthplace of decoupage is considered to be Siberia, where products decorated in a similar way were used for ritual purposes. Fabric or paper pictures were used to decorate furniture, cereal jars and other decorative items.
This art in its essence can be compared to appliqué, however, objects made using the decoupage technique look more sophisticated.
Pictures for fabric decoupage can be found on the Internet and printed on a printer.
Now this world-famous technique is used not only to give a noble look to interior items, it can also be used to create bags, jeans, skirts, as well as shoes made of fabric and leather.
Photos, fabrics and napkins are great for decoupage-style crafts, but it is easiest to work with special decoupage cards, so it is better for beginners to pay attention to them. The color and appearance of these cards can be very varied, so if this is your first time walking into a craft store, it may be difficult for you to make a choice. In order not to buy a lot of unnecessary things, before going to the store, think in advance about what product you want to end up with, what design is needed for it, and what size the card should be.
Decorating fabric products with table napkins
Sachet bags made using this technique look very beautiful. For their decoupage, ordinary table napkins can be used.
First, you should carefully cut out the design motif chosen for decoration. Having placed it in the place where it will be attached, the master either marks the outline with chalk, a marker (disappearing), dry soap, or pins it with safety pins. Then the base fabric is smeared with glue exactly in the place that was marked. Now you need to wait a few minutes.
After the glue has set slightly, the fragment of the pattern is carefully placed where it will now be permanently located. Then, using a brush from the middle to the corners, the part is covered with a layer of glue. You need to straighten the fragment as you proceed, slightly stretching the napkin. But you need to do this extremely carefully, trying not to tear it.
After the entire surface of the picture becomes smeared, use cotton swabs moistened with clean water to carefully remove excess glue that has protruded onto the base beyond the border of the fragment. You can dry the product on a clean film or in a suspended state using a clothesline and clothespins. The item should be secured at the corners. This process takes at least a day.
After thorough drying, you need to thoroughly iron the product with a hot iron from the wrong side, then from the front. It is better to do this through the fabric so that the glue does not spoil the sole of the iron and the picture does not change its colors.
Bags for herbs: master class on decoupage on burlap
Using the technique of decoupage on burlap, you can make a huge number of original gifts, for example, sachets, bags for storing various spices and aromatic herbs, bags for jewelry.
A great idea would be to make bags for herbs, decorating each of them with an image of the plant that will be inside.
To decorate crafts made from burlap, it is better to choose napkins or decoupage cards with imitation embroidery, then they will look more harmonious.
Herb bags, decorated using the decoupage technique, are an excellent decorative element for any room.
Master class for beginners “herbal bag”:
- Cut a rectangle from burlap, twice the size of the future bag.
- Fold the fabric in half and sew along the sides. Sew the edges. Now you can turn the resulting bag right side out.
- To prevent the parts of the bag from sticking together when gluing the napkins, place a thick piece of cardboard into the bag.
- Cut out the element you need from the decoupage card printout. Attach this element to the bag and decide on the place where it will be glued.
- Generously coat the desired area with glue.
- Remove the top layer with the pattern from the napkin and stick it on your future craft.
- Fill the bag with herbs and tie with bright ribbons.
Making such bags with your own hands is very simple and quick; they will be an excellent gift for your family and friends, and the pleasant aroma emanating from such sachets will fill the room with a romantic atmosphere.
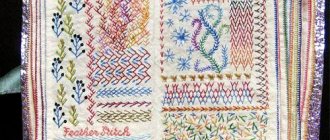
Imitation of embroidery using decoupage technique
This type of wall decor is suitable for those who do not like embroidery, but want to have something reminiscent of embroidery.
As a base, it is best to take canvas that can not be washed. It is enough to iron the fabric well through a wet cloth with a very hot iron. The drawing itself must be printed on an inkjet printer or a photocopy made from paper. The picture is made on rice paper or a thinned printout. Next, the cut out pattern is glued according to the algorithm for working with napkins. Only when painting the picture with a brush should you make driving movements so that the paper is slightly deformed in the voids between the threads of the canvas and the effect of punctures and holes is created. You can also make holes with a needle after drying, then the imitation of embroidery will be more accurate.
Sometimes you can find a color cross stitch pattern. Then you no longer need to pierce holes. The picture will already be very reminiscent of finished embroidery.
After drying, you can coat the decoupage with varnish. A picture inserted into a frame will wonderfully decorate a room.
Photographs are stylish and creative!
You can decorate your home in the style of the sixties by making original decoupage on fabric. A photo of a loved one or your own should be processed in Picasa by selecting the “Other filters and effects” option and clicking the “60s style” button. It is also recommended to make an oval or round frame on the photo with smoothed corners and remove all excess.
The picture is printed on thin paper (for calligraphy or rice) in the same way as is done when preparing an embroidery pattern for decoupage. The work algorithm repeats the process of decorating fabric with motifs from table napkins.
Wall panel using the technique in question
Decoupage on fabric, the master class of which is presented here, repeats the algorithm for decorating with napkins. The fragments of the painting for the panel themselves should be printed on calligraphy or rice paper.
As a base, you can take ordinary fabric of two colors and sew the pieces together. But there is a way to paint them in the desired colors with acrylic paints. The panel will be especially successful if you make it on burlap or sackcloth. The paint is applied to the fabric in several layers, two or three.
After drying, the place where the panel fragment is glued is smeared with glue. Then the carved motif is attached to it.
After gluing, you can paint the sun’s eyes and draw rays.
Sometimes it is necessary to outline the motif. This is especially true for panels with children's themes.
Animal figures are attached in the same way as when working with napkin motifs.
Any glue protruding beyond the fragment should be immediately removed with cotton swabs soaked in water.
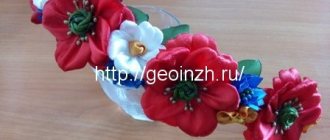
Flowers on the panel can be used either printed on paper or voluminous artificial ones. The butterfly can also be voluminous, taken from a hair decoration.
Necessary materials
Before you begin, you need to prepare some necessary materials that are needed to create decoupage:
- a pair of synthetic soft brushes (for applying glue);
- cloth to remove excess glue;
- regular PVA glue, not too liquid;
- a napkin with the selected pattern (to transfer to the fabric);
- water at room temperature;
- fabric (on which the design will be placed);
- gauze;
- scissors;
- iron.
Recommendation: the main fabric on which the picture will be applied should preferably be made from natural materials so that no difficulties arise in the process.
For drawing, paper napkins and sometimes rice paper are used. Brushes are used only synthetic, but soft. You may also need acrylic paints to outline the outline of the drawing, and stains if they appear.