In any family, as they live together, a considerable amount of things appear that accumulate and sometimes even clutter the room. Endless cleaning, of course, helps for a while. But there is a way out - to create an organizer with your own hands. Here you can store whatever your heart desires - stationery, accessories, decorations, etc. Creating an organizer is not difficult and quite accessible even for those who are not keen on making crafts. So, we will tell you how to make an organizer.
DIY organizer: necessary materials
To create a convenient organizer for household items, prepare something that is likely to be found in every home, namely:
- cardboard shoe box;
- 3-4 identical cardboard boxes of smaller size;
- roll of wrapping paper;
- colored cardboard;
- pen or pencil;
- scotch;
- scissors;
- various elements for decoration (optional).
Master class: DIY organizer
So, if all the necessary materials have been found, choose a day when you are in a good mood and start making your own organizer:
How to make an organizer: another master class
Surely every home has a desk with a pull-out shelf, where everything necessary and unnecessary is periodically dumped. As a result, the shelf becomes a mess.
You can solve this “disgrace” using the same organizer. To create it, find cardboard boxes of different sizes (and, if you want, the same ones) in your home for food or equipment. Also prepare scissors, PVA glue, water-based varnish and a piece of beautiful fabric.
By the way, the scope of application of such an organizer should not be limited to computer trifles and stationery. Using the master class described above, you can create a laundry organizer. We just recommend choosing boxes of the same size. And then your panties and bras will be stored in decent conditions!
Organizers are not only a beautiful decorative element that complements the interior favorably, but also a fairly practical thing that allows you to competently organize the space in any room.
The stores offer a wide range of different organizers that will be appropriate in any interior, but it is more convenient to make one yourself. This makes it possible not only to save money, but also to make the most suitable option for your personal needs.
The main thing is to know how to make an organizer with your own hands and follow all the advice of experts.
Jewelry organizer
Costume jewelry requires a special place for storage, since small parts are quickly lost if handled incorrectly. At the same time, jewelry should be visible to simplify the process of getting ready for the fair sex. Organizers in the form of photo frames or paintings are suitable for storing jewelry.
Basic materials from which you can make an organizer in a home workshop:
- Frame for a photograph or painting;
- Water-soluble paint;
- Varnish for coating;
- Simple pencil;
- Glue;
- Lace fabric or a beautiful picture for the background;
- A piece of rope (tape);
- Ruler;
- Stapler;
- Self-tapping screw.
Car organizer made from jeans
This device is characterized by increased reliability and simplicity, because it is made of dense and strong denim fabric. You can buy a special piece for this, but it would be much more practical to make a product from old pants. In this case, you can use not only back pockets, but also belt loops, which will serve as fastening elements for round objects.
You might be interested in Sewing short skirts with and without patterns
Seat back option
There are many options for making a device made from pants. You can leave the back part to the knees, and cut off the remaining legs and sew them in the form of additional pockets. Another option involves sewing the pants into a rectangle and sewing on the compartments. In any of these cases, it is necessary to provide for mounting on the rear surface of the car seat or on its cover.
Stages of work
A ready-made frame can be purchased at an art store or hardware supermarket, but it must be uncoated in order to be able to paint the product in the desired color.
The painting process is carried out first, for which two layers of paint are applied with short breaks (about 1 hour) so that the first layer has time to dry well. A layer of varnish must be applied to the dried paint.
Do not forget that after each stage it is advisable to clean the brush of paint, especially before applying varnish.
A piece of beautiful fabric, lace or a regular picture is inserted into the frame, which will become the background for the future organizer.
The decorations will be held on by ropes (ribbons) or self-tapping screws. Sections of rope along the length of the frame are located along the product and secured either with a stapler or glue.
You can hammer in 2 small nails on each side and simply pull the rope over them. Large nails, metal hooks and baskets can serve as jewelry holders.
At the last stage, you need to secure the loop with a self-tapping screw in order to hang the picture on the wall. The jewelry organizer is ready!
Making an organizer for wires and office supplies
In addition to decorations, organizers are convenient for storing various little things that can be found in every home. A photo of a homemade organizer for small items can be found on the Internet and used as an example.
It’s easy to make such a product, but you will need the following materials:
- Thick cardboard (can be used from an unnecessary box);
- Glue and double-sided tape;
- Paints or paper for scrapbooking;
- Pencil;
- Ruler;
- Scissors;
- Stapler;
- Stationery knife;
- Textile.
Work on creating an organizer
To begin with, the dimensions of the future organizer are determined. It will consist of several parts, which are arranged depending on personal needs in any convenient way.
5 parts are cut out of cardboard: rectangular for the bottom and 4 as walls. The large part is easily replaced by 2 small ones, which are glued together in the middle.
The main thing is that the structure is firmly secured with tape.
The walls of the organizer are glued to the base with ordinary tape on opposite sides. To do this, the wall is placed on the edge of the base, and the tape captures two parts at once. After this, the other two sides are glued, and the edges between all the walls are secured with tape. If necessary, you need to cut off some of the cardboard at the joints to make it easier to form a “box”.
At the fourth stage, you need to measure the box from both the outer and inner parts, and then transfer the measurements to fabric or scrapbooking paper. It is recommended to use different shades for decoration to make the product look more stylish and interesting.
Before gluing the fabric, it must be carefully ironed to facilitate the next stage of work.
In the upper inner part, the fabric is secured with a stapler, and the edge at the bottom with glue. After this, double-sided tape is half-glued to the upper inner edge, which is folded to the outer side. It should be on both sides of the edge.
The fabric parts for the outside of the box are placed on the tape that was glued earlier, on the inside along the entire perimeter of the product.
Double-sided tape is glued to the bottom along the entire perimeter of the box, after which fabric is stretched over it to finish the outside. This must be done so that there are no folds or unsightly creases left on the fabric.
The bottom is covered with fabric, after which marks are made to bend it to the size of the box. The excess needs to be folded inward, where the pieces of double-sided tape are placed.
Thus, the bottom of the box is filled and the product takes on its final form. Any errors are glued with glue.
Sometimes a box is filled with such small parts that large compartments are not suitable for storage. Partitions come to the rescue, which are installed inside, dividing the space into many small cells.
The partitions are made of cardboard, pasted over in the color you like, each of which has cutouts on one side. The cell size depends on the number of cutouts on one partition. After the preparatory work, they are simply inserted into each other, creating separate “boxes” for small components.
This way, either one box or several are made, but at the same time they are connected with double-sided tape or a stapler into a single product. The organizer's sections can be of different sizes depending on the imagination of the master.
Using a similar principle, you can make your own organizer at home from cardboard tubes. Suitable materials are tubes from hardware stores or a large cling film base, from which several pieces are made. They are pasted over with fabric or paper, the edges are sanded with sandpaper, fastened together with glue or glued to a chipboard stand that acts as a base.
Hallway organizer
To avoid clutter in the hallway from scattered small items (mittens, scarves, scarves), sew an organizer with pockets convenient for this purpose. Such an organizer, by the way, can be hung on a closet door or on the hallway door. From any thick fabric (you can use, for example, out-of-use curtains), cut out two identical pieces measuring 40 x 80 cm (they can be cut to any size as desired). Sew these pieces first with the wrong side up, and then, turning them right side out, stitch along the edges. Now cut four more strips from the same or another fabric that matches the color. From the strips, make four lines of pockets, each with three pockets (you can vary the number as desired). Tuck the upper edges of the stripes and trim them with beautiful braid or appliqué. Then add depth to each pocket using two folds that are not secured at the top (otherwise the filled pocket will protrude greatly). The entire strip with folds is attached on three sides, as well as between the pockets. The bottom edge of the bottom line of the pockets is sealed with braid or finishing fabric, which will close the edge and strengthen the folds.
Phone organizer
How often do you find your pen or notebook missing when you're on the phone? This can be avoided by sewing a small organizer and placing or hanging it near the phone. The organizer is easy to sew - we sew a long and narrow pocket for a pencil or pen on a base of thick fabric. Another compartment, a little wider, is for an alphabet notebook. Or you can stitch a strip, and then use stitches to “make” pockets.
Bathroom organizer
There are always a lot of different necessary little things in the bathroom - brushes, creams, deodorants. In order for them to be in proper order and in a certain place, we suggest sewing a case. Depending on where it will hang, it can be made larger or smaller. It is better to make all the details of the pockets in different sizes, from fabrics with different patterns. You can also use oilcloth for the product. All parts are cut out along the grain thread with 1 cm allowances along the cuts. Each pocket is edged with bias tape. You can see how to properly edge parts in the master class Edging seams. The finished width of the edging is 0.75 cm. The bottom pocket is made large, which should be carefully stitched to the base. A rail is inserted into the upper drawstring, which is attached to the wall. Don't forget the hanging loops.
Using the same principle, they make a case for storing necessary things in the kitchen (various brushes, powders, napkins) so that they are always at hand.
Organizer for small items
Pockets for storing small and small items (glasses, combs, knitting needles, scissors, etc.) can be of various sizes and shapes.
An organizer for glasses can be made from bright felt. Glasses are put away in a pocket specially designed for storing glasses. The organizer can be folded and fastened with a button, but you can also hang it on a wall or door handle near your workplace using a loop. This way, you are less likely to break or crush your glasses.
It is convenient if combs and necessary toiletries are always at hand, near the mirror that hangs on the wall. A small sachet will be useful for this.
Using the same principle, unique pockets for scissors, measuring tape, crayons, and a thimble are made. Several spare buttons, pins, and small spools of thread will also be placed here.
The case can be folded, in this form it will take up no more space than a wallet and will not weigh down the bag, but at the right time everything you need will be at hand.
Thanks to such pockets, you can greatly increase the capacity of your wardrobe, and there is also room for many important little things.
Closet organizer
To sew the closet organizer, I used two types of fabric - flannel and chintz. I cut out 2 rectangles 40 x 80 cm from flannel and polyethylene. I stitched the edges together, leaving 10cm for turning. I turned it right side out and sewed a finishing stitch around the edge. The base for the pockets is ready. I sewed pockets of different sizes onto the base. I made three large pockets. The lower, middle and upper pockets are rectangles approximately 25 cm high and about 50 cm long (40 cm is the width of the base and + 10 cm for folds and gathers). I gathered the top of the lower and upper pockets with elastic, and placed folds along the bottom of the pockets. The pockets turned out to be voluminous - they fit a lot of things. I sewed pockets on the top pocket - for handkerchiefs, creams, etc. The pockets are arbitrary in width and length. In order to prevent the pockets from sagging too much due to an overabundance of things, I sewed and stitched loops to the base, and sewed buttons to the pockets. Buttons and loops can be replaced with Velcro tape (Velcro). I sewed such an organizer after reading the book “To Help Housewives.” I used some quotes from the book in this article.
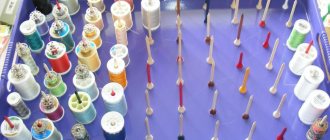
Handicraft organizer
Organizers for handicrafts vary in purpose. A needlewoman who is interested in sewing will be interested in this organizer, which is easy to make with your own hands.
For those who like to knit, you need a case for knitting needles, which is made on the same principle as a case for glasses.
The base is made of cardboard covered with fabric, the pocket and lintel are made of any bright patterned fabric. Height - 45 cm.
The frame of the craft box is covered with fabric. Pockets for scissors, knitting needles, glasses, etc. are sewn on before the frame is covered.
Organizer for the artist
An artist's folder can be made simply. Two rectangles of the required length and width, depending on the size of the sketches, are cut out of cardboard and covered with matting or harsh canvas.
They are sewn together, wearing straps and fasteners are sewn on. You can make a beautiful applique from colored fabrics - for example, a jug for brushes and a cup for pencils.
Photos of DIY organizers
There are a lot of amazing things around us, at the first glance of which no delight arises. And only upon closer examination does one realize that before one’s eyes is a masterpiece! One of such masterfully executed works is a DIY cardboard organizer.
Here are some examples of how a recycled product can be turned into a functional, useful and beautiful product:
These things are not only beautiful and exclusive, but also bring comfort, order and individual flavor to the house.
Having set the task of making something similar in a home, everyone wonders where to get the required amount of starting material. After all, cardboard for children's creativity is not suitable for these purposes. Flexible thin material is produced for schoolchildren. There is not much of it in sets, and besides, it is limited in size and will not work for large products. The way out of the situation is to go to the nearest store, or rather, to the warehouse of the nearest store. There you can always find an abundance of empty packaging containers for fruits, groceries and similar goods. Also, thick boxes made from large household appliances are suitable for crafts of this kind.
Once the basis for the future product has been found, we begin work. Let's look at a few ideas for creating different types of cardboard storage.
Main types of organizers
There are several main types of organizers:
- wall (boards or other shelves);
- tabletop (stands with compartments);
- “drawer” type (dividers inside regular dresser drawers).
There are a huge number of models made of wood, plastic, acrylic or even metal on the organizer market. Not all of them may be suitable for a particular person, since his shelves may be too narrow and his table may be small. If you make the devices yourself, you won’t have to guess about the sizes.
You may be interested in: Rules for sewing pillows for a pregnant woman yourself
Important! It is also noteworthy that these interior items can be made from almost any material at hand.
Using clothespins to store headphones
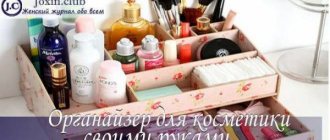
For cosmetics
The simplest type of craft that even beginners can do is presented below.
To work you will need:
- Cardboard box;
- Decorative paper for decoration;
- Glue;
- Stationery knife;
- A simple pencil.
The basis of the organizer will be the box. For these purposes, it is better to choose packaging without a removable lid. The best option would be an empty container from a laptop or tablet.
We cover the box with paper and decorate it to your taste. Let it dry well. Next, use a stationery knife to cut holes that fit the size of the existing cosmetics. The stand for cosmetics is ready. It is convenient because it can be placed on any table or bedside table.
Let's consider another version of such an organizer.
This product has a more complex and impressive design and is made in the form of a small chest of drawers. But thanks to the pattern presented below, making it will not be difficult. The dimensions for the chest of drawers are shown in the image.
The video tutorial explains how to cut and assemble all the parts correctly:
A product with a masculine character
Not only women love order in everything. Most men are zealous about their belongings and cannot stand it when they are moved to other places. This is understandable: clarity and accuracy are the two main traits of successful people. Therefore, any representative of the stronger sex will love a cardboard organizer for office supplies.
A master class on making this masterpiece will help you complete the job with ease and get a brilliant result.
The entire structure is collapsible and consists of individual elements. They are covered with kraft paper and vintage decorative paper.
The books in this organizer are removable. This is a more convenient option for use.
Decorating materials can be purchased at specialized stores that sell scrapbooking products.
Let's move on to the manufacturing process. Let's make books first. To do this, we will transfer the diagram with the dimensions of future folders onto cardboard and cut it out.
After this, we assemble a book from the covers, gluing the flyleaf to it.
We strengthen the spines of the books for rigidity.
Let it dry thoroughly and begin making the closed side panel.
The result was separate blanks for the covers and ends of the books. Let's put them together.
We cover each individual element with decorative paper. This type of paper with an aging effect is easy to make yourself, rather than buying it in a store. To do this, soak ordinary office sheets in tea leaves or infusion of onion peels and dry them. After pasting, we assemble the structure.
Finally, we make a retractable drawer. We also paste it over and decorate it with paper.
We assemble all the parts into the finished product.
The nuances of making such an organizer can be seen in a detailed video tutorial that will answer your questions.
Real men will highly appreciate the effort spent on making such a useful desktop accessory.
Hanging Organizer Ideas with Pockets
An interesting and useful item can be used in all rooms of any apartment.
Bathroom .
A similar thing in the bathroom will be a good solution for placing combs, shower and hair products, foams, creams, gels; Children's room Here, in general, everything can be hung with lovely little things. Near the desktop they will serve to place notepads, scissors, pencils or markers, near the bed and in the play area - to place small toys; Hallway. In the hallway you can compactly place light scarves and hats, fluffy mittens and gloves. Shoe creams and brushes will also be placed here, and the shoes themselves will take up much less space; Bedroom. Next to the bed you can find a place to place glasses, medicines, watches, phones, chargers; Living room. Near the armchair and sofa it is convenient to place an organizer with glasses, a TV remote control, a newspaper with crossword puzzles;
Kitchen. In the kitchen, such storage can be used to store cutlery, spices, and place decorative elements.
There are no creation rules for organizers. They can be made from any fabric, have any color, be of any shape.