Hello, our dear site guests! 2021 is approaching and we are starting to prepare for it in advance. So, today we’ll talk and review about the New Year’s interior. We all know very well that we create vivid holiday impressions ourselves, not only for ourselves, but also for all our loved ones. And for children this magical holiday is simply necessary. After all, the New Year, like a birthday, is a holiday of childhood.
And of course the holiday atmosphere is very important. Therefore, we have selected for you a review of beautiful crafts and jewelry that you can easily and simply create with your own hands.
We will talk about magical characters; they will be part of the New Year's atmosphere. And as you may have guessed from the picture, these are gnomes. They are different and our task is to show you as many examples as possible for inspiration. And then the work will be left to you. Bring your own signature touches and your creativity will be unique. Let's move from conversation to action.
DIY gnomes for the New Year
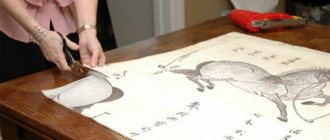
In order to make a magical friend, we will need fabric for the body measuring 20*25cm. Then fold it in half.
Next, take a ruler and a pencil and draw two lines that together will create a triangle.
Now we need to sew the fabric using a sewing machine or by hand along two lines. The fastest way will be by typewriter. There is no need to sew it completely, we will leave a small hole so that later we can fill the body with filler.
We cut off the fabric we don’t need at the corners. This is the fabric triangle you will get.
It is necessary to sew the bottom to the base of our figure. To do this, cut out a circle of the required size from the same fabric and sew it on.
Next, turn the products right side out.
We fill the torso. In order for our hero to be stable in the future, we pour cereal into a bag and put it on the bottom, and then just take the filler. This is of course optional.
Once the process is completed, take a needle and thread in your hands and carefully sew it up.
If you have a gray sock that for some reason you no longer need. It will suit the nose just right. To do this, take a small piece of fabric in the form of a square, use a thread and a needle to make rhymes around the edge in a circle.
Let's take a little filler and tighten the rhymes. We should end up with a nose like a button.
Apply thermal glue in the center and glue it to the product. It will look something like the photo below.
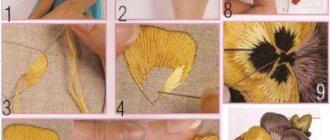
Next we will need our drawing abilities. You don’t have to do anything complicated, just draw a mitten.
We do everything on the wrong side. The arm itself will be made of the same fabric as the body, but the mitten will be made of fur. We cut it out and stitch it along the seam line (don’t forget to leave a little hole), then turn it right side out and fill it. We do the same with the other hand. Then we glue everything to our hero.
Sew or glue the eyes. Cut out a white beard from fur fabric and glue it on.
Now we’ll make a cap and our fairy-tale character is ready to decorate and create a festive atmosphere. The final touch will be the eyebrows. And then we glue everything carefully and voila! Everything is ready, boss!
We found this master class on YouTube. The channel is called “ DIY Come to Us Crafts Alterations ”.
Knitted beard
What could be easier than crocheting a beard?
To do this, you need yarn of a suitable shade and a knitting tool. It is desirable that the thread be synthetic (acrylic) and quite fluffy.
Knit a chain of chain stitches of such length that you can secure the beard close to the ears. The first row is done with single crochets. The next row will be a front row, and you need to knit it with elongated loops. It is most convenient to carry them out using a ruler, then the rings will be even. The diagram describes in detail the process of forming elongated loops.
Related article: Which oven cleaning system is better
After knitting a row as described, perform a purl row. To do this, unfold the fabric and knit with connecting stitches behind the front half-loop of the previous row. Unfold the fabric again and make a series of elongated loops. After repeating knitting 2-3 times, begin to shape the beard, making the required number of decreases on both sides. After finishing knitting, cut the thread and sew on an elastic band for fastening.
Or you can knit a simple rectangle with grass yarn, rounded at the bottom.
Or make the same detail and attach fringe to each eyelet. So, you can get a long and lush beard for a gnome. It will look amazingly realistic.
Gnomes for the New Year for interior decoration
There can never be too many magical toys, so let’s look at another idea for inspiration. I won’t tell you what we need for work; we’ll figure it out during the creative process. Everything is created simply, the only thing that matters is that you have time and the willingness to create.
So, let's move on to the process of creating interior heroes for the holiday. Practically the process is the same, there may only be different materials and parts.
We will create such small, cute gnomes. Here we go. To get started we need knitted gloves. You can buy them at an inexpensive price for creativity, of course, at a fixed price. We take white and dark beige. Next, fill one finger with fillers, shape it, tie the top with thread and cut off the finished body from the glove.
Then we make the nose, and the beard can be made from any old fur or bought at a craft store.
We glue the nose and beard with thermal glue.
We cut off one finger from the glove and make a hat. If the body is beige, then the hat should be white or red. Any, but not the same color as the body, otherwise our hero will merge and will not be particularly beautiful.
Glue the hat on and you're done. Using this process, we create other similar interior toys.
To make the interior interesting, we will create other wizards or sorceresses. And so, we still need gloves, knitting threads, glue and beads.
We fill the finger with filler, fix the top with thread and cut it off from the glove, then make a nose from a small piece of fabric, braid it from knitting threads and glue it to the head.
Cut off the finger and glue on the hat. For beauty, since this is a girl, we will glue beads. You can decorate it however you like, you just need your imagination.
The characters turned out to be wonderful and delightful.
And then it remains a matter of creativity; you can create a magical atmosphere not only with gnomes, but also with beautiful snow houses. Think about what declarations you want to decorate your house with and go for it. After all, we make our own moods!
Trio of gnomes in clothes
These New Year's toys will appeal to those who like to sew a variety of figures. These gnomes are real people with legs, arms and clothes, so you have to:
- print the pattern;
- choose fabrics of suitable colors - beige (white) and multi-colored;
- buy a filler - padding polyester or holofiber, a replacement for it - cotton wool;
- find yarn for making hair;
- prepare sewing supplies, glue;
- purchase bells (beads) for caps.
The process of making New Year's toys looks like this:
- The patterns are printed on a printer, then transferred to paper and all the elements are cut out.
- They are fixed on the fabric and as many parts are cut out as indicated in the drawing. Don't forget to leave small seam allowances.
- To make the bodies of the three dwarves, white (beige) material is used. The cut blanks are stitched, but an unstitched edge is left at the bottom for turning right side out. They bend him over.
- Then they sew, turn out the legs and scarves made from fabric of different colors, since each gnome will have his own outfit. The torso and legs are stuffed with filler, then the parts are sewn to each other.
- Clothes - shirts and trousers - are made from any fabric - plain or colored. For the first, the shoulder seam is sewn, then the neckline is processed, the side seams are laid and the sleeves are rolled up. The trousers are first sewn on the sides, then the trouser legs are made, the clothes are designed according to the waistband (small folds are made “according to the figure”) and length.
- Caps are created by sewing blanks on the sides. Beads or bells are attached to the tips of New Year's hats. Yarn acting as hair is glued onto the gnomes' heads, then they are dressed, caps are sewn on, scarves are tied, and scarves are secured.
- Since a well-mannered gnome always brings gifts with him, for this New Year’s trinity they usually sew several bags, which are tied with bright threads.
A DIY New Year's gnome is a feasible task for every family. The main thing is to find suitable materials and a model you like. Another way is to independently invent a New Year's fairy-tale figurine. In this case, it will definitely not look like those that flaunt in virtual space. Ideas that will give you a chance to awaken inspiration can be gleaned from video tutorials. One of the most interesting videos is here:
How to sew a gnome from felt patterns and diagrams
So, felt is the most popular material for any crafts. You can create anything you want from it, just do it. Our review hero today is no exception, so we have prepared several options for you, which we hope you will like and take ideas into your arsenal.
The fastest and best option for patterns is, of course, to draw them yourself. But if this suddenly happens, then it’s easy to find the pattern you need. Now there are many opportunities that cannot be missed. Below we found several options, choose to suit every taste.
It looks simple, just draw, cut, glue and sew. =)
There are mini heroes that are perfect not only for the interior, but also for the Christmas tree.
Option for inspiration.
How is this an option?
More like Santa Claus, but if you change the hat and beard a little, you will get the hero of the review, a gnome.
DIY gnomes patterns for the New Year
Interior New Year's characters are now gaining popularity not only for decoration, but also for gifts. Handicrafts sell charming gnomes. So if you like this type of creativity, then you can also earn money from your favorite hobby. And what could be more beautiful than doing what you love, which brings not only pleasure, but also income to the family budget.
So a little, we switched to another topic.
Take a sheet of paper and draw a heart-shaped figure, as shown in the photo below.
For the composition we need half a heart.
Then we cut out two circles from felt, one larger in diameter, the other smaller.
Set the small circle aside. Take half a heart and a large circle. These two parts are glued together with hot glue.
Since the glue dries quickly, we work quickly and carefully.
We need to glue a small circle to the back of the craft.
Turn the composition over and set it aside. Let's move on to the fairy-tale hero. Take a small strip of felt and roll it into a tube.
To prevent the base from unwinding, coat the edge with glue and secure it.
Draw a triangle on a piece of paper; see the photo for its size.
Next, we finish drawing our triangle, as in the photo below.
Then we cut it out. Now we transfer our finished pattern to felt and cut it out. Two such parts are needed. The top of the figure must be cut off.
Glue the two sides of the two parts with glue. And turn it right side out.
We are making a beard pattern, for this we will draw a rectangle. Inside the rectangle we will draw two lines, as shown in the photo below.
We cut out the template, transfer it to the fabric from which we make the beard, give it a shape and everything is ready. In order for our hero to turn out beautiful. We will glue the beard at the junction of the roll, thereby making the gnome look gorgeous.
Let's create a small round nose from fabric, fill the triangle, and fill the character's hat with filler. Just a little bit to give it some shape. Fix the nose and cap with thermal glue.
We glue the finished character to the previously prepared base. And then it all depends on the mood and creativity. We decorate everything to our liking and the New Year's decor is ready.
Such stylish compositions will create a New Year's atmosphere and festive decor. But this idea is also perfect for a New Year’s gift to your family.
Just look at what incredible beauty can come out of ordinary felt. We hope you liked the idea and be sure to bring it to life.
Christmas herbal gnomes
Such a holiday gift will not only be pleasant, but also useful. After all, in a bag made of bright cotton fabric there will be the most medicinal herb in the world. Glue a wooden ball to the bag. This will be the head, so draw a funny face on it. And again sew and put a felt cap on the ball so that our little man can rightfully consider himself a gnome.
INTERESTING: Tilda in Boho style
How to sew a felt gnome for the New Year
To be honest, you won’t have to sew anything, since we have a miracle thermal glue and with it all the work goes much faster. It's much more convenient than sewing everything on. All we need is felt in two colors and an old pillow that doesn’t create a festive mood at all. Faux fur for the beard, and a couple of other things.
So, we will repair the old pillow. We cut out a cap and mittens from red felt. Cut out the body from gray felt. We draw it ourselves or find a pattern that suits us. We cut out a beard from fur, of course we don’t forget about the nose. Next, we carefully and slowly glue all the details to the pillow in such an order that the details create the character we need.
The idea, in our opinion, is very original and suitable for the upcoming holiday. And such a pillow will serve as room decor.