Useful tips
Watch the video if you are too lazy to read
Watch the video if you are too lazy to read
It is worth noting that working with matches not only develops imagination
, but also
perseverance, tolerance, accuracy and attention
.
Crafts from matches can be made with or without glue
. If you use glue, you can attract children, since such work is easier than making crafts from matches without glue.
The matches stick together very quickly and well, so you won’t have any big problems during the assembly process.
You can also use whole matches, or carefully separate them into smaller pieces.
Using matches you can make both two-dimensional and three-dimensional images
, including animal figurines, furniture and houses.
For beginners, it is best to make crafts using glue.
, and when you gain experience, you will be able to create crafts from matches without glue.
Helpful Tips:
* The place where you will work with matches needs to be prepared. First you need to cover the table with oilcloth.
* Prepare glue and a saucer into which you will pour it.
* For convenience, it is advisable to take the glue with a sharpened match or toothpick.
* For the front side of the craft, it is better to select matches with a smooth edge surface.
* If desired, you can cut off the match heads (with scissors or a stationery knife) - this way you will get a more even craft. Such work should be done by adults and children should not be allowed near sharp objects.
How to make a house from matches
To make such a house you do not need to have any special talent, you just need to know the stages of assembly, be careful and have patience.
You will need:
– 7 boxes of matches
— 2-3 coins of large diameter
- disc box.
1.
Prepare a base for the craft - it could be, for example, a CD box - and place 2 matches parallel to each other on it.
2.
Place 8 matches perpendicularly on the lying matches (the foundation of the house) - this must be done so that there are gaps of the same size between the matches.
3.
Place 8 more matches perpendicular to the previous ones (using the same principle).
4.
Now start laying matches around the perimeter as shown in the image. You need to make 7 rows (the heads of the matches should go in a circle).
5.
Place 8 matches on the last row so that their heads face in the direction opposite to the first row of 8 matches (the foundation of the house).
6.
Perpendicular to the top 8 matches, place 6 more matches in the middle, and place a coin on top of them.
7.
Between the last two rows, holes have formed in the corners; you need to insert 1 match into them. While you insert matches, hold the structure.
8.
Now stick one match into each gap along the walls and cover the perimeter (see picture).
9.
Adjust the structure with your fingers so that all the matches fit snugly against each other.
10.
Try to complete the walls of the house by sticking matches along the perimeter of the walls with their heads up.
11.
We make a horizontal layer of walls. Insert matches around the perimeter so that their heads alternate with the ends. After this, press in all the matches that start from the head.
12.
Let's start making the roof of the house. To do this, you need to insert matches along opposite walls (see picture).
13.
Alternate the direction of the matches and insert them perpendicular to the ceiling of the house.
14.
First you need to put 2 matches, then 4, then 6 matches in the two central ones, eight each.
15.
Next we make a roof (see picture), windows, doors and a pipe from match halves.
Video lesson
Basics
The basis for the manufacture of most match houses is a cube. It is also called a well. It is better to start mastering the technique of working with matches with him. While you are building a well, you will master the technique, understand the principle of operation, and also be able to understand your level and decide whether to work with or without glue.
It's easy to find diagrams on the Internet or old DIY magazines describing how to build a well. This article provides a detailed explanation of the found drawing; by analogy, you can read other diagrams.
- We take two matches and place them on a flat and smooth surface parallel to each other. The distance between matches should be 2 cm.
- Flooring is laid on top. It contains eight matches, which are laid out at a distance of one match width from each other. It is important to note that all heads must face the same direction.
- Another level of flooring is placed on top of this level. At the second level, matches are placed perpendicular to the matches of the first level. The heads should also point strictly in one direction.
- 4 matches are placed on the second level of the flooring in the form of a well. The heads of each match should point in different directions.
- Six subsequent rows of matches are laid according to the same pattern. All heads in their vertical row should be directed in the same direction.
- The well is covered with a level of eight matches, similar to the first level.
Related article: Crochet summer hats for women: description with diagrams and video
As a result, you should end up with a cube, as in the photo.
This is what the basics look like, by modifying which you can create a wide variety of match products.
Wheels made of matches (schemes)
In this example, NO glue is used, and the strength of the product is provided by internal tension and friction.
There are several options for the wheel: with laying through 1 support match (it has 15 vertices, and 105 parts are used for it), through 2, 3 and 4 support matches, respectively.
Laying through 2 support matches.
The product consists of 95 parts, has 19 vertices and a small diameter that allows it to fit inside a wheel with a larger diameter.
Laying through 3 support matches
The diameter of this design is even smaller. The wheel has 21 points and is made of 84 matches.
Laying through 4 support matches
This design is the most difficult to assemble. The wheel has the smallest diameter and can fit inside the old match wheels. The design has 22 vertices and contains 66 parts.
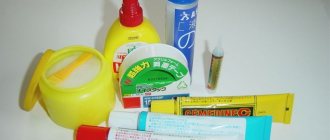
What glue is best to use for crafts made from matches?
To make crafts from matches, any glue will do. But it is best to use glue that becomes transparent after drying so that the product looks aesthetically pleasing.
PVA
Most often, PVA glue is used in needlework from matches.
This type of glue is good if you are preparing the product with your child.
PVA has a water emulsion of polyvinyl acetate and perfectly glues wood, which is necessary in this case.
"Carpenter" moment
This adhesive is an improved version of PVA. It clings to the material very well and very quickly.
Moment Montage “Instant Grip”
The moment is designed just for gluing wood and does its job in just a second. It is great for this type of craft because once it dries it is almost invisible.
Matchstick wheels (instructions)
1.
First you need to make an auxiliary tool. To prepare it, arm yourself with a notebook, a simple pencil, a ruler and a compass. You can use a protractor, but this is not necessary.
2.
Draw a template for the machine. In this example, the drawing will help you create a wheel of 15 links. Draw a circle whose radius is 42 mm. Next, divide this circle into 15 equal sectors (each sector has an angle of 24 degrees).
* If you do not have a protractor, make the distance between the legs of the compass 34 millimeters and draw notches on the circle.
3.
Once you have drawn the assembly panel drawing, start making the actual panel itself. A hard cover from an unnecessary book or thick cardboard will help you. In the places indicated in the picture, you need to punch holes in the cardboard using a hammer and nail.
Cut out the drawing and glue it to the cardboard. Choose a nail whose diameter is slightly larger than the thickness of the match. Place an unnecessary book or several sheets of cardboard under the cardboard (so as not to spoil the floor with a penetrating nail).
4.
Once you have the assembly panel ready, start assembling the wheel - if it has 15 links, you will need 90 matches.
* It is advisable to choose matches without defects.
Insert support matches into the panel.
4.1
Now fill the gaps with matches one by one. It is worth noting that each subsequent match in each ring must be placed overlapping the previous one.
4.2
Raise the first match in the ring in advance so that it overlaps the penultimate and last supporting matches.
4.3
Insert and secure the penultimate match, and then do the same with the last supporting match.
4.4
The first two matches need to be pressed back down, and the first created circle of supporting parts then needs to be carefully pressed down so that it lies tightly.
4.5
Using the same method, create a second ring of carrier matches, a third, a fourth and a fifth.
In these images you can take another look at the penultimate and final bearing matches.
* Raise the first match.
* We insert and secure the penultimate match.
* We insert and secure the last match.
5.
Now you need to carefully push the entire structure down. You need to do this several times, and then you can lift the working panel, turn it over and use a match to start squeezing out all the supporting matches one by one.
The diagram shows how to do this one by one in order to eventually pull out the wheel.
To further understand the assembly process, watch the video tutorial:
Models using glue
If houses made of matches without glue seem difficult, you can glue the parts.
As a diagram for beginners, you can take the previous diagram, but at the same time fasten the sticks together with glue. An additional advantage of glue is that it will be possible to eliminate the “lattice” that is characteristic of the glueless model. To do this, when laying out the well, glue a shortened match into the space formed between the long parts.
There is another way to make a match house with glue. Step-by-step instruction:
- The sulfur heads need to be cleaned or cut off. It is more convenient to do this using a stationery knife.
- For a house with glue you need a drawing of the base. You need to draw a square on a thick sheet of cardboard, the side of which is equal to the sum of the length and width of the match.
- We lay out the prepared sticks along the sides of the square. The short end should rest against the edge of the long side. The base is ready.
- Next, apply a thin layer of PVA to the surface of the resulting square and lay out the next 4 elements. It is important that the long part lies on the joint made below.
- By connecting the rows to each other with glue, we build a log house. How many rows to make depends on the selected wall height. Before drying, the structure is not yet very strong. To avoid unwanted movement of parts, it is better to pause after every 3-5 rows laid out, waiting for the glue to dry.
- After leaving the log house to dry, you should begin to create the base. To do this, the matches are glued together along the long side. After drying, the base is glued to the bottom of the building.
- The roof must be formed in the same way as the corner of the house, connecting the parts at right angles. Irregularities in the lower part of the slope are cut off with a stationery knife.
- Now you will have to take a break from work for 5-6 hours until the glue dries completely. This time should be spent on preparing the decorative design: gluing the door, porch, window casings. To make the decor beautiful, it is recommended to draw a sketch on cardboard, and then lay out the part, trimming the protruding ends.
- After the log house has dried, we build an attic space. To do this, shortened matches must be glued to two parts of the log house, gradually reducing the size. If the ends of the elements forming the attic are not very smooth, then it is better to wait until it dries and clean off any pieces that may prevent the roof from fitting tightly.
- Now we sand the outer surfaces using fine-grained sandpaper. The manipulation will eliminate the roughness of the matches and remove protruding particles of dried glue.
- Next, coat the top part of the frame with glue and attach the roof. You can immediately attach decorative details.
- While the product dries, a pipe is formed: 4 matches are glued together and part of the resulting bar is cut off at an angle. We glue the pipe to the roof and leave it to dry.
A large house is glued in the same way. But to form long walls, you will have to glue not only the corners, but also short joints. If, when laying out the next row, a long element is located at the junction of the match ends, the structure will be strong.
The advantages of glue are that you can add an extension to the house and attach the original porch.
What else can you make from matches?
You can create many different masterpieces from matches: castles, wells, benches, fences, and much more. There are many step-by-step instructions on the Internet on how to do this.
You can create excellent beautiful furniture for our house, for example a chair.
How to make a chair from matches
- Cut off the heads with sulfur.
- Take two sticks and place them parallel.
- Take another stick without sulfur and cut it into two equal parts.
- Glue these two halves to two parallel ones. You will get a back for the chair.
- Take a whole match and cut off the excess part from it so that the remainder is equal to the width of the back of the chair.
- Glue this piece in the center to create the back base. Below will be the back legs of the chair.
- Cut another similar base and glue the chair legs to it; they should be the same length as the back ones.
- Divide another log without sulfur into two equal parts.
- Make a side base out of them, gluing it to the back one, then glue it all together with the front legs.
- Cut 8 logs equal to the width of the seat.
- Place them tightly together and connect by gluing two crossbars.
- Glue one more such log on both sides of the resulting seat.
- Place the finished seat on the high chair.
Our chair is ready.
