Do you have an idea to make a pirate chest with your own hands? It's not as difficult as it might seem at first glance. If you have children in your house, you should definitely build such a treasure chest for them, they will be immensely grateful for it. This paraphernalia can be used for daily games, or you can make it for the New Year or on the eve of a child’s birthday and arrange an exciting quest game, and the main element, of course, will be a pirate paraphernalia. This work is quite extensive and requires some time and creativity, but if you think that the chest is made for one game, you are mistaken. It can be used later. You can store jewelry in it, you will agree that it will turn out very colorful. In a children's room, toys can be stored in it; the child will certainly like this very much, and, perhaps, will even encourage him to put the toys back in their place sooner and more often. An interesting solution is to fill the chest with various sweets, including chocolate coins.
What could be the shape of the chest?
And the shape, first of all, depends on the lid, because the lower part is always the same and is, in fact, a spacious rectangular box. Historically, there have been three types of caps. Let's look at the features of each of them.
Trunk
First type. Semi-cylindrical cover
It was very common among the rich segments of the population, while peasants preferred a flat lid, which allowed the chest (or rather, box) to be used, including as furniture. The rich people attached an important role to the aesthetic function.
Chest with semi-cylindrical lid and padlock
On a note! The chests of wealthy people were decorated with precious stones and carvings, and the inside was lined with expensive fabrics or leather. As a rule, there were entire paintings on the sides, and the lid was often equipped with an additional (mostly secret) compartment in which especially valuable things were stored.
From the history of the chest
Second type. Chest-teremok
The structure received this name due to the superstructure that was built over rich houses; it was called the tower. Such chests had 2 separate tiers, one of them - the smaller one - was at the top and was used for jewelry.
Chest-teremok, upholstered in wrought iron
Consequently, such a chest had 2 lids at once, while it itself looked like a square box with a high hipped “roof”. Each of the lids was decorated with picturesque paintings (both inside and outside), so that the rich could continuously enjoy the beauty of fine art while sorting through household items.
Chest-teremok
Third type. Headrest chest
Another name for the design is a headrest. This is a small box with a beveled top lid, which, in turn, consists of two planes (see photo below). Such a strange design is explained by the fact that such a chest was convenient to store under the head while moving (to protect things from thieves while sleeping). Hence, in fact, the name.
17th century headrest chest
What you need
What is needed to create a chest from a box? Depending on the creative concept, literally anything can be needed! But the basic list of materials is:
- cardboard for the base;
- paper - colored and white (for office);
- scissors;
- stationery cutter;
- a set of paints (preferably acrylic or gouache);
- brushes of different thicknesses;
- a simple pencil for marking;
- glue (stronger - PVA, Moment);
- ruler (preferably metal, plastic);
- double-sided tape;
- knitting needle, dull pencil or out of pen;
- brads in the shape of carnations;
- fabric (what kind and whether you will need it depends on your idea);
- small decorative elements (also selected according to the design).
IMPORTANT. The optimal solution is to use beer cardboard for the base. Ordinary corrugated cardboard is easily deformed, forming unsightly breaks, and it has unsightly ends. The binding is “oak”, it bends too tightly - it’s not for nothing that covers of large albums are made from it. Cardstock (designer cardboard) is a bit thin for the base, but a sheet of silver cardstock is very useful for decoration.
Please note: beer cardboard is much easier to cut with a utility knife than with scissors!
What material can be used?
There are several options for raw materials that can be used to make a wooden chest. They are described in more detail in the table below.
Table. Materials from which to make a chest.
| Name, photo | Short description |
| Plywood | It can be purchased at almost every hardware store. The material is inexpensive, and the thickness can be any. It is easy to work with plywood sheets; they themselves retain their shape well. However, a chest made of plywood alone will look boring and cheap. |
| Furniture panels | Made from solid wood of various types, they look attractive and expensive. They are highly durable and can be used to make a high-quality and durable chest. But to work with furniture panels, you need some knowledge of carpentry; They also weigh a lot and are not sold in all stores. |
| Furniture board | Compared to the previous option, this is a cheaper material. Working with a board is easier; even a beginner can handle it quite well - he can easily cut the material into parts of the required size. But finding furniture boards is still more difficult than finding plywood. |
| Plywood + furniture board | If you combine these materials in one chest, you can get a reliable and durable structure that looks noble and attractive. |
The simplest wooden souvenir chests
Having familiarized yourself with the important nuances of the issue, you can proceed directly to making the chest. Let's look at a few popular options.
How to decorate
The decor for the first version of the chest from the box is selected according to its main color and style. It can be:
- multi-colored ribbons;
- braid;
- lace;
- beads;
- appliqués made of fabric and paper;
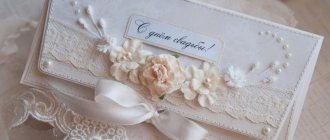
- fragments of photographs (photos of the newlyweds are suitable for a wedding);
- natural materials (like “stuck” dried flowers, very small pebbles and shells),
- thematic collages from various clippings;
- elements of the same styles that are accepted in scrapbooking (shabby, vintage, Provence, steampunk, journaling, etc.).
For the second, marine version, we will need a “wrapping” - a sheet of silver cardstock is suitable for this.
We cut out two strips for the lid (19.5*2 cm) and two for the base (we adjust these so that there is enough for three sides - the front wall, the bottom, the back). Using brown and black paints (you can mix them for a more natural look) with a brush, “paint” them over the stripes, imitating the effect of rust. At equal intervals we insert brads - an imitation of nails - into the “forged” strips. Then we glue the strips on both sides over the lid, and the lid to the box. We glue the strips for the body so that their edges coincide with the stripes on the lid.
Both chests are clearly missing something, right? Of course, the castle!
The easiest way is to buy a decorative lock for scrapbooking - they cost a pittance. For the first version, the castle can be made from cardboard or anything - and not necessarily in the shape of a castle, it depends on the style.
For a pirate look, a decorative furniture handle with a ring of the appropriate color is suitable - black, steel, bronze or brass; you can use a figured one or in the form of a lion's head. A couple of the same handles can be glued to the sides - supposedly “for carrying” a heavy treasure box.
Option No1. Pirate chest made of wood
To make such a chest, no special skills are required. You only need to have minimal woodworking skills. In such a chest you can store various small items and toys, and it can also become an important component of children's games.
DIY pirate wooden chest
To get started, prepare the following:
- furniture board;
- Door hinges;
- jigsaw;
- leather belts;
- 2-component glue;
- furniture casters;
- putty intended for wood;
- electric drill, attachment for it (“feather”);
- acrylic paint (several colors required - white/brown/caramel/black);
- strong rope;
- powder “gold”;
- gold leaf;
- spatula to imitate a wood cut;
- glue intended for gold leaf;
- milk;
- flour;
- plastic/paper stencil with pictures that match the theme;
- a small amount of decorative wax.
Prices for popular models of jigsaws
Jigsaw
Step 1. Arrange the prepared tools/materials so that they are at hand. Then cut out the details of the future design from the furniture board. At the junctions of the parts, cut out spikes, thanks to which the parts will be connected into a lock.
Parts with spikes for connecting into a lock
Step 2. Then connect the lock joints using glue.
Connecting parts
Box assembly process
Step 3. Cover the structure with plaster - both outside and inside. Wait for the plaster to dry.
The structure is covered with plaster
Applying plaster
Step 4. Next, the future pirate chest needs to be painted. Apply caramel paint - also inside and outside - in an even layer.
Painting the future chest
Step 5. To make the chest look truly original, add milk and flour (pre-mixed) to the brown paint and mix everything well. As a result, you should end up with a mixture that has the consistency of sour cream.
Flour and milk
The resulting mixture is added to the paint
Step 6. Apply the resulting mixture to the outer surfaces of the structure using rough strokes. Then take a spatula and go over the strokes to create the effect of the wood texture showing through.
Apply paint to the outer surface of the chest using rough strokes.
Painting process
Step 7. Then proceed to the final decoration of the structure. Using a stencil, apply the selected design to the lid.
Stencil included
White paint is used to apply the design.
Finished drawing
Step 8. Apply glue intended for gold leaf on the inside.
Applying glue to the inside
Step 9. After this, cover the structure with gold leaf from the inside.
Covering a chest with gold leaf
Step 10. Apply wax mixed with gold powder on the outside.
Cover the outside with wax to which gold powder has been added.
Waxing
Prices for wax for wooden surfaces
Universal oil with wax for wood
Step 11. Finally, sand the surface using a cloth pad and glaze it with black paint.
Sanding with a cloth swab
Glazing with black paint
Step 12. We proceed to the last stage - directly assembling the structure. Install rollers at the bottom and secure the lid with door hinges.
Attaching legs and door hinges
Step 13: Drill a couple of holes in the lid as shown in the photo below. Pass a rope through them and tighten the ends with sea knots. After this, wrap the product with leather straps on the sides of the applied pattern.
Attaching rope and leather straps
This is what the finished structure will look like in the nursery.
Ready-made pirate chest in the nursery
Decor: what can you use to paste it over?
The first chest can be pasted over if desired:
- colored paper;
- cloth;
- wallpaper imitating wood texture;
- worn leatherette or old leather;
- fragments of a wooden napkin.
When choosing a material for gluing, consider the intended purpose of the product: the design must correspond to it.
Use your limitless imagination! For example, even a wedding chest for collecting money can be designed in completely different ways, depending on the purpose of the collection:
- just cash gifts for newlyweds - the chest from the box is decorated in a traditional “wedding” style or in the style of a wedding (nowadays thematic ones are popular - in a single color scheme, in a certain surroundings);
- packing for a honeymoon - the chest should be bright and festive. If you already know where the newlyweds will go, you can use something from the style of the country chosen for the trip.
If the product was created together with a child, let him figure out how he wants to see it and try to cover it with whatever he wants.
IMPORTANT. When cutting out parts for gluing, do not forget to leave allowances for bends.
The second option is declared to be pirated - therefore it will be made from “rotten boards”. How to achieve this effect?
- We cut strips of cardboard 2-3 cm wide (you can deliberately make them unequal for greater naturalness). The “covering” for the bottom and sides is true to size in length, for the lid, front and back walls - 1 cm longer, this spare centimeter is necessary for bevel. Now on the front side, using a stationery knife, we slightly “plane” the strips from the edges so that the “boards” appear unevenly planed and rotten.
- We make the “boards” for the lid strictly 2 cm wide - the same as the scoring lines, otherwise they will give the finished lid an unsightly bend. The last strip (there is more than 2 cm, remember?) must be carefully adjusted to size.
- We glue the “skin” onto the body and cover.
- Glue the second blank for the bottom to hide the strips of paper connecting the bottom to the side walls.
- We paint the workpiece with brown paint, trying to create the tone of wood, and wait for it to dry.
- Using a thin brush, apply black paint to the edges and cuts of the “boards”: this is how they become “old and rotten”.
We ended up with a well-deserved sea chest, perhaps even lying at the bottom of the sea.
Option No3. Small antique chest
To make it you will need a furniture panel made of soft wood. The dimensions of the structure are as follows: 28x24x20 cm (although you can make the chest in other sizes). Having chosen the parameters, cut the shield into the bottom, walls and lid; You will also need 4 legs (in our example, their dimensions are 3x3x2 cm).
After sanding the future interior surfaces of the chest, assemble all the parts (except for the lid). For assembly, use wood screws, making holes of a slightly smaller diameter for them in advance. Select the correct length of screws to avoid the formation of through holes! Seal the screw heads with wood putty after priming.
Assembled wooden chest
Bottom view
Chest with lid
Important! Instead of putty, you can use wooden plugs (the fact is that its color may change after painting) or cover these places with belts, as the author did in our example.
Next, brush all external parts with a metal brush, including the ends of the structure. Do this along the grain to remove the softer wood tissue.
Metal brushing
The more time you process and the harder you press the brush, the brighter the structure of the wood will be revealed.
After this, apply a deep penetration primer (no color). Because of this, the pile will rise, which will increase the adhesion of the surface to the layers that will be applied further. When the primer has dried, remove any raised lint with sandpaper.
Applying primer
Sandpaper treatment
When finished processing, remove the dust with a wet cloth. Then apply acrylic wood stain (in our example we used a walnut shade), and then go over again with a damp cloth to remove excess product. This will reveal the structure of the wood.
Acrylic impregnation is applied
Removing excess impregnation
Result of work
Cover the structure with another layer of the same primer, and after it dries, look at the pile. If it has risen, remove it with sandpaper and wipe the surfaces with a wet cloth to remove dust.
To get the moss green effect, prepare acrylic paint in advance that has a chromium oxide color. It must be diluted with water and then applied to all surfaces of the structure. Do not wait for the paint to dry, but immediately remove the excess with the same wet cloth.
Chromium oxide (acrylic paint color)
Painting the chest
Excess is removed immediately
Product after painting
Once you have achieved the desired effect, apply the primer again. Inspect the pile. Dry the structure, then apply matte parquet varnish (in one or several layers - decide for yourself). The advantage of parquet varnish is that it is very wear-resistant.
The chest is varnished
Install the fittings. Make a hole in the middle of the lid and install a carrying handle there.
A hole is drilled in the center of the lid
Handle installed
Screw on the loops (about 5 cm from the edges) that are about 2 cm wide.
The hinges are screwed on
Install the latch lock. It will be located in the center.
Installing a Latch Lock
On the sides, step back 6 cm from the top and drill holes there to install the side handles. It is important to drill with extreme caution, especially at the exit of the drill.
Holes are drilled in the side walls
Prices for the range of drills
Drill
Holes are ready
Installed side handle
Next, prepare eyelets with an internal diameter of 0.4 cm, a riveter for them, leather 50x50 cm, a punch (required diameter - 0.4 cm), nails, 2 plaques 3x3 cm.
Take the leather, cut strips 2 cm wide from it, make straps with a length corresponding to the height of the front wall of the structure + grip to the bottom (corresponding to the thickness of the wall). Next, nail the straps on the front part of the structure at a distance from the edges corresponding to that of the hinges. There shouldn't be any difficulties with all this.
Nails, cut leather straps, hammer
Leather strips are nailed
The straps are nailed
Important! Use caution when using upholstery nails! Their length should not be greater than the thickness of the walls. Otherwise, the excess will have to be removed with pliers.
The excess length of the nail was bitten off with pliers
Upholster the lid, focusing on the previously attached straps, go to the back wall, close the hinges and go down another 10 cm. Cut the ends of the straps so that they look like a triangle with rounded corners.
Upholstered product cover
Same, rear view
Upholster the structure along the edges, moving from one leg to the other. Do not touch the bottom and legs. Be careful not to hit the screw head and forget the upholstery nails!
Upholstery of the chest along the edges
We do not touch the bottom and legs
Seal the screw heads at the bottom of the structure using the same straps with upholstery nails. Also try to act carefully.
Make lid opening limiters using the same straps. Secure them against the hinges.
Lid opening limiters
That’s it, the antique chest is ready, but if you wish, you can further decorate it. Good luck with your work!
This is what the finished chest looks like
Photo of the product before and after processing
Step-by-step description of the process
Let's consider two options for a cardboard chest: a simple one and a more complex pirate one.
Option 1, base assembly:
- We create a “pattern” - first we cut out a strip of 90*30 cm from cardboard. We make markings on it: cover (30 cm), back side (20), bottom (20), front side (also 20).
- Cut out the sides (20*20).
- We cut out the sides of the lid: they will be semicircular - we bend a strip of cardboard (40*9) exactly in half and use scissors to make the upper part semicircular, cut it at the bottom - and the sidewalls are ready.
- We bend the first piece as the diagram is drawn and glue the sides. We glue them with paper ribbons bent in half lengthwise (they need to be cut 2-3 cm wide).
- We subject the lid to the creasing process - this means that we press parallel lines on it at regular intervals with a blunt pencil, knitting needle or non-writing pen - it is better to draw them along a ruler in advance. We bend the lid in an arc and glue the sides using paper strips bent lengthwise and cut into teeth on one side (the cut is necessary so that they do not wrinkle).
- Glue the lid.
The base of the simplest chest is ready.
IMPORTANT. There is an even simpler option - take a ready-made cardboard box and separately make a chest lid for it in the manner described above.
Option 2, basis for a pirate chest:
- We create blanks - we will need two front walls (18 * 8 cm), two side walls (11.7 * 8), two bottoms (18 * 12), a lid (18 * 19.5 cm), sides - we make them in the same way , which is in the first option, but the lower, straight side is supposed to be 11.7 cm - you need to draw a circle with this diameter and cut it in half. Be sure to estimate - the corners of the semicircular sides should coincide with the corners of the lid, it’s easier to fix everything in advance, then it will be too late.
- We crease the blank for the lid using a metal ruler - draw lines at intervals of 2 cm (the outermost fragment will be wider, almost 3 cm), fold it into a semicircle so that it bends and “gets used to” holding its shape.
- We cut 2 strips of 4 cm wide from office paper, bend them lengthwise and cut one half of both in the shape of cloves. Using these strips we glue the lid and its side parts.
- We connect the parts of the base using paper strips 3 cm wide, also folded in half.
We have the frame of a pirate chest. How to make it exactly pirate?
IMPORTANT . As in the first case, for this option you can use a ready-made box and make the lid yourself. You can not put it on glue, but come up with wire or leather loops for it - this way it will be easier to open and will stay in place longer.
How to decorate a chest from the inside
Depending on the overall style, you can cover it with paper, leather, any suitable fabric (plain, colored, emphatically luxurious - for example, velvet), or even faux fur.
Photo collages inside such chests look original. For our pirate chest, matting, burlap, worn leather, canvas, brown or black leatherette are ideal. You can simply paint the inside a dull black color, but everything stored in it will look bright and impressive against such a background.
Subscribe to our Social networks