How to make a piece of cake from cardboard and paper: diagram, template
- A piece of cake from cardboard and paper can be made in two ways (in fact, there are many more, but the ones that we will bring to your attention are the most convenient and simplest).
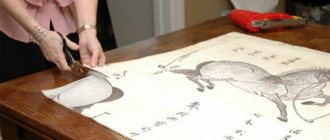
- If you are full of desire to create a surprise with your own hands, you cannot do without a printer (to print the template) or the ability to redraw. Don’t forget to buy thick, beautiful paper and put some knives, a ruler, a running tool or a pin with a bead inserted into a ballpoint pen, as well as an eraser and glue, side by side so that you have them at hand.
Let's look at each method step by step:
First method.
- Choose one of the templates below. There are two options for creating a lid - either with a wavy edge or a straight edge. We send two stencils of your choice for the base and for the lid for printing.
Sample
Select and print
- After cutting out the stencils, place them on a sheet of thick paper and trace them with a pencil.
Transfer to thick paper
- And again - with scissors: they cut it out, and then drew fold lines with a pencil. We cut it out, and on each of them we draw fold lines with a running pencil.
Getting ready for running
- We press it through all the folds we need. If you don’t have the necessary tool at hand, then a pen with a pin stuck into it with a bead at the end is quite suitable for this. Next, we will need an eraser to erase all the previously drawn lines. We make folds on the blanks along the paths we have laid.
Getting ready for gluing
- After applying glue to the bottom of the workpiece, glue it together.
Sticking
- We do the same with the lid. You can see how to glue it all together correctly in the photo .
Preparing the lid
- And then everything is simple, all that remains is to close the bottom of our craft with a lid, and the intriguing decor for gift wrapping is ready!
Done
Second method .
- After printing the template ( see below ) on thick paper, apply glue to the parts highlighted on the cliche and cut the workpiece where there are special marks.
Sample
- After gluing, all that remains is to lock the front part.
Ready
How to assemble a paper cake from pieces?
- There is a game for 10 people: collect a paper cake. Not only is it very nice to receive a gift in such an intriguing package, you can also play a fun game with the whole group gathered.
- You need to make two layouts: a piece of cake and the side of the base. The diagram can be viewed below in a 50*65 cm .
- Get ready for the fact that you have to painstakingly calculate the layout. After downloading and printing (A4 format, you need to select the actual size, or remove o - depending on what program the printout will be made in) - all this needs to be done for the correct proportions of our cake.
- We have given you a diagram of 11 pieces - one extra for selecting ribbons, flowers and bows. When gluing the remaining ten boxes, we do not recommend using Moment glue - it smells unpleasant, it is better to use PVA glue.
- So, in order to bring such an interesting game to life, you need to purchase a box for the cake (base 200*200 mm ), and also create a cliche from which, like a Phoenix bird, the future cake will be reborn.
- To create stencils for the base and each piece, you need to purchase a set of thick chocolate-colored paper, a dark chocolate-colored satin ribbon 10 mm wide - 3 m, 10 ribbon bows, the same number of textile roses, craft paper for the base and notes with tasks - 30*70 cm , thermal gun, 10 cm rod for gluing fabric, and paper - PVA glue.
Layout
- To create a fake cake, you also cannot do without a brown felt-tip pen, a simple pencil, scissors, packaged sweets and coffee beans.
Paper cake
When you have already collected all the boxes, ribbons and bows can be glued on top of our cake using a heat gun.
The flowers you choose should be glued last, so as not to stain them with glue. After this, you can collect all 10 boxes we collected into one beautiful cake.
Wafer paper toppers
Another way to use wafer paper is to make cake toppers. More precisely: the decor of the toppers, the toppers themselves can be made of mastic or gingerbread dough.
These toppers are very easy to make. Print the desired picture on wafer paper and cut along the outline. Take a little mastic, knead it well and roll it into a thin layer (the thickness depends on the skewers on which you will place the toppers on the cake). Attach the picture to the mastic and trace the outline using a stick. Cut out the future topper. Carefully insert the skewer. Then apply confectionery decor gel to the mastic and glue the picture. On top there is again a thin layer of gel. Once the topper is dry, you can insert it into the cake.
If you need gingerbread toppers, prepare and roll out the dough. Attach the picture and cut out along the outline. Then insert the skewers and send the pieces into the oven to bake. When the gingerbread cookies have cooled, spread the glaze on them and wait until it dries. After this, cover the gingerbread cookies with neutral gel and glue the picture, with a thin layer of gel on top.
Rolling pin for mastic with limiters on the thickness of rolling out the layer, acrylic - 21 cmPrice 288 ₽ upon order (5 days)
Qty
Set of stacks for working with mastic, 3 pcs Price 214 ₽
in stock
Qty
Round wooden sticks for lollipops, cake pops, meringues, 15 cm - 50 pcs Price 50 ₽
38.80 ₽ from 20 pcs
Set for modeling confectionery decorations, 15 items in a casePrice RUB 1,002 in stock
Qty
What to put in a paper cake with a surprise: options
To make the gift even more enjoyable, add interesting gifts inside. What to put in a surprise paper cake :
- M&M's - Place them inside the box. This will be a symbol of a vibrant life. You can attach a bright note to them with the wish: “My dear friend! May you have a bright and sweet life, just like these candies!”
- A car - choose a small and cute one for women, and a big dream jeep for men. Wish the birthday boy the following: “My friend, buy yourself a new car! Until you do this, get this mini-copy of your dream!”
- A shell from the sea - this way you can hint to the birthday boy that it’s time for him to go on vacation. Write: “I wish you to go to the place of your dreams - to the beautiful warm sea and soft warm sand. Relax there 100%, have a blast there!”
- Coffee and sugar sticks - there will be as many as 2 wishes for a sweet and cheerful life. And you can write the following: “My friend, may you have a lot of strength to achieve your goals! And your life will be sweet and happy!”
- “Tick-Tock” - this is how you can wish: “My friend, let only fresh thoughts arise in your bright head, with which you will only move forward!”
- The heart is, of course, a toy in any form of keychain, soft toy, figurine . Wish the following: “May there be a sincere and happy fairy tale called love in your life!”
- Kinder surprise - everything is very simple here: “My dear friend, may your every day be filled with only joyful surprises!”
- Colored pencils or jars of paint and a brush - write the following on a piece of paper: “Your life is in your hands, paint it with the brightest colors!”
- Dice - this is how you wish good luck.
- Smile - it can be on a picture, a pen, a magnet. In your wish, write: “May every day in your life there be only a smile and positivity!”
- Ascorbic acid or a jar of vitamins - this is how you wish the most important thing - health: “May good health allow you to live up to 100 years!” And for this anniversary, we will dance together with you!”
- Money - we will hint at wealth and prosperity: “I wish to live in such a way that in the morning, sitting in my own villa on the seashore and eating a sandwich with black caviar, I feel real happiness!”
Cardboard sweets
So, for work you will need: thin cardboard, scissors, glue, ruler and pencil, for decoration - colored paper, ribbons, beads and everything that your imagination suggests.
The cake making tutorial begins with creating a drawing of each piece.
You can use a ready-made cardboard cake template with dimensions, for example, like this:
Related article: Duck in a hat. Crochet a toy
Or print out the following template on paper:
We transfer the stencil to cardboard or draw the part ourselves, and then cut it out along the contour.
For convenience, you can immediately use colored cardboard - you will need 13 sheets of different colors. Now in stationery stores you can find material not only in a variety of bright colors, but also textured, iridescent, holographic and other types of cardboard. This will make the cake look very impressive.
Along the dotted lines, bend the workpiece towards the inside of the cardboard.
Glue the edges together and make a small cutout according to the following pattern.
We leave the wide side of the piece open in order to fill it with wishes and surprises.
Now comes the fun part – filling the contents of the cake. We put a note with a wish in each piece. You can limit yourself to only congratulations, but the greatest delight will be caused by small surprise gifts that correspond to every wish.
We close the cake pieces using the slot in the piece as a lock. And then we decorate the cake with ribbons or beads.
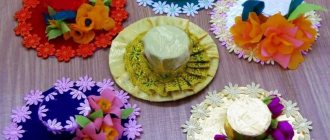
Decoration options can be very different. Below are a few photos with cake design ideas:
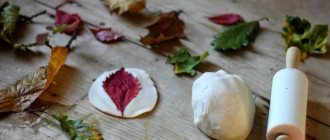
Polymer clay or plasticine is also great for creating the effect of real cream on a cake, or for placing and fixing small candles. But you need to be careful when using real candles and follow fire safety rules.
By the way, cake pieces can be made in the form of triangular boxes with a lid, for example, like these:
Options for wishes can be very diverse, ranging from standard to the most personal and special. Here is an example of some congratulations and good parting words:
- “Sweet Life” and add some chocolate or candy.
- “Vivid impressions” - colored pencils, crayons or multi-colored candies are suitable.
- “Great luck” - symbolizes dice or a lottery ticket.
- “Untold wealth” - of course, money or coins.
- “Have a good rest” - a shell or magnet.
- “Good health” - vitamins, ascorbic acid or hematogen are suitable.
- “Boundless love” - a small heart.
- “Home warmth” - you can put a candle.
- “Additions to the family” - a small doll or pacifier.
- “Pep” - coffee beans in beautiful packaging are perfect.
Article on the topic: Master class “How to make Christmas tree decorations with your own hands” with photos
And many more different surprises and gifts can be invented for any holiday.
Wish list for paper cake to put inside
- If the angel day of someone dear to you or some other significant date is coming soon, you shouldn’t rack your brains over a gift.
- Make a paper cake with your own hands and put wishes that you have thought up in advance into each piece.
- If you are gathered at the festive table to congratulate the birthday person, then the twelve wishes that you put in each piece of the fake cake will certainly be heard on this day. After all, it’s also toast!
- And if there is also some sweetness in a piece of cake, then all your guests will undoubtedly appreciate your surprise.
Options for wishes:
- May things come to you: moving to a new home, a trip around the world, the love of your life, loyal friends.
- May you have Dolce Vita - that is, a sweet life, an unbending will, excellent performance.
- May simple human happiness, good health, unforgettable emotions, the smile of Fortune, incredible adventures never leave you.
- May you find a new turn in life, a new addition to your family, innovative ideas, a way out of difficult circumstances, pleasant purchases, victories and achievements.
Gifts with wishes
You can also wish and add a certain symbolic object. For example, wish:
- Housewarming or new profitable business (and present the key);
- Have a great holiday (Big Ben figurine, boat);
- Wonderful friends (toy dog);
- Energy (high-quality batteries);
- Have a happy life (a horseshoe will come in handy here);
- Women's joys (flowers, ring);
- Drive only on the right road (compass);
- Refills (present a pacifier, pregnancy test or baby pants);
- Innovative ideas (light bulb);
- Brilliant ideas (nuts);
- Romantic meeting (candle);
- Passions (present a remedy or chili pepper);
- Dizzying love (chewing gum “love is...”)
- Make all your dreams come true (goldfish figurine);
- Eternal youth (apple).
If you do not find the wishes you need, we advise you to turn to this source, because they offer a lot of interesting options.
How to decorate a paper cake with wishes: tips, options
- You can use any decorations for a paper cake, the main thing is to be creative. For example, you can make a cream cake - take the diameter of a store-bought cake and make a circle out of thick paper, making holes along the edges of your cake.
- It is advisable to stick the cream onto all individual pieces. If you decorate your cake with satin flowers, it will be even cooler (for this you will need either textile salons, or you can do it yourself using satin, nylon or velvet ribbons - after twisting and tightening, they should be placed and secured in the center, thus decorating our cake.
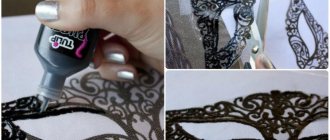
- sequins, beads, beads will not be superfluous . It will be very original if each piece is decorated with a pattern.
- It is quite possible to create a whole composition that is light and romantic. To do this, you need to purchase all sorts of stickers and place them on each piece of our cake. The main thing is to remember the theme of the party. If the festival is being held for children, it would be appropriate to apply stickers with famous cartoon superheroes.
- Classic floral arrangements will be appreciated by adult guests. Foil or corrugated paper work well for example, you can cut out stars or hearts. It is quite possible to use lightweight plastic toys, all kinds of figures, flowers - here again glue will come to the rescue.
- There are some rules when decorating: for example, make all the pieces the same so that the cake is harmonious. If you plan to make all the pieces with different shades, you still need an overall composition - it’s worth making at least four pieces in the same color scheme.
- If decorative ornamental paper is used when creating a paper cake, then it will become the real “trick” of the party.
- Don't forget to check that the glue no longer sticks to your hands. After adding wishes and small gifts to each piece of cake, we tie them with a ribbon .
- You need to purchase for decoration: A4 cardboard; multi-colored paper; necessary templates; bows and those decorations that you came up with for your cake. You also cannot do without scissors, a glue stick, double-sided tape and a hole punch.
Pieces of cake
Cake
Paper cake
What kind of coating can you put a waffle picture on?
What kind of cream can you put a waffle picture on? Wafer paper is afraid of moisture and if the cream is too liquid, it will simply get wet and spoil. Therefore, it is best to place the waffle picture on mastic, chocolate, marzipan, or frozen icing. It is also possible to place it on a very cool ganache, which contains a minimal amount of cream.
Vanilla sugar mastic Top decor 600 g, whitePrice 265 ₽ in stock
Qty
Sugar mastic for covering and modeling Princess, 500 gPrice 585 ₽Price 468 ₽
Belgian Callebaut white chocolate in callets 25.9% cocoachoose packaging... in stock
Icing - a dry mixture based on milk protein for preparing glaze for gingerbread, 1 kgPrice 336 ₽
If you still need to decorate a cream cake with a waffle picture, then there is a little trick. (We note right away that manufacturers of wafer paper do not recommend using it with cream). So, if the waffle picture is first glued onto thinly rolled mastic, then it can then be placed on cream, preferably non-greasy.
The waffle picture is glued using a neutral gel. It has a dense enough structure so as not to soak the paper, and dries quickly enough. However, if you use too much gel, bubbles may appear in the picture. If this happens, you can fix it by piercing the bubble with a thin needle and gently squeezing out the air.
Decorating paper cakes for the New Year: photos of the best
- We decorate the cake as usual. We decorate it with tinsel as decoration. In each piece you can put Christmas tree decorations or souvenirs and wishes. Everything is like a regular cake.
- Such a creative paper cake for the New Year is quite appropriate to put under the Christmas tree, and your guests or relatives will undoubtedly be delighted.
- If the cake is being prepared for children, then bright colors are suitable; for adults, sophistication is suitable.
- A satin ribbon will help you decorate each piece of the cake; it will tie all the cake triangles together and provide the desired shape to our cake. The cake pieces and their insides will be very realistic, as if a knife had worked here. And if the cake is in a plastic box, then the intrigue will be maintained until the very end.
Cake like real
Pieces of cake
Bright cake with wishes
For the holiday
Decorating paper birthday cakes: photos of the best
- If you decide to make it yourself, then you are ready, guided by the measurements, to create this masterpiece with your own hands - draw on paper sheets, align the edges, make a printer printout. If this is not possible for you, use templates.
- You can make a cake from chocolate, vanilla, strawberries , for this you just need to buy the appropriate paper.
- Or you can use a template diagram for printing.
Sample
- For children, it is suitable to use flowers made of paper, serpentine ruffles, a rainbow made of multi-colored paper and all kinds of ribbons, favorite cartoon characters, images of all kinds of sweets, bows and beads.
- If you are good at quilling, then you can make colorful patterns for the cake with your own hands. The cake can be made with 2 or 3 floors - you can fasten the “floors” with a ribbon.
A piece
To kid
Best wishes
In flowers
For the holiday
Bright cake
Beautiful decoration
Birthday boy
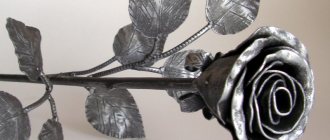
Modular origami cake
Before getting ready for a birthday, we undoubtedly think about what to give the birthday boy? We always remember that it would be nice to do something with our own hands - such gifts are very much appreciated! We wanted our gift to be beautiful and looking at it would bring up the best memories!
A cake could be the perfect gift! But not a simple cake, but an origami cake made from modules! 
How to make a paper cake? Believe me, it's possible! For such a cake we will need modules of different sizes.
How to make modules
First type. Module from 1/4 A4 sheet - 175 white and 7 green.
Second type. Module from 1/8 A4 sheet - 166 white and 14 green.
Third type. Module from 1/16 A4 sheet - 14 white and 14 green.
Fourth type. Module from 1/32 A4 sheet - 7 white and 7 green.
To make a plate from modules, you will need 130 type 4 modules. What color the plate will be is up to your taste.
And so, look at the instructions on what modules we will need to assemble such an original craft:
And having prepared all the modules, we can start assembling the origami cake!
Step 1. The first, second, third row consists of 42 modules.
We need to assemble the modules in such a way that in the first row they stand on the short side, and in the second - on the long side.
After we have connected 4 modules of the first row and 3 of the second, we begin the third row. You need to secure the triangles on the long side using a checkerboard assembly order.
Step 2. 3 rows have already been assembled, we make a ring out of them that needs to be secured.
Step 3. And so attention, very delicate work: our design needs to be turned inside out. Look carefully at the picture to see how to do this.
Step 4. Turn the structure over again and assemble the fourth row. It consists of type 1 modules (1/4 A4 sheet).
We attach 7 green models so that between them there are 5 more white modules.
Step 5. Take 14 modules (type 2), attach them to the sides, where the green modules of type 1 are.
Step 6. And so on, we attach 14 modules (of the 3rd type) to the side, where the modules of the 2nd type are, and insert 7 modules (of the 4th type) in the middle.
Step 7. On the green triangles we insert the same number of white modules of the same type.
Step 8. To make the top tier of the cake, you need to repeat the instructions described above for assembling the bottom tier, using type 2 modules. The upper tier consists of 5 rows.
Three rows consist of 22 modules (each). We recommend collecting them at the same time. We also fold them into a ring, then carefully turn them inside out:
Step 9. Let's start assembling the stand. It consists of 130 modules of the 3rd or 4th type, we insert them one into the other and close them in a circle, so we get a plate.
To make the bottom, take thick paper, cut out a circle (diameter 20 cm) and glue it to the modules.
We recommend making a cake support. To make the design hold its shape, you can use a simple plastic bottle: cut out a cylindrical shape and simply put it inside the cake (look at the photo)
Step 10. And so we place the first tier and plate. If it seems to you that the distance between the modules is large, you can insert type 2 triangles into the gaps with the pockets facing out.
Step 11. We place and secure the upper tier on the lower tier. Now you need to find a groove in the bottom for each corner of the upper tier. To do this, use a toothpick.
Having selected all the grooves, the upper tier should “fit” into the lower one. Now just press it in a little.
The cake is ready, all that remains is to decorate it beautifully!
We have roses as decoration. For roses we need:
Modules of the 4th type (pink – 27, yellow – 27, red – 9, green – 16).
Step 1. For the rosette, take 9 modules (type 4).
Step 2. Expand 3 modules and cut off the valves.
Step 3. Then tightly screw each of the modules onto a thin stick.
Step 4. We need to make sure that the end of the rose is even so that we can place the flower on the cake.
Step 5. Expand 6 more modules and wind their stick:
Step 6. Cut out a circle (diameter 2.5 cm) of the same color as the roses, grease the valves with glue.
Step 8. Now bring the halves of the triangle together and glue them onto the circle. We repeat this with two more modules.
Step 9. We also glue the next circle of rose petals.
Step 10. We insert the folded blanks one into the other. Lubricate their ends with glue and glue them to the center of the flower.
Step 11. Lubricate the third blank with glue and glue it around the first two.
The rose is ready! By the way, if you don’t like these roses, you can choose any others, we have a lot of them on our website - roses .
In order to make a leaf: unfold two modules, lubricate the valves with glue and insert them into the pocket of the other module. Lubricate the valves of the second module with glue, but on the reverse side, and glue them.
The place where you glue both parts will be the central vein of the leaf. You can twist the corners of the leaf onto a stick. Leaves and roses can be attached to the cake where you like it most.
If desired, you can make a candle. For a candle: roll a piece of paper into a tube. Cover the tube with a thin strip of foil. Candle light: just glue two modules together.
We got a gorgeous cake - a great gift, and even made by ourselves! Be creative and don’t forget that your attention is worthy of respect!
If you still have questions about how to properly assemble such a cake, watch our video tutorial!
Decorating paper cakes for a wedding: photos of the best
Such a wedding gift can be either primary or additional. After all, you can put congratulatory notes and many, many other interesting things into such a cake.
Three-story
With wishes
For a wedding
Gentle
Collecting the cake