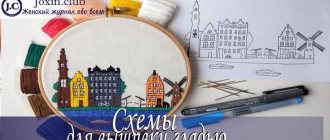
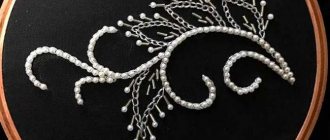
Around the bush or the subtleties of circular embroidery
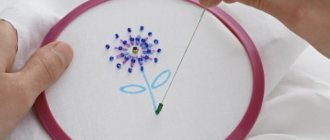
The circular technique is quite popular today. The essence of this embroidery method is that the pattern drawn in the form of a spiral is to be sewn up. Moving clockwise, the entire canvas is gradually covered with beads.
It is worth noting that such works look amazing! Ideally placed beads with an enchanting wave of shine create a true masterpiece. A typical example of such embroidery is the full stitching kits from Butterfly. Exquisite execution and modern embroidery techniques make these paintings stylish and mesmerizing. The circular technique is just a way of arranging beads, while the embroidery itself is done using a line stitch, which we will discuss below.
Schematically, circular embroidery can be depicted as follows:
Video tutorial on embroidery using the circular technique:
Circular bead embroidery technique
HomeInformationBlogCircular bead embroidery technique
The circular bead embroidery technique resembles the monastic embroidery technique in appearance. Only it is done not in columns or rows, but in a spiral, starting from the middle - like crocheting lace napkins.
The technique of embroidery with beads in a circle is often used not only for round motifs, but also for complete sewing of paintings. The only disadvantage of this technique when making an embroidered pattern is that only a special pattern is suitable for it. Therefore, if you have never tried embroidering pictures in a spiral, be sure to select either a ready-made pattern or buy a ready-made kit for embroidering in a circle.
Here are a few tricks that will help you make work enjoyable and comfortable.
The circular bead embroidery technique requires a serious master class even in organizing the space, not to mention the process.
- A rectangular hoop on a stand – ku-snap – is best suited for circular embroidery.
- Spiral embroidery does not allow you to work first with one color of beads and then with another - all colors must be at hand at once. Therefore, for the embroidery process you will need not a saucer, but an organizer.
- For circular embroidery you will need more threads and maybe even different colors. Place white and colored threads at your work place so you don’t have to look for them throughout the house.
- Any beautiful picture is not suitable for spiral bead embroidery. For this work, if you have never done this before, you need a special circuit. Making such a scheme yourself is quite difficult.
- Experienced embroiderers advise using Japanese beads for embroidery. It is the most uniform. Uneven beads, different in diameter and height, will make the picture sloppy and rough.
- Remember that circular embroidery may have more than one center. Follow the drawing carefully so you don't have to start all over again. Embroidering with multiple centers is much more difficult than embroidering with a single center. Such schemes are not suitable for beginners.
The circular beading technique may require instructions - it seems a little more complex than other techniques. In general, this is how it is: it will take more time to organize the workplace, a more careful selection of beads, a search for a special pattern for embroidery, and more attention when doing the work.
In addition, for circular bead embroidery, only “small” seams are used, mainly the following: the “back needle” seam and the so-called arched seam, when you string two beads on a needle, but fasten only one. In essence, the arched seam is a variation of the “back needle” seam.
It is very important to fasten the beads well so that they lie close to each other. This is the main condition for an excellent result of your work.
Read about bead embroidery techniques in our article.
How to embroider with beads in a spiral? You start from the center and move from it, gradually increasing the radius of the circle. On the patterns created specifically for circular bead embroidery, designers carefully indicate not only the color, but also the needle puncture locations, so that even a beginner can handle it. When you hit the edge of the picture, simply stitch the rest of the space with arcs.
It’s a completely different matter if the picture has several centers. In this case, the circles will sooner or later touch each other. Embroidering in a circle with several centers is difficult precisely because the arcs need to be joined very carefully so that the joints of the arcs are not noticeable. This is quite difficult, and even experienced craftswomen do not always succeed the first time. However, with each embroidered picture your skill will grow, and one day you will succeed!
We give blog visitors a 5% discount
When placing an order, enter the promo code
BLOG
You can order the products that we talked about in the article
Go to catalog
Stitching is the key to everything, briefly about the main thing
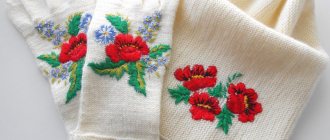
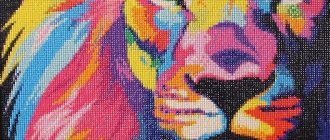
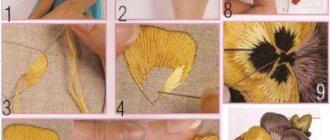
The stitch stitch is the technique that is most often used in large embroidery kits. It is based on the principle of “one stitch – one bead”. Using this embroidery method, each individual bead gets a secure place on the canvas and does not move during the embroidery process. It is important to make symmetrical punctures in the fabric to achieve an even and beautiful pattern. Dense embroidery delicately emphasizes the shades of beads, creating a harmonious, complete story.
The execution of the line seam is shown in the photo:
Popular bead embroidery
Modern beadwork
is a painstaking craft. The wide selection of beads provided in various colors and textures allows you to embroider truly royal prints. To master this difficult craft, you will need bead embroidery kits, which will greatly simplify the selection of the desired shades of different bead colors and the number of beads themselves. These kits are sold specially prepared for users - with a pattern of the design and the beads necessary for embroidering a specific design.
Necessary materials
the embroidery needed for this technique
materials, it will be most convenient to embroider on specially prepared fabric on which a drawing or specific pattern is applied. But beads can be purchased from top manufacturers, given that today the most popular suppliers are China, the Czech Republic, and Japan.
The technique of almost any needlework is always aimed at the pursuit of perfection and the stitches performed in bead embroidery
In addition to peace, they demonstrate the result - the resulting original design, which looks like luxurious embroidery with expensive natural stones.
In order to be able to carry out bead embroidery
, it’s worth using ready-made kits.
Soon she also plans to release a series
of bead embroidery kits
.
It will include both sets made only with beads, and sets made with the usual floss with the addition of beads. The studio designers did a lot of work to make the work “play.” Such embroidery kits will include a German quality embroidery canvas, a bead needle
, an embroidery pattern and high-quality Czech beads.
Those who choose bead embroidery kits “Golden Fleece”
— the resulting painting will decorate any modern apartment interior, including a business work interior in an elite mansion. Each craftswoman will be able not only to boast of the unique style of her work, which she can enclose in a frame or an elegant baguette, complementing the passe-partout, but also to embroider a picture for her beloved spouse - a battle or sea motifs with spectacular prints.
For embroidery
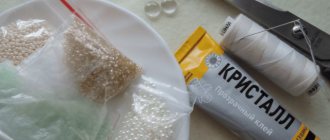
Tools and materials required:
- The needles used, depending on the material, are beading or sewing.
- Threads represented by wool, floss, silk, nylon. They are selected based on the color of the base itself, as well as the size of the selected beads. (The thin thread is processed - this will avoid the formation of knots. The processing is done with wax - the thread is pulled through a piece of wax several times). The thread is secured to the front surface of the fabric, where the stitches are hidden by the beads themselves.
- Beads
that can replace - beads, glass beads, sequins, rhinestones, sparkles, stones. - Stretcher (hoop).
- Scissors (optional - tweezers).
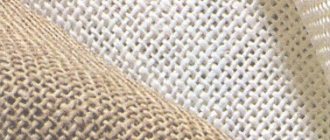
- Fabric or canvas (soutache). Canvas is used for panels or paintings. The sizes of the beads should be similar to the sizes of the cells on the canvas.
The art of embroidery
Modern embroidery
represents an art that helps to decorate fabric with stitches, enriching it on the surface with the spectacular and iridescent shine of the beads of the chosen print. It emphasizes the beauty of the image and the wonderful sense of taste of the craftswoman herself.
For many centuries, embroiderers had to experiment and select the most suitable types of material and texture for this, developing and improving this type of art. By doing bead embroidery, the craftswoman not only draws inspiration from the world around her, but also positions the art using popular ornaments of other cultures and eras. Such embroidery
was used to achieve specific goals, which were determined by the desire to perpetuate the memory of ongoing events that were of a private or public nature in public life. They expressed not only political or spiritual ideas, but also unobtrusively emphasized the status of the one who owned this thing. In addition, beaded paintings told about a certain story that happened or conveyed the enchanting beauty of the natural world.
Of course, the current fashion for all kinds of embroidery
Each time period of eras carries its own charm, but the basic criteria are always intended to remain unchanged.
The enormous popularity inherent in bead embroidery is explained by its high-quality level of execution, in which each bead is attached to the material. Bead embroidery
on fabric is carried out by making a specific pattern by hand using the necessary tools - needles and beads.
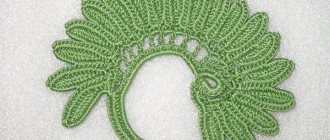
Main types of seams
In embroidery
popular seams are used - single-sided and double-sided, where each bead is sewn separately like a button. Some beads can be secured with additional small beads.
Looking at one-sided seams, you can distinguish - the seam is forward with the needle. It is the simplest seam. They are used in the same way - lowercase stitch and stem stitch. In the stem-shaped one, unlike the previous ones, two beads are strung together. They use an arched seam or it is also called “back needle”, which in its technique resembles a stem-shaped and fastened seam, which is characterized by a set of a row of beads.
Of the double-sided seams used - double-sided forward needle, fastened (double-sided), double-sided stem-line stitch, overlock stitch and monastic stitch (which in its execution resembles cross stitch
).
Arched seam, the main thing is smoothness!
This type of seam is better known as the “back stitch”, the simplest, most intuitive type of seam. This technique is similar to satin stitch embroidery, so it is recommended to start your embroidery career with it if before that you have only dealt with floss and classic embroidery. The arched seam ensures soft lines and a smooth transition from one row to another. The main feature of this seam is the ability to string several beads at once, while only the outer ones are directly attached to the fabric.
How to do this: we bring the needle to the working surface of the fabric, string 3-4 beads onto a fishing line (thread), bring the needle on the wrong side after the last of the beads (3 or 4), bring the needle back to the front side and thread the needle through the last bead.
Half-loop stitch with attachment and beads
In appearance, I really want to call this stitch a “herringbone” stitch, but in fact this name goes to a slightly different, albeit similar stitch. First of all, mark the width of the seam and the middle. One thing to keep in mind is that the width of the stitch is directly related to the amount of beads used - if this sounds confusing, check out the next step first.
We draw a needle at the upper right point, string six (or more, if desired, but an even number) beads, and then make a puncture with a needle from the lower right point to the middle. At the same time, we divide the beads in half so that later the attachment goes exactly in the middle. We attach - a straight stitch exactly in the middle.
As you can see, the beads lie tightly, without gaps, since their quantity corresponds to the width of the seam. If there are fewer beads and the stitch is longer, the seam will look less aesthetically pleasing.
How to make and dye embroidery ribbons
Fastened seam - simple and reliable
No less popular than all the seams mentioned is the “attached” technique. The name itself reveals the essence of this seam - fastening. In practice, it looks like this: the required number of beads are strung on a thread (according to the diagram). Next, this thread is sewn along the drawn line, fixation occurs at the junction of the beads. We lay the thread with beads and make fastenings with another thread every 2-3 beads. This method of embroidery significantly saves time, is easy to perform and gives a three-dimensional effect in images. Interestingly, residents of North American countries call this type of embroidery “lazy wife,” implying the minimum effort required from a woman.
Regardless of what stitch you use in embroidery, it is important to follow the pattern suggested by the manufacturer and listen to the tips from us. You shouldn’t be afraid of failures, the main thing is to have a desire to understand new technology, master new techniques and create beauty in a different, perhaps unusual form. Good luck with your crafting endeavors and all the best!
Learning to embroider with beads - basic techniques
1:502 1:507
Beads can be included in almost any known stitch, but most often bead embroidery uses an arched stitch ("Back needle"), as well as a snap stitch. Let's look at some techniques.
1:846 1:851
The bead can simply be sewn with a stitch to the fabric, or you can use a smaller bead to make a small column. Instead of the bottom bead, you can insert a sequin.
2:1751 2:4
For volumetric sewing, you can make a column of two or more beads. Beads of different colors and different sizes look very nice, sewn one by one close to each other. They can be placed inside a metal figure, inside a contour of contrasting beads, or applied in a chaotic scattering on the canvas, creating bright spots on the embroidery.
2:611 2:616
3:1122 3:1127
The stitch “Forward the needle” is familiar to us from labor lessons at school. Why not decorate it with beads? Bring the needle to the right side, thread a bead onto it and pass the needle through the fabric close to the bead. Bring the needle back to the front side, making a small stitch on the wrong side and thread the bead again.
4:2245 4:4
5:510 5:515
This seam can be similar in execution to either the “Forward needle” seam or the sewing stitch - you yourself vary the distance between the beads. If you want to give your embroidery rigidity or fix the beads on a straight or smooth curved line, then after completing the stitch, pass the needle in the opposite direction, then the beads will stand straighter.
6:1689 6:4
7:510
With this sewing method, the embroidery turns out to be quite stiff. Cast on 2 beads and pass the needle through the fabric to the wrong side near the second bead. Bring the needle to the front part between the first and second beads, pass through the hole of the second bead. String the third bead and again pass the needle to the wrong side close to the bead you just strung. Continue until you reach your desired stitch length.
8:1806 8:4
9:510 9:515
The execution is similar to the previous stitch, only 2-4 beads are strung on a needle. With this sewing method, the beads are positioned more freely and the embroidery is less rigid.
10:1409
To make the arched seam more rigid, you can go back not one, but two or three beads.
10:1583 10:4
11:510 11:515
For fastened sewing, beads are first strung on a thread, which is then sewn to the fabric with short stitches between the beads. Sewing with fastening allows you to quickly make beaded products; it is no coincidence that the North American Indians gave this method of sewing the name “Lazy Wife”. Lay the thread with beads on the fabric. Using another thread, sew a bead bottom through each bead (see picture) or through 2-3 beads:
12:1784 12:4
13:510 13:515
For each stitch on the front side, one bead is strung, a diagonal stitch is made and the thread goes to the wrong side close to the bead. A vertical stitch is made on the wrong side, the thread comes out again to the front side and another diagonal stitch is made with a bead. Thus, on the front side you get diagonal stitches with beads strung on them, and on the wrong side the stitches are vertical:
14:1832 14:4
15:510 15:515
The seam is made like an ordinary overlock stitch, and a bead is inserted into each upper loop:
16:1240
Beads can be inserted into almost all known seams. Don't be afraid to fantasize!
16:1395 16:1402