Floral motifs in needlework have always been very popular. These flowers symbolize lightness and ease, and, of course, simpler than others. This is not strange at all, because they can be used to decorate both clothing items and household items, including bed linen, tablecloths and even curtains. Embroidering daisies with ribbons is a very interesting activity; this hobby will distract you from your daily routine. It should be noted that the skills will definitely be useful in life to young people who follow fashion and try to stand out from the gray mass. Even old things can get new life. You need to remember this and not neglect the opportunity to update your wardrobe without a significant investment of time and money.
Necessary materials for the bouquet
Like any type of needlework, it requires some preparation. There is no need to be scared, nothing supernatural is required. It’s just better to put all the necessary materials in one place in advance, so that later you don’t have to go looking for scissors or a lighter.
White petals look very harmonious on a dark canvas color; choose the tone of the base depending on the shade of the walls, if you mean a painting, or on the clothes that will be decorated with an ornament.
If you do not have experience, then draw in advance with a pencil on the canvas the location of the stems, so as not to further distort the image and to guide you in the placement of the elements of the picture.
White ribbons 7 mm wide, green 3 mm and yellow.
Tapestry needle with a wide eye.
Green threads for knitting.
Scissors and lighter.
Today the public strongly encourages this type of needlework and in stores you can find ready-made kits with a set of threads, needles and even a painted ornament on the canvas.
Making the painting “Field daisies”
Field chamomile is my favorite flower. Its simplicity enchants and attracts.
Chamomile is a cute, charming flower. It is usually accompanied by the epithet “modest”, “field”, but it is difficult to do without it when weaving a wreath or collecting a bouquet. Even a chic bouquet of red roses is illuminated by these little white flowers so much that it becomes even more festive.
Let's start with a small painting measuring 15 x 20 cm.
Step 1. Prepare the necessary materials. I used:
- a piece of fabric (crepe-satin 30 x 30 cm);
— hoop (d= 20 cm);
- Turkish ribbons (white about 3 m (4 and 10 mm wide) and green about 1 m (4 mm wide);
— needles with wide ears “Chenelle”;
— “Denim” threads No. 36, yellow (for the centers of daisies) and different green knitting threads for the branches;
- lighter, scissors, Decola fabric paints;
- Frame.
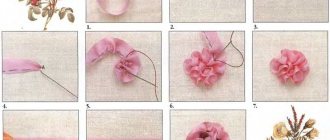
Step 2. Attach the ribbon to the needle.
2.1. We tighten approximately 5-7 cm of ribbon into the needle.
2.2. We make a puncture at a distance of 1.5 cm from the edge of the tape.
2.3. We pull the needle and ribbon through it, pull out the entire needle and pull it by the short edge of the ribbon.
2.4. We make a fastener at the other end of the tape. Fold the ribbon in half, pierce it with a needle and pull the needle and ribbon through the entire length of the ribbon. With narrow ribbons, you can make a regular fastening knot (as in threads).
2.5. It is advisable to scorch the edge of the tape with a lighter with a quick movement of your hand.
Step 3. Embroider chamomile petals.
We use a regular straight stitch and a stitch with a curl (we stick the needle into the ribbon and then into the fabric). After each stretch, we adjust the tape, forming a natural bend in the petal. There is no need to tighten the tape too much. You can also secure the ribbon on the back side of the embroidery using a lighter, carefully singeing the edge of the ribbon and pressing it to the fabric or ribbon in the right place.
Step 4 . We embroider the middle of the daisy.
For this I used yellow thread in Denim spools No. 36.
4.1. With your left hand, we wrap the thread around the end of the needle once and stick the needle into the required place.
4.2. Pull the thread with your left hand so that it completely wraps around the needle.
4.3. Pull the needle all the way to the wrong side of the embroidery. The front side has a nice French knot.
4.4. We repeat this many times until the middle of the flower is completely filled with nodules.
Step 5. Embroider greenery.
We embroider several elements of greenery with ribbons. We also use any thread in natural green shades, from the finest for sewing to knitting.
Step 6. We design the embroidery and tint.
Our embroidery is ready. You can frame it yourself, as I did, or use the services of a framing workshop.
I used Decola fabric paints. I prefer to do the tinting after the embroidery is “dressed” in the frame. This way you can evenly distribute the necessary strokes and compensate for missing elements.
Good luck!
Performance technique
A piece of fabric is inserted into a hoop to make it easier for needlework and determined with a floral arrangement. Such flowers are simpler than other plants, as the picture implies even stitches.
There are more than 22 types in total, but in our case, only two will be required. There is nothing complicated; even novice needlewomen can cope with this task. Cut off a white one, approximately 30 cm long, pull it through the eye of the needle and stop the needle at a distance of 5 cm from the end. A puncture is made in this place and a needle is pulled through. This way you will secure the piece and it will not slip. The second end needs to be burned with a lighter so that the threads do not fray and the structure does not unravel. It is created, as mentioned above, with a simple stitch.
It is very important after each piercing of the fabric to correct the embroidery and form the correct petals in your picture. Many novice needlewomen make the mistake of tightening the stitch too much; ultimately, the fabric underneath will wrinkle and the product will lose its aesthetics. Repeat the straight stitch in a circle, and then move on to making the middle of the flower. The color used for it is yellow. It is also used to make stitches with a curl.
French knot in daisy embroidery
If you can't do this, as an alternative, use a thick wool thread of the same color and simply sew up the middle. If you have experience and want to make it voluminous, you can decorate the middle with French knots. Knots are made using a simple principle - the needle is twisted around three times and pulled through the canvas. The end result is a neat knot.
When the petals and the middle are ready, you need to move on to the stems and leaves. We make the stems using knitting threads of a dark green or olive shade. As a rule, the stem of a plant is made with a stem stitch, and with the help of green ribbons (3 mm), the leaves are sewn with a twisted straight stitch. Experienced craftswomen recommend using several shades for leaves in paintings. This allows you to visually enlarge the picture and make it more realistic.
Stem seam
Twisted straight stitch
Embroidery of chamomile with ribbons
Fantasy technology has a rich history. It is easy to implement and allows you to realize any whim of the artist. Embroidering daisies using bright ribbons is the easiest way to master the basics of the craft.
This technique is generally well suited for decorating wildflowers: daisies, poppies, bells and cornflowers, made with ribbons, look surprisingly realistic. You look at the picture and feel how the room is filled with the aromas of fields and forests. The similarity with the living flowers of the ribbon analogues, brought to life by the skillful hands of experienced craftswomen, defies explanation and causes delight.
In general, fantasy technology originates in ancient China and received rapid development in medieval Europe. French kings are fine connoisseurs of original tape art.
Nowadays, unique designer items are again at the peak of fashion. Ribbon embroidery is used to decorate items of clothing and accessories; this technique is used to create panels and paintings that can diversify the most dull interior and give it coziness.
Try to join this art, you will succeed.
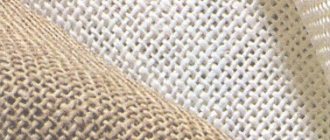
Luxurious flowers made from ribbons will “bloom” on any material: cotton, velvet, silk. Beginning needlewomen are recommended to purchase regular canvas or any fabric with large mesh weave for the base.
We will stretch the canvas onto the hoop. For ease of use, purchase a hoop with an adjusting screw. It will help adjust the tension of the base and avoid tightening. You will need special needles with wide ears.
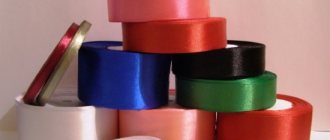
Crafts stores offer a wide range of ribbons for crafts. They come in different types: satin and moire, corrugated and smooth, silk and velvet.
It is better to learn the skill on satin ribbons 50 cm long and 4 mm wide.
Simple stitches - classics of the genre:
- Correctly fasten the tape to the base. To do this, bend the edge of the tape by 2 mm and additionally pierce it with a needle. A “flat knot” is formed. Proper fastening of the tape will help to avoid additional volume from the “wrong side” of the work.
- We master the basic stitch “Forward needle”. Learning to adjust the length and tension of the stitch.
- The width of the Japanese stitch can vary from one to four centimeters.
- The French knot is a basic stitch in the ribbon technique. A ribbon is wrapped around the needle in 2-3 layers and a neat knot is obtained.
Having mastered the basics of craftsmanship, it will not be difficult to combine different types of stitches, creating real masterpieces.
Master class on daisy embroidery with detailed photos
Suitable for beginner craftswomen.
Materials for work:
- Hoop;
- Canvas;
- Scissors;
- Simple pencil;
- Special needle;
- Satin ribbons;
- Lighter.
Procedure:
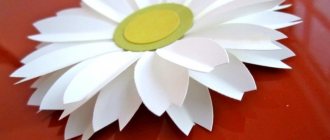
Draw a sketch of a flower with a pencil. We cut off one end of the ribbon and burn it to avoid thread shedding.
We cut the other tip diagonally and thread it through the eye of the needle. We secure the tape with a “flat knot”.
We embroider chamomile petals with ribbons using straight stitches. If you pull the tape tightly, you will get sharp-angled petals. A slight tension will give the chamomile fluff and volume.
We will decorate the heart in yellow with a French knot.
We embroider the stem with a “twisted stitch”. We twist the tape on the “face” of the work and bring it to the “wrong side”.
We decorate the leaves with a sharp “Japanese” stitch.
The chamomile embroidery is finished.
We embroider cornflowers with satin ribbon. Materials for work:
- Satin ribbons in blue or blue;
- Green satin braid 3mm wide;
- Blue and purple floss threads;
- Hoop;
- Scissors;
- Special needle;
- Canvas.
Procedure:
Let's make a sketch on the fabric. First, draw a circle of the required diameter. Let's divide it into 8 parts. In the center we select a circle - the middle of the flower. The scheme is ready.
We embroider the flower petals with three stitches. It is necessary to perform segments of different lengths. The stitches start at one point and spread out in “rays” to the sides. should be longer than all the others.
We decorate the cornflower center with floss threads. We form the base of the flower using a large loop. We twist the green ribbon as tightly as possible, we get a neat stem.
Work on the cornflower has been completed.
Poppies. Materials for work:
- Nylon tape, corrugated;
- Material is the basis;
- Hoop;
- Scissors;
- Tapestry needle;
- Bugles are black.
Operating procedure:
We take 70cm of nylon tape, thread it into a needle, and stretch it to the front side of the work. We make a seam along the entire length of the tape. Let's make transverse seams for the constrictions of the flower petals.
We carefully tighten the thread, giving the poppies their natural shape. We form flowers by laying out the ribbon in a spiral and securing it to the fabric. We fill the center of the flower with a “French knot” using green satin braid, and sew on black bugles.
We embroider green twigs and leaves from green satin braid. The poppies turned out great.
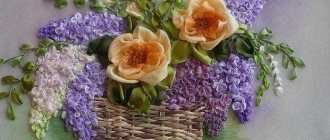
If you have mastered the embroidery of individual flowers, you can begin to create a large-scale canvas. This is the kind of bouquet of wildflowers in a basket that a professional craftswoman can embroider.
Watch video lessons and improve your skill level
Source: https://sdelala-sama.ru/vyshivka/1862-vyshivka-romashki-lentami.html
Design of an embroidered picture
If you have finished, but still have the feeling that something is missing, you need to improve your work by turning on your imagination. You can complement the picture, for example, with buds. The base is made with green straight stitches, and the upper part is decorated with white or milky shades. As for their quality, what you will use, then you decide. Silk ones, of course, will look much more impressive, but their cost is much higher; satin and synthetic options are considered an economical option. They go well with almost all types of fabric; they can even be used to embroider on leather if you make holes with an awl. Only experienced craftswomen use organza, since the fabric is transparent and the seams must be neat, but novice needlewomen do not always succeed.
After the main components of the picture are ready, decorate with beads, rhinestones, bows or sequins. If the composition looks unfinished, add flowers of a smaller size and the opposite color. There are no rules in choosing additional flowers, the main thing is that it looks beautiful. The finished picture is placed in a dark frame, because white flowers in a light frame will look dull.
If you don’t succeed at something the first time, don’t be sad, everyone starts somewhere. Be patient, you will definitely achieve the expected result, and you will certainly amaze your friends with the created composition. With each new job, you will improve your skills and before you notice, you will start giving master classes yourself.
Embroidery with daisies ribbons in a video tutorial
A simple-looking beautiful flower with branches or individual flowers with beads will decorate the entire atmosphere in the hostess’s house on a special day. Embroidery on napkins with ribbon patterns is a wonderful decoration for a festive table. You can embroider this exclusive piece yourself.
Beginning needlewomen who already know how to make the simplest basic ribbon stitches simply must show their skills on tablecloths or napkins. I bring to your attention a step-by-step master class on embroidering a pattern and we will answer the question of what is needed for this, what technique is used to create the patterns and according to what patterns.
Preparatory stage
The pattern can include many different elements to further decorate the tablecloth or napkins. Let's look at what we need:
- cotton, linen or gabardine fabric;
- hoop;
- pencil;
- satin ribbons width – 1.2 cm (white), 7 mm (pink), 4 and 7 mm (green)
- floss threads green and light
- for decoration beads, beads to your taste
- needles with a large eye and regular ones for sewing
- scissors;
Master class for beginners step by step
The process will be carried out on napkins in any color, and you yourself decide where you want to depict the pattern. The main idea in our business is to embroider a pattern. So, let's start with the flower arrangement - chamomile and spikelet inflorescences.
- Take a napkin measuring 30 by 30 cm and straighten the edges of the napkin with zigzag scissors (you can simply process the edges of the napkin using a sewing machine).
- We make a sketch of the design of our pattern, and then we stretch our napkin onto the hoop.
Chamomile stem
We take a needle with a green thread, fold it three times, and sew the stems. So we embroider the stem using the “back needle” technique.
Chamomile petals and spikelet inflorescences
Let's begin the process of attaching the ribbon to the needle. It is necessary to cut off about thirty centimeters of white and cut off its edge diagonally. Then we pull the cut edge into a needle with a wide eye and pierce it two centimeters from the eye of the needle. Thus it was secured.
Now we’ll make a beautiful knot at the other end of the ribbon, which will remain on the wrong side. This means we fold the edge twice half a centimeter and pierce it.
Now let's move on to the petals. According to the applied pattern from the middle of the flower, you need to bring the needle and ribbon from the wrong side to the front side and embroider the petals with a straight stitch. So we do this slowly, carefully forming 6 petals.
Next, with a pink one 60 cm long, which was secured into a needle, we make inflorescences of spikelets according to the drawing on the base. The principle is the same as that of chamomile - straight stitch.
flower leaves
We will create two leaves using twisted and straight stitches. We prepare a 4 mm green one, 50 cm long. We attach it to a needle in the same way as the previous working tapes. Using a twisted stitch we make the vein of the flower leaf. Using a straight stitch, we sew leaves from the embroidered veins that fit tightly to each other.
Next, following the pattern, we embroider leaves on the stems under the inflorescences of the spikelets using a ribbon stitch. You can vary the creation of leaves by using a straight stitch with a curl in the same way.
Addition to the ribbon pattern
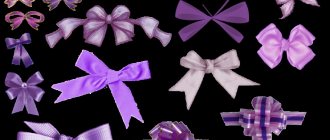
Now that the pattern is embroidered, you can decorate the core of the flower. You can complement the elements with beads, sequins or seed beads. You can also sew the decoration between the leaves. Form a bow at the base of the flower arrangement and sew it on.
You have already tried to embroider the simple pattern I suggested on a napkin. Now you can choose a more delicate composition of a floral motif, for example, roses, and embroider it on the tablecloth.
Master class with step-by-step photos on embroidering daisies with ribbons
To embroider snow-white daisies, you need to prepare the following according to the list below:
- ribbons made of satin fabric in several colors;
- canvas, needle and scissors;
- be sure to prepare a hoop and a simple pencil;
- matches.
If you want to embroider large buds, then use a wide ribbon for this purpose. Conversely, if you want small flowers, then use narrow satin material. The canvas should have large holes. Matches are needed to singe the edges of the ribbons to prevent the threads from falling off. You can draw a drawing diagram yourself or choose a suitable one on the Internet. The length of the satin strip should not exceed fifty centimeters, otherwise it will get tangled and form knots.
Cut one side of the tape diagonally and insert it into a tapestry needle, and scorch the other side with fire. Insert the needle two centimeters from the cut edge and pull it by the long end. Your material is now secured.
Trace your diagram onto the canvas using a pencil or a quick-fading marker. Be sure to insert the material into the hoop. This is necessary especially for beginners who are just starting to engage in such needlework. Rest assured that the work will be much easier with a hoop.
Read
Embroidery on cardboard with threads: what is it called, materials and patterns for children
Using straight stitches as shown in the photo, embroider the snow-white petals of this wildflower. If you tighten the ribbon more tightly, then the petals will turn out to have a pointed shape, and if you don’t pull the material too tightly, then the daisy will come out in a lush shape. These are the secrets that will help beginners in the first stages of learning.
The core of the flower is known to be yellow. Therefore, take the appropriate satin ribbons and make French knots in the middle of the bud. Make two curls with a needle, and then bring it to the wrong side of the canvas.
We decorate the stem of the plant in green using a twisted stitch. Bring the needle to your face. side, twist the main material and bring it to the wrong side of the fabric at the required length. All that remains is to embroider the leaves of the snow-white field chamomile. They are made using a stitch using Japanese technique. To do this, draw the satin onto the front part of the canvas, and on the back, go through its own end. Now the embroidery of this flower for beginner craftswomen is completed. You can complement the picture by embroidering other wildflowers. These can be scarlet poppies and blue cornflowers.
The end result is a captivating summer bouquet. In exactly the same way, you can decorate various interior items and women's accessories. As you can see from your own example, this embroidery is not complicated, but on the contrary, it is completely simple and accessible to beginners.