List of necessary tools and materials
- The most important thing is napkins with suitable patterns or simple pictures.
- Next you will need decoupage glue. It can be replaced with simple PVA glue, which needs to be slightly diluted with water.
- Tassels. It is better to take synthetic ones, since they practically do not shed lint.
- Varnish. You can take a special one for decoupage, a craquelure one to create cracks, or one that is available.
- A piece of sponge. You can cut a little bit from a kitchen washcloth.
- Acrylic paints. The quantity and color depends on your wishes.
- Ribbons so that the toy can be hung on the Christmas tree.
The rest of the list depends on the design of the crafts. So, for example, to make New Year's toys using the decoupage technique with a voluminous texture, you will need to take a structural gel. It is applied with strokes, hardens and takes shape. Then it is painted in the required color.
Various sparkles, beads, rhinestones and other small decor may also come in handy. To glue these materials, it is better to use a glue gun.
What can you make crafts from?
Decoupage of New Year's toys cannot be done if you do not have a base. The following materials can be used:
- old New Year's balls;
- special round shapes made of polystyrene foam (available in any diameter);
- wooden bases of any shape (for example, a ball, a Christmas tree, a star, and so on);
- transparent glass or plastic balls;
- old light bulbs;
- thick cardboard from which various figures are cut out, and much more.
Decoupage of New Year's toys - a master class for all design options
Instructions on how to make crafts using decoupage technique:
- Take your base and, if necessary, clean it of any dirt (such as peeling paint, paper labels, etc.).
- Cover the base with a layer of acrylic paint. If you want to completely decorate the craft with a napkin, then use white paint as a substrate. If you are gluing small elements, then draw the background in the required color.
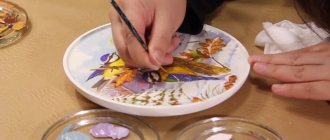
- Cut out the part of the design that you will glue. It is best to wet the brush in water and run it over the napkin. Easily tear off excess paper.
- Coat the area on the base with glue and lean the picture against it.
- Apply a thin layer of glue over the picture.
- Let the craft dry completely.
- Next, pour some of the paint you used for the background onto the paper or palette, lightly dip a sponge into it, and run it around the edges of the glued design. Movements should be light.
- Cover the craft with a layer of varnish.
- Attach a ribbon so you can hang your own New Year's toys on the tree.
Decoupage is complete. At your discretion, you can sprinkle glitter on top, paint individual elements of the design or make a shadow, glue rhinestones or beads, and so on.
New Year's crafts
In this section I offer my New Year's crafts. I sincerely hope that they will be interesting. There are many New Year's crafts, I will consider the three most successful and simplest options. You will need: threads, buttons, beads, balloons, napkins, paper, cardboard.
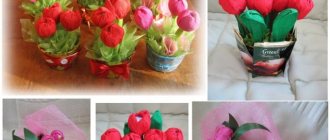
“Snowy Christmas tree”
- Place white and green napkins in one pile (3 green, 3 white, 3 green). Attach the corners of the napkin with a stapler, then outline the circles.
- Cut circles around the staple. You will get blanks of snow-covered spruce branches.
- Take a thick piece of paper and draw a circle with a diameter of 40 cm. Cut out the circle with scissors, then cut it to the middle.
- Roll the cut circle, make a cone and fasten it.
- Glue the spruce branches to a thick paper base.
“New Year's balls”
To make this craft you will need a regular balloon, an old newspaper, a little glue, braid, a pack of napkins and some white acrylic paint.
- Inflate the balloon to the size of an apple.
- Tear a sheet of newspaper into small pieces.
- Glue pieces of newspaper to the ball.
- Cover the ball covered with newspaper with acrylic paint.
- Select a design for the ball from a multi-layer napkin and cut it out.
- Glue the napkin plot onto the ball
- Attach a ribbon bow to the ball.
"New Year card"
To create a masterpiece you will need colored cardboard, paper, candy wrappers, silver and golden colored paper, braid and glitter. During the work, use a ruler, a construction knife, glue, and scissors.
- On a piece of paper, draw a picture related to the New Year. A Christmas tree, a snowman, and a few snowflakes will do.
- Take cardboard and fold it in half. A ruler will help you make an even fold. Draw along the resulting line with a stationery knife. Do not cut through the sheet all the way.
- Having made a blank for the postcard, start working on the basic decor. Glue a strip of golden paper along the workpiece. You can use patterns and flowers made from wrappers.
- Cut the previously drawn drawing into small squares.
- Prepare the base for the composition. Cut several rectangles of different sizes from cardboard. One rectangle is slightly larger than the other.
- Glue the largest rectangle onto the base and the smaller one on top. Having dealt with the rectangles, glue a composition of squares on top.
- Diversify the picture by adding elements of gold and silver paper. You can use feathers, sequins, braid.
- Decorate the bottom part of the finished card with glitter patterns, add a few snowflakes and a themed inscription.
Video tips
By finishing the crafts quickly, you can take some time to think about where to go on vacation. If you do something different for the New Year holidays, be sure to share with me. I would be glad to receive any advice and recommendations.
Origami
I'll tell you what New Year's crafts you can easily make from plain paper. The material is perfect for making gifts, cards, Christmas tree decorations, and interior decor items.
Christmas tree
The main symbol of the New Year is the Christmas tree. There are many manufacturing options. We make the simplest Christmas tree from cardboard. You will need glue and several sheets of colored paper.
- Make a cone from cardboard. Then cover it with green paper and decorate with multi-colored decorative elements.
- If you don't have colored paper, take ribbons, bows and tinsel.
Popular articles 7 mistakes when replacing incandescent lamps with LEDs
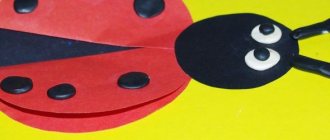
Toy
- You can make a New Year's toy in the shape of a Christmas tree. Draw a Christmas tree figure on a sheet of cardboard and cut it out with scissors.
- Cover with colored paper and decorate. Attach a loop.
- The Christmas trees are ready.
Snowflakes
Time to make some snowflakes.
- You can cut it from a regular napkin, thick cardboard or thin paper.
- If you want to get an openwork and graceful snowflake, just make as many slits as possible.
- An interesting snowflake made from buttons and several strips of paper.
Possible decoration options for Christmas tree toys
- Take a ready-made base (for example, a star or a ball), cover it with a layer of paint, and then glue the entire napkin. Turn the base over and go over the edges with a brush dipped in water. Tear off any excess paper. Do the same with the reverse side. Paint the edges.
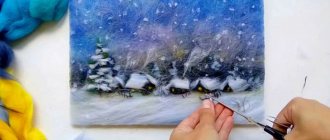
- You can make volumetric decoupage of New Year's toys. The master class consists of the fact that, after the glued pattern has dried, a structural gel is applied to the base. With its help you can depict snow or some elements. It is better to mix the gel with paint in a separate container or cover it with acrylic at the end.
- Take a ball and cover it with a layer of paint. Then tear the patterned paper into several pieces. Glue each piece separately. You will get a very beautiful New Year's toy.
- Prepare the base. Cut out the design in a circle and stick it on. Cover the craft with varnish. Using a glue gun, place beads with a flat bottom (special droplets) along the outline of the picture. The image will appear to be framed.
Simply and easily.
Ideas for New Year's decoupage
New Year's decoupage is indispensable for creating holiday accessories or original gift design. You can decorate almost any object, the main thing is that its surface is smooth.
Dishes with Christmas decor look impressive. These can be individual plates, glasses, coasters, or entire sets decorated in the same style. Glass, ceramics, plastic – any base material will do.
After decoupage, the dishes should be varnished. Such glasses or plates cannot be used for their intended purpose, but as an original accessory or gift they will come in handy.
Buy regular wide white candles and decorate them using decoupage. They will decorate any interior and become a pleasant gift for loved ones. Moreover, these are not only accessories; if desired, you can light them if you don’t mind spoiling such beauty.
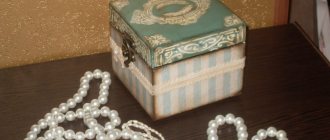
New Year's decoupage can turn even the simplest box into a stunningly beautiful box or gift wrapping. You can cover it all with New Year-themed pictures and add congratulatory inscriptions. Or decorate it in a vintage style, decorating it with a Victorian-style pattern, beads, braid, or ornate patterns.
To extend the service life of products, it is best to coat them with decoupage varnish.
The decoupage technique allows you to change the appearance of familiar things, and the ease of implementation makes such decor accessible to everyone. Create a festive atmosphere in your home with cozy handmade decorations.
Useful video: decoupage of a Christmas ball using craquelure
Author
Nadezhda Gusinskaya
Author of the portal Mama66.ru
Share