How to apply a design using a laminator
To print in this case, you will need, in addition to a laminator, a laser printer. It would be better if it is not full color, but regular. As for the laminator, it is worth purchasing a model with a very high compression force. You will also need tone-sensitive foil. If desired, you can use either matte or glossy, or holographic.
It is best to use plain paper. Textured or special decorative ones for embossing at home are not very suitable. When using such material, the drawing will turn out sloppy and ugly. In the recesses of this type of paper, the metal simply will not stick.
Foil stamping using a laminator is done as follows:
- Find a beautiful vector pattern or ornament. You can also write in some program, for example in Photoshop, a suitable text in the original font. It is only desirable that it not be too thin.
- Print the drawing on a printer.
- Place a sheet of paper with a pattern or message on the table and cover it with metallic foil of any color.
- Place another sheet of clean paper on top of it.
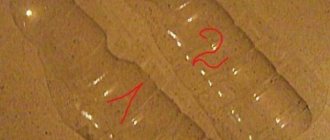
- Pass the resulting “pie” through a laminator. Thin foil will definitely stick to the picture. If the pattern turns out to be sloppy and intermittent, the procedure can be repeated. Run sheets through the laminator until satisfactory results are obtained.
The material must be removed from the sheet carefully, slowly.
Foil stamping at home with an iron
Of course, not every household has a laminator. This device is inexpensive, but it is not necessary to buy it in order to make beautiful embossing. You can also use a regular iron for this purpose. With regard to the inscription or pattern, the procedure in this case will be exactly the same as when embossing with a laminator.
The printed sheet should be placed on a hard surface with the pattern facing up. The foil is placed on it with the wrong side down. That is, the shiny side should be on top.
The iron is set to minimum heat. They need to move them along the foil as carefully as possible. If it does not stick to the pattern, increase the heat setting a little. You need to iron the foil for about 2 minutes until the thin metal sticks to the heated paint. Do not remove the foil from the sheet immediately. Wait until it cools down.
Hand stamping technique on foil
It happens that they immediately begin to extrude a pattern without drawing up a sketch.
But the best thing is to first think through all the details of the drawing, sketch the future composition on a sheet of paper according to the actual dimensions. This way it will be more convenient to work out the slightest nuances and make the necessary changes to the sketch. Operating procedure:
- Prepare a patterned drawing.
- Place foil on the cloth material of the working board.
- Apply the drawing and use a pencil or fountain pen to outline the outline of the sketch. Achieve a clear drawing of the pattern on the foil. A drawing on the reverse side of the workpiece is allowed. You need to know that the convexity of the image is a mirror manifestation of what concerns the original drawing. In order to avoid this, you need to sketch on tracing paper, then turn the front side down and trace along the contour, squeezing the image onto the foil.
After this, start embossing. Before starting work, it is better to place hard rubber on which it will be more convenient to perform squeezing techniques.
- Take a ballpoint pen with a refill.
- Press grooves into the workpiece using small strokes.
- Then use an awl with a rounded end to align the grooves and connect them into a single line.
- Finish the operation and turn the workpiece over to the front side. If you look at the result obtained, you can see that the convex pattern still does not have clear contours and has not been finalized. That's why it will require separate processing.
The subsequent embossing step is performed on the front side of the form. Here it is necessary to push through the background, which will enhance the relief and give the miniature clear outlines.
- To work out the relief image, you need to take the appropriate crusher.
- Increase the pressure little by little.
- The desired embossing depth must be achieved. It is worth considering that the processing of the relief image is carried out due to stretching, and therefore thinning of the foil. It is necessary to pay attention to the fact that too thin a layer of sheet may tear.
- As you work, there is a constant need to turn the sheet over, working on both sides. Because in order for the bulge to appear from the front of the work, you need to press from the back. And, conversely, the indentation in the picture comes out if you press from the front side.
- The elaboration begins with large details and moves on to small elements.
- The processing ends with the application of the smallest strokes of the picture and the subsequent picturesque design of the background.
- Most often, it is customary to grain the background, putting a lot of pinpoint dents on it. This gives the picture a pronounced contrast.
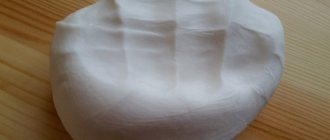
The art of chewed paper
The finished relief miniature, for the most part, receives one or another rigidity. But sometimes this is not enough. Sometimes, for example, it is used as a decorative cover on the cover of a book or album. This frame is very easy to crumple. To avoid bitter disappointment from wasted efforts and spoil the masterpiece, it needs to be strengthened. There are several proven recipes for this purpose.
First:
- prepare an aqueous solution of casein glue,
- add chalk or tooth powder there,
- constantly adding chalk and stirring, bring the mixture to the consistency of sour cream,
- add drying oil or oil paint.
Second:
- put paraffin and rosin in a metal bowl in a ratio of 2 parts to one,
- heat over heat until melted and stir.
Stir the prepared mixtures thoroughly before use. Pour the finished craft from the wrong side. When the solution has hardened, the picture should be fixed to the base.
Embossing on leather
Using the technology that will be presented below, you can decorate almost any leather product: bag, boots, wallet, notebook, belt, etc. To complete the design in this case, you will need a cliche - a special stamp with a pattern. You can take, for example, some large metal button. The procedure for foil stamping in this case is as follows:
- The skin is placed on a hard surface.
- A small rectangle is cut from the foil (the size of the future drawing). It needs to be applied to the skin.
- Next, heat the iron and press it onto the foil. You need to keep the hot sole on the material for about a minute.
- After the thin metal has warmed up well, the iron is removed.
- Without waiting for the workpiece to cool, you need to attach a button to it and press down firmly. The “cliché” should be kept on the skin for at least 30 seconds.
Foil stamping on leather at home is a simple procedure, but in any case, it’s still worth practicing on an unnecessary piece of material first. If you underexpose the iron or stamp, the design will turn out sloppy. Removing foil from a bag or wallet will be quite problematic.
Foil stamping on paper. Types of embossing
How to apply a design using a laminator
To make a design using a laminator, you will need a laser printer (ideally a simple one, not a full-color one). It is best to use a laminator with the highest compression strength . For this method, a toner-sensitive material is used. You can use glossy, matte and holographic foil . But it is best to use regular paper . On decorative and textured paper, when embossed with a laminator, patterns may turn out sloppy, since the material may not be fixed in the recesses.
The foiling process using a laminator is as follows:
- Find on the Internet or create a pattern or inscription yourself in an original font (it is better that the lines are thick);
- Print the selected picture;
- Place the printout face up on the table and cover with foil;
- Place another sheet of plain paper on top;
- Pass the resulting “sandwich” through a laminator. If for some reason you are not satisfied with the result (the pattern is intermittent or untidy), repeat the procedure.
To get the impression right the first time, try to remove the material from the product as slowly as possible.
Gallery: gold and silver foiling (25 photos)
Foil stamping at home with an iron
Still, a laminator is a specific thing and not everyone has one. If you don’t have this device, but want to make an original drawing, you can use an iron. The sequence of actions will be exactly the same as if you were working with a laminator, with the difference that the foil must be laid with the wrong side (matte) side on the work surface.
Set the iron to low heat. Iron the piece slowly and carefully. If the metal does not stick to the sheet, increase the temperature slightly. You need to iron the drawing for at least two minutes, usually this time is enough.
At the end of the process, let the workpiece cool, and only then carefully remove the material.
Embossing on leather
To emboss leather, in addition to an iron, you will need a cliche (a stamp with a pattern); for example, you can use a large metal button.
DIY applications from paper napkins: detailed master classes Flowers made from beads. How to make DIY crafts with children 3 years old